
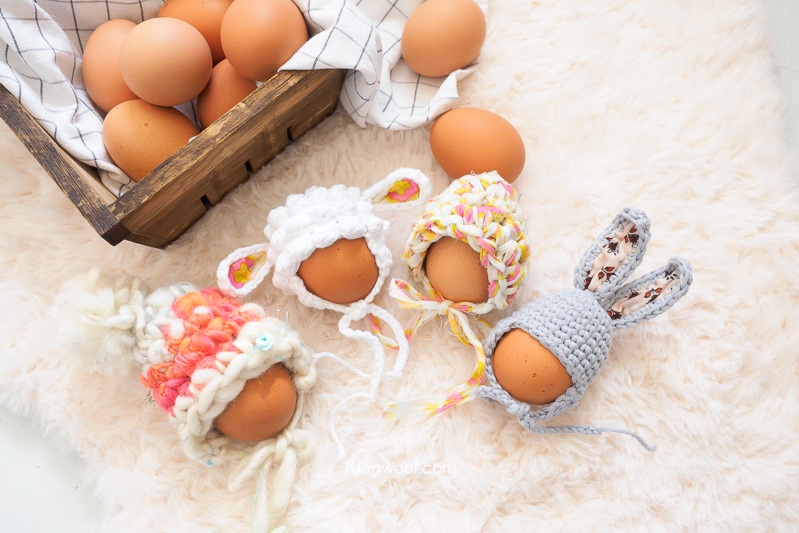
If you’re going to make a mini bunny hat for your Easter eggs, then you pretty much have to make a matching Easter egg lamb hat, right? I mean, it’s Spring, so let’s celebrate with more spring cuteness!
Save This on Pinterest!

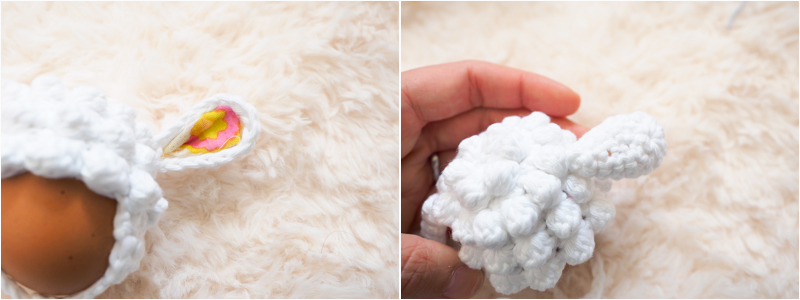
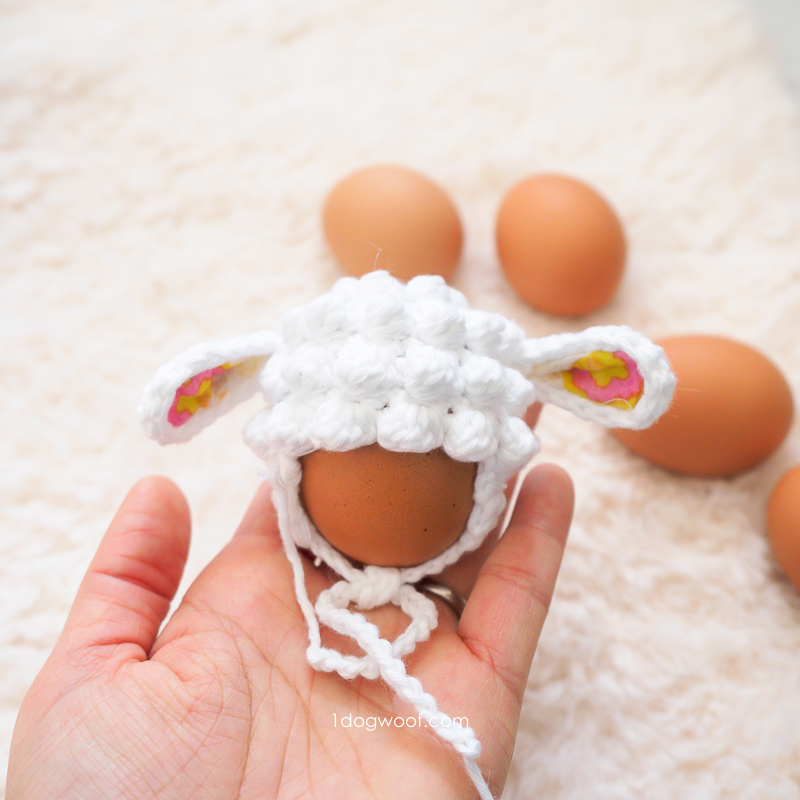
Like the bunny hat, the mini lamb hat is worked up using Paintbox Cotton Aran yarn, with the inside of the ears filled with scraps of Knit Collage fabric yarn. The ears are smaller here though, so instead of crocheting the fabric scrap into the ear with the Sharp Crochet Hook, I folded a small piece of fabric and glued it into the ear. Yeah, ok, so I took the easy way out. But I got the effect I wanted, and it would have been too cumbersome to do it any other way. Plus, you have to gauge how big your stitches are compared to the accent you’re using. If I crocheted the fabric in, the size of the stitches would have overwhelmed that tiny piece.
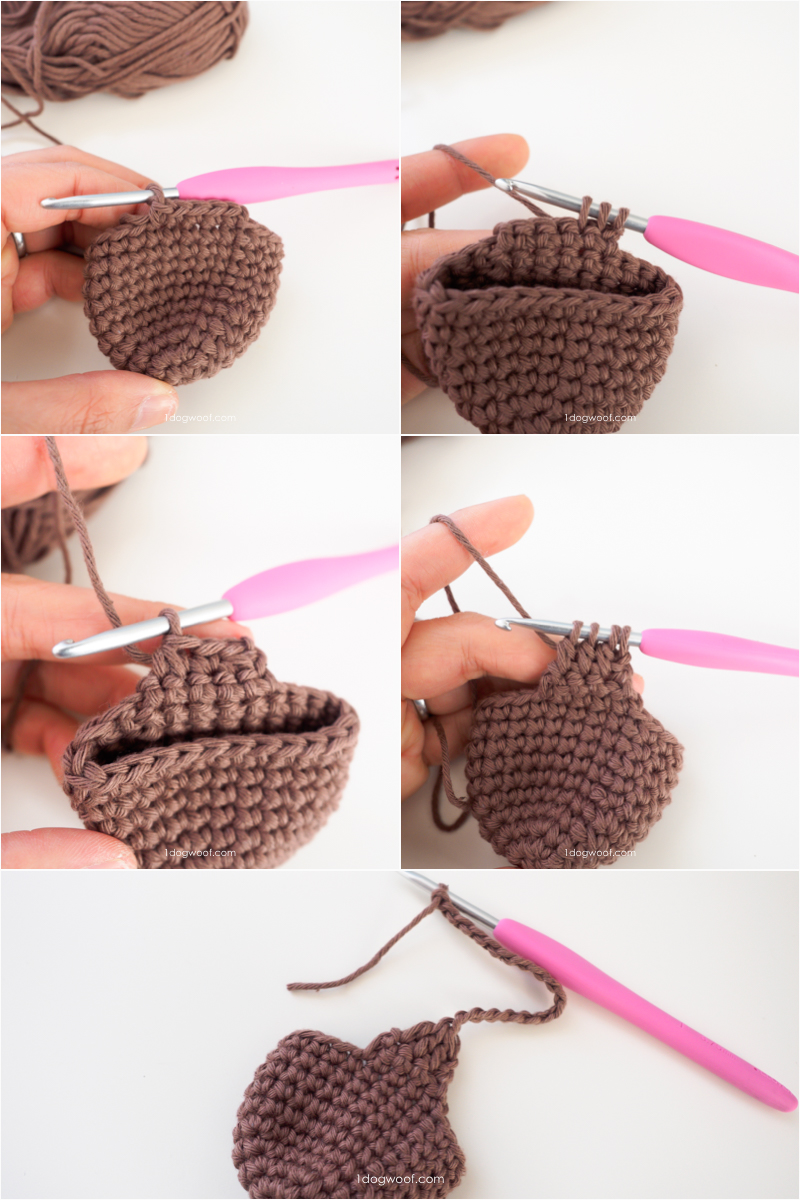
The construction of the lamb hat is the same as other animal character hats, in that you need a base, and then you sew on the ears. However, we can’t use the same base pattern we used for the bunny, because there’s BOBBLES. That’s what makes this hat so fun! The base of this hat is worked up sort of like my cherry pie amigurumi, with the bobbles worked in seamed rounds. Actually, the first few rounds are exactly the same. But you don’t need to keep expanding the size of the round, since you’re working into an oblong hat shape, so after a few rounds, you’ll stop increasing and just work the same round of bobbles.
If you need help with crocheting bobbles in the round, you can watch my Crochet Bobbles video tutorial on YouTube, which I’ve also shared below. I’d love for you to subscribe to my channel so you can stay up to date on new tutorials!
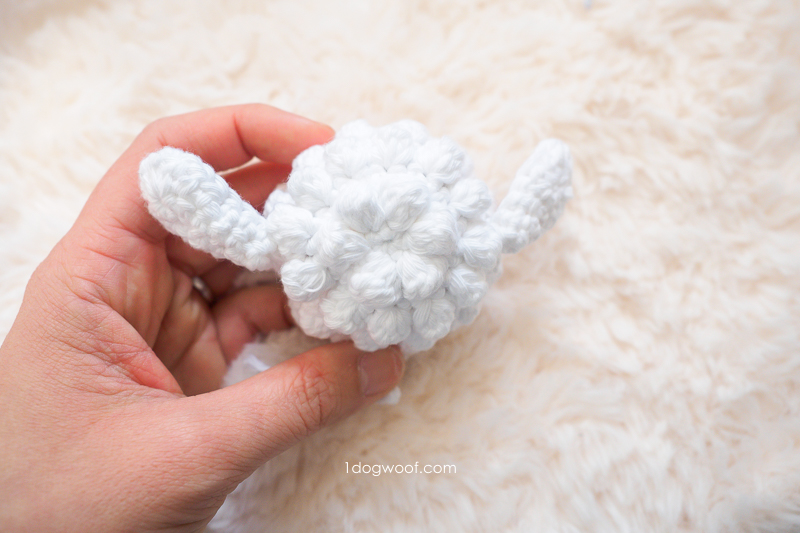
Once the bobble part of the hat is complete, you’ll work the ear flaps the same way you did for the bunny. Then crochet up the ears, add in colorful fabric, felt or even foam for the inside of the ears, and sew the ears to either side of the lamb head. Here, UNLIKE the bunny, the ears will be positioned lower down on the hat so that they droop. You’ll also want to pinch the bottom of the ear together as you sew it to the side of the side to shape it a bit more like a real lamb’s ear.
Once you’ve made a few egg hats, you can start playing around with your own creations too! Use thicker yarn to make chunky hats (especially for the large plastic Easter eggs), or make a fun bonnet instead of a beanie!
You can find this lamb hat pattern, along with the bunny hat and an unpublished pattern for a mini aviator hat, as a downloadable and printable pattern bundle PDF in my pattern shops. You’ll get all the info you need to make all 3 adorable Easter egg hats, all in one beautifully formatted file for easy offline use.
Get the Easter egg mini hat crochet pattern bundle PDF from Etsy
Enjoy the pattern below, and please share your creations with me on Instagram by tagging your photo with @1dogwoof!
Supplies
- MC: Paintbox Cotton Aran Yarn small amount
- F/3.75mm crochet hook
- scissors
- tapestry needles
- (Optional: decorative fabric, felt, or foam for inside the ear)
Abbreviations
- st(s) – stitch(es)
- sl st – slip stitch
- sk – skip
- yo – yarn over
- ch – chain stitch
- sc – single crochet
- dc – double crochet
- inc – increase: work 2 sc in same st
- bb – bobble: (yo, insert hook into st, pull up a loop, yo, pull through 2 loops on hook) 4x, yo, pull through all 5 loops on hook
Pattern Notes
- Skill level: Easy
- Size: Project is too small for an accurate gauge. Using Paintbox Cotton Aran (lightweight worsted), the finished hat should easily cover a Large size chicken egg.
- Hat is worked top down, using seamed rounds. See this video tutorial for extra help.
- Ears are sewn to the side of the hat using the finished yarn end.
Easter Egg Lamb Hat Instructions
Round 1: Work 6 sc into a magic circle. Join to first sc with sl st. (6)
Round 2: Ch 1. Work [1 sc, bb] in each st around. Join to first sc with sl st. (12)
Round 3: Ch 1. Work 2 sc in each st around. Join to first sc with sl st. (24)
Round 4: Ch 1. Work [1 sc, bb in next st] 12x around. Join to first sc with sl st. (24)
Round 5: Ch 1. Work 1 sc in each st around. Join to first sc with sl st. (24)
Round 6: Ch 1. Work [1 sc, bb in next st] 12x around. Join to first sc with sl st. (24)
Round 7-8: Repeat Rounds 5-6.
Continue to make the Right Ear Flap
Right Ear Flap
Row 1: As continued from Round 10. Ch 1. Work 1 sc into each of next 5 sts. Turn. (5)
Row 2: Ch 1. Work 1 dec, 1 sc, 1 dec. Turn. (3)
Row 3: Ch 1. *YO, insert hook into first st, pull up a loop. YO, pull through 2 loops on hook.* Repeat * for each of next 2 sts. You should have 4 loops on hook. YO, pull through all 4 loops on hook.
Ch 18 to create hat ties, and then fasten off.
Left Ear Flap
Row 1: Skip 7 sts from end of Row 1 of Right Ear Flap. Work a standing sc into the next st, then work 1 sc into each of next 4 sts.
(Math Note: The final round of the hat has 24 sts. Each ear flap starts with 5 sts. So 24 minus (2 x 5 sts) = 14 sts. There should be a gap of 7 sts between the two ear flaps.)
Repeat Rows 2 and 3 from Right Ear Flap.
Ch 18 to create hat ties, and then finish off.
Weave in all ends.
LAMB EARS (Make 2)
Ch 6.
Round 1: Starting from the 2nd ch from hook, work 1 sc in each of next 4 chains. Work 3 sc in last ch (end of oval). Work 4 sc down the other side of the chains, then join to first sc with sl st.
Round 2: Ch 1. Work 1 sc in each of next 3 sts. Work 1 hdc in next 2 sts, 5 dc in next st (end of oval), 1 hdc in next 2 sts. Work 1 sc in each of next 3 sts. Join to first sc with sl st.
Fasten off, leaving a long tail.
Use tail to sew the ear securely onto the side of the hat, at Round 5, between the two rounds of bobbles. You can slightly squeeze the bottom of the ear together to give it more shape.
Fasten off and weave in ends.
FINISHING (Optional)
Cut a small piece of felt or craft foam to fit inside each ear and glue into place.
Tie the hat ties into a loose knot and then gently fit a chicken egg into the hat.


These are so cute ! I have bantam chickens so small eggs, but I’m going to have to try these little hats, thank you!
row 5 on the hat is wrong
thank you for your free patterns. i can’t afford anything else and all my wool comes from the charity shop. this is so cute. i have altered it a bit to make it bid enough for a tennis ball and just kept making bobbles to cover. my son has a service dog for autism and this is the dogs favourite free time toy. he’ll fetch but i do think he rather enjoys flinging it around by the ears by himself.
Oh how cute! Thanks so much for the pattern, I’ll be linking and making some myself!
Hi!
Thank you for the great pattern! Nicely written, easy to follow. I used your pattern, changed to a larger hook with worsted yarn, and I made a lamb hat for my marshmallow mug!
That’s so cute and pretty! Lovely and I enjoy your post very much. You are so creative and inspirational women for the others. Great job! Keep sharing for the inspiration!