
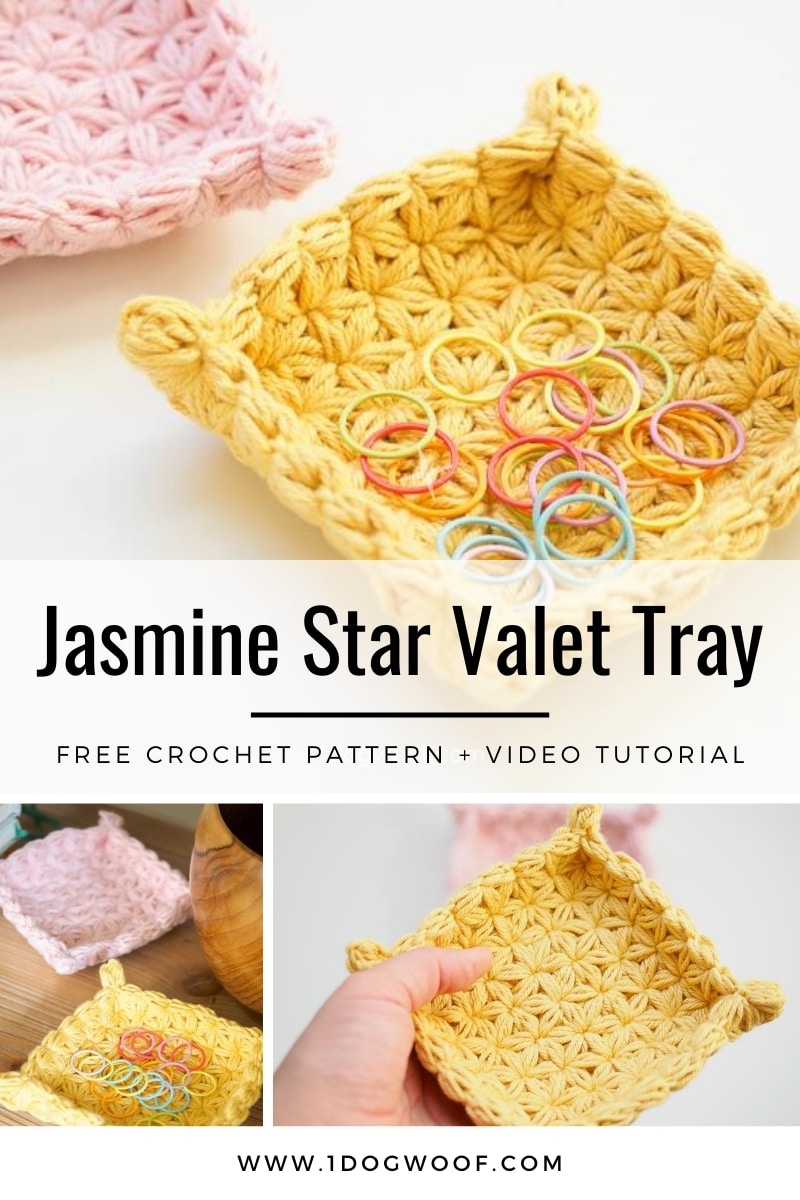
The Jasmine Star Stitch is a perfectly gorgeous stitch with and overload of texture and squishiness. It’s best used for projects where the stitch definition is allowed to shine without any other complications or distractions. Because this stitch uses a lot of yarn, and can be hard on the hands, sometimes, it’s best in small packages, like this adorable and incredibly simple Jasmine Star crochet jewelry dish!
This project is made in collaboration with WeCrochet.
WeCrochet Dishie Yarn
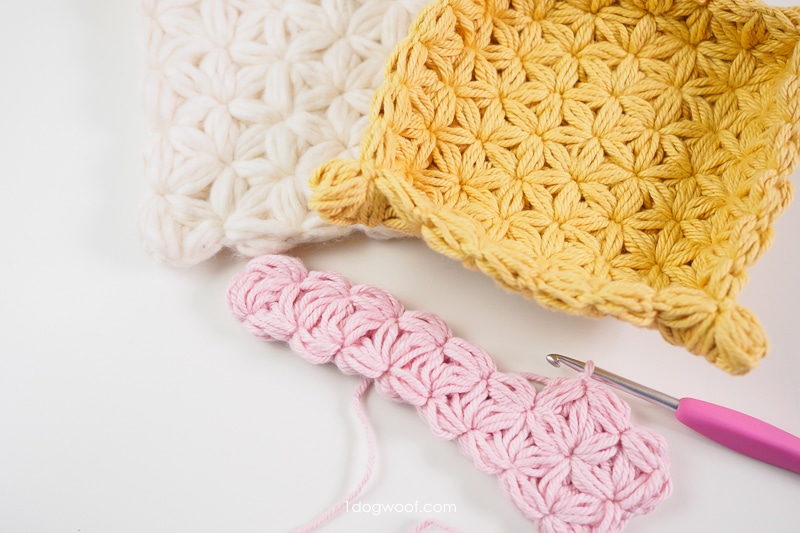
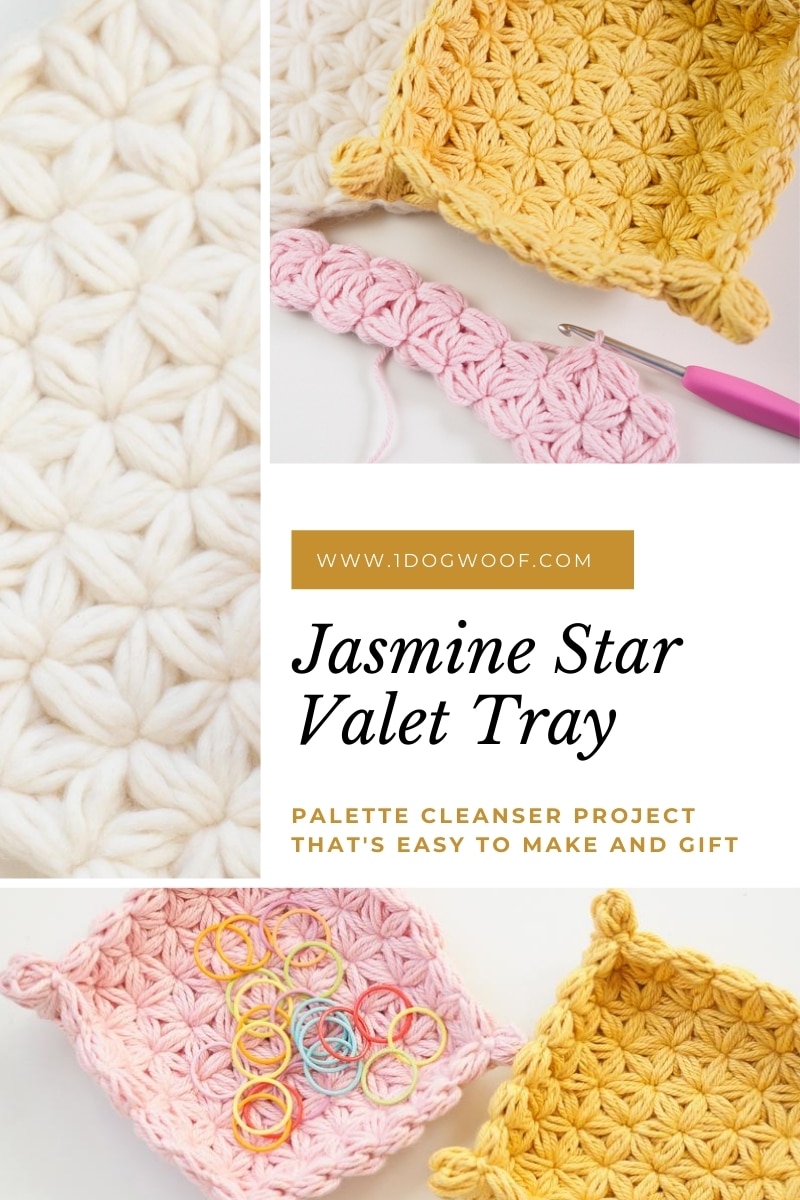
I’ve previously used the Jasmine Star Stitch with Lion Brand’s Wool Ease Thick and Quick, and wasn’t sure how the stitch would work with a much thinner, less lofty yarn. For this project, I used WeCrochet Dishie, a 100% cotton, worsted weight yarn. It’s thinner and softer than Sugar and Cream yarn from Yarnspirations. There’s a bunch of colors to choose from, and WeCrochet even has Dishie in high yardage cones for large projects.
Why Use the Jasmine Star Stitch?
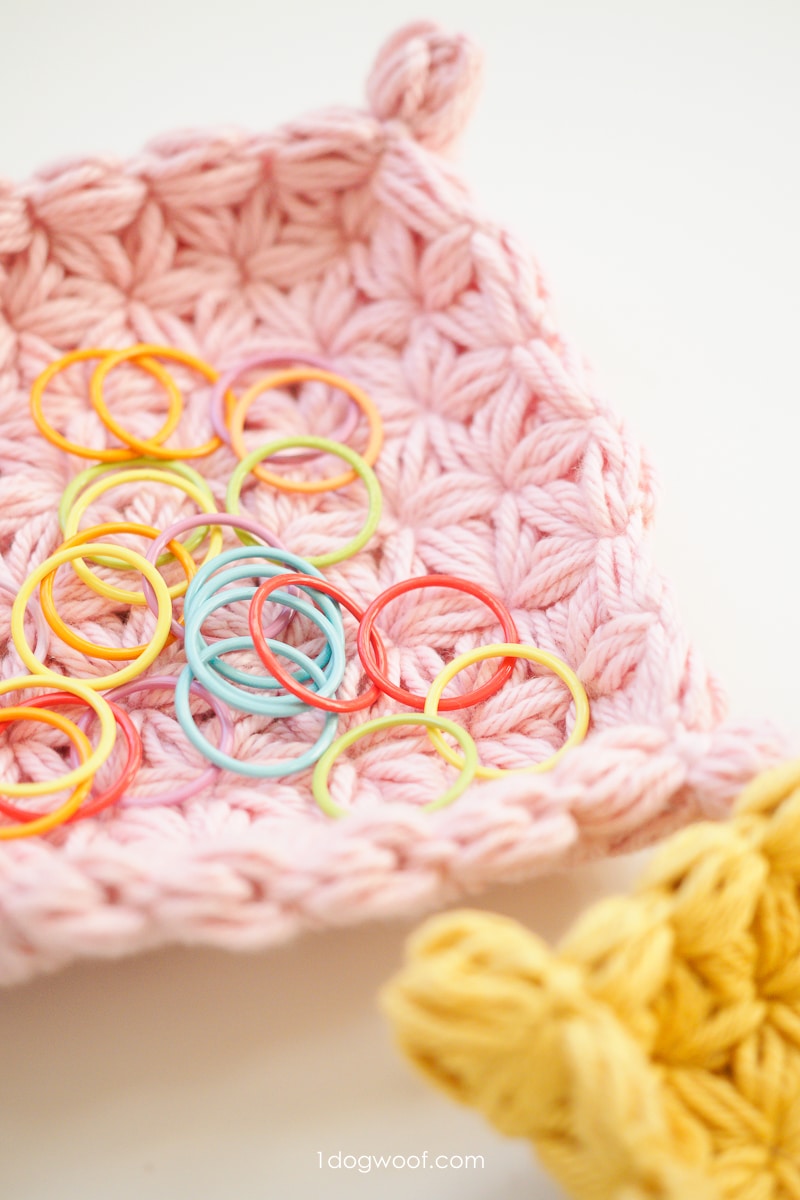
The Jasmine Valet Tray is inspired by Flax and Twine’s Woven Heart Jewelry Dish. I realized any simple square can be made into a jewelry or valet tray, but it took some time to work out the best stitch to use. I wanted the tray to be sturdy and not flimsy, be reversible because you see both sides, and be compact enough to not snag any earrings or stitch markers you might put it in. I really wanted the dish to have heft without resorting to crocheting with multiple strands of yarn, but still be small and dainty at the same time.
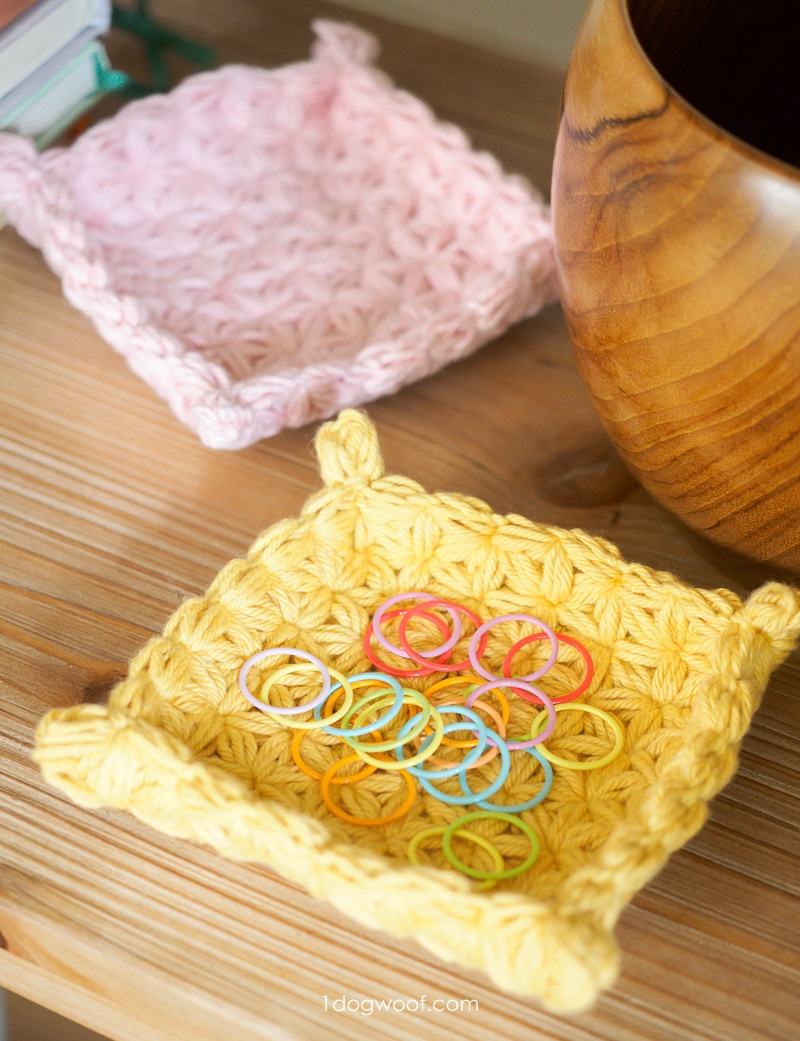
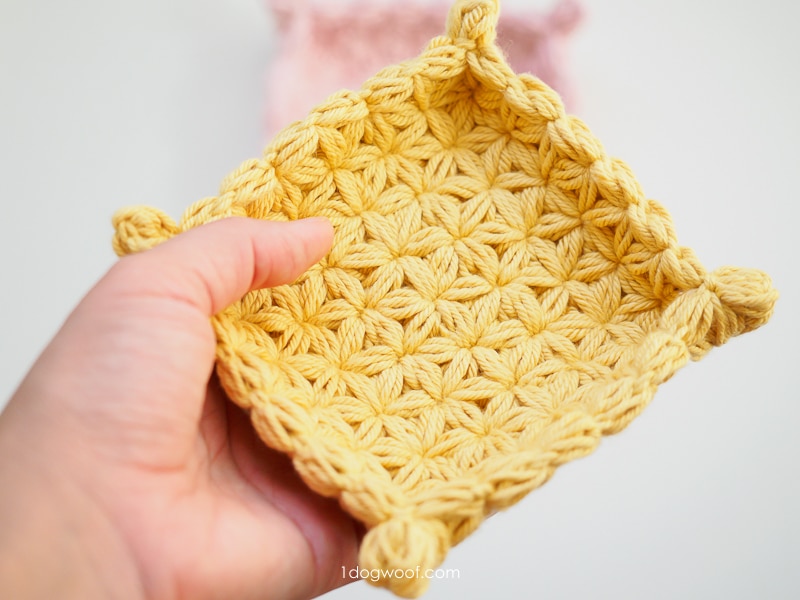
The Jasmine Star Stitch checks off all of those boxes. It is a reversible stitch, and really, it looks the same any way you turn it. The front and back look the same, as well as all four sides. You can’t easily tell your first row from your last row, which made it perfect to use in a square tray. Because it’s a series of puff stitches, the swatch comes out dense, thick, and evenly textured.
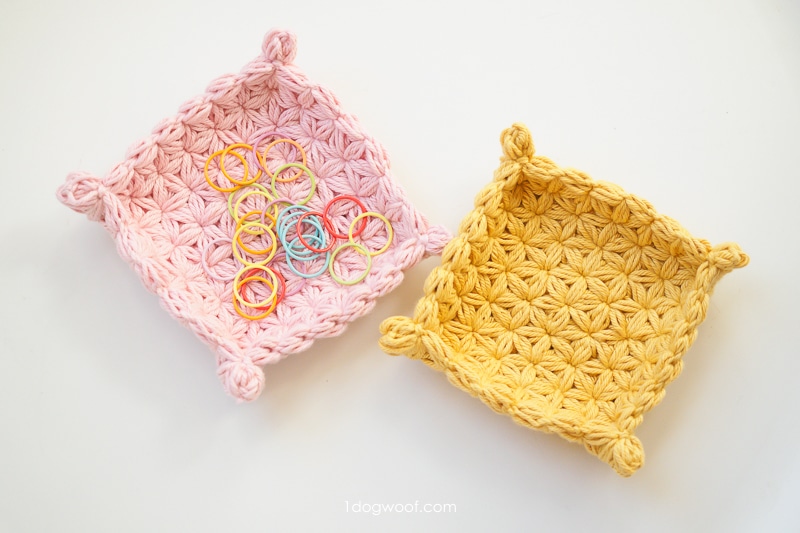
Once you’re finished with the square Jasmine Star swatch, all you need to do is crimp each corner. This was made easier by crimping at the first junction point on each side of the corner. Just whip stitch the junctions together and weave in the ends by following the direction of the petals. The hardest part about this project is choosing the color!
Crochet Jewelry Dish Video Tutorial
My Jasmine Star stitch tutorial includes the video tutorial below as well as a couple of important tips to keep in mind as you choose your yarn and hooks in order to create tight star clusters and keep your crochet jewelry dish compact.
Click Here to Pin it For Later!
Jasmine Star Crochet Jewelry Dish
Supplies
- 34 grams of WeCrochet Dishie yarn (3.5oz/100g, 190yds/174m) in your choice of color
- F/3.75mm crochet hook
- scissors
- tapestry needle
Finished Size
Swatch size : 6″/ 15.25cm
Finished size: 5″ / 12.7cm
Abbreviations
- st(s) – stitch(es)
- sl st(s) – slip stitch(es)
- ch – chain stitch
- sc – single crochet
Pattern and Construction Notes
- If you’re using a different yarn, make sure to use a smaller hook than what the yarn recommends.
- Start with a 9″ / 23cm tail before your slip knot, and end with a 9″ / 23cm tail. You’ll use these tails to crimp two of the corners.
- See video tutorial for step-by-step instructions. Crimping the corners of the valet tray is towards the end of the video.
Instructions
Foundation Row: Start with a slip knot on your hook. Ch 1. *Ch 1, pull up the loop to the desired petal size, [yo, insert hook into first ch, yo, pull up a loop] 3 times. You should have 7 loops on your hook. Yo, hold on to the active yarn behind the yo, pull yarn through all loops on hook, insert hook into the held yarn, yo, pull up a loop, yo, and complete a sc. One petal made. Repeat from * 7 more times to create a total of 8 individual petals, inserting your hook into the sc made in the previous st.
Row 1 Setup Stitch: Ch 1, pull up the loop to the petal size, [yo, insert hook into the sc made in the previous st, yo, pull up a loop] 2 times, close off the petal with a sc as described in the Foundation Row.
Row 1: Ch 1, pull up the loop to the petal size, [yo, insert hook into the sc from the Setup Stitch, yo, pull up a loop] 3 times, DO NOT CLOSE OFF, [yo, insert hook into the next junction point between petals, yo, pull up a loop] 3 times, DO NOT CLOSE OFF, [yo, insert hook into the next junction point between petals, yo, pull up a loop] 3 times. You should have 19 loops on your hook. Yo, hold on to the active yarn behind the yo, pull yarn through all loops on hook, insert hook into the held yarn, yo, pull up a loop, and complete a sl st. You should have worked 3 petals around a single junction point. Repeat the 3-petal combination across the row, working into each petal junction points as you go. Work the last petal of the last 3-petal combination into the first ch1 of the Foundation Row.
Repeat Row 1. At the end of the row, work the last petal of the last 3-petal combination into the first junction point of the previous row.
Work 8 full rows until there are 8 petals along all 4 sides of the square.
Fasten off, leaving a 9″ / 23cm tail.
At each corner with a tail, use the tail to whip stitch the first junction point on either side of the corner. Wrap the junction point 3 times to make sure it’s secure, tie a small knot and weave in the end into the crimped corner.
At the other two corners without a tail, cut a separate strand of of yarn to wrap the junction points 3 times. Tie the ends together and weave them into the crimped corner.

")


Great pillow! I absolutely love it. I’ve never seen that stitch before and can’t wait to give it a try. Thanks for sharing!
Your site url is being used to fraudlently represent messages from Amazon!!!
I don’t know if you’re aware of it or not. Here’s the url:
https://1dogwoof.com/comand.php
This is a great pattern, thank you for sharing it! I was unable to do it simply by the written directions (mostly because I’ve never done a star stitch before), but your video tutorial was perfect and even my first try with all of it’s first-try-biffs came out looking beautiful.
The video link says unavailable! Paid content only?
Keep up the amazing work!❤
No! It is free on YouTube: https://www.youtube.com/watch?v=rSuO-FbkNuE