
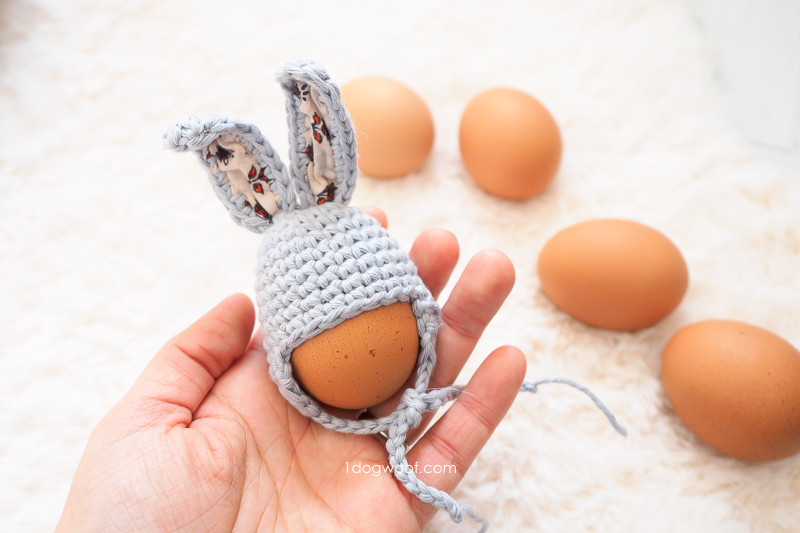
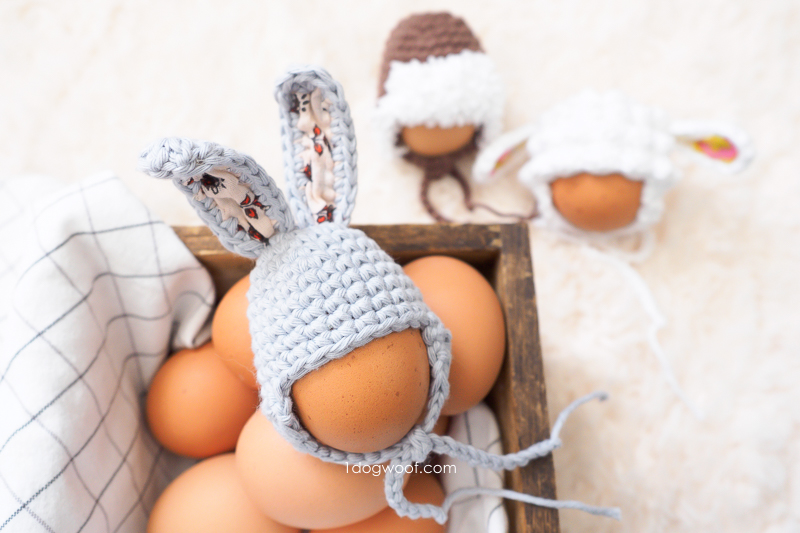
Add a touch of whimsy to your Easter eggs this year by dressing them up with mini ear-flap bunny hats! This easter egg bunny hat makes a fun and unique Easter basket gifts and is quick to work up using bits of leftover yarn from your stash.
A few weeks ago, my friend Jenny asked me to help out with a Maker’s Day at her local library by setting up a crochet demo table where kids (and adults) can learn or experience crochet. I needed a a quick project that was cute enough to draw people’s eyes and with Easter on my mind, I figured I couldn’t go wrong with more bunnies! There are lots of different takes on Easter egg hats on the internet, but that didn’t stop me from making my own. It was so much fun to get creative and enjoy the instant gratification of a quick success while I’m slogging away on larger projects. #palettecleanserproject
The Yarn
For the mini egg hats, you can use any yarn that you have available. I used Paintbox Yarns Cotton Aran, which is a light-weight worsted cotton yarn that has great stitch definition and a huge palette of colors. It’s easier to use a light worsted/aran, or thicker DK weight yarn so that the pattern ends up fitting a normal chicken egg, since the thickness of the yarn will determine the size of the hat in this case. You can switch to a bulkier weight yarn if you’re making hats for the larger plastic easter eggs, which I guess are about the size of duck eggs. And well, if you have an ostrich egg, you may want to skip right to a baby-sized hat pattern!
I also reached out to Amy at Knit Collage, who graciously provided me with some scraps of her beautiful hand spun yarn. I’ve admired her yarns for so long, and I’m so glad I got to play with some of them! She sent some fabric yarns as well as several small balls of thick/thin yarns. I especially love how there’s little surprises built in to the yarn itself, like strands of glitter, tiny flowers and gorgeous beads. It makes working them so much fun, because you never know what you’re going to get added to your pattern!
View this post on Instagram
The Construction
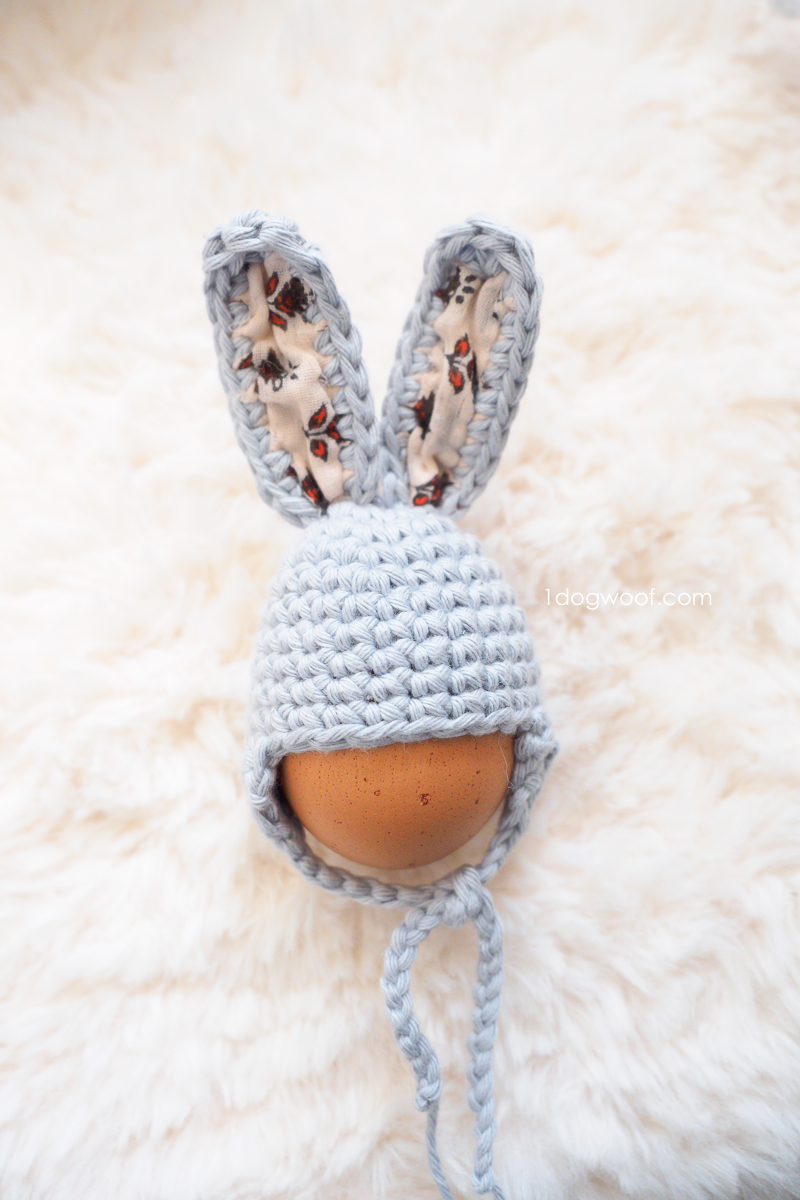
The Easter egg bunny hat is made up of 2 parts – the basic ear flap hat, and of course, the bunny ears themselves. Each part is worked up separately and then sewn together. The basic ear-flap hat is worked in seamed rounds, and the pattern can be the stepping off point for lots of different hat variations. I found that large craft pom-poms are the perfect size for gluing to the top for a simple pom-pom hat!
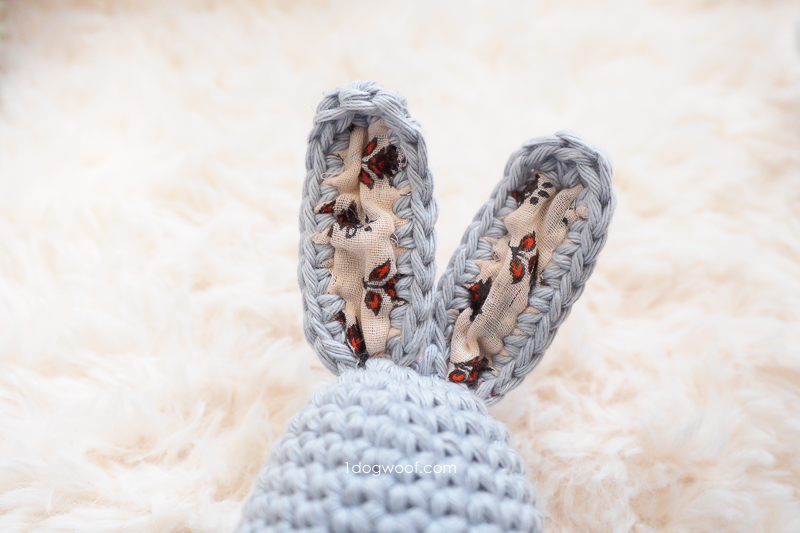
For the ears, you start off with chain stitches instead of working into a magic circle, and then create a long oval working in the round. I cut small scraps of Knit Collage fabric yarn and crocheted them directly into the last round of the ear, but it’s ok if you don’t have fabric to use. You can cut a small piece of felt or foam and glue it into the inside of the ear as well. If you do choose to add a fabric ear, you’ll want to look into the Sharp Crochet Hook, which is exactly what it’s name says, a crochet hook with a very sharp point. The hook is tiny so that the point doesn’t rip the fabric. Use the pointed crochet hook to punch through the fabric and if possible, pull a loop through, but then use your regular hook to complete the stitch. If you have trouble purchasing the Sharp Crochet Hook, this similar alternative is available on Amazon.
You can find a downloadable copy of this pattern, the Lamb hat, and the unpublished Aviator mini hat as an inexpensive crochet pattern bundle through my pattern shops. This printable PDF has all 3 patterns included, along with supply lists and helpful photos.
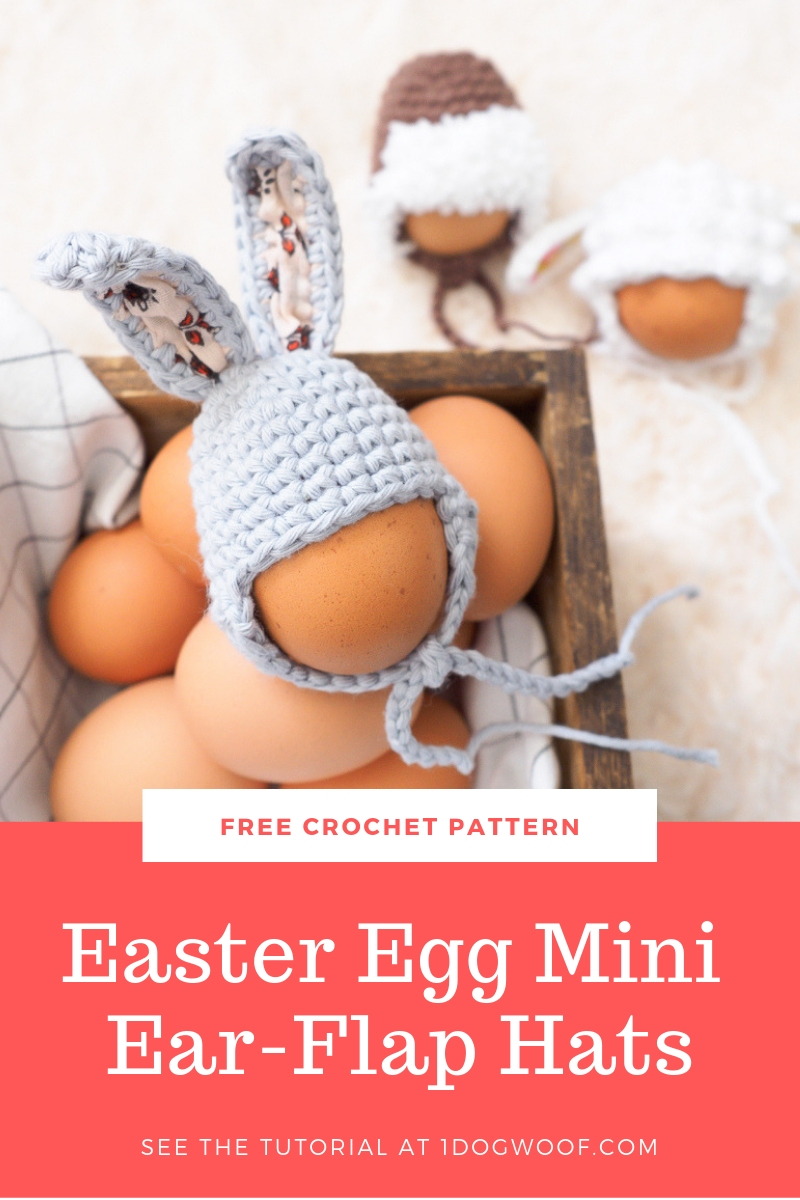
Save This on Pinterest!
Supplies
- MC: Paintbox Cotton Aran Yarn small amount
- F/3.75mm crochet hook
- scissors
- tapestry needles
- (Optional: decorative fabric, felt, or foam for inside the ear)
Abbreviations
- st(s) – stitch(es)
- sl st – slip stitch
- yo – yarn over
- ch – chain stitch
- sc – single crochet
- hdc – half double crochet
- dc – double crochet
- inc – increase: work 2 sc in same st
Pattern Notes
- Skill level: Easy
- Size: Project is too small for an accurate gauge. Using Paintbox Cotton Aran (lightweight worsted), the finished hat should easily cover a Large size chicken egg.
- Hat is worked top down, using seamed rounds.
- Ears are sewn to the top of the hat using the finished yarn end.
Easter Egg Bunny Hat Instructions
BASIC EAR-FLAP HAT
Round 1: Work 6 sc into a magic circle. Join to first sc with sl st. (6)
Round 2: Ch 1. Work 2 sc into each st around. Join to first sc with sl st. (12)
Round 3: Ch 1. Work [1 sc, inc] 6x around. Join to first sc with sl st. (18)
Round 4: Ch 1. Work [5 sc, inc] 3x around. Join to first sc with sl st. (21)
Round 5: Ch 1. Work [6 sc, inc] 3x around. Join to first sc with sl st. (24)
Round 6-10: Ch 1. Work 1 sc in each st around. Join to first sc with sl st. (24)
Continue to make the Right Ear Flap
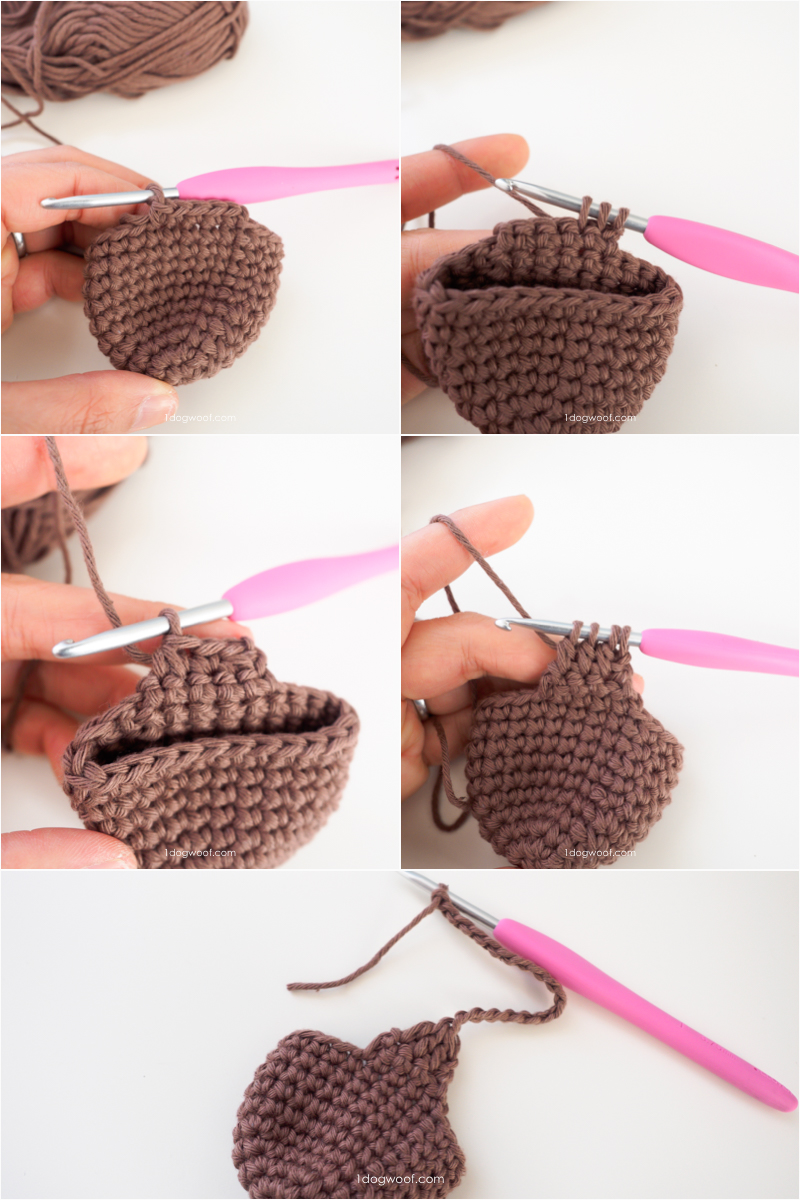
Right Ear Flap
Row 1: As continued from Round 10. Ch 1. Work 1 sc into each of next 5 sts. Turn. (5)
Row 2: Ch 1. Work 1 dec, 1 sc, 1 dec. Turn. (3)
Row 3: Ch 1. *YO, insert hook into first st, pull up a loop. YO, pull through 2 loops on hook.* Repeat * for each of next 2 sts. You should have 4 loops on hook. YO, pull through all 4 loops on hook.
Ch 18 to create hat ties, and then fasten off.
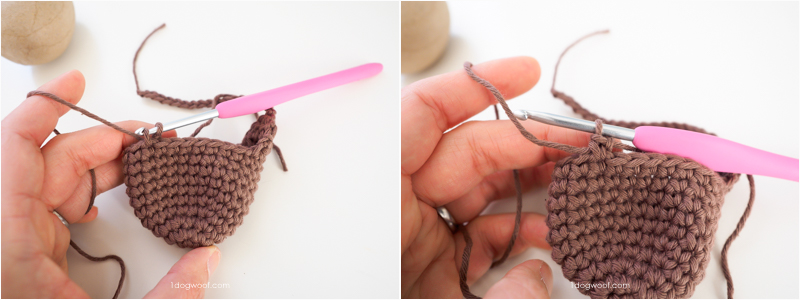
Left Ear Flap
Row 1: Skip 7 sts from end of Row 1 of Right Ear Flap. Work a standing sc into the next st, then work 1 sc into each of next 4 sts.
(Math Note: The final round of the hat has 24 sts. Each ear flap starts with 5 sts. So 24 minus (2 x 5 sts) = 14 sts. There should be a gap of 7 sts between the two ear flaps.)
Repeat Rows 2 and 3 from Right Ear Flap.
Ch 18 to create hat ties, and then finish off.
Weave in all ends.
BUNNY EARS (Make 2)
Ch 10.
Round 1: Starting from the 2nd ch from hook, work 1 sc in each of next 8 chains. Work 3 sc in last ch (end of oval). Work 8 sc down the other side of the chains, then join to first sc with sl st.
Round 2: Ch 1. Work 1 sc in each of next 8 sts. Work 1 hdc in next st, 3 dc in next st (end of oval), 1 hdc in next st. Work 1 sc in each of next 8 sts. DO NOT JOIN.
(Note: If you choose to crochet fabric into the ear, work the Sharp Crochet Hook through the fabric, then insert into the next st. Pull up a loop through the stitch and the fabric. Complete the stitch using your regular crochet hook. Repeat these steps for each stitch in Round 2. You will need to glue or otherwise secure any frayed ends at the bottom of the ear before sewing the ear onto the top of the hat.)
Fasten off, leaving a long tail.
Use tail to sew the ear securely onto the top of the hat, between Rounds 2 and 3. You can slightly squeeze the bottom of the ear together to give it more shape.
Fasten off and weave in ends.
FINISHING (Optional)
Cut a small piece of felt or craft foam to fit inside each ear and glue into place.
Tie the hat ties into a loose knot and then gently fit a chicken egg into the hat.

I admit I got a bit carried away making teeny tiny hats for eggs. Check out my Lamb Easter Egg Hat for even more cuteness!


You did your work very well. really love your needle works.
The such a useful article. Again, thank you so much,