
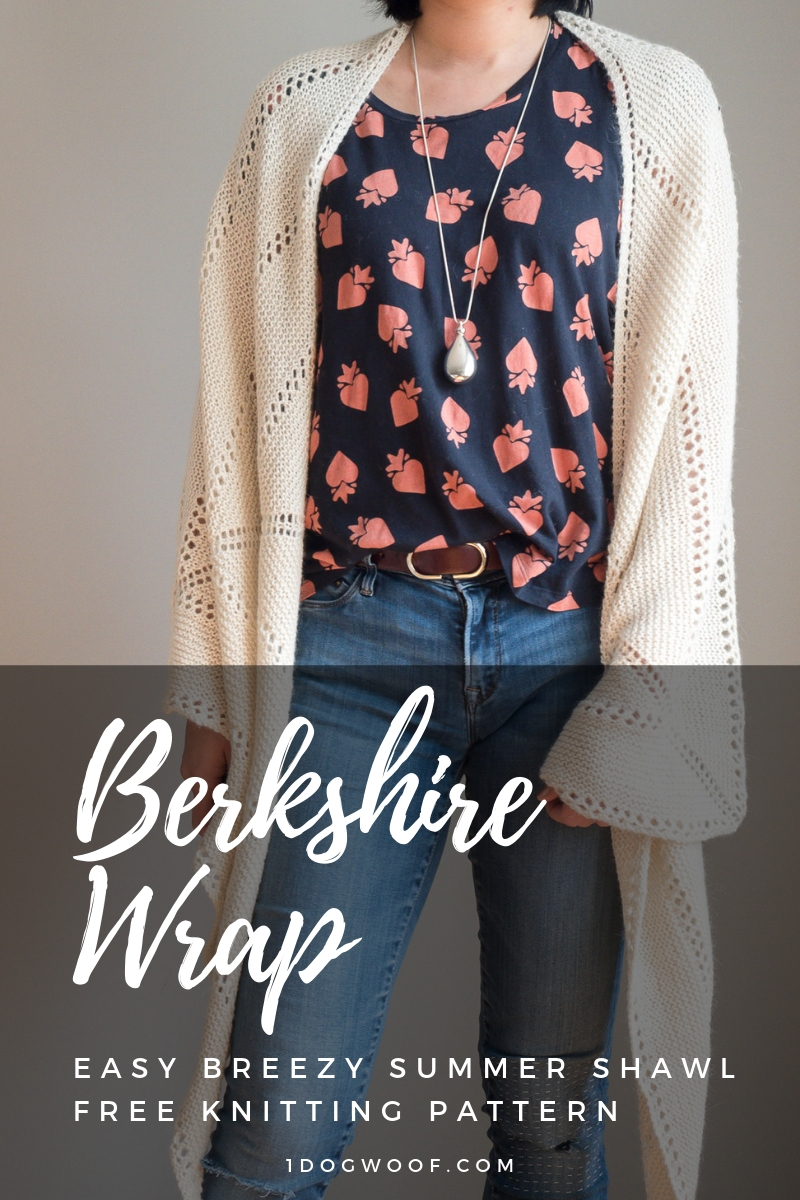
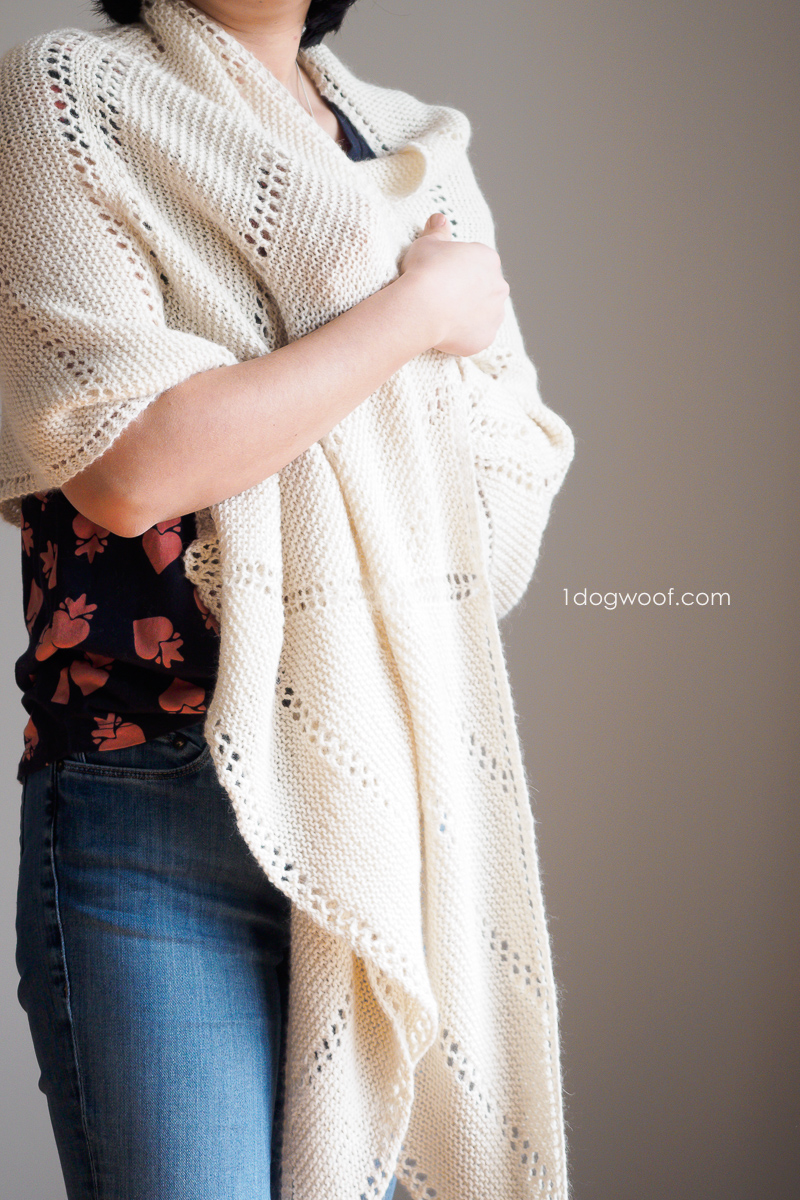
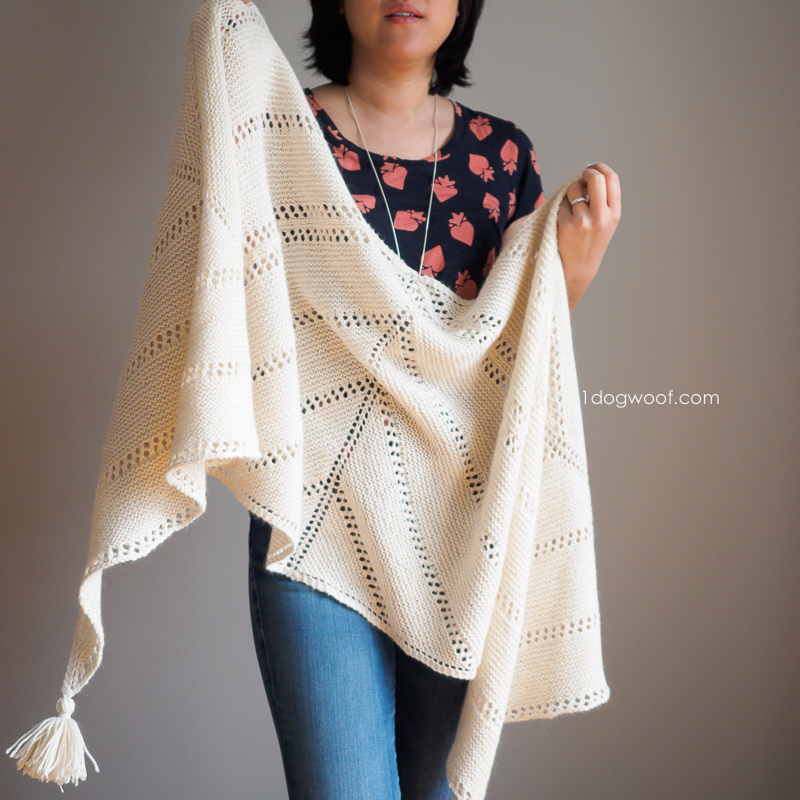
The Berkshire Wrap is the stunning knit companion to my popular crochet Adirondack Wrap. Like it’s cousin, this garter knit shawl uses basic stitches and a unique construction to create a long, wide shawl, finished off with fun tassels at the ends. Make it with DK weight yarn for a light and airy summer feel, or with something thicker for cozy warmth during the winter months!
Pin this for later!
The Yarn
Unlike the Adirondack Wrap, which used Lion Brand Mandala Yarn, the Berkshire Wrap uses Lion Brand Baby Alpaca Yarn, a lightweight yarn made with 100% baby alpaca wool. This yarn is incredibly soft and comes in 6 gorgeously neutral colors ranging from warm cream to a heathery tan, a rich brown to a rustic charcoal. Any color would create a sophisticated piece suitable for any occasion.
The Baby Alpaca yarn can be felted together at the ends due to its 100% natural fiber content, but you need to overlap it by a few inches. The yarn is so thin, the felting won’t be as strong if the felted area is too small.
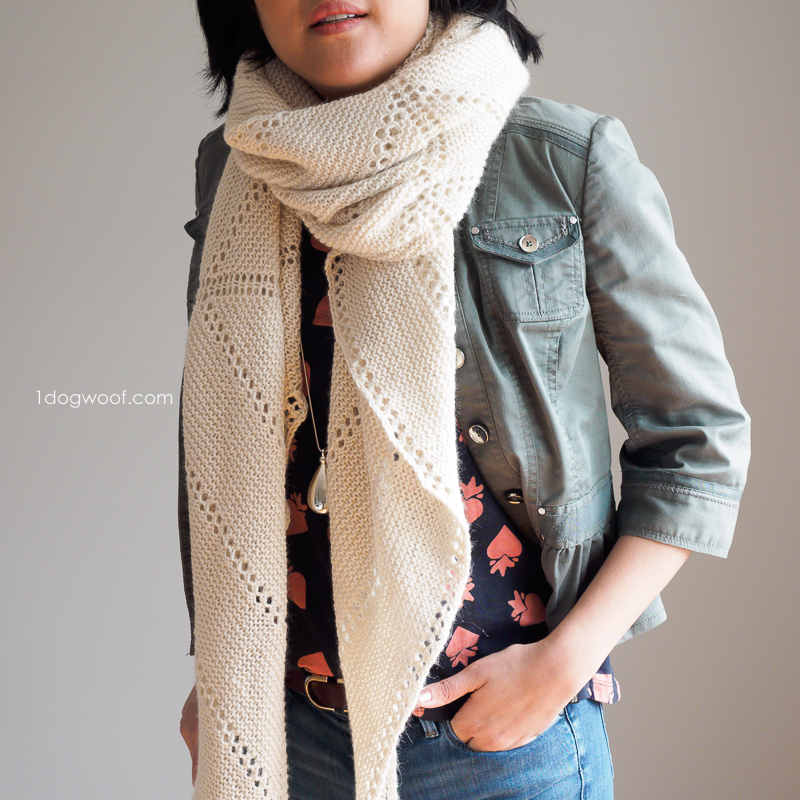
If you’re turned off by the thin yarn, don’t be! The Berkshire Wrap pairs this the Baby Alpaca with needles larger than the ones recommended on the packaging, while mostly using garter stitch. This contrast makes the shawl feel light, like fairy wings, while still having a soft squishy feel when it’s bunched together to be worn as a scarf.

The Construction
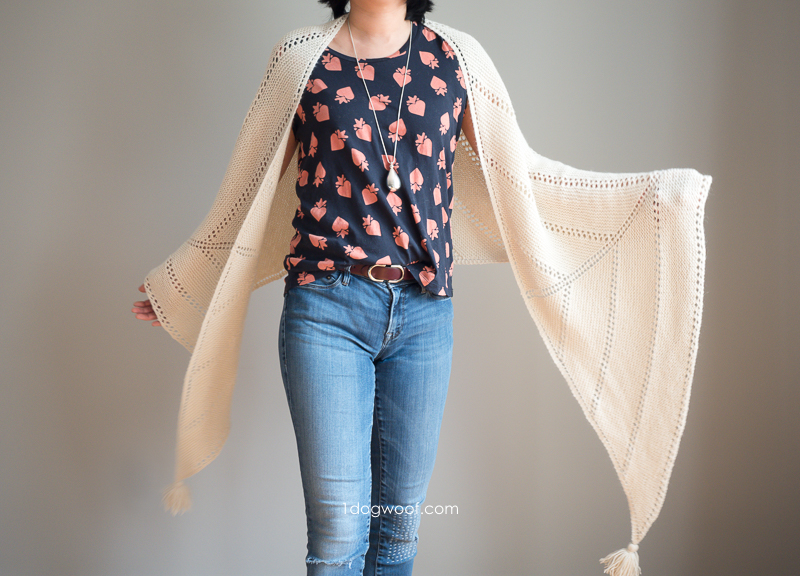
As mentioned before, the Berkshire Wrap is the cousin to the Adirondack Wrap. It is made up using 3 identical triangle-shaped garter knit shawls, each of which could be its own mini triangle shawl, if you wanted to stop one-third of the way through. Make 3 though, so you can have this impressively large with super lightweight summer wrap. A great feature of making a large shawl this way is that you only need to carry one triangle with you for your knitting-on-the-go. Each triangle can be made with just over 2 balls of Baby Alpaca, so there’s no awkwardness with having to lug around several balls of yarn’s worth of a growing project.
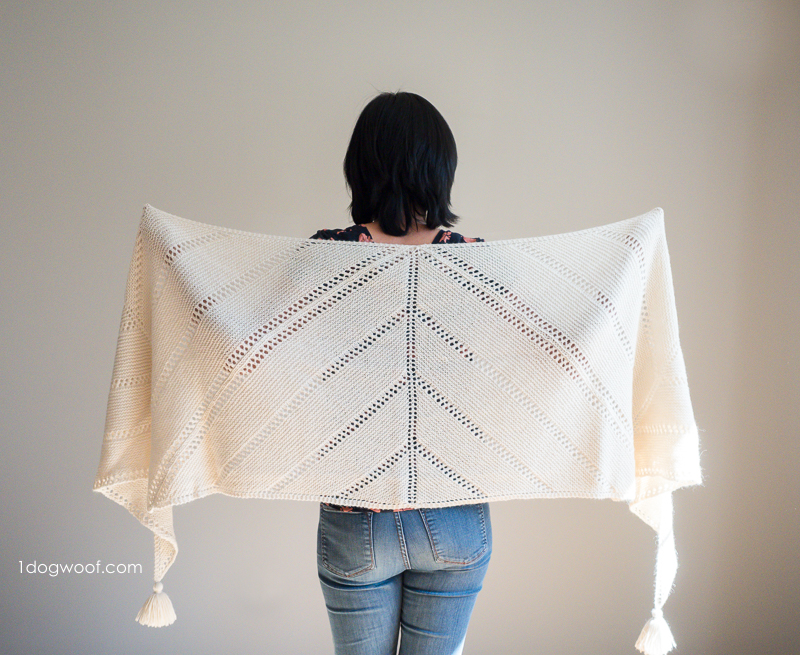
The triangle starts off with a basic garter tab cast on. Once the garter tab is complete, the triangle is made from simple garter rows, with a few rows of eyelet lace in between the garter sections. It’s always a good idea to leave a lifeline every few rows, so you can frog back to it in case you make a mistake. Even if you live on the wild side and hope to not make a mistake, I highly recommend at least putting in a lifeline before you start the eyelet lace sections, because those can be a lot more difficult to fix.
This garter knit shawl is designed so that it’s reversible, unlike the stockinette stitch which seems to have a true Right Side and Wrong Side. But, there are 4 increases on every right side row, so it is still important to keep track of which side you’re working on. If you work the garter tab as written, your beginning tail can indicate which side is which. Having the beginning tail on the right of center means you’re on the right side. Right -> Right. On the wrong side, the beginning tail will be on the left of the center line. At the beginning of each row, take a look at the tail to determine which side you’re working and you’ll know whether to add the increases or work knit stitches all the across. This means you don’t need to have refer to the pattern all the time!
Once all 3 triangles are complete, you’ll want to wet block them. This means to let the pieces sit in cold water with no agitation, then dried and laid flat on blocking boards held to the shape and size you want. I add in a bit of wool wash to the water, let it sit for 20 minutes, gently squeeze dry and then lay the pieces in a large towel, roll up the towel and walk on it to get the last bit of water out. I block all 3 triangles on top of each other to ensure they are all exactly the same size and shape, although it will take a bit longer to dry.

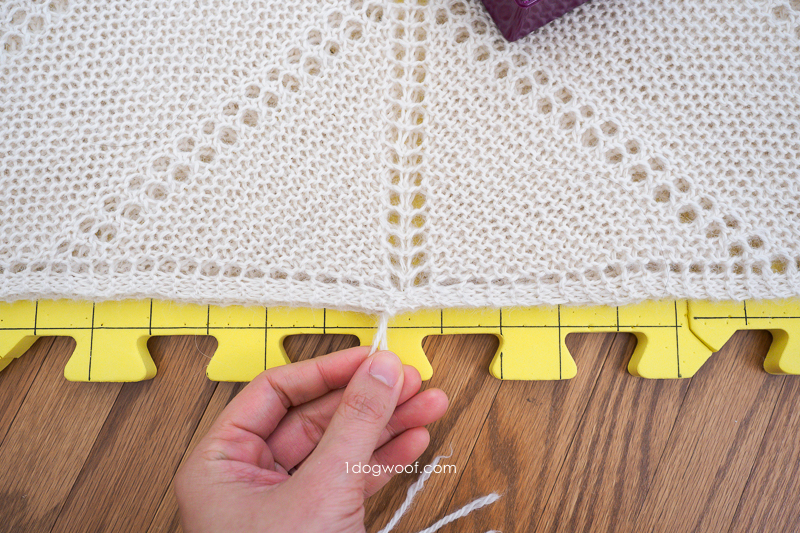
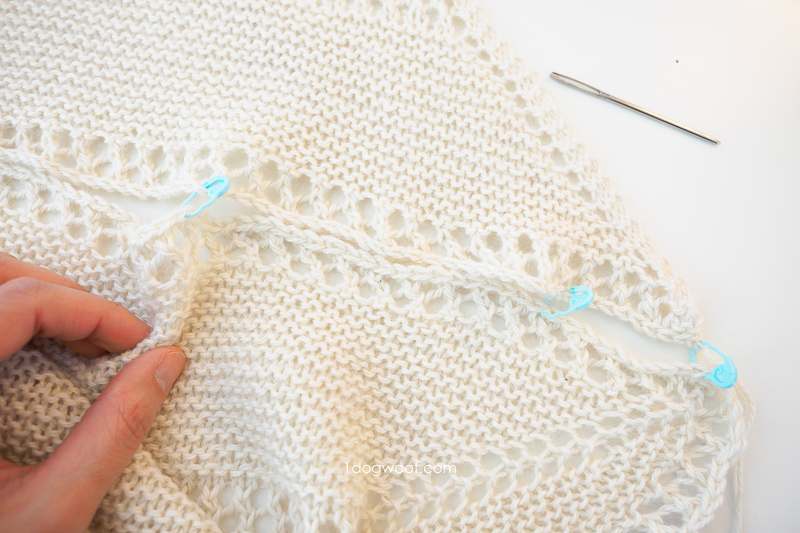
Once the pieces are dry, lay them right side up with the last triangle (the one with the long tail) in the middle. Use the end tail from the middle triangle to join the edges of the triangle together with a mattress stitch. If you run out of yarn, you can felt on more, or join more and weave in the extra ends. I also found it helpful to count my stitches beforehand, and hold them together every 20 stitches or so with stitch markers, so as I mattress stitch, I know I’m on the right track. This saves you the frustration of getting to the end to realize you’re one stitch off and have to rip the whole seam out!
The Pattern
You can access the free pattern below, or choose to purchase an inexpensive PDF from my pattern shops. The PDF is beautifully formatted for easy printing and downloading, without ads or comments, and helps enable me to provide more free patterns on my blog!
——————————————
Add the Berkshire Wrap to your Ravelry queue or purchase the PDF on Ravelry
——————————————

Supplies
- 8 balls of Lion Brand LB Collection Baby Alpaca (50g/1.75oz, 146yds/133m)
- US 7/4.5mm knitting needles, 40” circular
- tapestry needle
- scissors
- (Optional) Clover Tassel Maker
Abbreviations
- st(s) – stitch(es)
- K – knit
- P – purl
- yo – yarn over
- k2tog – knit 2 together
- ssk – slip slip knit
- pm – place marker
- sm – slip marker
Pattern Notes
- Skill level: Level 2 – Easy
- Gauge: 15 sts and 16 rows in 4 inches of garter stitch, blocked.
- One size only
- Measurements: 96 x 56 inches, blocked and laid flat.
- Yardage used: Approximately 1100 yds total
- The Berkshire Wrap is made from 3 identical triangles sewn together.
- There is an increase of 4 sts on every right side row.
Berkshire Wrap Garter Knit Shawl: Instructions for Knit Triangle (Make 3)
Start with a garter tab cast-on:
Cast on 3 sts. Knit 7 rows. Turn your work 90 degrees clockwise, and pick up 3 sts. Turn your work again 90 degrees clockwise, and pick up 3 sts. You should have 9 sts on your needle.
Garter section:
Row 1 (RS): K3, yo, k1, yo, pm, k1, pm, yo, k1, yo, k3. Turn. (13)
Row 2 (WS): K until marker, sm, k1, sm, k until end of row. Turn. (13)
Row 3 (RS): K3, yo, k until marker, yo, sm, k1, sm, yo, k until last 3 sts, yo, k3. Turn. (17)
Row 4 (WS): K until marker, sm, k1, sm, k until end of row. Turn. (17)
Rows 5-28: Repeat Rows 3 and 4. At the end of Row 28, you should have 65 sts in the row.
Eyelets section:
Row 29 (RS): K3, yo, k1, [yo, k2tog] until marker, yo, sm, k1, sm, yo, [ssk, yo] until last 4 sts, k1, yo, k3. Turn. (69)
Row 30 (WS): K3, p until marker, sm, k1, sm, p until last 3 sts, k3. Turn. (69)
Row 31 (RS): K3, yo, [k2tog, yo] until 1 st before marker, k1, yo, sm, k1, sm, yo, k1, [yo, ssk] until last 3 sts, yo, k3. Turn. (73)
Row 32 (WS): K3, p until marker, sm, k1, sm, p until last 3 sts, k3. Turn. (73)
Rows 33-60: Repeat Rows 3 and 4. At the end of Row 60, you should have 129 sts in the row.
Rows 61-64: Repeat Eyelets Section Rows 29-32. At the end of Row 64, you should have 137 sts in the row.
Rows 65-92: Repeat Rows 3 and 4. At the end of Row 92, you should have 193 sts in the row.
Rows 93-96: Repeat Eyelets Section Rows 29-32. At the end of Row 96, you should have 201 sts in the row.
Rows 97-124: Repeat Rows 3 and 4. At the end of Row 124, you should have 257 sts in the row.
Rows 125-128: Repeat Eyelets Section Rows 29-32. At the end of Row 128, you should have 265 sts in the row.
For the first 2 triangles, bind off loosely and fasten off with a 6 inch tail.
For the last triangle, bind off loosely and fasten off with a long tail at least 4x the length of a side of the triangle. This tail is used to sew the triangles together. You may need add more length as you join the pieces.
Blocking
→ Before continuing below to join the triangles, lay each triangle flat and either wet block or steam block to match the blocked gauge.
Joining the triangles
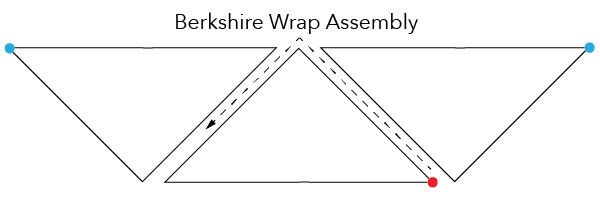
→ Lay out all 3 triangles to form a trapezoid, making sure all the triangles are facing right side up, and the last triangle is in the middle.
→ Use the tail on the middle triangle to mattress stitch the triangles together. Work the mattress stitch through the two loops closest to each other (the back look of the front triangle and the front loop of the back triangle.) Figure 1.
→ Note: It is helpful to line up the stitches and hold them in place with open stitch markers, since there are the same number of stitches along each side.
Fasten off and weave in all ends.
Finishing
→ Make 2 tassels about 4-5 inches in length. (I like using this Clover Tassel Maker)
→ Fasten each tassel securely to each end of the wrap, as shown by the blue dots below.
I absolutely love how this garter knit shawl slash wrap slash scarf turned out. It’s spring here now, but still chilly most days, so I’ve been wearing the wrap as a scarf. But as the days get warmer, I see myself wearing this more as a shawl, and how perfect would it be for a summer wedding? I hope you love this project as much as I do! Share your makes with me on Instagram by tagging it with @1dogwoof and #BerkshireWrap for a chance to be featured on my feed!


I made your Adirondack Wrap when I first saw the pattern and I loved making it. However it was very large and since I’m only five feet tall I felt like it “dwarfed” me! I wound up giving it to a larger friend. This Berkshire wrap is the same size but I won’t make it unless I alter the size somewhat.????
Wow, Chi Wei – this is totally gorgeous ! Thank so much for the free pattern – dunno why you aren’t selling it, as I would certainly pay for it.
Goodonyermate, as we say Downunder.
🙂
Muchas gracias, me encanta el patrón, yo hice el Adirondack Wrap y resultó precioso, ahora haré extender punto. Me gusta todo lo que haces. Saludos desde España.
I love this shawl. It is hip and young in design and would make a great DIY gift!
Goodonyermate, as we say Downunder.
I paid the $3.00 so that I could send the PDF to my knitter mom, however I did not receive an email or any instructions or a link to the PDF. Please help.
Denise, please email me with your purchase or receipt number, and I can look it up for you.
Great info. Thanks for so much useful article. You can also add a much more useful information on your blog. Very interesting blog!!
vidmate
Hi Margaret, I am having trouble blocking the Berkshire wrap, how did you go.
I’m in Australia and need some help. Any comments would be greatly appreciated