
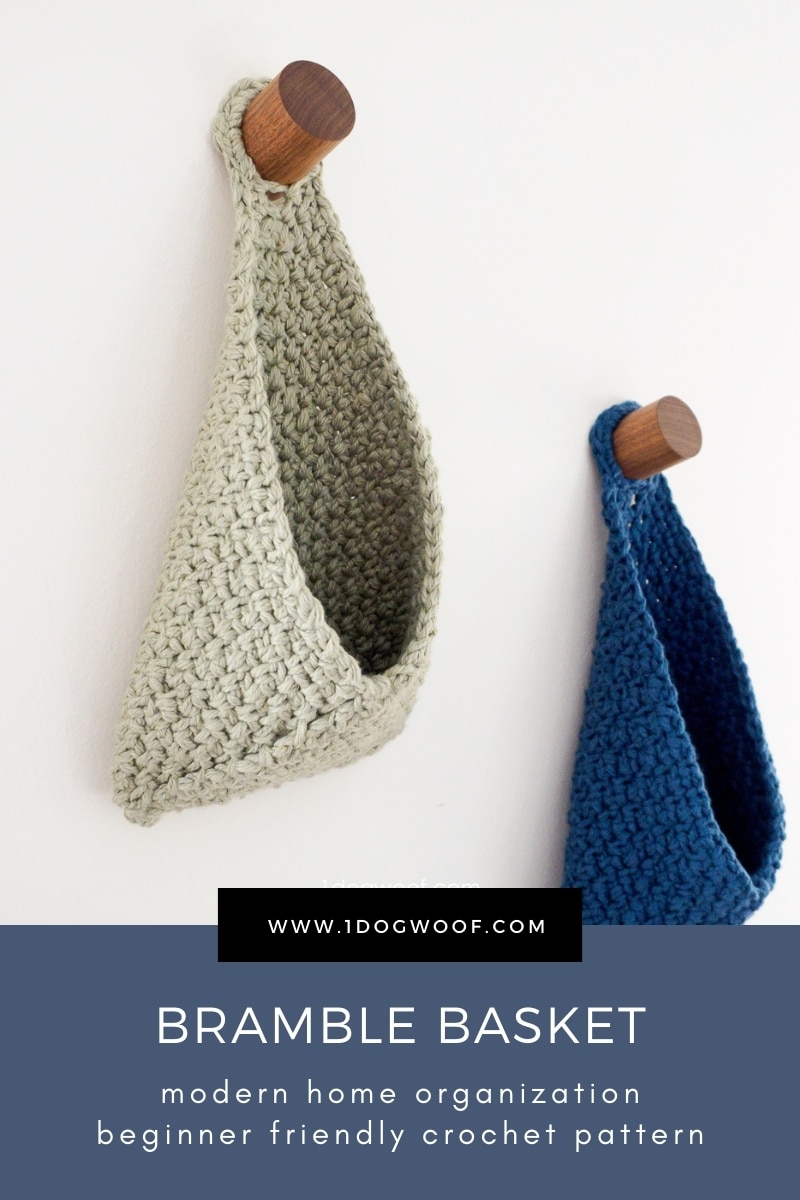
The Bramble Basket is a beginner friendly hanging basket crochet pattern that anyone can make to help organize small winter gear, display plants, and store closet accessories. This quick and easy palette cleanser project makes a great stocking stuffer gift or craft show product – you can whip up several over a weekend!
Click Here to Pin it For Later!
If you’re a parent, you know this scenario: 15, 30, 45 minutes before we all have to be in the car, you start reminding your family to get ready to go, and are met with 1) silence, or 2) complaints. No one moves. And then, when you’re right on the verge of being late, everyone is frantic, running to the bathroom, filling up water bottles, finding matching socks, and checking the weather. Add cold weather and a pandemic to that, and there’s a scramble to find hats, gloves and clean masks. Sound familiar? Or it’s just me?
It really only took one spell of cold fall weather to make me realize I really, REALLY needed some winter accessory organization in our mudroom. We already have hooks for each person to hang up their masks, so it was easy to imagine hanging a basket for each person as well. This hanging basket is easy to make, and gives quick gratification and functionality to a frazzled home.
A Bit of Experimentation
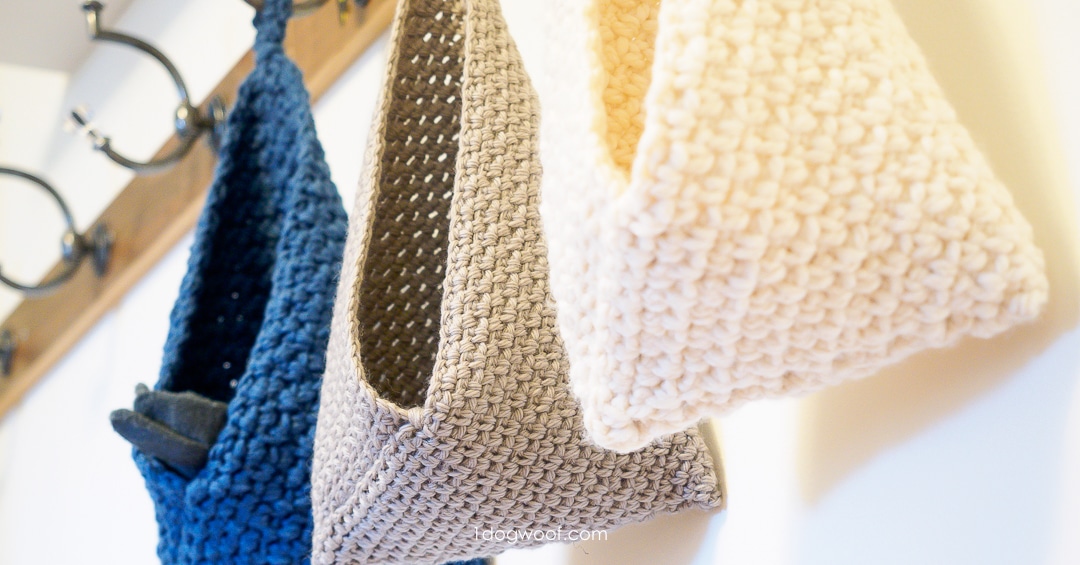
I made the Bramble Basket using two different yarns available from WeCrochet/KnitPicks. The first was Wool of the Andes Bulky Yarn – it is 100% Peruvian Highland Wool, slightly scratchy, and comes in a variety of muted color. The second was WeCrochet/Knit Picks Billow yarn – it is 100% cotton, has a nubby thick and thin texture, and also comes in several beautifully neutral colors. So, which one worked better?
I made the Wool of the Andes basket using a single strand of yarn. It came out with beautiful even texture, and a single skein of the yarn resulted in a useful, medium-sized basket, enough to hold kids gloves and hats. The basket itself had enough structure to hang from a hook, but felt a little flimsy. Because of its slightly Peruvian Wool fiber, I imagine the basket would felt very well if it was tumbled in the dryer. This would close up any gaps in the crochet, and make it suitable to hold much smaller items.
For the other basket, I held two strands of Billow Yarn together to create a super-bulky yarn equivalent. Each strand of the Billow has thick and thin sections, but holding them together sort of evened out those sections. Still, the basket had a distinct overall texture that was beautifully unique. Using this “super-bulky” yarn resulted in a much sturdier basket that kept its shape well when hung. Although I used two skeins of the Billow yarn together, the basket came out to around the same size as the single-stranded Wool of the Andes one. I would also not felt this basket, since the fiber make-up is 100% cotton.
Overall, I like the Billow yarn versions better because of the extra sturdiness and slightly nubby texture. I may try holding two strands of the Wool of the Andes together for a more sturdy basket with a minimal, modern look.
——————————————
In Case You Missed It:
——————————————
Geometry Rules
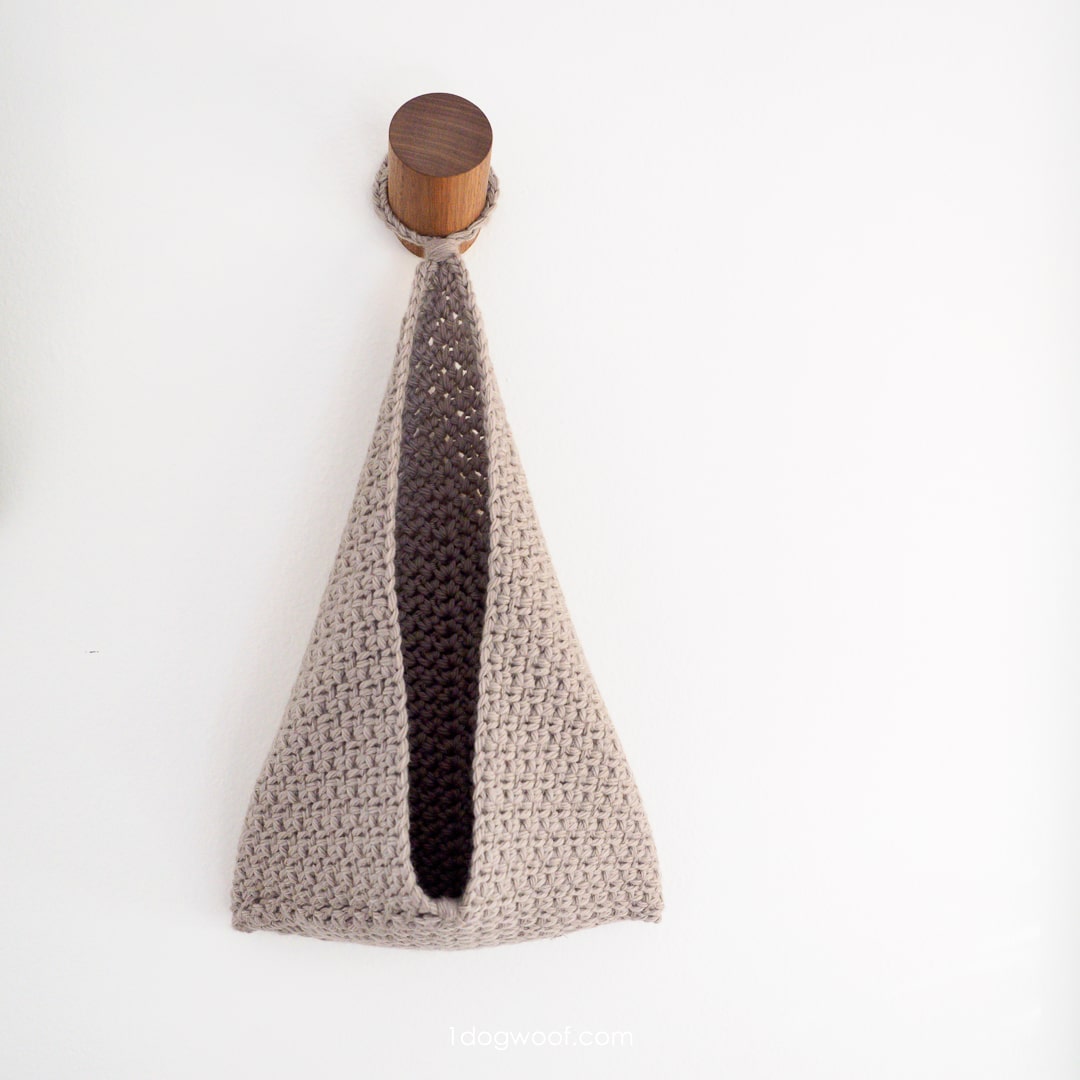
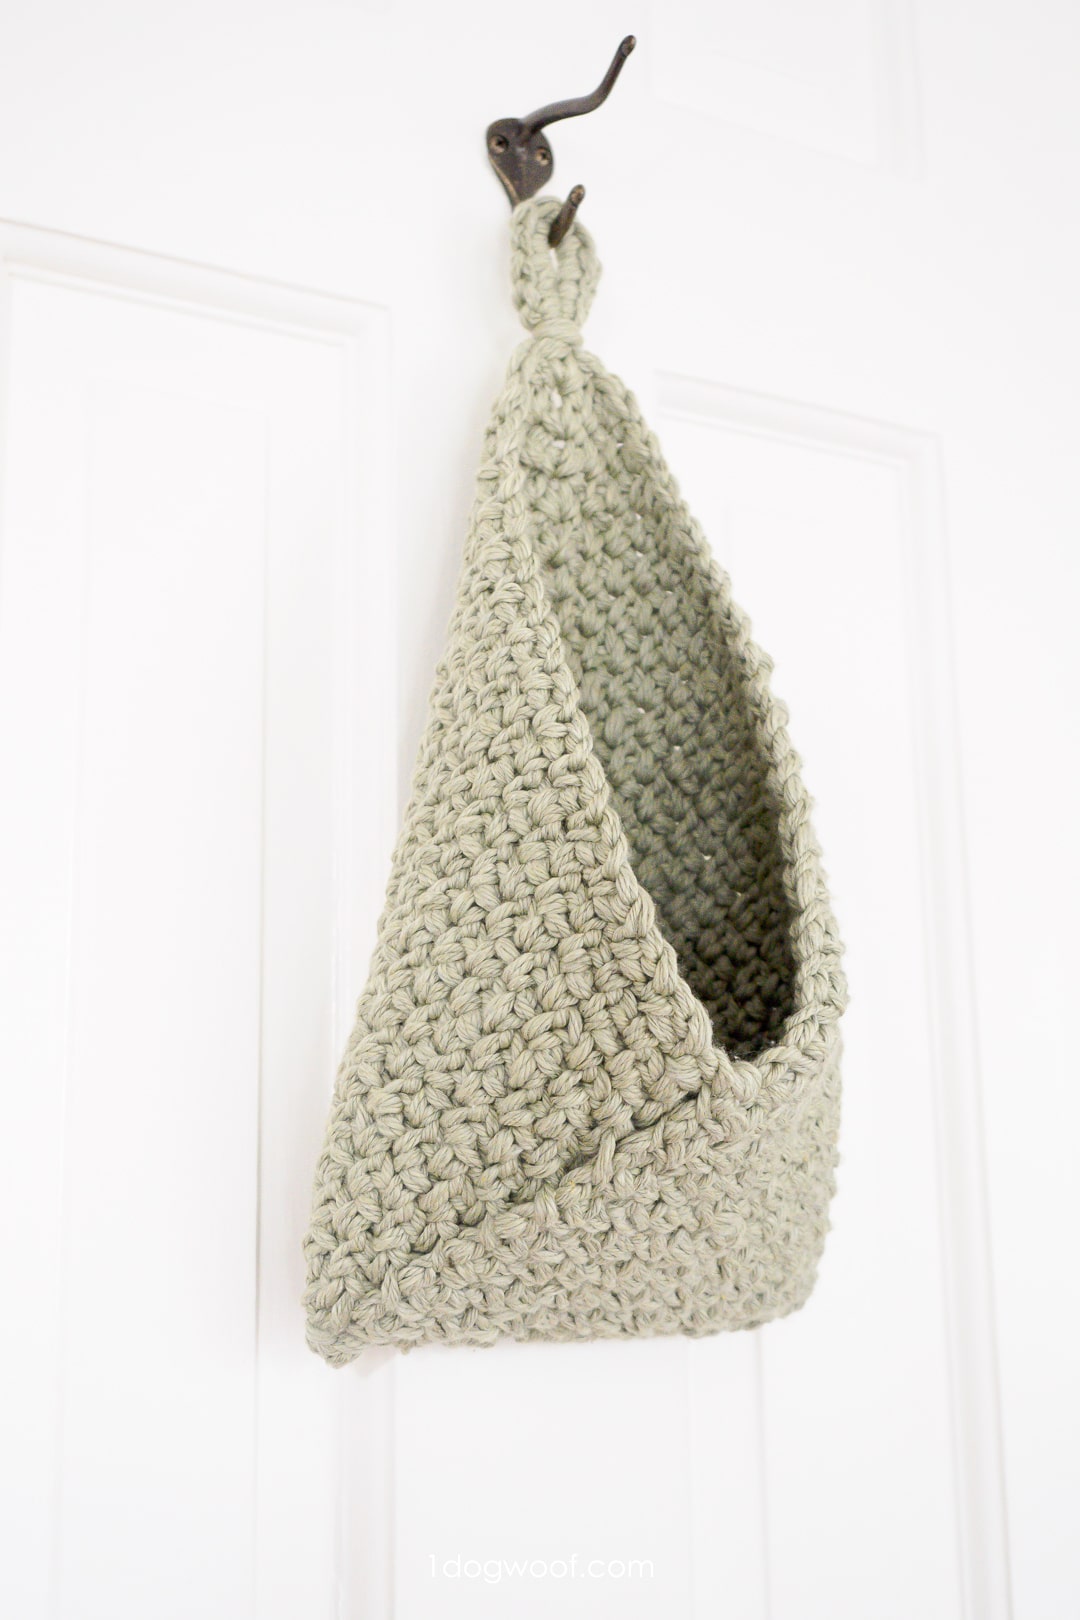
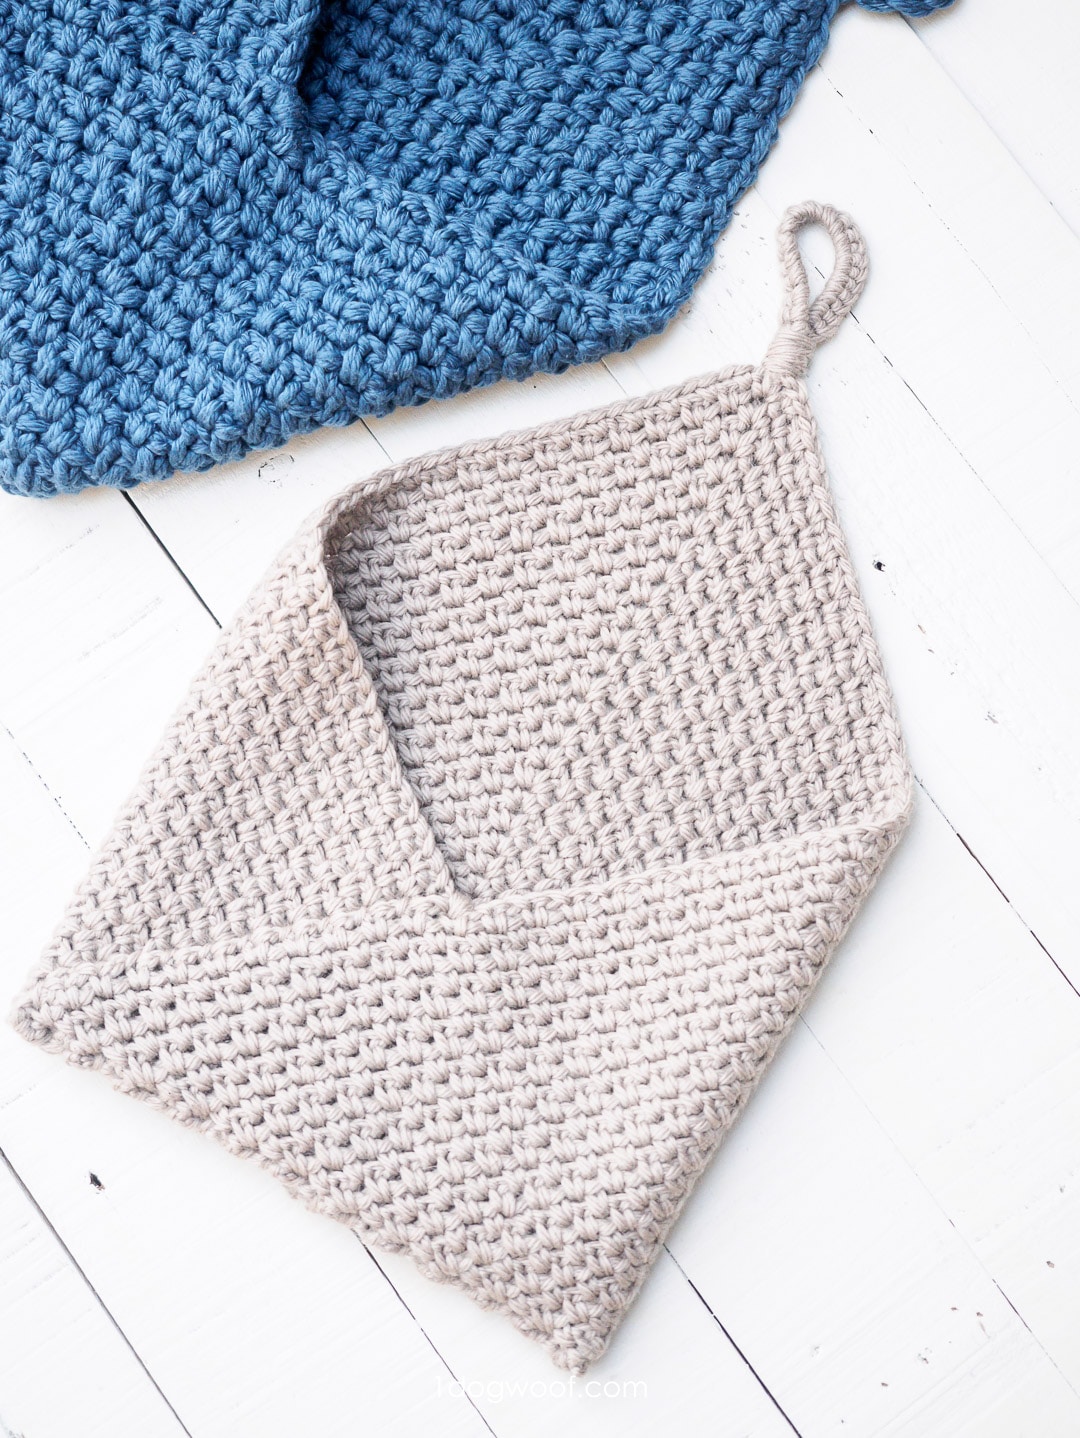
The construction of the Bramble Basket is simplicity itself. If you’ve ever made a triangle shawl or cowl (the Desert Dunes Cowl comes to mind!), you can make this too. Simply make a triangle, then fold the triangle into thirds, and seam up the bottom to create the well of the basket. It’s helpful to also seam up the outer fold of the triangle to provide more structure. The whole thing is kinda like a mix between a wrap dress and baby bunting!
Because you’re working from the bottom up, you can make as large a basket as you have yarn available. If you’re like me and like to use up every bit of yarn, you can crochet up to the very end, leaving just enough to seam up the bottom and side.
Bramble Hanging Basket Instructions
Supplies
- 135 yds of WeCrochet Wool of the Andes Bulky yarn (100g, 137yds) in your choice of color OR
- 230 yds of WeCrochet Billow yarn (100g, 120yds) in your choice of color
- L/8.0mm crochet hook
- scissors
- tapestry needle
- (Optional) chunky natural wood coat hooks
Finished Size
Wool of the Andes, single stranded: Gauge – 16 sts and 16 rows in 4″ of crochet linen stitch
Billow, double stranded: Gauge – 12 sts and 12 rows in 4″ of crochet linen stitch
Overall size of basket: 8″ wide x 12″ tall, not including loop
Abbreviations
- st(s) – stitch(es)
- ch – chain stitch
- sc – single crochet
- sp – space
- inc’d – increased
Pattern and Construction Notes
- This pattern can be used with any type of yarn. You’ll need to adjust your hook size for the chosen yarn.
- The Bramble Basket is worked in flat rows, turning at the end of each row.
- The ch 1 at the beginning of each row does not count as a stitch.
- The pattern begins with a magic circle, but it is not joined. The magic circle is used to prevent a hole at the center.
- This project does not need to be blocked.
Instructions
Row 1: Start with a magic circle. Work 2 sc, ch 2, 2 sc into the magic circle. Pull tight, but DO NOT JOIN. Turn. (4 sc + ch-2 sp)
Row 2: Ch 1, sc in first st, ch 1, (sc, ch2, sc) in ch-2 sp, ch 1, sc in last st. Turn. (6 – ch-1 counts as st, + ch-2 sp)
Row 3: Ch 1, sc in first st, ch 1, sc in ch-1 sp, ch 1, (sc, ch 2, sc) in ch-2 sp, ch 1, sc in ch-1 sp, ch 1, sc in last st. (10 + ch-2 sp)
Row 4: Ch 1, sc in first st, ch 1, (sc in ch-1 sp, ch 1) until ch-2 sp, (sc, ch 2, sc) in ch-2 sp, (ch 1, sc in ch-1 sp) until 1 st remains, ch 1, sc in last st. (4 sts inc’d on each row)
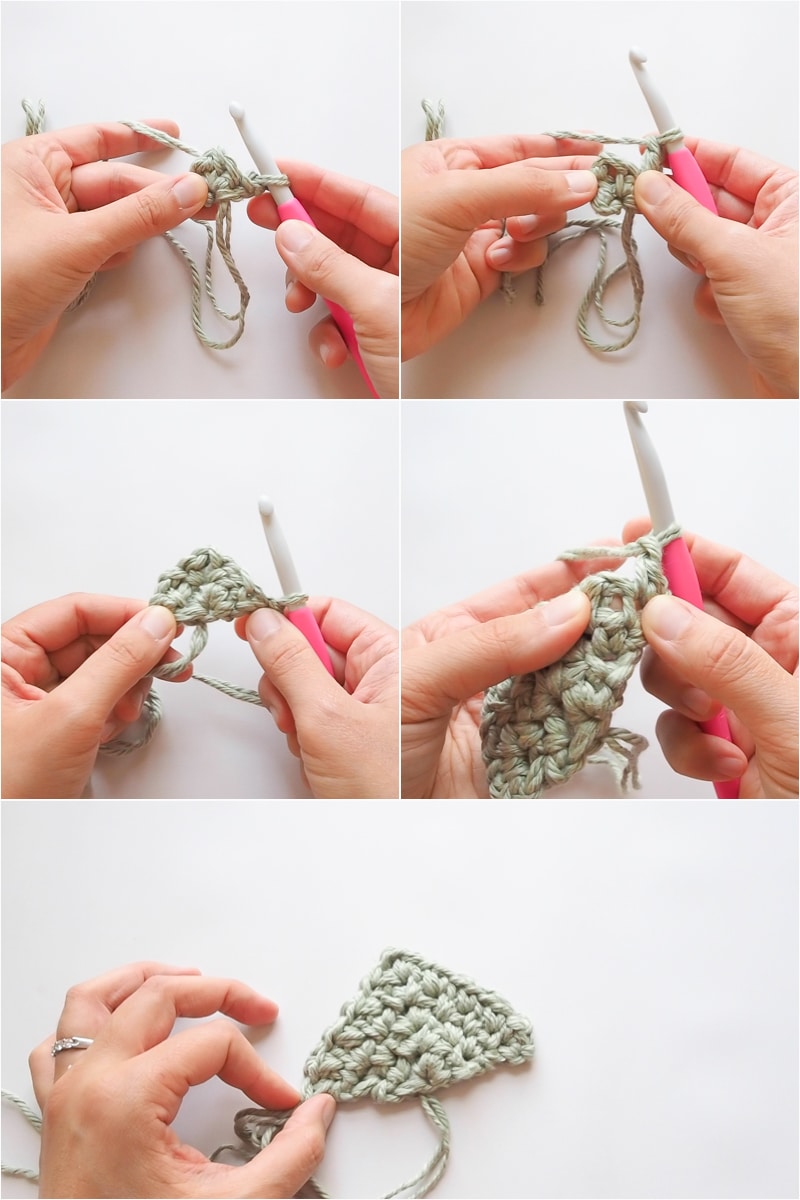
Repeat Row 4 until desired size. (For Wool of the Andes held single-stranded, repeat Row 4 until you have 35 rows total. For Billow held double-stranded, repeat Row 4 until you have 25 rows total.)
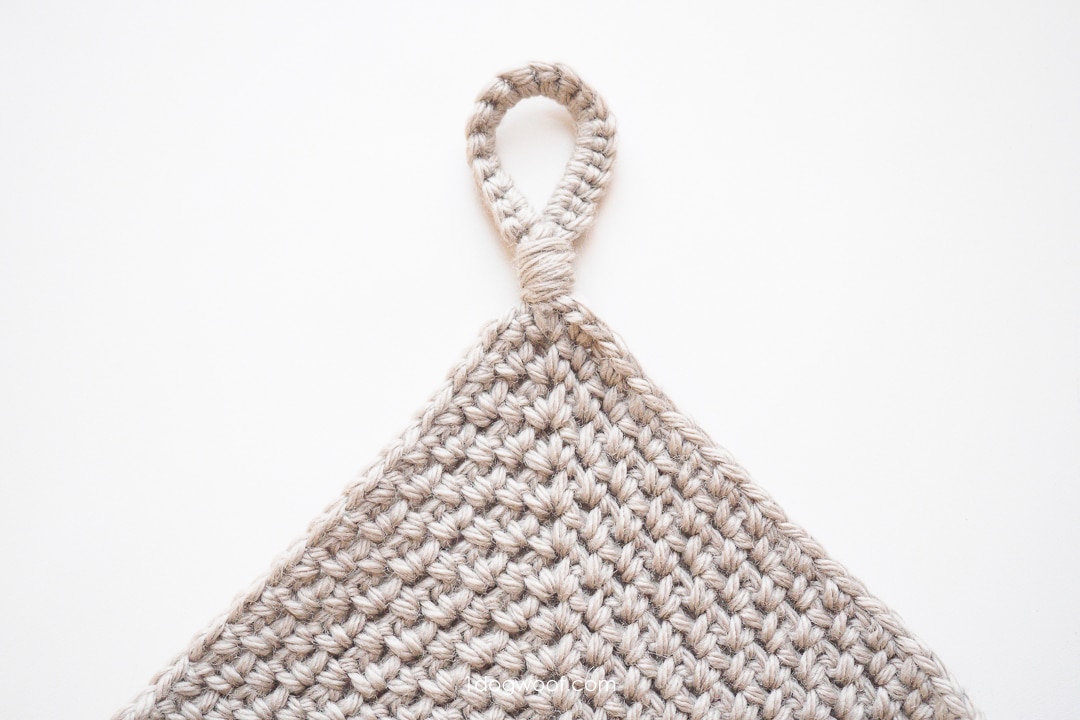
Hanging Loop Rows:
Row 1: Ch 1, sc in first st, ch 1, (sc in ch-1 sp, ch 1) until ch-2 sp, (sc, ch 10 , sc) in ch-2 sp, (ch 1, sc in ch-1 sp) until 1 st remains, ch 1, sc in last st. Note: You can increase the number of ch sts in the loop to fit the your hook size.
Row 2: Ch 1, sc in first st, ch 1, (sc in ch-1 sp, ch 1) until ch-2 sp, work 12-14 sc around the loop ch sts, (ch 1, sc in ch-1 sp) until 1 st remains, ch 1, sc in last st. Note: You may need to adjust the number of sc worked around the loop depending on the size of the loop.
Cut yarn, leaving a tail twice as long as the bottom of the triangle. Fasten off.
Secure the beginning tail at the magic circle with a knot and weave in ends.
Assembly:
With the end tail on the left, fold the corners of the triangle into thirds. The right corner should be folded on top of the left corner. After folding, the end tail is positioned on the right side, underneath the right corner fold.
Thread the tail onto a tapestry needle. Whip stitch across the bottom of the triangle, making sure to work through all layers/folds to secure the bottom.
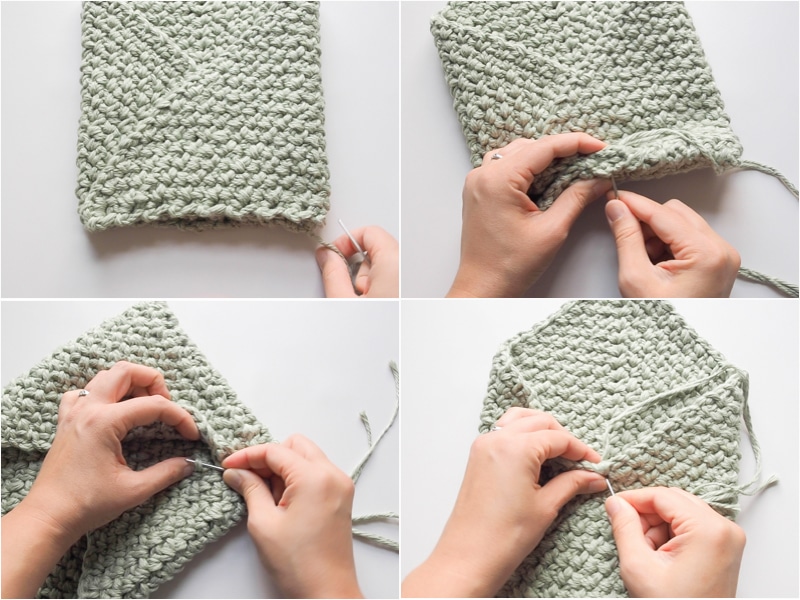
When you get to the left corner, use a running stitch to lightly secure the right fold to the body of the basket. You can wrap a few extra stitches where the two fold meet for a bit of extra sturdiness.
Up at the loop, you can leave the loop as-is, or wrap a piece of yarn around the base of the loop (like a tassel).


In the Bramble Basket directions, I am not understanding what stitch(es) to make in the ch-2 space… It simply says “in ch-2 sp”. And the stitch counts don’t add up to the number given for the rows; they’re two short without whatever stitches the “+ch-2 sp” means.
Should it be “(sc, ch 2, sc ) in ch-2 sp” for every repeated row? — which would add 4 stitches to the row count instead of 2.
Hello! In rows 2 and 3, what do you do in the ch 2 sp? It just says, “in ch 2 sp”. These are so cute! Thanks for your help!
For the life of me, I can’t get ‘in ch-2 sp’ what to do here in row 2. I think it’s way past my bed time too. I would so appreciate any help. I love this pattern!!!!
Hi, I’m so sorry, there seems to be a glitch in the post. The instructions are:
Row 1: Start with a magic circle. Work 2 sc, ch 2, 2 sc into the magic circle. Pull tight, but DO NOT JOIN. Turn. (4 sc + ch-2 sp)
Row 2: Ch 1, sc in first st, ch 1, (sc, ch2, sc) in ch-2 sp, ch 1, sc in last st. Turn. (6 – ch-1 counts as st, + ch-2 sp)
Row 3: Ch 1, sc in first st, ch 1, sc in ch-1 sp, ch 1, (sc, ch 2, sc) in ch-2 sp, ch 1, sc in ch-1 sp, ch 1, sc in last st. (10 + ch-2 sp)
Row 4: Ch 1, sc in first st, ch 1, (sc in ch-1 sp, ch 1) until ch-2 sp, (sc, ch 2, sc) in ch-2 sp, (ch 1, sc in ch1-sp) until 1 st remains, ch 1, sc in last st.
Hi, there seems to be a glitch in the post. Please see the above comment for the instructions, thank you!
Hi, there seems to be a glitch in the post. The instructions are :
Row 1: Start with a magic circle. Work 2 sc, ch 2, 2 sc into the magic circle. Pull tight, but DO NOT JOIN. Turn. (4 sc + ch-2 sp)
Row 2: Ch 1, sc in first st, ch 1, (sc, ch2, sc) in ch-2 sp, ch 1, sc in last st. Turn. (6 – ch-1 counts as st, + ch-2 sp)
Row 3: Ch 1, sc in first st, ch 1, sc in ch-1 sp, ch 1, (sc, ch 2, sc) in ch-2 sp, ch 1, sc in ch-1 sp, ch 1, sc in last st. (10 + ch-2 sp)
Row 4: Ch 1, sc in first st, ch 1, (sc in ch-1 sp, ch 1) until ch-2 sp, (sc, ch 2, sc) in ch-2 sp, (ch 1, sc in ch1-sp) until 1 st remains, ch 1, sc in last st.
I’m so glad it wasn’t just me, I was scratching my head over this for a good few minutes lol
I so love this pattern! Thanks so much for your reply and for doing it!!!!!
Hi
How do you start the loop?
Thank you
What loop do you mean?
Just finished my first bramble basket! Loved making the project and the final basket is perfect! Thanks so much for sharing.
Would it be possible to make a knitted Bramble basket? If so could you let me know. I don’t crochet. Thanks
Nice good information mam , I am from india and love this artical
It may be possible, but I don’t have a pattern for it yet!
Thanks for this fun pattern! I really enjoyed making it while I was waiting on the iron Bowl to start today. It helped my nerves! I enlarged the pics to see how to ‘follow’ your instructions. Your pics were so explanatory, thanks for that! I posted it on Instagram and tagged you. Thanks again!!
By golly….I believe I got it!!!! But THANKS!!
I figured it out! In row 2 you sk between the first sc and the stitches in the ch-2 sp.
I love your blog, btw. Your patterns are great! Thank you for sharing!
I love this and will be making them after the two projects on my couch! lol.
Where did you get the chunky wood posts used to hang the baskets from. They are perfect for my decor.
Thank you
Diane Flynn
is there a video for this it’s so cute but I just can’t seem to get my head around it
Sorry, no video at this time!
I got them on Amazon! https://amzn.to/2Z8FZfx
Do you have any suggestions for a yarn substitute for the cotton yarn?
You can look on yarnsub.com for a substitute. It is a wonderful resource!
I’m sorry, I’m just a little confused. Is what is in parentheses recapping what you just did or additional instructions?
I love simple, useful projects like this! And as I make some for my bathroom, I’m thinking these could be really useful for little things in the dorms when my daughter goes to college in August, too! Thank you for sharing 💙
Most of the instructions in parentheses are additional instructions, a series that needs to be done as a repeat or in one stitch. There are a few places where they are a summary, these usually indicate things like how many stitches were increased in that row.
I’m sorry but what does (4 sc + ch-2 sp) in the first row mean? I don’t understand what space were going into
hi is this pattern on YouTube as i battle to follow the written pattern
Hi Jacqui,
No video tutorial for this pattern, though you can search YouTube for tips on reading written crochet patterns!
The (4 sc + ch-2 sp) at the end of the row is the stitchcount after completing the row. After creating the magic circle, you work 2 sc into the magic circle, ch 2 (creating the ch-2sp), and work 2 more sc into the magic circle. Does this help?
My finished product is more like a diamond shape than a triangle. I’m not sure what I’m doing wrong and have started over many, many times now. Please help. How do I get the bottom edge of the triangle to be straight OR please give additional joining instructions. I love the idea of the finished product and know it would be a perfect gift -if only I could figure this out!
Hi Jess! Is it a diamond shape before or after you seam? The way you fold, the edges should line up on the bottom helping create more of a triangle shape. Hope that helps!
I would also love this in a knitting pattern if you can make one! My crochet skills are limited and I just prefer knitting. Thank you in advance of your efforts!