
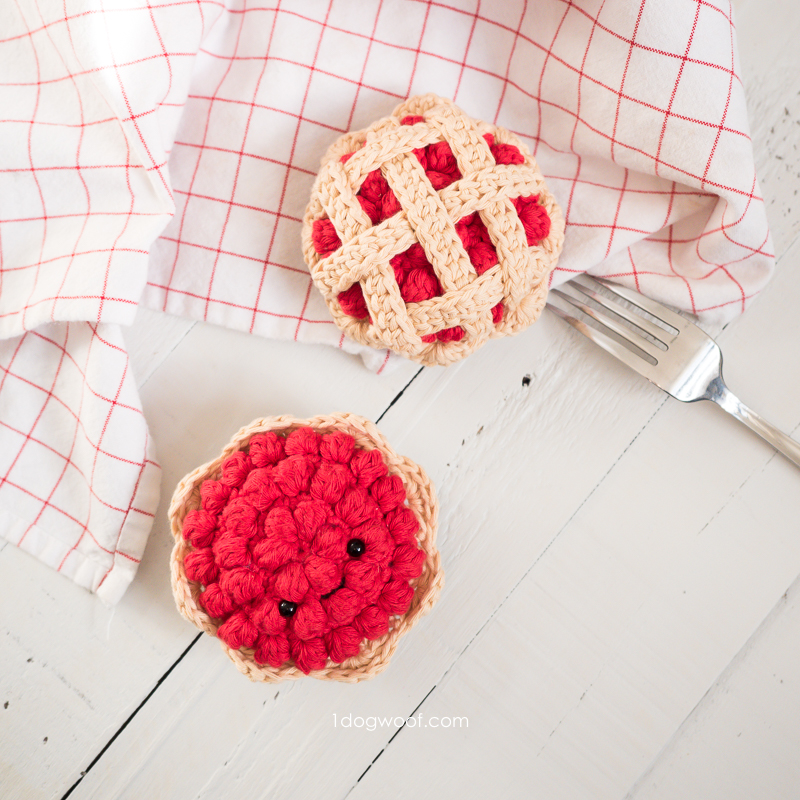
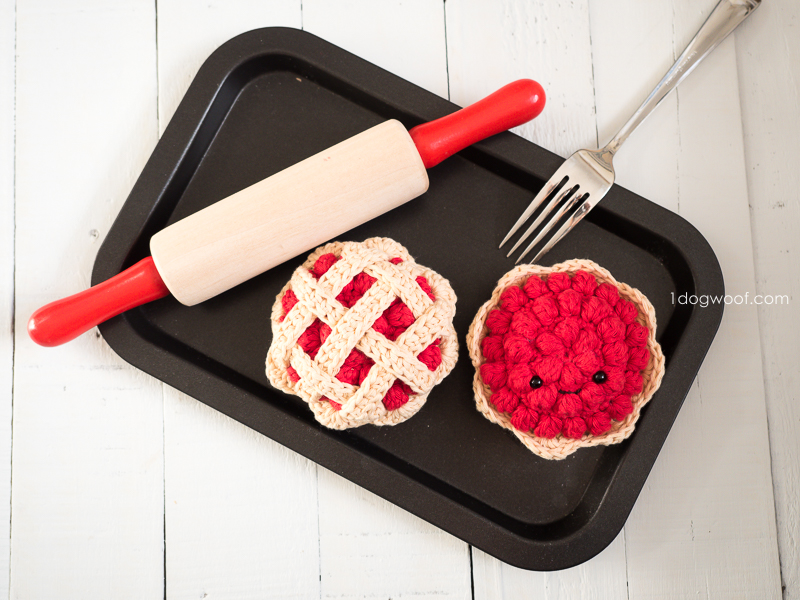
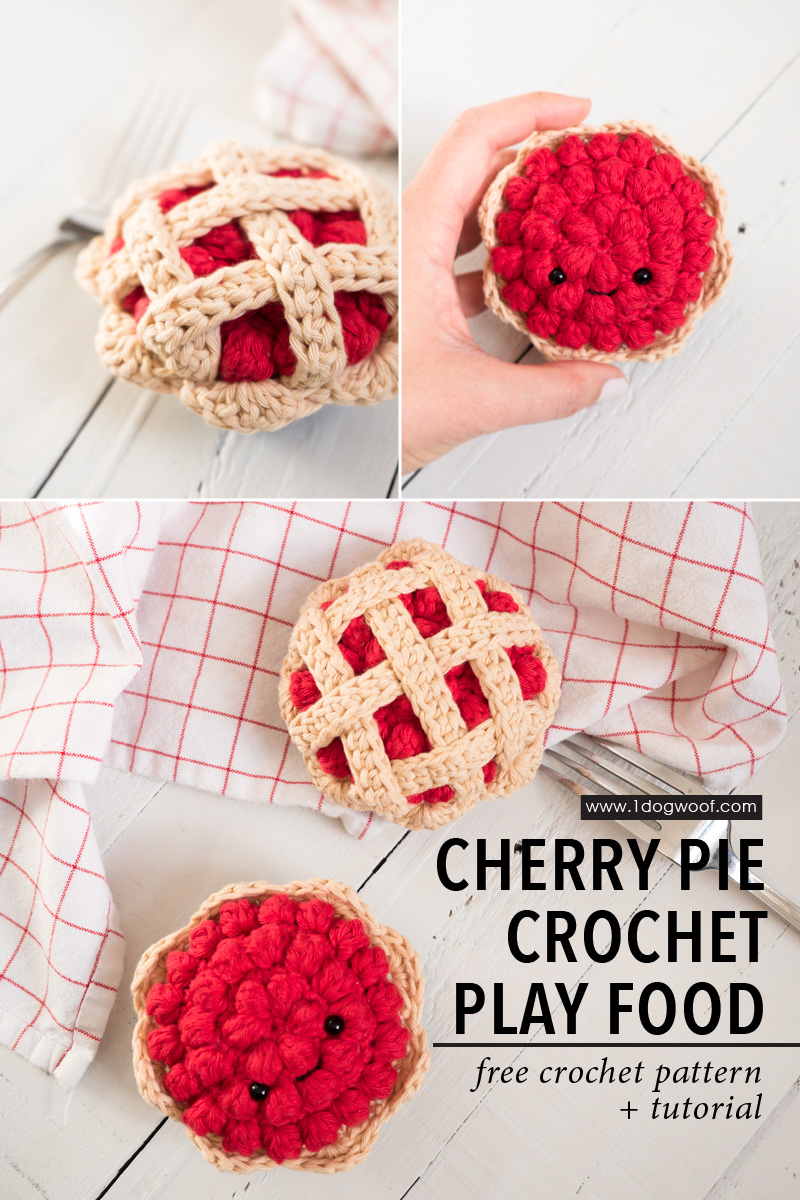
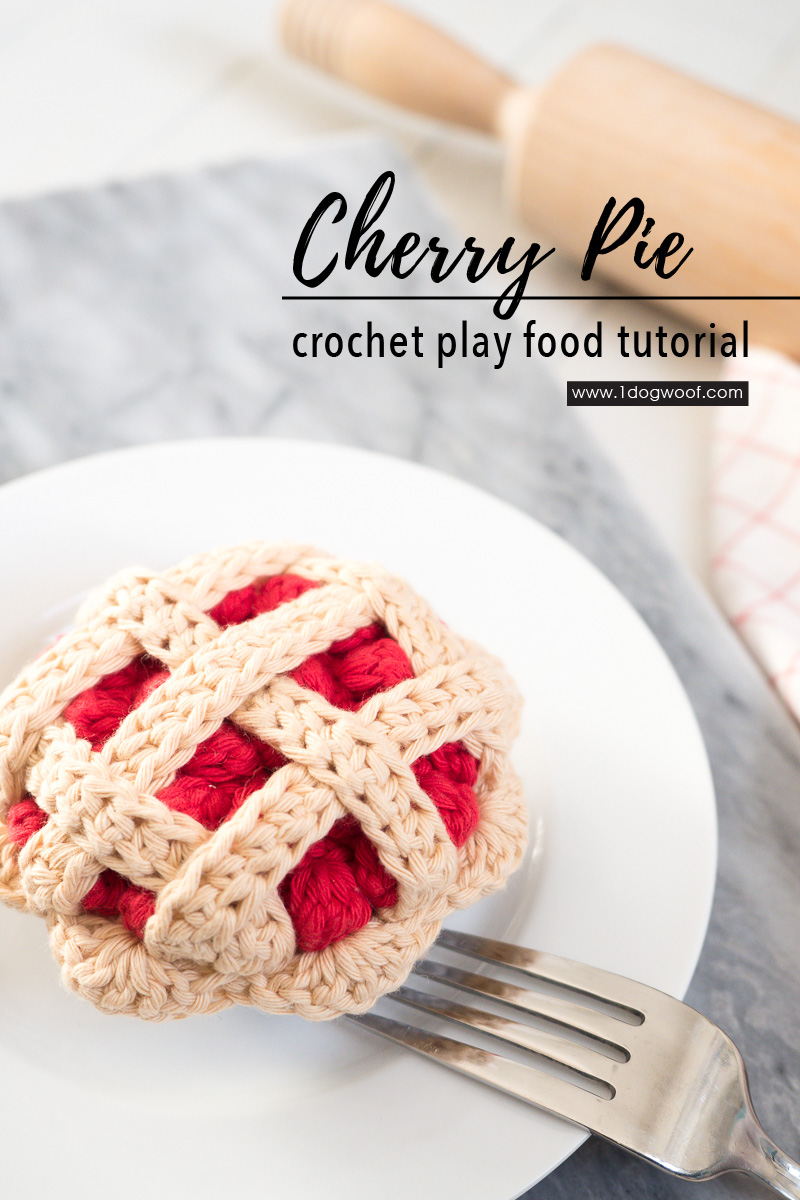
The second installment of my Amigurumi of the Month series, after January’s dose of sweetness, is this cute little crochet cherry pie. Whether you add a face on it or not, it’s a great play food addition for childrens’ kitchens or as a fun gift to the bakers in your life. Who knows, maybe even the mathematicians will appreciate this as we look ahead to Pi Day in March!
Save this on Pinterest!
As with the other amigurumi in this series, I am using Paintbox Yarns Cotton Aran. I find this is a good weight yarn to make a fun sized amigurumi, and the yarn has great stitch definition. Best of all, Paintbox Yarns, as its name implies, comes in 56 gorgeous colors, so you’re bound to find one that is perfect for your project. Each of these amigurumi designs uses a fraction of full skein, so if you choose to use different yarn, they’re great projects to help bust your yarn stash too!
The Construction
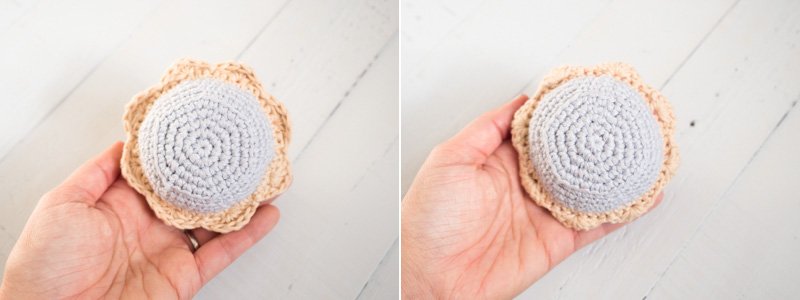
In general, this pie amigurumi consists of 3 major parts – the pan, the cherry filling, and the pastry – just like a real pie.
The pan is made from a gray/silver yarn, worked in rounds and then fastened off using an invisible join. The cherry filling is a collection of crochet bobble stitches in the round, worked in either red, or if you’re going for a raspberry tart, in a magenta yarn. This piece is also fastened off with is ends woven in. Finally, the pastry, like pastry in a real pie, offers opportunities for embellishment and customization. It is used to bind the cherry bobbles and the pan together, and then to create the scalloped edge and lattice on top.
This tutorial will go through a few different options that I experimented with as I worked up the design.
Choose Your Own Adventure
The bottom of the pie is a standard pan and the pattern is shared below. But once we go beyond the pan, we move into a series of choices you can make to give your pie a unique look. As a side note, I like to provide these options so that anyone can experiment, and learn something new in the process. The pattern below will have a main standard method, with these little side paths in case you want to veer off and play around on your own.
First up is the crocheted bobbles, worked in the round. In most cases, bobbles get pushed out to the back of your work, so that you see the backs of all your other stitches as well. The video below shows you how to crochet bobbles in the round, but also how to push the bobbles so that they come up on the front side of your work. This is a very minor choice, and as I worked to polish the design, it became less important in the overall scheme, but I wanted to point it out and we’ll refer back to this a bit later.
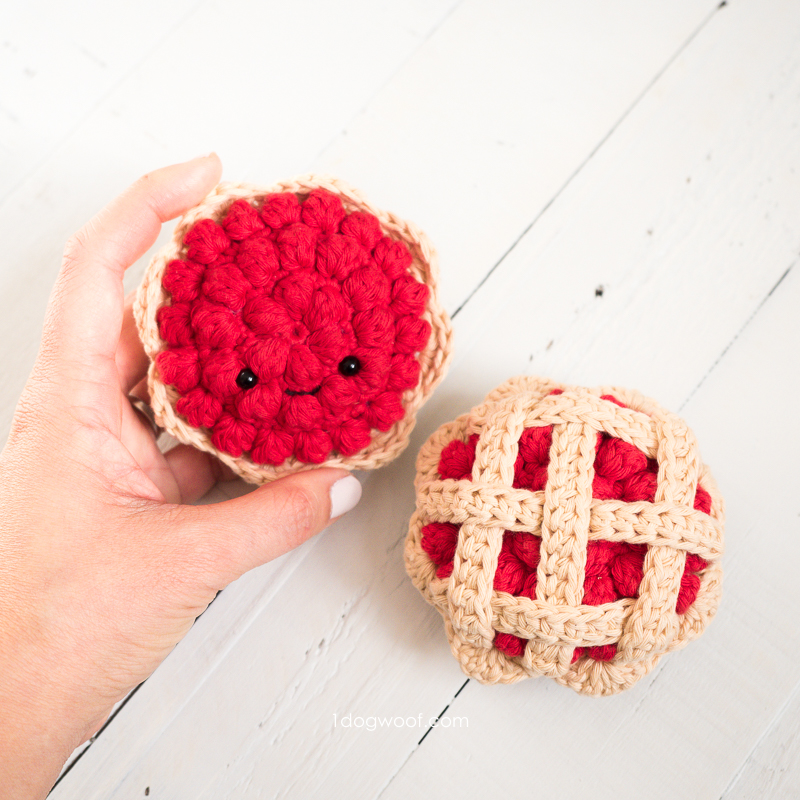
Next, will your cherry pie be a cherry pie or a cherry tart? Will it be open faced, or covered with a lattice? I found that it was difficult to fit a kawaii face onto a pie with a lattice, despite many suggestions on how to do so from interested readers on social media. My recommendation is to choose either a face or a lattice, but not both.
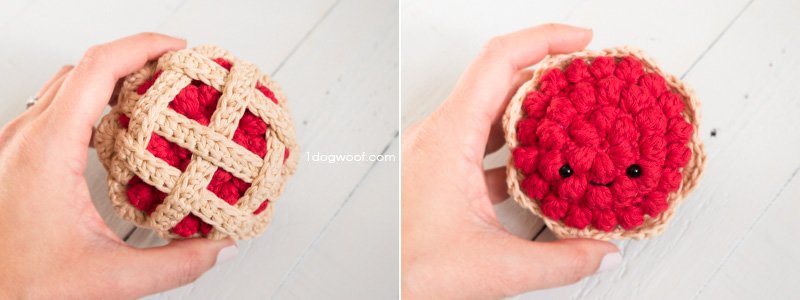
If you choose to add a face, you’ll need to install the safety eyes and embroider a mouth onto the crochet bobbles before you move on to joining the filling to the pan. If you choose to not have a face on it and go for the cherry pie play food, you can skip the face step and go right into joining up your pie and adding the fiberfill stuffing.
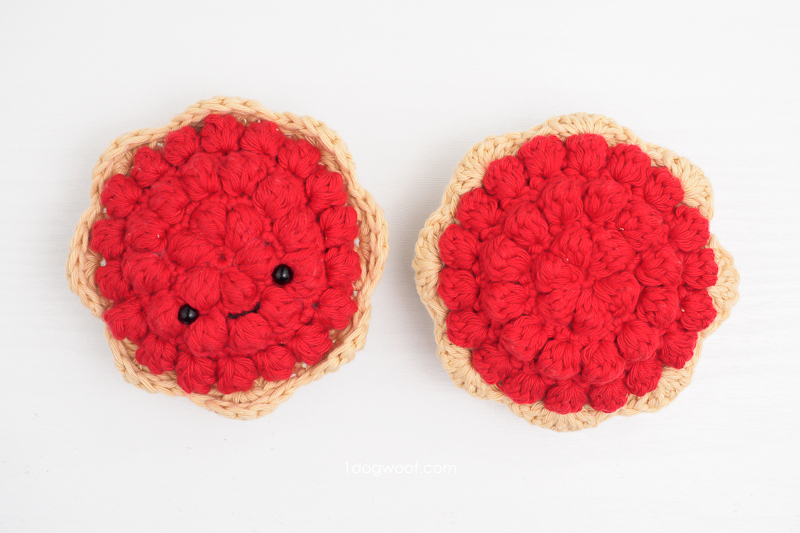
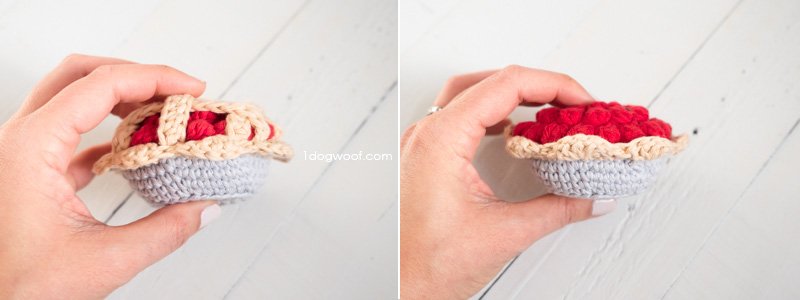
When you join the pan and the filling together with pastry colored yarn, you have a choice of working with the pie filling up facing you, or with the bottom of the pan facing you. When we crochet (right-handed), we move in a counter-clockwise direction, and the directionality of these join stitches will determine whether your scalloped edge curls up or down. If you work with the filling face up, your scalloped edge will curl up into the filling. If you work with the pan bottom facing you, the scalloped edge will curl down away from the filling when you flip the pie right-side up.
Again, all of these choices are minor, and make very little difference in a very cute pie, but I share them here so you have the information in case you want to experiment with your own design. This is an opportunity to try your hand at designing with guidance!
Crochet Cherry Pie Tutorial
Supplies
- MC: Paintbox Cotton Aran in Pillar Red
- C1: Paintbox Cotton Aran in Misty Gray
- C2: Paintbox Cotton Aran in Light Caramel
- F/3.75mm crochet hook
- Cluster fiberfill
- 6mm safety eyes
- scissors
- embroidery thread or lightweight yarn in Black
- tapestry needles
Abbreviations
- st(s) – stitch(es)
- sl st – slip stitch
- sk – skip
- yo – yarn over
- ch – chain stitch
- sc – single crochet
- fhdc – foundation half double crochet
- dc – double crochet
- inc – increase: work 2 sc in same st
- bb – bobble: (yo, insert hook into st, pull up a loop, yo, pull through 2 loops on hook) 4x, yo, pull through all 5 loops on hook
- BLO – back loop only
Pattern Notes
- Skill level: Intermediate
- Gauge: 5 sts and 5.5 rounds in 1 inch. The filling is approximately 3.25 inches across.
- Safety eyes are placed approximately 1.0-1.25 inches apart.
- Stuff the pie lightly to retain the shape of the pan.
Crochet Cherry Pie Pattern Instructions
PIE PAN
- Worked in seamed rounds.
- Worked with C1 (GRAY).
Round 1: Work 6 sc into a magic circle. Join to first sc with sl st. (6)
Round 2: Ch 1. Work 2 sc into each st around. Join to first sc with sl st. (12)
Round 3: Ch 1. Work [1 sc, inc] 6x around. Join to first sc with sl st. (18)
Round 4: Ch 1. Work [2 sc, inc] 6x around. Join to first sc with sl st. (24)
Round 5: Ch 1. Work [3 sc, inc] 6x around. Join to first sc with sl st. (30)
Round 6: Ch 1. Work 1 sc in BLO of each st around. Join to first sc with sl st. (30)
Round 7: Ch 1. Work [4 sc, inc] 6x around. Join to first sc with sl st. (36)
Round 8: Ch 1. Work [5 sc, inc] 6x around. Join to first sc with sl st. (42)
Round 9: Ch 1. Work [6 sc, inc] 6x around. (48)
Fasten off with an invisible join and weave in ends.
CHERRY FILLING
- Worked in seamed rounds.
- Worked with MC.
- See this video tutorial for extra help.
Round 1: Work 6 sc into a magic circle. Join to first sc with sl st. (6)
Round 2: Ch 1. Work [1 sc, bb] in each st around. Join to first sc with sl st. (12)
Round 3: Ch 1. Work 2 sc in each st around. Join to first sc with sl st. (24)
Round 4: Ch 1. Work [1 sc, bb in next st] 12x around. Join to first sc with sl st. (24)
Round 5: Ch 1. Work [1 sc, inc] 12x around. Join to first sc with sl st. (36)
Round 6: Ch 1. Work [1 sc, bb in next st] 18x around. (36)
Fasten off with an invisible join and weave in ends.
(Experiment: If you chose to have the bobbles on the front side of your work, you can join the last bobble to the first st in the round, and join C2 directly to work the next round. Otherwise, it’s easiest to fasten off, and then continue below)
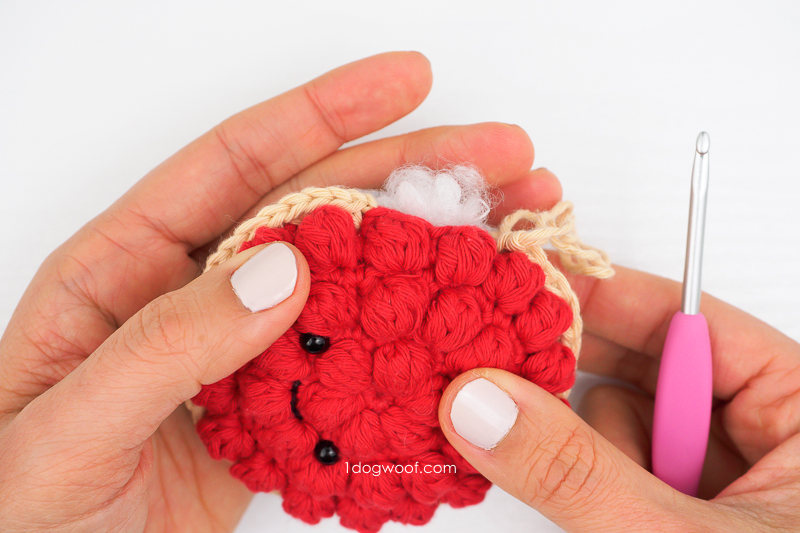
(Optional: add safety eyes and sew on a mouth with a short length of black embroidery thread onto the finished bobbles.)
PASTRY
- Worked in seamed rounds.
- Worked with C2.
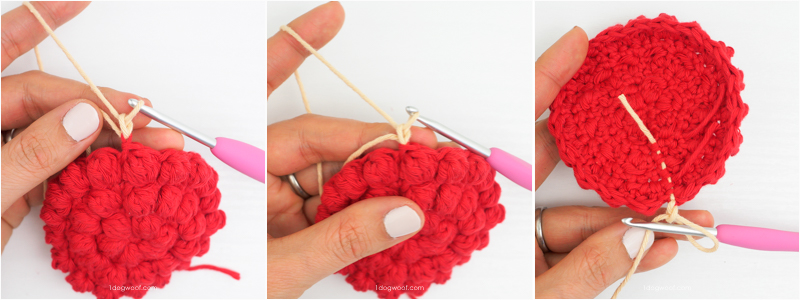
- The first round of the pastry is to join the filling and the pan together. The filling has 36 sts in its final round, and the pan has 48. This first round of pastry will have 48 sts in the round, so you will be working into every pan st once, but working 2 sts into every 3rd filling st.
Round 1.1: With the filling and the pan held together and the filling facing you, work a standing sc through one stitch in both the filling and the pan.
Round 1.2: Work 1 sc through one stitch in both the filling and the pan.
Round 1.3: Work 1 sc through one stitch in both the filling and the pan.
Round 1.4: Work 1 sc through the same stitch in the filling, but the next st in the pan.
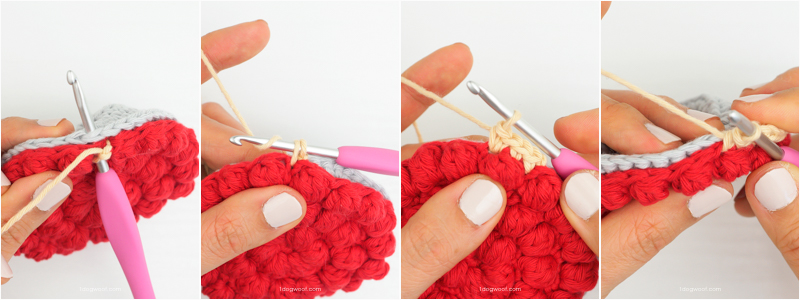
Pattern repeat is “Work 1 sc through each of next 3 sts in filling and pan. Work the next st through the same stitch in the filling, but the next st in the pan.”
Repeat the pattern around, leaving a small gap to stuff the pie.
Stuff the pie with polyester fiberfill, and then continue the pattern to close, joining to first sc with sl st.
For Round 2, you’ll want to work in the opposite direction as the previous round, so you’ll work this round with the pan facing up. You can experiment with this, but I like having the scallops point downwards.
Round 2: Ch 1, and then TURN. Sk same st as join, sk 2 more sts. Work 5 dc into next st. Sk 2 sts, work 1 sl st into next st. *Sk 2 sts, work 5 dc into next st. Sk 2 sts, work 1 sl st into next st*. Repeat from * around, joining to the beginning of the round with a sl st.
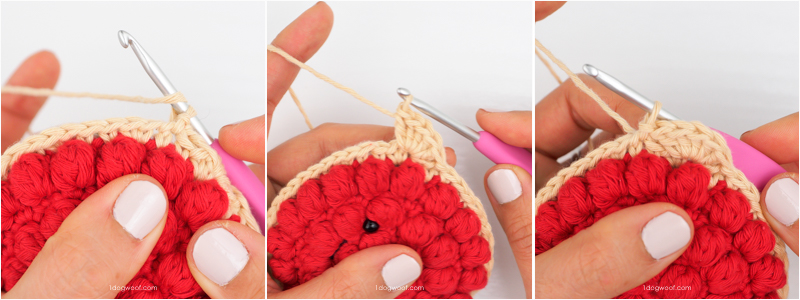
Fasten off and weave in ends.
LATTICE
The lattice is worked using C2 and the foundation half double crochet stitch. By using this foundation stitch, you can adjust the length of each piece of lattice to fit your pie without having to frog and redo the entire piece.
Make 4: Work 14 fhdc. Fasten off, leaving a tail to sew onto the pie.
Make 2: Work 17 fhdc. Fasten off, leaving a tail to sew onto the pie.
To assemble, sew each lattice piece to Round 1 of the PASTRY using both the beginning and end tails.
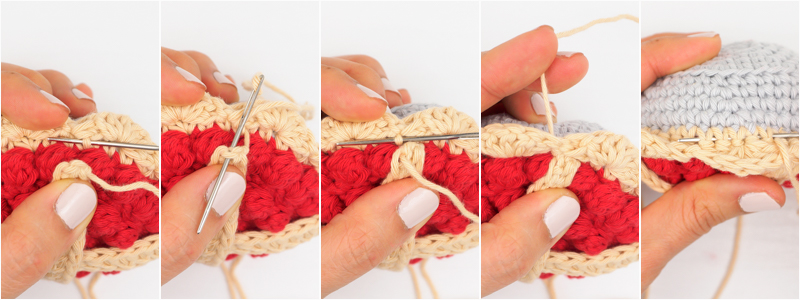
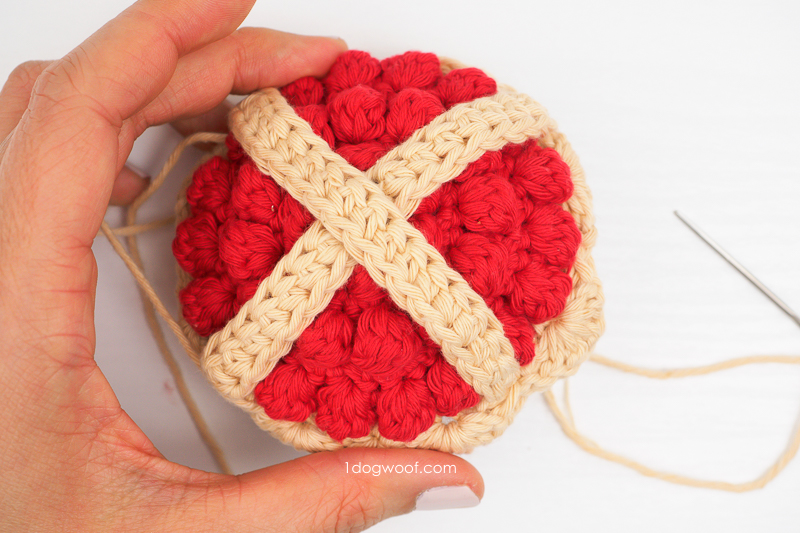
Start by making a cross with the 2 longer lattice pieces and sew them in place.
Add each of the smaller lattice pieces, 2 on either side of the center, for a total of 3 lattice pieces in each direction.
Make sure to weave the pieces in for a basketweave look.
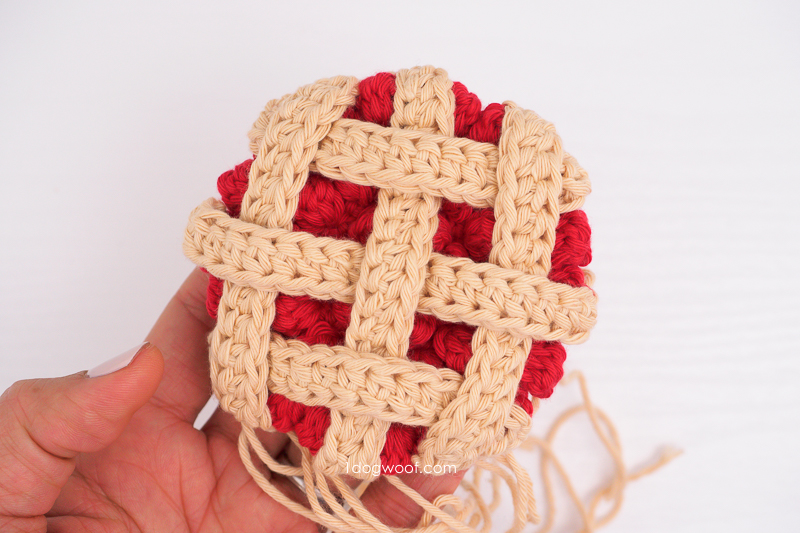
When all the lattice pieces are sewn on, go through and weave in all ends.
Annnnd you’d done!
This is definitely a more complex amigurumi pattern than some of the others, and it took longer to perfect, but I really like how it all turned out in the end. I think you can easily have a whole bakery of tarts and pies after this!


Super cute pattern. I saw a seahorse on your page. Is that pattern available too? Have you thought of writing a book??
Sooo CUTE! I’m loving all the bunny patterns!!! Thank you ???? ????
https://happywheelsgame.io/
The article is very easy to understand, detailed and meticulous! I had a lot of harvest after watching this article from you! I find it interesting, your article gave me a new perspective! I have read many other articles on the same topic, but your article convinced me! driving directions