
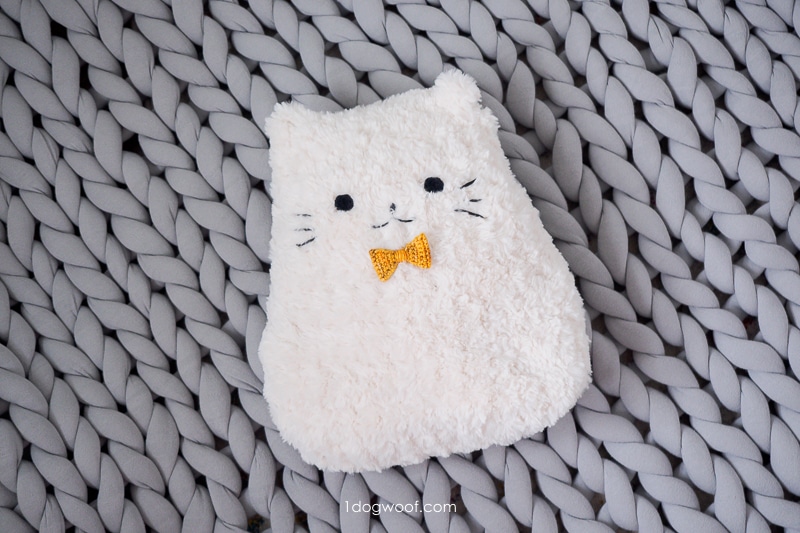
Sometimes, life is like that book, If You Give a Mouse a Cookie. Because if you make a Dapper Cat, you’re going to need a cute mini crochet bowtie to go with it. And if you need a cute bowtie, you can’t just use the pattern you already have, noooo, you need to design a new one, from scratch. And you can’t just use any yarn, it has to be that gorgeous golden variated number from Kenyarn. If you’re going to use a hand-dyed skein, then you’re going to have to wind it up. So, what I had originally estimated to be a quick 15 minutes of my time turned out to be a few hours, but this adorable crochet bowtie is worth every minute!
Click Here to Save this To Pinterest!
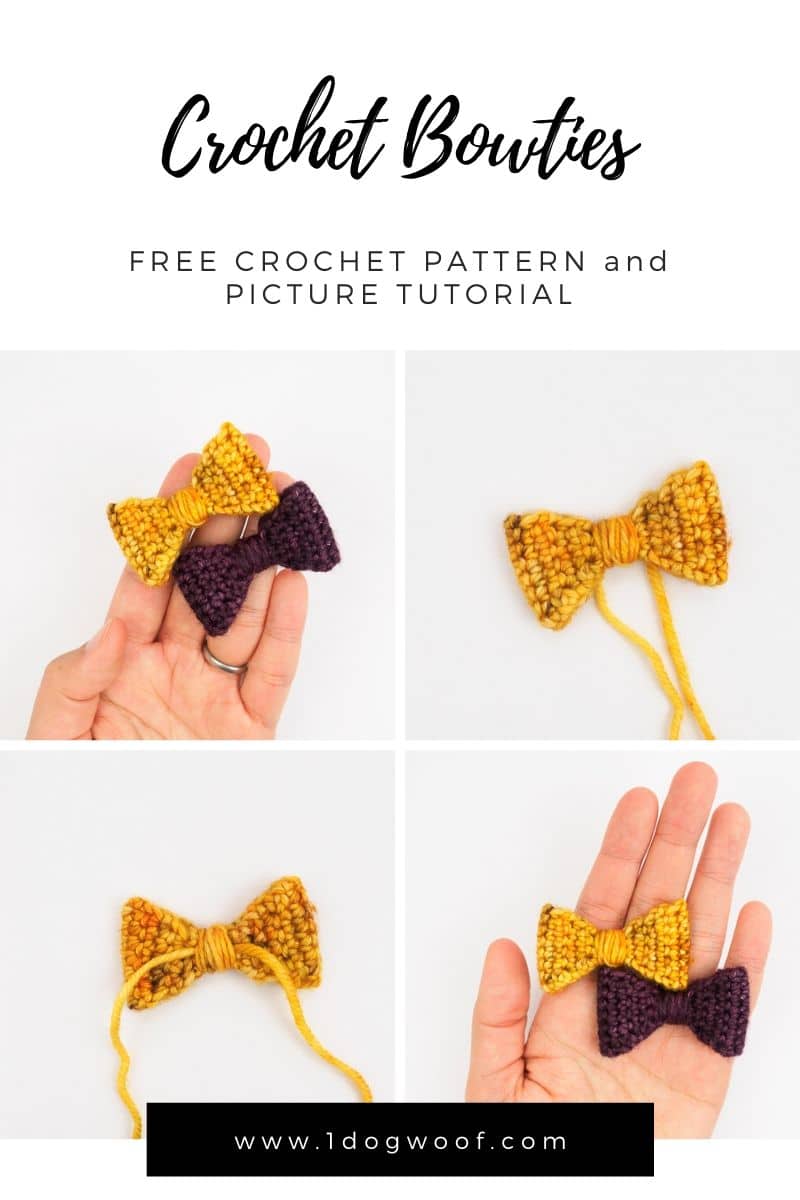
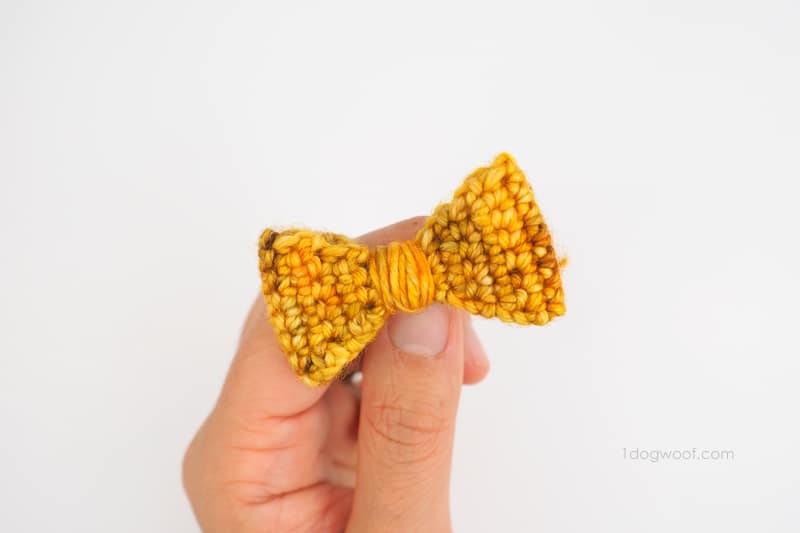
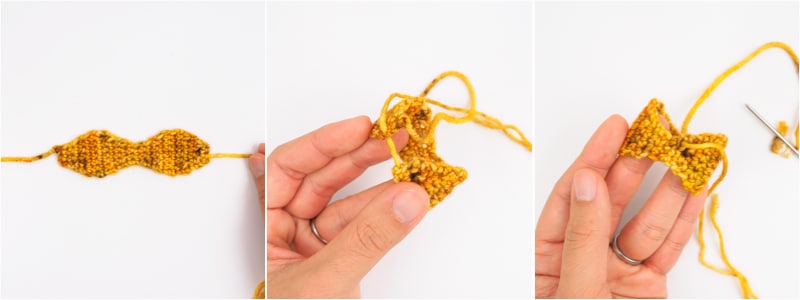
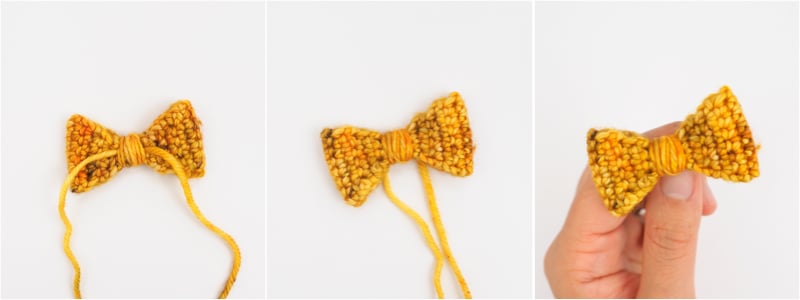
This crochet bowtie looks like two simple triangles, but it’s actually folded over to give a slightly more realistic look. It starts off looking very similar to a real, just without the whole strap around the neck bit. You fold the flaps inwards, do a quick bit of seaming, and you can see the bowtie’s final shape. Use your yarn tails to wrap the middle, and you’re done. Best of all, you’re left with 2 yarn tails that you can use to attach the bowtie to any doll or stuffed animal you’d like.
What Yarn Do I Use
For my bowtie, I used a DK weight, hand-dyed yarn that gave the bowtie a bit of color variation and richness. Several years ago, I had bought my dad a golden silk bowtie, as he loved that old-fashioned, professorial look. As I scanned my stash for the right yarn to use, I couldn’t help but think Jake’s Wheel of Fortune Bold skein was the perfect yarn to use, in memory of those long-ago gift. I also made a second one using some Backyard Fiberworks DK weight yarn, which was leftover from my Astoria Beret. Both these bowties are DK weight, and both are about 2 inches wide when complete.
You can easily substitute thicker yarn for larger bowties, or thinner yarn for smaller ones. I do love the look of hand-dyed or variegated yarn, as it adds color and interest. This would be a perfect way to use up any bits and pieces of expensive skeins leftover from previous projects!
Note that the amount of yarn will vary based on the weight of the yarn you use. I used less than 10 yds of DK weight yarn, but the thicker the yarn, the more you’re going to need, since the bowtie will be bigger. The instructions below are for the DK weight crochet bowties shown in the photos.
Crochet Bowtie Free Pattern
Supplies
- ~10 yds of DK weight yarn
- G/4.00mm crochet hook
- Tapestry needle
- Scissors
Abbreviations and Stitch Guide (US terminology)
- st(s) – stitch(es)
- ch – chain stitch
- sc – single crochet
- inc – increase: work 2 sc in same st
- dec – decrease: work 2 sc together
Pattern Notes
- Skill level: Beginner
- Gauge: not applicable due to small size
- Finished size: 2-2.25 inches wide
- The ch 1 at the beginning of each row does not count as a stitch.
——————————————
You Might Also Like:
——————————————
Instructions for a Mini Crochet Bowtie
Row 1: Start with an 8 inch tail. Ch 4. Turn.
Row 2: Starting with the 2nd ch from hook, work 3 sc across. Turn. (3)
Row 3: Ch 1. Work 3 sc across. Turn. (3)
Row 4: Ch 1. Inc, 1sc, inc. Turn. (5)
Row 5: Ch 1. Work 5 sc across. Turn. (5)
Row 6: Ch 1. Inc, 3 sc, inc. Turn. (7)
Row 7-9: Ch 1. Work 7 sc across. Turn. (7)
Row 10: Ch 1. Dec, 3 sc, dec. Turn. (5)
Row 11: Ch 1. Work 5 sc across. Turn. (5)
Row 12: Ch 1. Dec, 1 sc, dec. Turn. (3)
Row 13-15: Ch 1. Work 3 sc across. Turn. (3)
Rows 16-25: Repeat Rows 4-13.
Cut yarn, leaving a tail at least 12 inches long.
Use end tail to mattress stitch across 3 sts to join the ends of the bowtie, then use tail to wrap around middle of bowtie several times.
Use beginning tail to also wrap around the middle of the bowtie a few times as length allows.
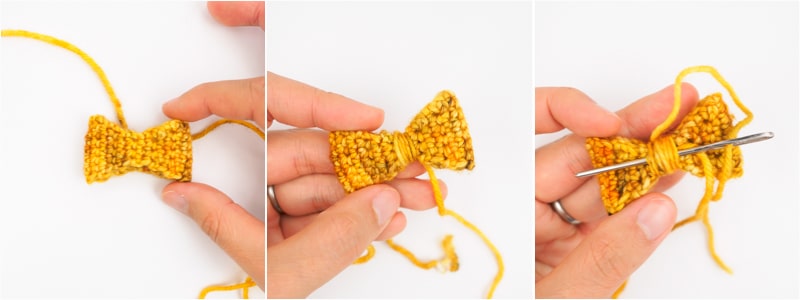
Thread a tail onto a tapestry needle, and run the needle under the wraps to secure the tail. Repeat with the other tail, running the needle under the wraps in the other direction.
You should now have a finished bowtie with two tails coming out from both sides of the wraps on the back side.
Wanna see where I used this cutie patootie crochet bowtie? The Dapper Cat Crochet Cuddler is a free pattern!


I love this cute and easy pattern! It’s perfect to decorate a small hairband or hairpin for the girls.
It’s so adorable!