
You’d think that since it took over a year to get that dang card catalog up and running in the attic, I’d be all over that piece of furniture like Nutella on toast, but no, I had to go have a baby and you know, do that. So, I’ve been marooned on the first floor for weeks with this weird paranoia that I’m going to slip and fall while carrying LM and catastrophe ensues. You can imagine the poison ivy type itching I’ve had to actually get up there and do some crafting and go rooting around for all the fun goodies I spent sooo long organizing.
Well, I finally did it! Fed the baby, took a shower (I know! high five!) and headed straight up to the attic, no passing Go! or stopping by the kitchen. I grabbed a little vibrating chair to keep LM in a state of drowsy happiness and got down to some serious crafting. What a refreshing moment that was! No computers, no tv, no husband, no screaming toddler. Just me, my baby, a constant droning from the vibrating bouncer and oodles and oodles of craft supplies spread out all over my desk. Crafting heaven this is, yoda. So much so that I ended up with 13 gift tags instead of the 12 I had planned. Granted the work (I mean “fun”) was slow as first, but as I got deeper into the mess of mixed media supplies, inspiration hit and I was almost going to choose crafting over sleeping. Almost. Not quite.

So, 12 days of Homemade Christmas Gift Tags. They won’t be consecutive days – that’ll take more planning than I’m capable of at this time. That means that if I only get sleep in 2 hour chunks, yeah, you won’t be hearing from me. Although KNOCK on wood, because I’ve been getting a whopping 4-5 hour stretch of sleep some nights! But I digress.
Day #1: Toothpick Christmas Tree
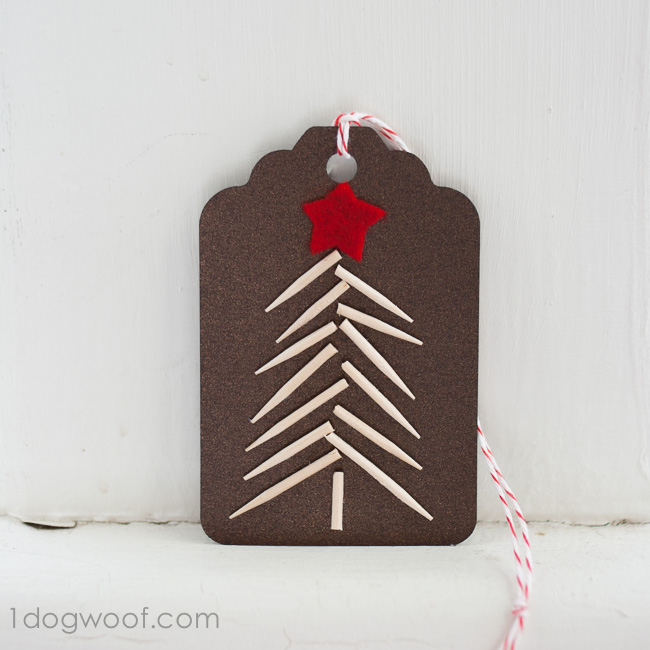
The tags themselves are made using a paper punch. That’s right folks. I’m one of the 2 dozen people left in the crafting world without a Silhouette machine. But I own a gift tag paper punch. So there. And I own some pretty nifty papers, as I found out once I organized everything.
Supplies
Gift tag, or just a piece of cardstock or cardboard.
Toothpicks
Felt
Scissors
Craft glue
Twine
Instructions
1. Punch out your gift tag.
2. Cut wooden toothpicks into different lengths, all approximately 1/2 inch long. You want a little variation, but nothing over an inch long…unless you have a ginormous gift tag.
3. Cut out a star from felt or cloth or paper or whatever media you’d like.
4. Start gluing the toothpicks onto the gift card in the shape of a tree. Start from the bottom with the longest segments and stagger up to the top. Don’t make it too uniform either, a little “rustic” build character!
5. Punch a hold in the tag. I guess if you own a Silhouette, the hole is probably created for you. If only we’re all so lucky.
6. Grab some twine and string it up for the finishing touch.
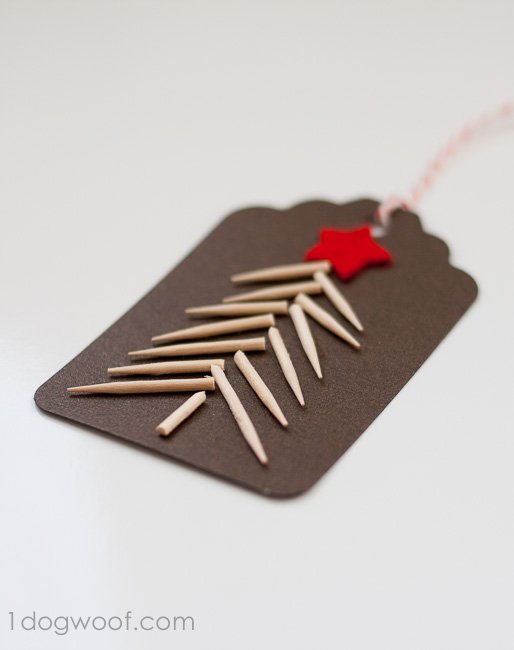
That’s it! Easy peasy right? Actually, all 12 are pretty simple. I started with this one because…well, I like the photo I took. Did I mention I’m using nothing but Manual mode now? It’s a big step for me, and it wasn’t nearly as hard as I thought it was. But oh, here I go digressing again.
Pardon the back annotation, but now you can see all the gift tag ideas here as they get published!
[cgview id=38 tags=gift-tag size=200×200 lightbox=0]
And if this little project has got you in the crafting mood, here are 25 more ways to get your craft on for Christmas:









I’m so excited for this series! I LOVE gift tags! Can’t wait to see the rest 🙂
So adorable!
Thanks Bethany!
Awesome! I told myself I was only going to make tags with supplies I had on hand, because God knows I already have too much stuff. It was fun trying to think up new designs, and really, the possibilities are endless!
I love these, where do you get your gift tags from?
Hi Jennifer, I have a Marvy Uchida tag punch that I used to make these. I cut tags out of white, kraft and glitter cardstock.
Ridiculously cute and a brilliant idea!
Thanks Laurel!