
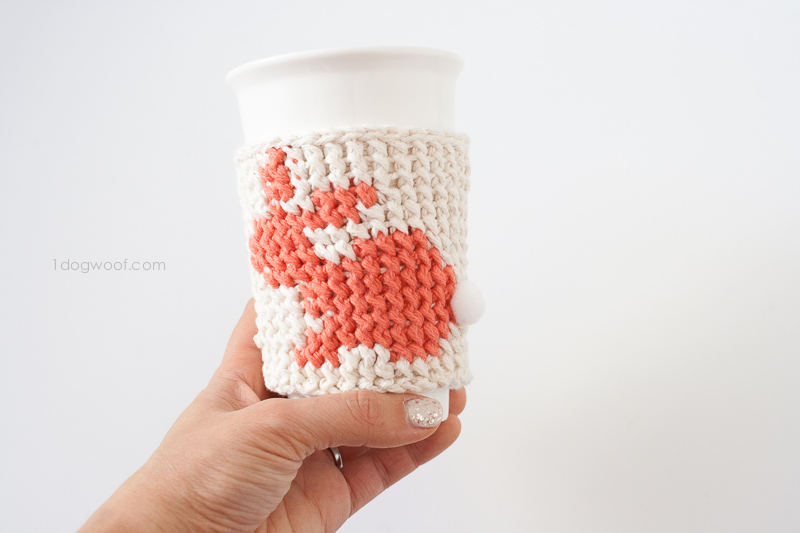
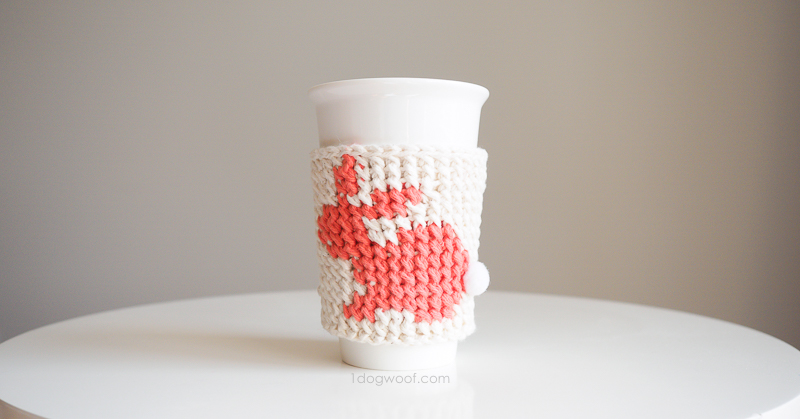
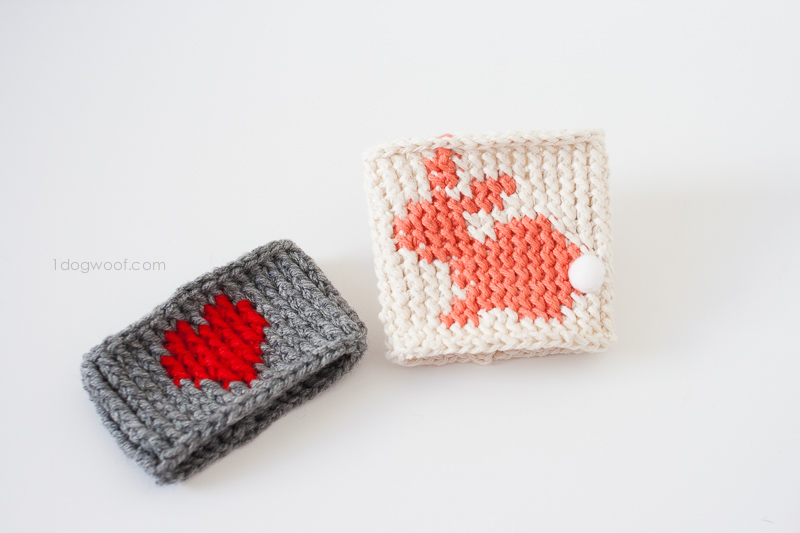
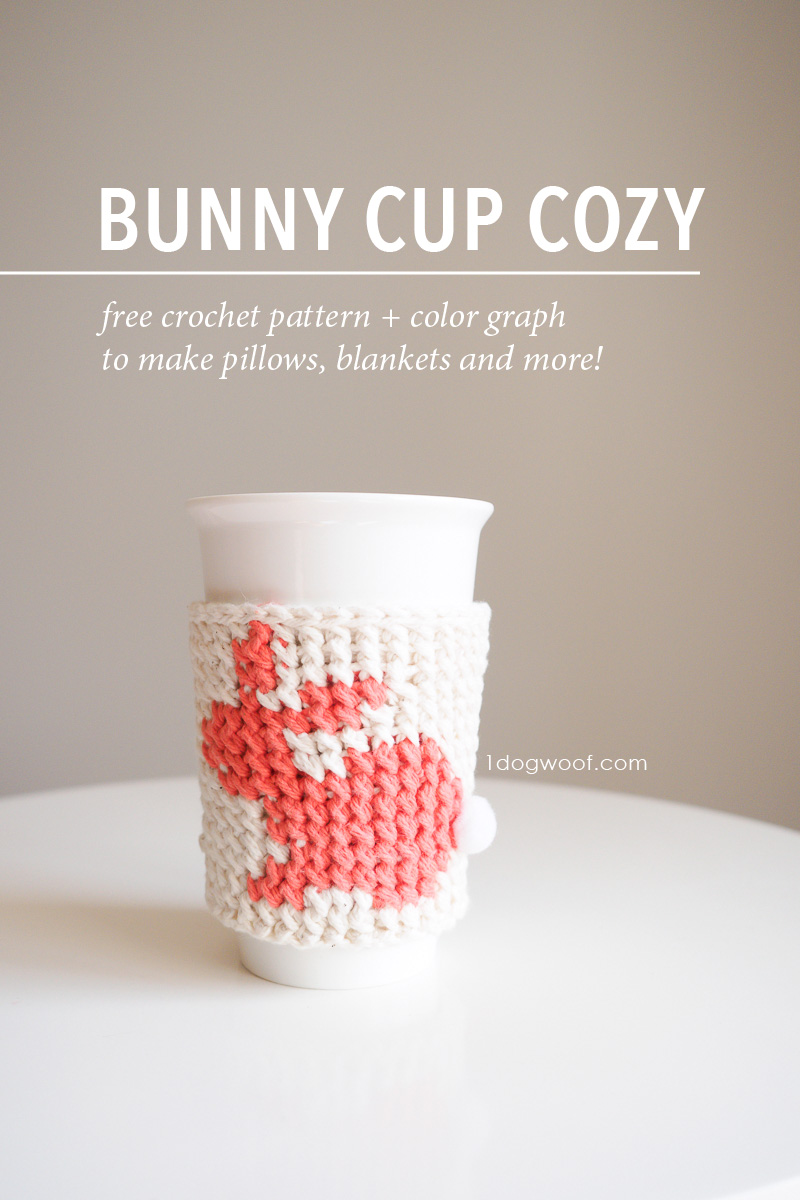
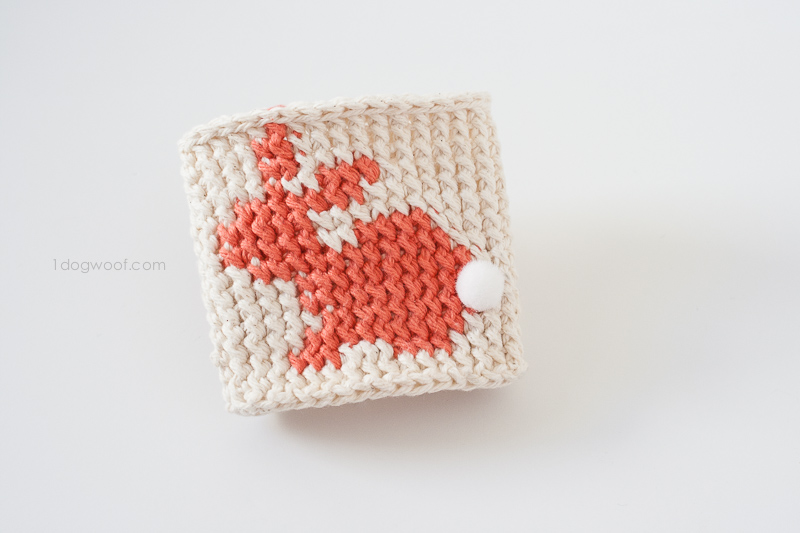
Fill your spring-themed Easter basket with this simple and functional crochet Bunny Cup Cozy. Then use the included graph to make other pillows, blankets and handwarmers for a fully matched Easter set! And yes, put that cotton pom-pom on everything!
This bunny cozy is a project I made almost 3 years ago but never published, so I’m happy to finally get this pattern and graph out into the world just ahead of Easter this year. It’s strange to look back on an old project and try to write up the pattern for it. My writing style has definitely changed, but this project still speaks to me, so I guess my design style hasn’t changed much. I have to admit, it feels kinda nice to see how I’ve grown and evolved over the last few years of blogging and designing!
The Yarn
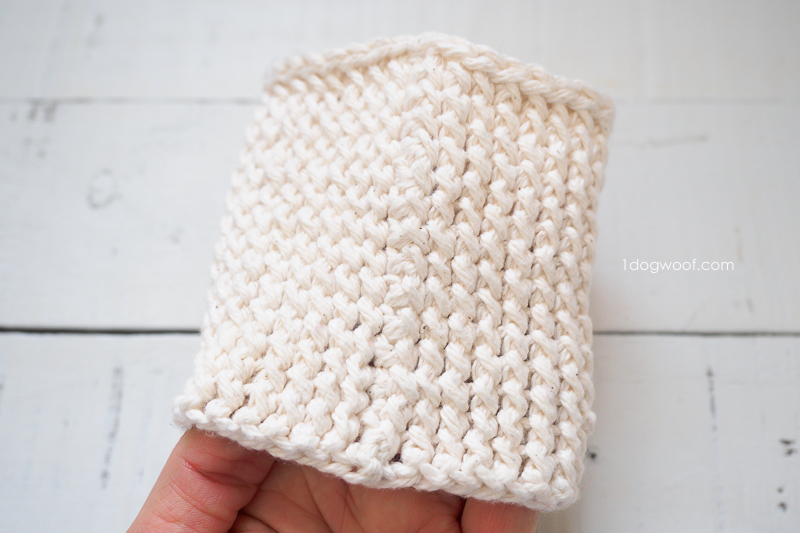
Because this project is small, it’s also a great way to use up any leftover yarn in your stash. This year, I’m all about the stash-busting and getting creative with what’s already in my closet. Then, I can really go ahead and splurge on new yarns next year, lol. I used Lily Sugar’n Cream Cotton Yarn, which you can often find for between $1-$2 a ball at Michaels. It’s a great kitchen cotton, although I find it’s rough on your hands over time, so it’s best for small, quick projects like cup cozies and washcloths.
The Construction
The cup cozy uses the front post single crochet stitch to create its unique slanted line look, almost cross-stitch look. Each stitch comes out fairly square which makes it so well suited for graph designs. When you use this stitch, you’ll switch colors as you normally would with single crochet. The difference is that instead of inserting your hook under the top 2 loops and then pulling up a loop, you’ll then insert your hook from back to front under the next stitch and pull your loop around the ‘post’.
I have also tried the front post half double crochet stitch on my heart cup cozy, and that stitch is great when you’d like a bit more height to each color block. But if you’re looking for a unique stitch to work up color graphs, the front post single crochet stitch is great! Just note that it’s more dense than a regular single crochet, especially if you’re carrying yarn in the back. If the fpsc stitch confuses you, you can always make this cup cozy in regular single crochet too. The graph will still work, and it will still look fantastic!
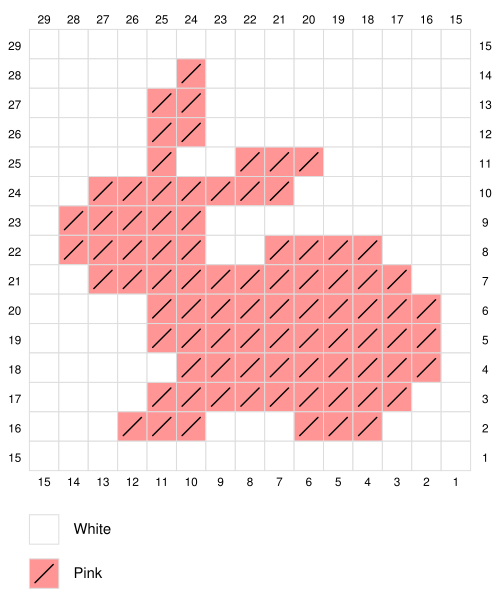
If you ever need to adjust the pattern for different sized coffee cups, you can add width by increasing the number of neutral background stitches. The bunny itself is built on a 15×15 grid. Beyond that, you can get creative with borders, other drawings, or extending the background for larger circumferences.
I think my favorite part about this whole pattern is the cotton ball pom-pom for the tail. If you use the graph for a larger project, you can definitely make a yarn pom-pom tail, but for this sized project, I just grabbed a craft pom-pom (I always have a stash of craft poms, googly eyes and pipe cleaners, who doesn’t?) and hot-glued it to the bunny’s behind.
Save this on Pinterest!
Supplies
- MC: Lily Sugar’n Cream Cotton Yarn in Ecru
- C1: Lily Sugar’n Cream Cotton Yarn in color of choice
- H/5.00mm crochet hook
- scissors
- small white craft pom-pom ball
- tapestry needles
Abbreviations
- st(s) – stitch(es)
- sl st – slip stitch
- sk – skip
- yo – yarn over
- ch – chain stitch
- sc – single crochet
- fsc – foundation single crochet
- fpsc – front post single crochet
Pattern Notes
- Skill level: Easy
- Gauge: 4 sts and 4 rows per inch. However, gauge can vary based on yarn and hook used.
- Overall size: 4.25 inches wide and 4 inches tall, laid flat
- MC is carried behind the C1 yarn. However, the C1 yarn is not carried all the way around the cozy. You can pull the C1 yarn back to where you need to use it, leaving enough slack for sufficient stretch, and then carry the slack yarn under your active stitches. You can also cut the yarn on each round and weave them in if you choose.
- Cup cozy is worked bottom up.
- The last round of sl sts should be worked loosely to ensure there is enough stretch at the top of the cozy.
- There’s not a lot of stretch in this cup cozy, so be aware of your tension as you work. You may need to loosen your tension and carry yarn with extra slack to ensure your cup cozy can stretch around your cup!
Bunny Graph:
Written Instructions for Crochet Bunny Cup Cozy:
Round 1: With (MC), work 33 fsc, join to first fsc stitch with sl st.
Round 2: Ch 1. Work 1 fpsc into each stitch around. Join to first stitch with sl st.
Note: To better secure the join, work the last fpsc around the post and the first ch 1 stitch.
Round 3: Ch 1. Work (MC) x 13, (C1) x 3, (MC) x 3, (C1) x 3, (MC) x 11. Join to first stitch with sl st.
Round 4: Ch 1. Work (MC) x 12, (C1) x 9, (MC) x 12. Join to first stitch with sl st.
Round 5: Ch 1. Work (MC) x 11, (C1) x 9, (MC) x 13. Join to first stitch with sl st.
Round 6: Ch 1. Work (MC) x 11, (C1) x 10, (MC) x 12. Join to first stitch with sl st.
Round 7: Ch 1. Work (MC) x 11, (C1) x 10, (MC) x 12. Join to first stitch with sl st.
Round 8: Ch 1. Work (MC) x 12, (C1) x 11, (MC) x 10. Join to first stitch with sl st.
Round 9: Ch 1. Work (MC) x 13, (C1) x 4, (MC) x 2, (C1) x 5, (MC) x 11. Join to first stitch with sl st.
Round 10: Ch 1. Work (MC) x 19, (C1) x 5, (MC) x 11. Join to first stitch with sl st.
Round 11: Ch 1. Work (MC) x 16, (C1) x 7, (MC) x 10. Join to first stitch with sl st.
Round 12: Ch 1. Work (MC) x 15, (C1) x 3, (MC) x 2, C1, (MC) x 12. Join to first stitch with sl st.
Round 13: Ch 1. Work (MC) x 19, (C1) x 2, (MC) x 12. Join to first stitch with sl st.
Round 14: Ch 1. Work (MC) x 19, (C1) x 2, (MC) x 12. Join to first stitch with sl st.
Round 15: Ch 1. Work (MC) x 19, C1, (MC) x 13. Join to first stitch with sl st.
Round 16: Ch 1. With (MC), work 1 fpsc into each st around. Join to first stitch with sl st.
Round 17: Work sl st around to create finished border. Join to first stitch with sl st.
Fasten off and weave in ends.
To finish, use hot glue or craft glue to attach a small white craft/cotton pom-pom.


Love it! Thank you so much xxx
https://run3.site/