
I may not have mentioned it here yet, but I got a Silhouette for Christmas! Well, not quite Christmas, since I ordered it in early December, but whatever, it counts. I haven’t played with it much, but am LOVING it so far. My new motto is “why use scissors when you can use the Silhouette?” Which is exactly what I said to my husband when he walked into my craft room and saw me cutting out straight lines with the machine instead of by hand. But it’s more than just straight lines – it’s the fact that I can design my whole project in Silhouette Studio and do all of my measurements and drawings on a digital grid instead of messing with a ruler and a pencil. And the project? Using my new wonder machine to make custom box templates to hold all of my desk clutter!
Apparently, I have a lot of random office … stuff. There’s the stuff I already have at home, plus the stuff I brought back from the office when I left. Two boxes of stuff that I now have to incorporate into my craft room. Big things like pictures and folders I can manage, but the push pins, safety pins, paper clips, note pads, staplers, scissors, pencil fillings, pencils, highlighters, clips….you get the idea…those were giving me a headache. So it was time to dump it all out and clean it all up.
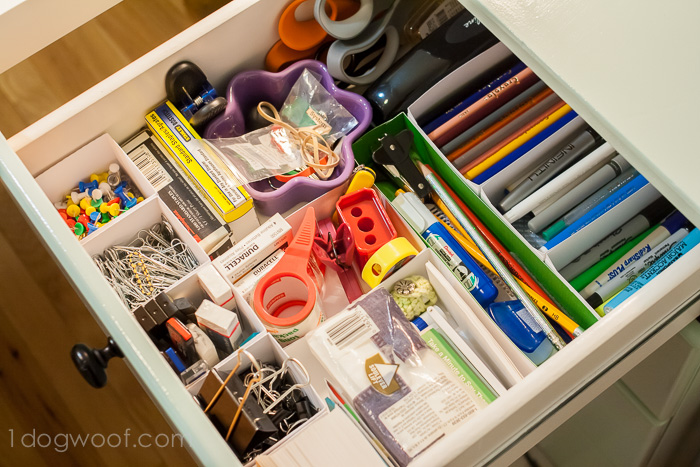
Here’s a quick before pic:

There’s no need to dwell on that too long. It’s just a lot of stuff. I have other words for it, but we’re gonna keep it PG here.
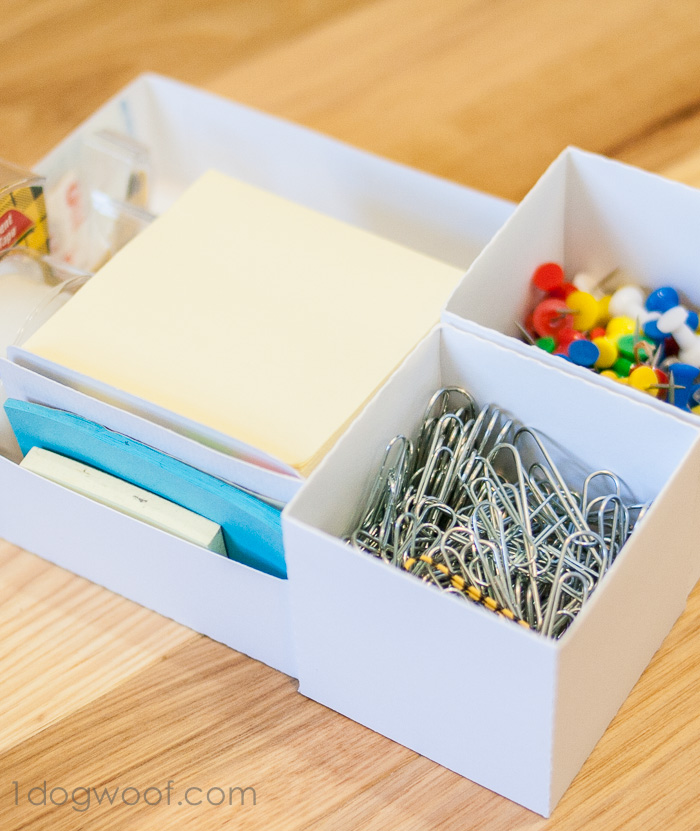
Here’s the after:
Much better, yes? Like my embroidery thread drawer and my stamp drawer, I did spend a bit of time just admiring my handiwork.
How Did I Do It?
First, I looked at all my stuff and tried to group them together in little piles. Push pins over here, all pencil fillings over here, stapler packs over there. Then I took some measurements of my drawer. This one was 13″ wide and 17″ deep. Why prime numbers? I dunno. After some scribbling and measuring, I wrote up some ideas for how big I wanted my different boxes. I have 2.5″x2.5″ cubes, a 5″x3″, a 5″x5″, and a few rectangular boxes to hold assorted writing implements. I didn’t bother with boxes for the staplers and scissors because they can stand on their own. Next up, I went a-shoppin in the Silhouette Online Store. But after a while, I decided to make my own, because I couldn’t tell if the cut files I bought could be tailored the way I wanted. (Note: I did buy a cut file from Lori Whitlock for the cubes, and expanded them to fit my needs.)
How You Can Do It Too!
Your boxes will not be the same dimensions as mine, so I don’t have a cut file for you. However, I AM going to show you how you can design your own simple lidless box for yourself. And have that Silhouette cut it out for you, no scissors needed. All you’ll need is a bit of glue.
1. First, open up Silhouette Studio, choose your paper size, turn on the Grid and choose Snap to Grid (under the View menu).
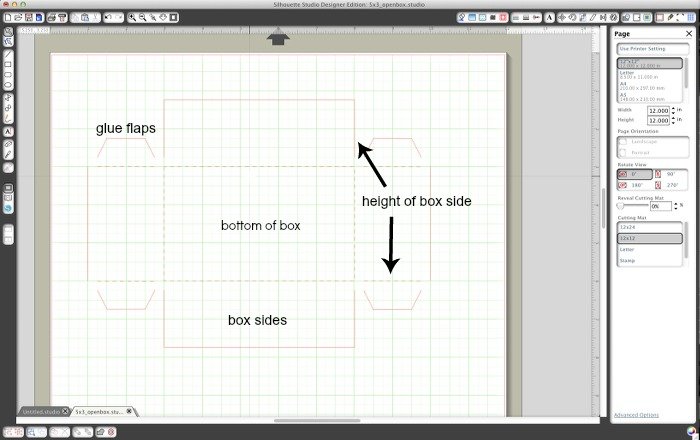
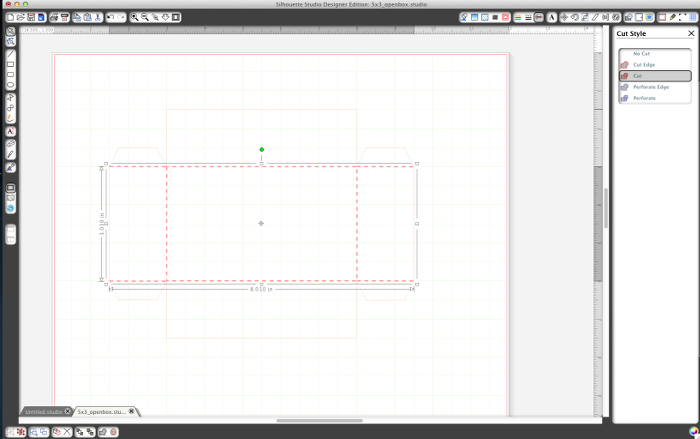
2. The picture below shows the different pieces you’ll need to assemble a box design. You’ll need to draw a rectangle with the Rectangle draw tool on the left side menu. This is the bottom of your box.
3. Create the box sides with the Line draw tool, making sure you follow the dimensions dictated by your box bottom, and choosing a height for the box sides.
4. Using the Polygon draw tool, create 4 glue flaps. They should be the same width as your box height. Make sense?
5. Pressing down the Shift key, choose the pieces that will be folded. Right click and Group them together. I also chose to give this group a dashed line style, so that when it’s cut, the lines will end up being perforated.
6. Do the same with the outline. Pressing down the Shift key, choose the pieces that make up the outline of the box, right click and group them together. These have a solid line style.
7. Load your paper and your mat into the Silhouette.
8. Go up to the right top corner and choose the Cut Style menu. Click on the outline and choose No Cut.
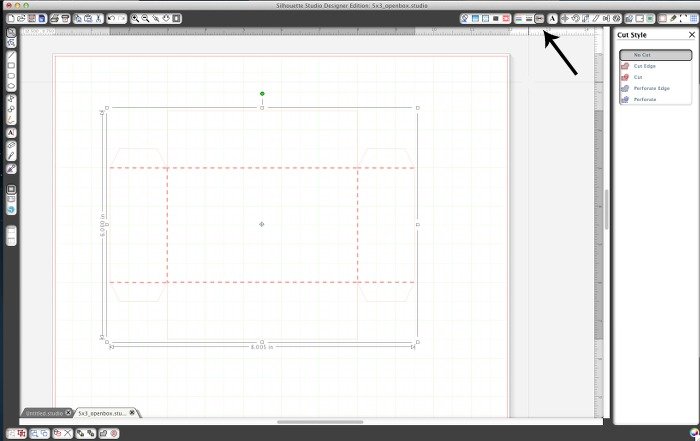
9. Click on the dashed lines and choose Cut. There is an option to Perforate Edge, but I chose the Cut option because my lines are already dashed, and it’ll end up with the same result.
10. Go ahead and set up your Silhouette to cut the dashed lines grouping and then cut. I chose to set my blade at a shallower depth to not cut through my cardstock, as I found that made for a sturdier box.
Speed: 3
Thickness: 4
Blade: 1
11. DO NOT remove the mat from the machine when the dashed lines are cut. Go back into the Cut Styles menu, set the dashed lines group to No Cut and the outline group to Cut.
12. Change your Cut Settings to the cardstock material, switch your blade depth, and then cut.
Speed: 3
Thickness: 33
Blade: 4
13. Once both passes are complete, you can remove the mat and peel off your box template. Fold on the semi-perforated lines and use the glue flaps to assemble the box.
Now you have the power to make whatever size box your paper will allow!
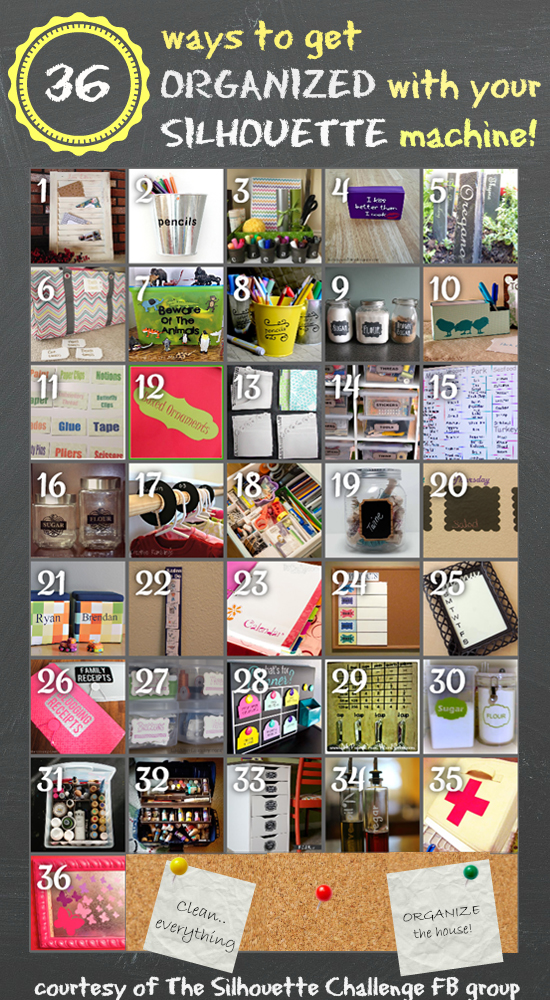
Check out the 35 other organization projects being shared in blogland today:
- DIY Window Shutter Mail Organizer by Weekend Craft
- Kids’ Art Wall by Tried & True
- Organizing Silhouette and Craft Supplies by The Happier Homemaker
- Simple Recipe Organization by It’s Always Craft Time
- Put a Label on it! Herb Names for Plant Stakes by Get Silvered
- Super Simple Linen Closet Labels by Two Purple Couches
- Beware of the Animals Vinyl Toy Box by A Tossed Salad Life
- Child desk accessories by Architecture of a Mom
- Organizing & the Important of Labels by The Turquoise Home
- Index Card Organizer for Easier Meal Planning by Chicken Scratch NY
- Create Craft Room Labels by Dragonfly & Lilypads
- Simple Storage Solution for your Christmas Ornaments by Vintage News Junkie
- Organize this: DIY Planner Covers, Tags & Dividers (made with Cereal Boxes) by Black and White Obsession
- How to Make a Cut File into a Print & Cut by Create & Babble
- Simple Chest Freezer Organizational Board by Nearly Handmade
- Vinyl Your Kitchen Canisters! by From Wine to Whine
- Nursery Closet Dividers & Silhouette Cut File by Creative Ramblings
- Make Custom Box Templates with a Silhouette for Drawer Organization by One Dog Woof
- Organizing the Craft Room by What’s Next Ma
- Vinyl Wall Calendar by Crafts Cakes and Cats
- Personalized Toy Storage Bins by Lil’ Mrs. Tori
- Personalized Routine Chart by Work in Progress
- Blog Planner Sheet Dividers + Free Cut Files by TitiCrafty by Camila
- Simple Project Calendar by Little Blue’s Room
- Dry Erase Photo Frame Menu Board + Free Cut File by Essentially Eclectic
- Receipt Organization with Free Cut File by The Thinking Closet (you are here!)
- Cute and Easy Labels by Life After Laundry
- “What’s For Dinner?” Menu Planning Board by unOriginal Mom
- Mixing Organization and Function: An Easy Conversion Chart by My Paper Craze
- Why do my cookies taste so bad? A lesson in baking. by The Life and Times of a TAP
- Custom Drawer Dividers by Please Excuse My Craftermath…
- The evolution of my labeling system by feto soap
- Ikea Drawer labels by McCall Manor
- Glass Etched Vinegar & Oil bottles by Terri Johnson Creates
- Organize It: Bathroom Closet by The House on Hillbrook
- Ombre Butterfly Magnet Board by Sowdering About

")


Great tutorial! I love that you go through the step by step on how to create your own boxes. I’m definitely pinning this for later!
I do not have a Silhouette (yet), but this is wonderful information that I will bookmark for when I do. 🙂 Oh & by the way…youre embroidery thread drawer is to die for! I may have to concoct something similar to organize mine. Thanks for sharing!
Lisa
I have no hope of organizing an office space, but I love this tutorial for making boxes for drawers in other rooms of my house! I got a Keurig for Christmas and I think I see a K-cup box in my future! Pinning!!
What a great way to get organized!
Thanks Bethany!
Thanks Lisa! It can come in handy anywhere – I think holders for K-cups would be great!
Haha, thanks Lisa! I was just getting tired of those little boxes, because I’d have all these boxes laying around holding random bits of embroidery thread. I guess it’s the same with the office supplies; everything was just “laying around”. I hope you get a Silhouette soon 🙂
Thanks for the pin Kristy!
Great idea and great Tutorial! I just love organizing drawers with boxes like those!!! Thanks for sharing! Pinning!
XOXO
Cami
I see a lot of boxes in my future! Thanks for the inspiration!
Wow, what a great idea. I’m always trying to find the perfect bins for organizing my desk drawers. Making my own cubes like these are a great solution!
Thanks for the tutorial. I really need to do this all over the house, not just my craft room. Pinning this for future reference.
Great organizing tips. I love all those little boxes, thanks for sharing!!
This is so awesome!!! Can’t wait to give it a try!
Thanks Krista! I’d love to hear how they work out for you!
You’re so welcome Tanya! I’m a sucker for little boxes to organize things 🙂
I totally understand that. I probably should make more of these to organize bathroom drawers or nightstands too. Great idea!
I was thinking about your comment in the car, and about how I have had so many different organizers, but never stuck with them because they didn’t fit perfectly in the drawer. And now you can make them perfect. Thanks for the comment Diana – you summed it up perfectly!
You’re welcome!
Thanks for the pin Camila!
I would have never thought to make drawer organizers with my silhouette machine! I’m adding this to my to-do list!! Good bye junk drawers!
Chi Wei,
Wow! I am just starting my first craft space in my home. I will be using what I learned from your lesson to get started on the right track and stay organized.
That’s exciting! Yes, it’s sooo much better to just be organized right from the beginning than have to try to clean everything up! Good luck, and have fun!
Yeah! I’m in love with my Silhouette. Anything I can cut with scissors, I’ll take the extra time to cut with my Silhouette now. Have fun organizing your junk drawers!
I have yet to venture into 3D projects and I’ve been Silhouette-ing for over a year…so of course I give you MAD PROPS for tackling this so early on. Clearly, you were MEANT to own a Silhouette. So excited for the 1 Dog Woof Silhouette creations to come!
Haha, thanks! I’ve been intrigued by the 3-d models. The first cut files I bought were for those winter village houses in the Silhouette Store 🙂
Love the drawer dividers…have to organize my own drawers at work and will probably try your idea…thanks for sharing!
Just getting around to check out everyone’s Silhouette Challenge entries. All I can say is WOW! You really knocked this one out the park! I mean you’re projects are fantabulous every time, but to see that before and after! You go girl!
P.S. I’ve been playing around with boxes for a while and I’m so glad you showed off how to really hammer it out!
Aww, thanks Trisha! Yeah, thank goodness for those boxes, because that before picture was pretty horrendous. It was quite the sinking feeling look at it all and wondering how it was all going to fit.
You’re welcome Jeanette!
ChiWei, you did a WONDERFUL job! Thanks so much for sharing your tutorial…I’ll definitely be organizing my drawers too! Pinned!
Thanks Marilyn!
We can help our childrean learn such tricks to increase their IQ and get more inventional and creative thinking. If we start this kind of mental exercise then our children will develop good and high creativity in their life and career
If you would like to grow your experience just keep visiting this site and be updated
with the most up-to-date news update posted here.
As it is a no cost registration tournament, many players do not want to watch
for premium hands and so they go all-in with all of kinds of hands inside first hour.
Everything must be slightly muted, exuberance isn’t what you are after.
Strategy 2 – Blind Steals For Extra Chips – A very effective
poker tournament strategy is to consistently incorporate blind steals into your normal play.
I have noticed you don’t monetize your website, don’t waste your traffic,
you can earn extra cash every month because you’ve got high quality content.
If you want to know how to make extra $$$, search for: best adsense alternative Wrastain’s tools
Very Nice Post! I really like reading it. Thanks for sharing.
This is such a great idea.