
This post has been in the making for longer than a pregnancy, and there’s really no good reason why except that I just never got around to it. So I’m super glad to finally “birth” this project and I hope it helps many of you as you prepare for the season’s holiday shows! This craft fair hat stand is surprisingly simple, and there’s lots of flexibility to make it your own!
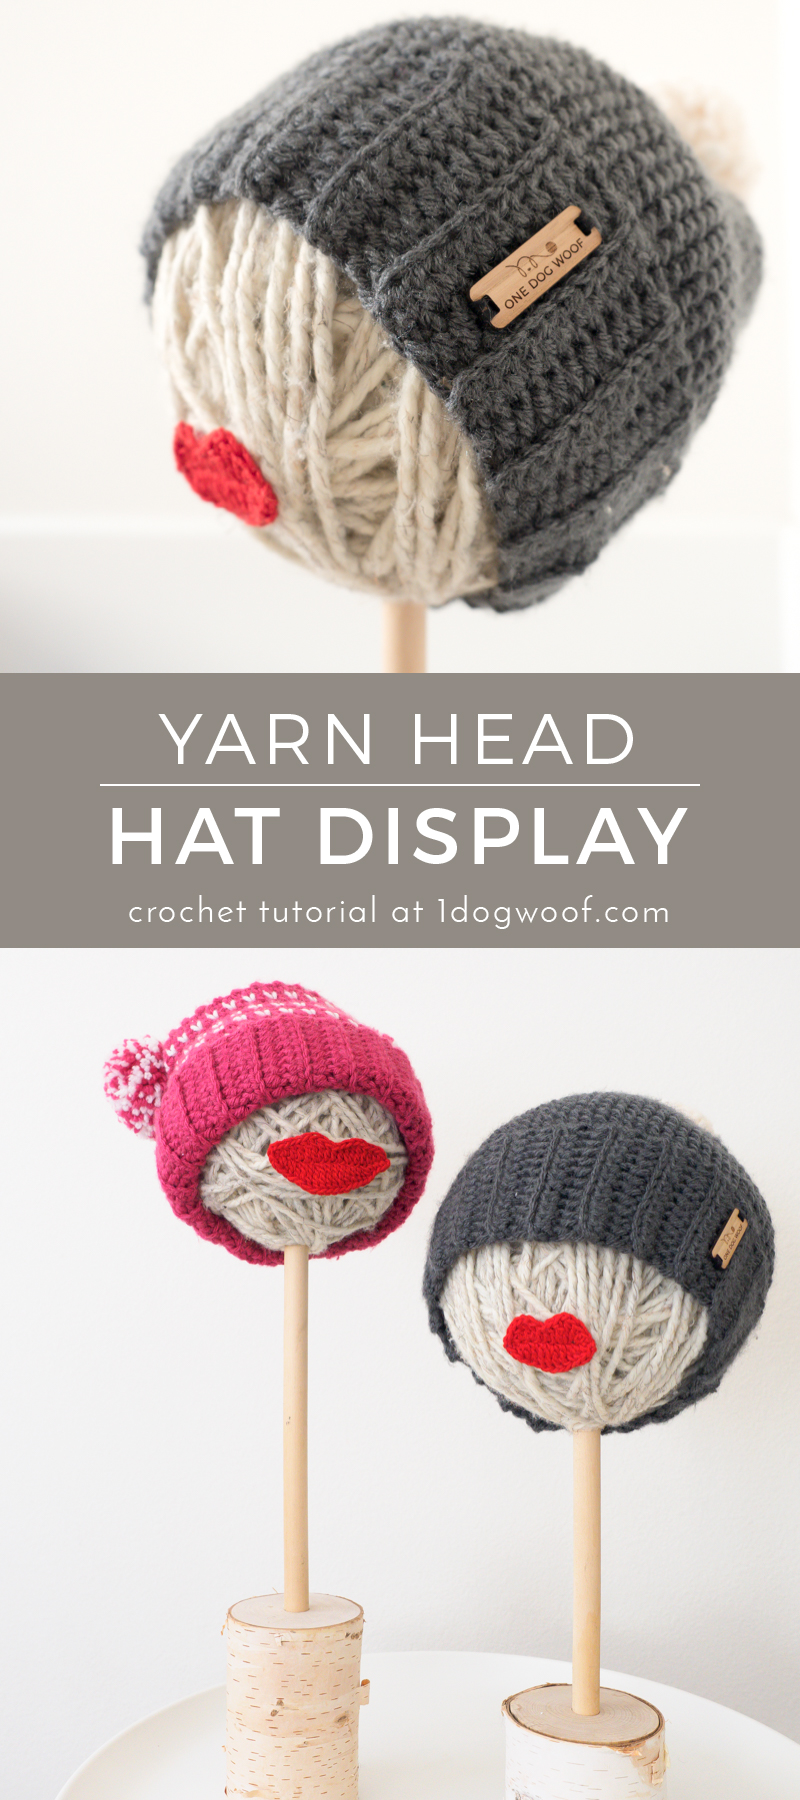
The original idea for this yarn head hat stand came from Katie at The Queen Stitch. You can find her on Instagram @thequeenstitch! She had some gorgeous displays of her shop and I noticed these cool hat displays. We chatted and she gave me permission to share a tutorial with you all, so the notes below are partly mine and partly hers. Like I said, there’s lots of flexibility to play around, so you can find what works best for you and your show.

The basic idea is beyond simple. Just wrap a foam ball with yarn, stick a .. stick in it, and top it with a hat! Not too hard right? But like all craft projects, a little planning can help prevent a Pinterest fail!
Foam Balls
You can find foam balls at most craft stores or on Amazon. They come in both Styrofoam and Polystyrene, and I found that the Polystyrene ones were less messy than the Styrofoam ones. It doesn’t really matter though because you’ll cover all of it in yarn anyways. I made the mistake of purchasing sizes to equate to a person’s head, but forgot to take into account the bulk that yarn will add. SO, for an adult size head, a 6 inch ball will work, and for a child size head, you can use a 5 inch ball. Here’s an Amazon listing for different sizes of foam balls in bulk packs*, which you might appreciate if you’ll be displaying a lot of inventory.
Yarn Choice
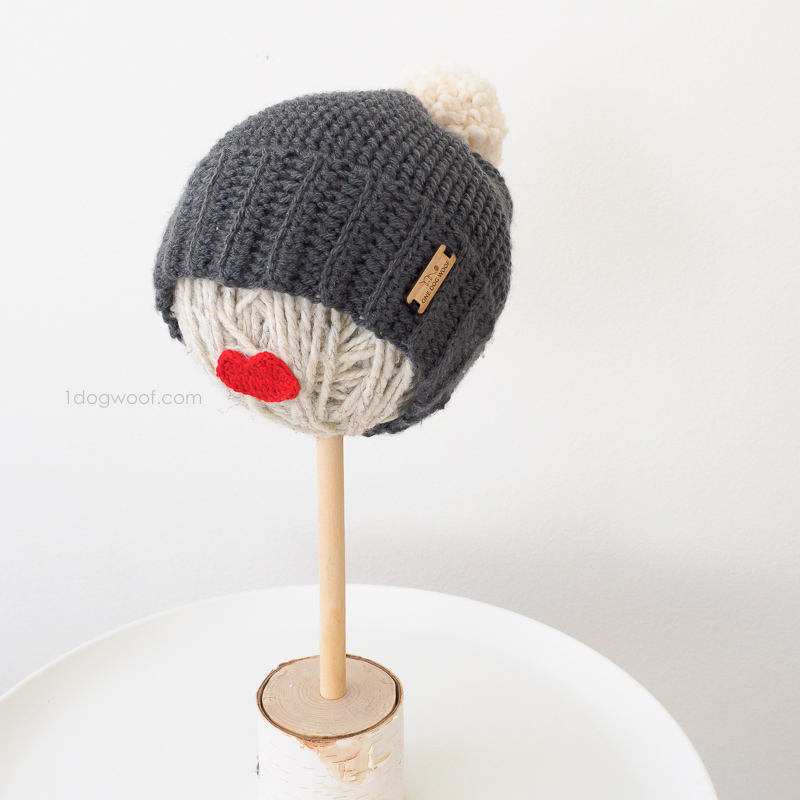
This is a great scrapbuster project, since the color of the head doesn’t really matter. Chunky yarns will cover the foam ball easier, but add more bulk. You may need more of a thinner yarn, but the wrap will create an awesome texture for the head. Yarn shown is Lion Brand Wool Ease Thick and Quick in Wheat.
Dowels
You’ll need a stick, like the “head on a pike” idea, but less gruesome. Katie used 5/16″ dowels, whereas I used 5/8″ dowels. She felt that anything thinner than 5/16″ would be too wobbly and I think my 5/8″ dowel was already a bit too wide. My guess is that a simple 1/2″ dowel should work just fine. Dowels tend to come in 36″ lengths, so you can make at least 2 hat displays with a single dowel, depending on how tall you want your display.
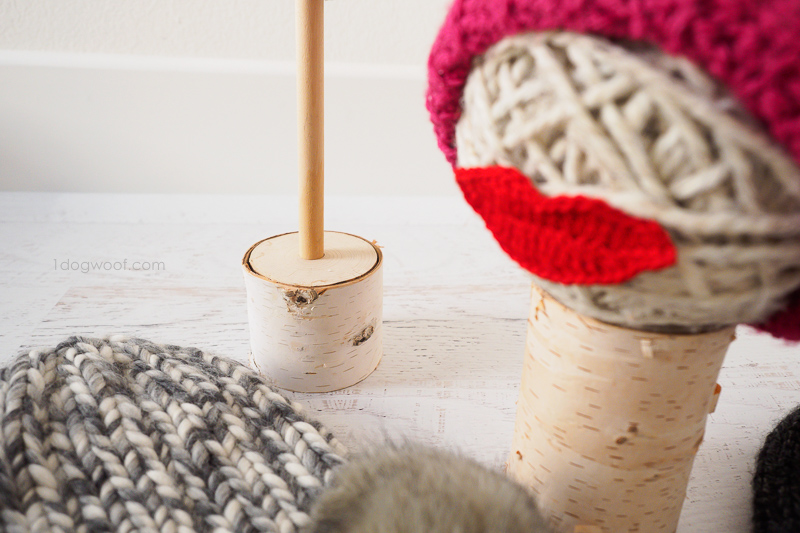
Wood Base
You can buy hunks of wood at most craft stores too. Any hunk of wood will work, as long as it’s at least 1/2″ deep. You’ll want to think about the balance of the head a bit, so if it’s a tall display, you may want a wider base to keep it stable. I used birch trunks that I found at Michaels, and I really like the look of them. If you have woodworking friends, you may be able to source some scrap wood too!
Lips
Ahh, the decoration! You can leave the head plain, or embellish them with fun facial features. Here are the crochet lips appliques that I worked up for my own yarn heads; they’re both free patterns and are super easy to make. Other ideas are to add a mustache, or even sunglasses! And if you don’t crochet, you can cut them out of felt* or craft foam*.
The Tools
For this project, you’ll need a saw if you want to cut the dowels down to the right length. A regular handsaw does the trick. Of course, it’s nice to have a vice to hold the dowel in, but a friend can do the same! And then you’ll need a drill to make the hole in your wood block. I actually used a drill to carve out a hole in my foam ball because my dowel was too big to stab into the ball. Katie had no problems stabbing the 5/16″ dowel into her heads.
Assembly
Here are the steps for making my specific yarn head, along with a quick video. I think my instructions are slightly different because of the big fat dowel I chose to use. Below this, I’ll give slightly different instructions for a thinner, stabby dowel.
- Cover a small area of the foam ball (5″ for child, 6″ for adult) in masking tape. This is to prevent a lot of shredding.
- Take a drill bit slightly smaller than your dowel and lightly drill a hole in your foam ball, through the masking tape.
- Insert the dowel. You can glue it in place if you’d like.
- Put a small dab of glue anywhere on the masking tape and start winding your yarn. I used Elmer’s Glue here, since I was afraid that hot glue would melt the plastic styrofoam.
- Wind the yarn tightly around the foam ball, and around the dowel. Use different weights and colors of yarn to create texture. Once the foam ball is completely covered and you are feeling good about your yarn ball, tuck in the yarn end and hot glue it in place. You can use hot glue now because the foam is protected….by yarn.
- Inspect the yarn ball and hot glue any loose pieces in place.
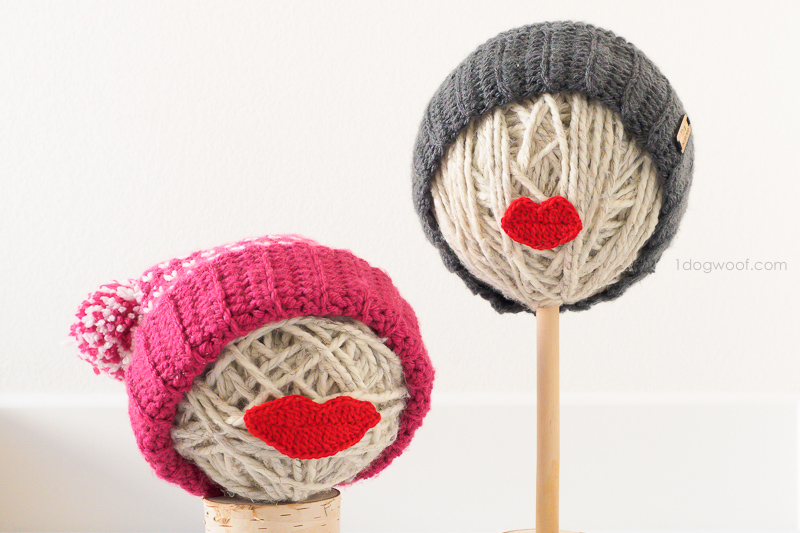
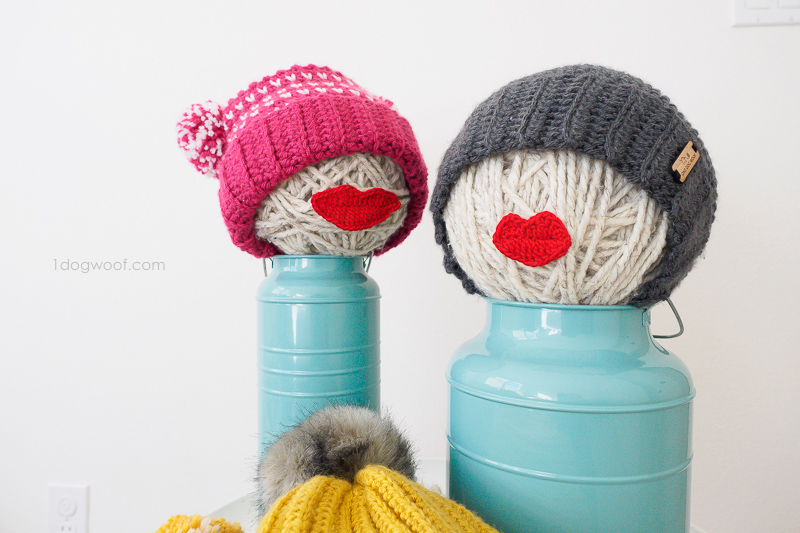
- Crochet a lips applique and use hot glue to attach it to the yarn ball. I placed the lips at around the lower third of the yarn ball, but the placement doesn’t have to be exact. #abstractface
- Take a drill bit the size of your dowel and drill a hole in the center of your your wood block, straight down at least 1/2″. Make sure it’s straight down, unless you want a topsy-turvy hat stand!
- Insert the dowel with yarn head into the wood block and you’re done!
- Put a hat on it!

Alternate Assembly for Thinner Dowels
- Cover a small area of the foam ball (5″ for child, 6″ for adult) in masking tape.
- Put a small dab of glue on the masking tape and start winding your yarn.
- Wind the yarn tightly around the foam ball. One the foam ball is completely covered, tuck in the yarn end and hot glue it in place.
- Inspect the yarn ball and glue any loose pieces in place.
- Attach a pair of crochet lips or other embellishment.
- Take a drill bit the size of your dowel and drill a hole in the center of your wood block, straight down at least 1/2″.
- Insert the dowel into the wood block.
- Stab the yarn head onto the dowel.
- Put a hat on it!
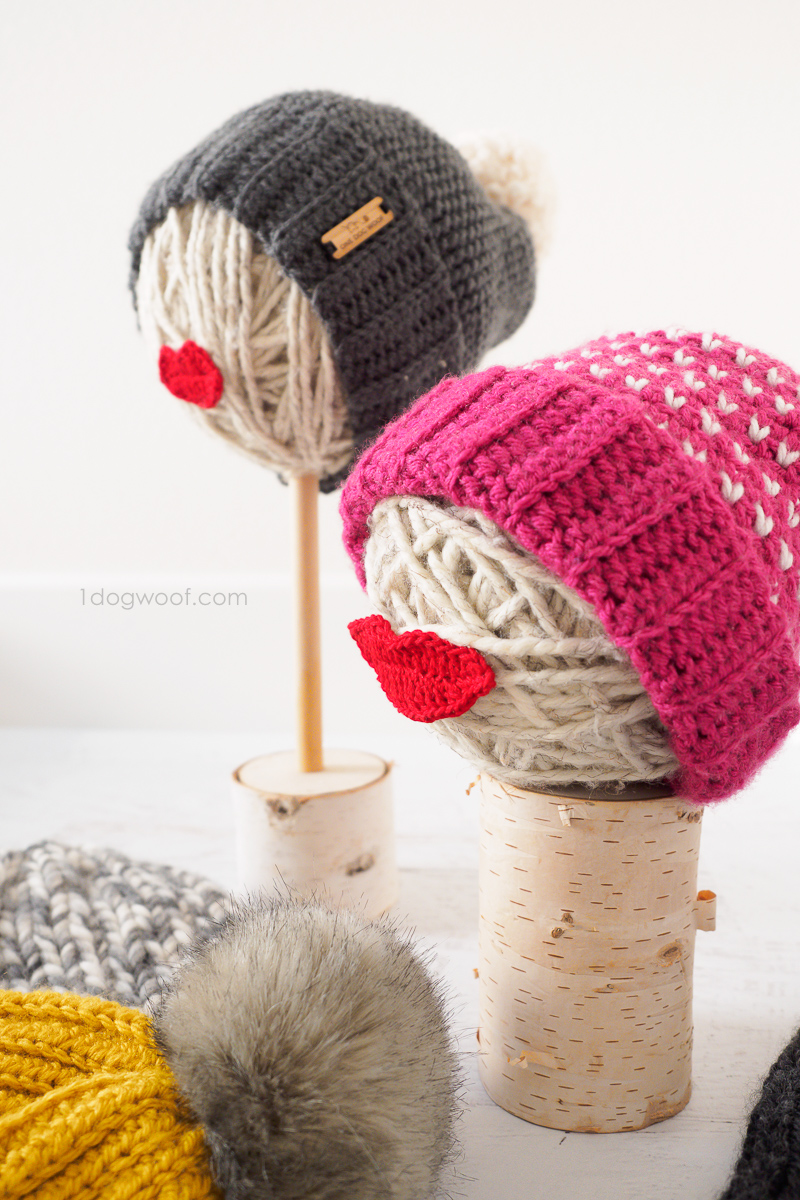
As you can see, the instructions are really simple and you have lots of room to play around and experiment to find the best look for your handmade display! If you make your own for this season, please share with me (@1dogwoof) and Katie (@thequeenstitch) on Instagram. We’d love to see your heads, and your hats!
I’ve also shared other craft fair tips that I picked up in the few shows I’ve done, and if you’re looking for more seasonal decor, entice people to stop by your booth with adorable baby succulents planted in crochet pumpkins!
********
Check out my pattern shops on Ravelry and Etsy where you can purchase printable PDFs of my latest crochet patterns. These PDFs are formatted without comments or ads, and have instructional photos at the bottom for optional printing.
I sometimes include affiliate links in my supply lists. Purchasing from these merchants earns me a small commission with no extra cost to you, and goes towards supporting One Dog Woof.
Please be respectful and do not sell or distribute this pattern in any way, especially as your own. Instead, share the original blog post link! You can sell finished products made from this pattern by giving credit to One Dog Woof as the pattern designer and linking to the blog post. If you have any questions regarding distribution or translation of this pattern, please see my Terms of Use. Thank you for your consideration!


")


How cute are you?! Absolutely love it. Thanks for sharing such a clever idea!
How clever! The lips are unique, never seen anything like them on a hat stand. Thanks for this idea!
What a clever idea. I am always amazed at the fantastic things some of you crochet friends come up with. I wish had such an imagination. Thank you Chiwei x
Love the little leather tags on your hats! Can I ask if you had those made or where you got them?
I love these and will be making some for a Christmas Craft Fair to display my hats. I think I will add a mustache to display the hats for men, and if I can find some plastic lashes I think I will doll up one for the ladies.
I too would be interested in learning the source of your brand label. Very professional.
Awww! Sooooo cute.
Thank you so much for this helpful tutorial. I love how the character of the hat stands align to the crocheted hats, and how playful they are. I can’t wait to make a few of my own to use at a craft fair!