
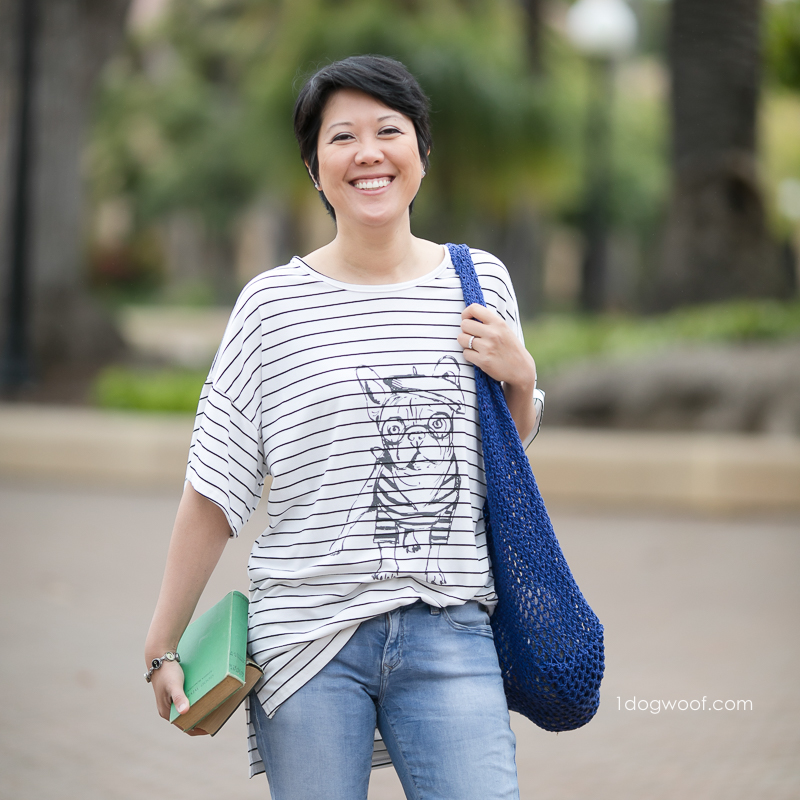
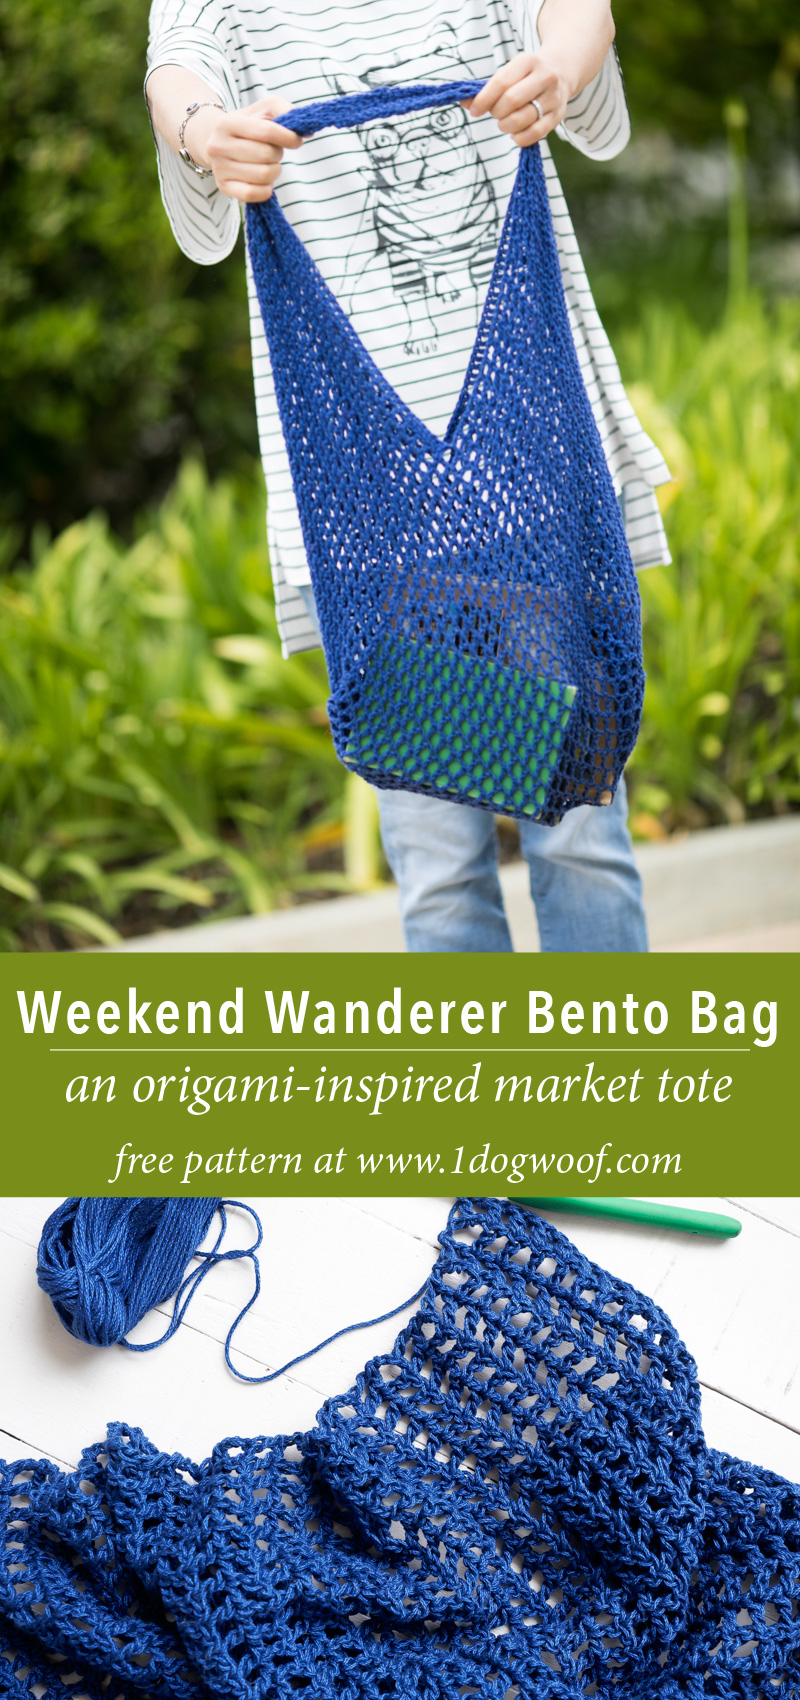
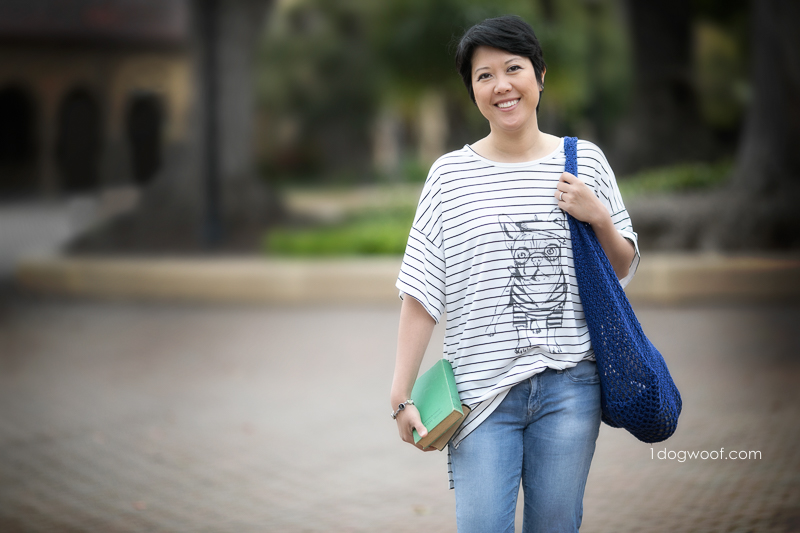
Whether you’re off to the farmers’ market, the beach, the library, or just strolling around town, this origami-inspired Weekend Wanderer Mesh Bento Bag will come in useful to haul all your summer treasures!
After finishing my last market bag and fully realizing that I am, indeed, a bag lady, I knew I wanted to make more bags, more bags! I saw a bento bag and it occurred to me that, once again, crochet creates fabric, and fabric can be turned into a million different things. So anything that can be made with fabric can most likely be made with crochet. In this case, a bento bag is simply made with a single piece of fabric, which makes things even easier!
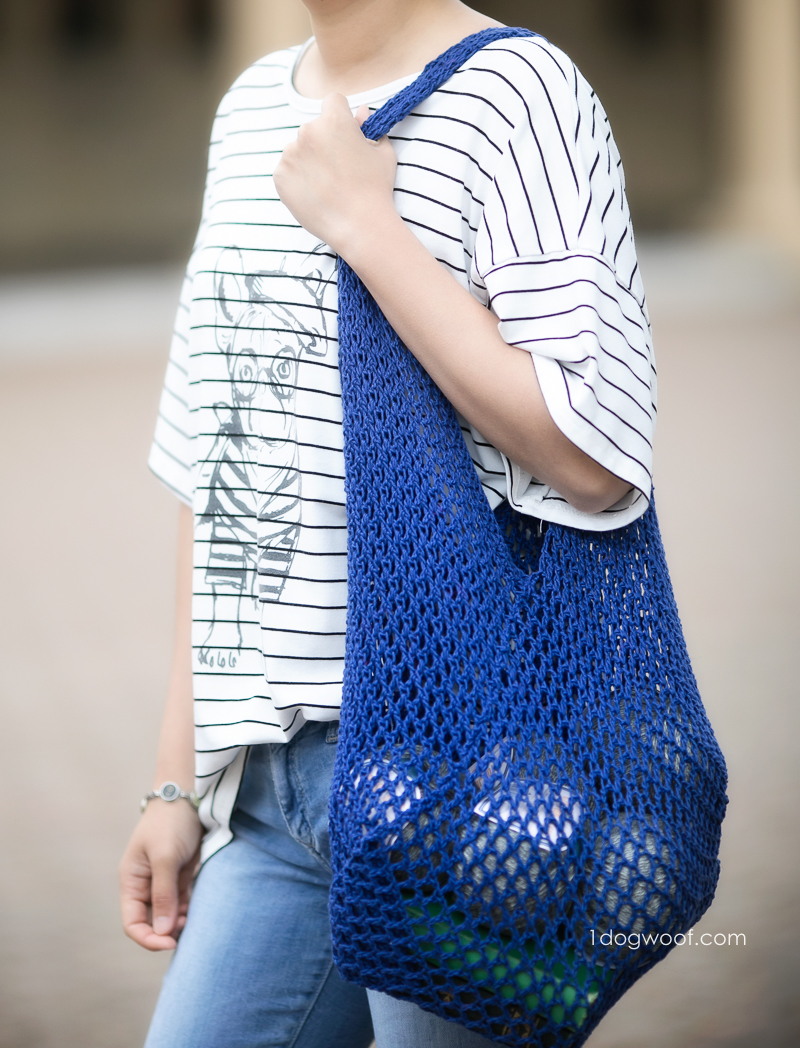
I used Lion Brand’s 24/7 Cotton yarn because it’s a sturdy, non-fuzzy, vibrant yarn. I find the texture of the yarn, and its weight, is not my favorite for clothing, but it’s perfect for bags, and this won’t be the last time I use it for that purpose!
The pattern for the Weekend Wanderer Mesh Bento Bag is so simple, it’s going to take just a few lines to explain it all. The magic is in the assembly. Basically, you want to crochet up a piece of fabric that has a length to width ratio of 3:1, and then fold it up into the bento bag shape, seam it, and secure the “handle”. That’s it!
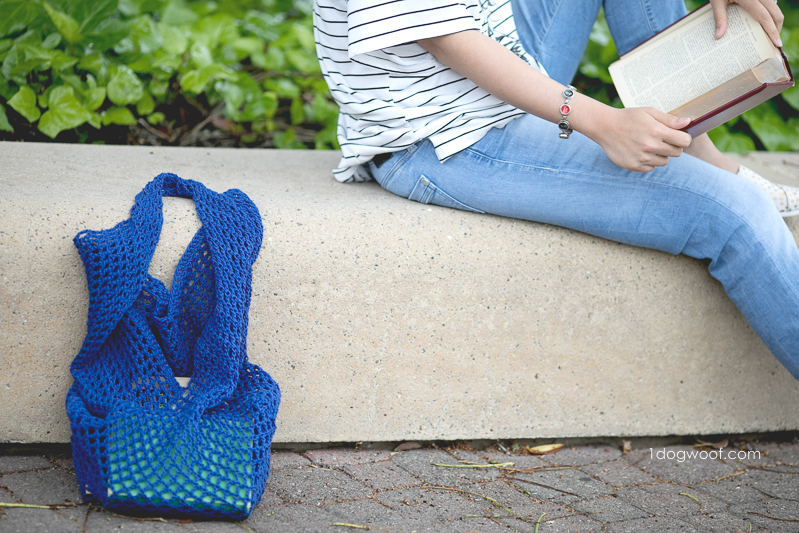
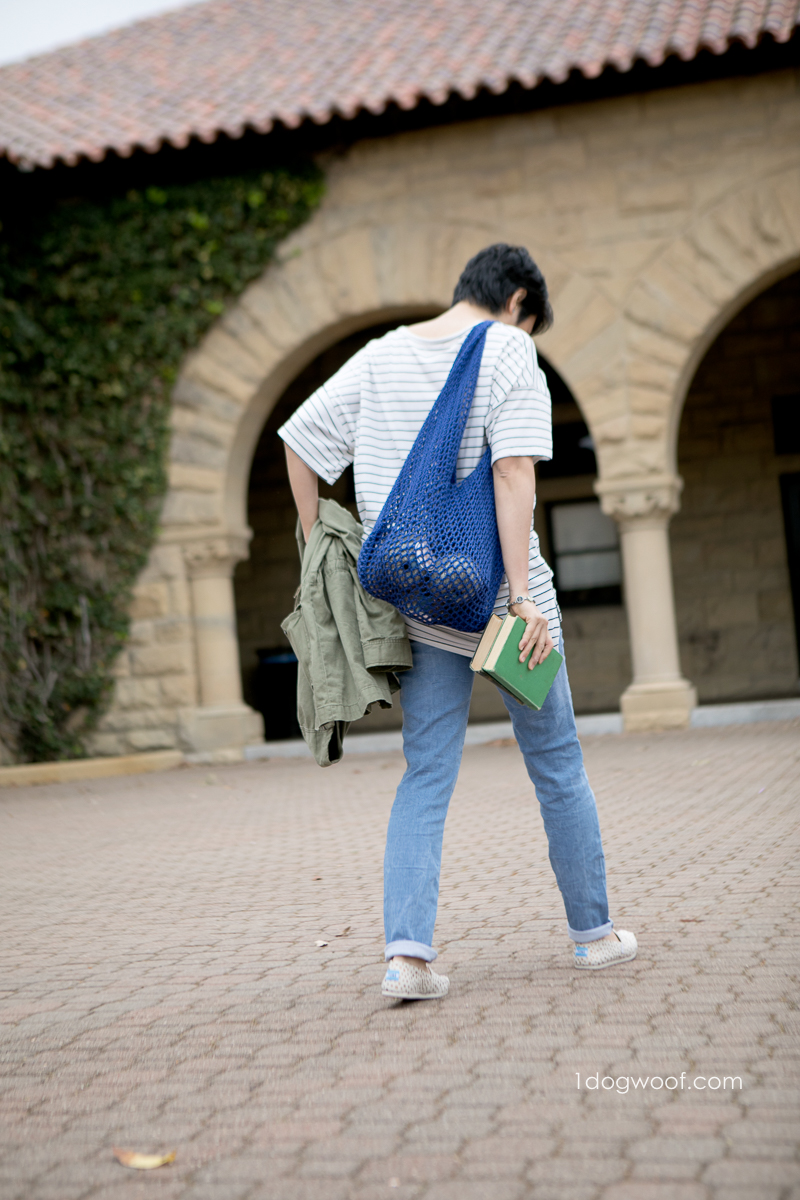
I added a box bottom to the bottom of my bag to give it a bit more shape, but that’s optional. I also debated whether to macrame wrap the “handle” with leather straps, but decided to hold off and just enjoy the bag for its simplicity.
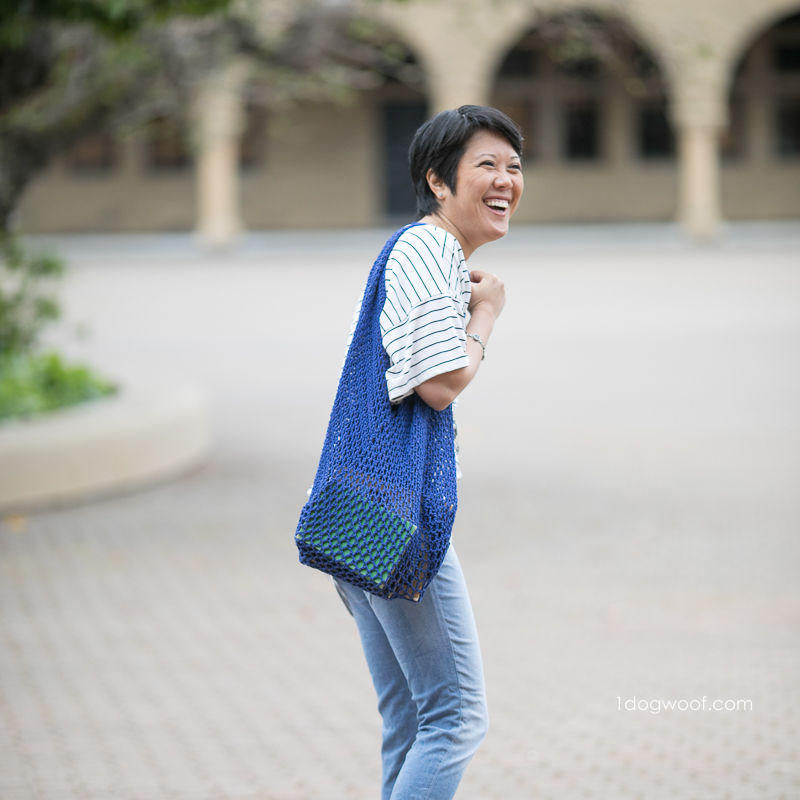
Once you weigh the bag down with stuff, it does stretch quite a bit, but I never found it to be too slouchy. It’s just the perfect length to throw over your shoulder and go wandering!
Supplies
- 3 skeins of Lion Brand 24/7 Cotton yarn (3.5oz/100g, 186yds/170m)
- Size I/5.5mm crochet hook*
- tapestry needle
- stitch markers
- scissors
Abbreviations
- st(s) – stitch(es)
- sk – skip
- ch – chain stitch
- dc – double crochet
Pattern Notes
- Skill level Beginner.
- Gauge: approximately 14 stitches and 6 rows in 4 inches.
Weekend Wanderer Mesh Bento Bag Crochet Pattern Instructions
Row 1: Work 63 foundation double crochet. Turn.
Row 2: Ch 4 (ch 3 + 1), sk 1. Work [dc, ch 1, sk 1] until last st. Work 1 dc in last st. Turn.
Repeat Row 2 for another 81 rows.
Row 84: Ch 3 (counts as st). Work 1 dc in each st across.
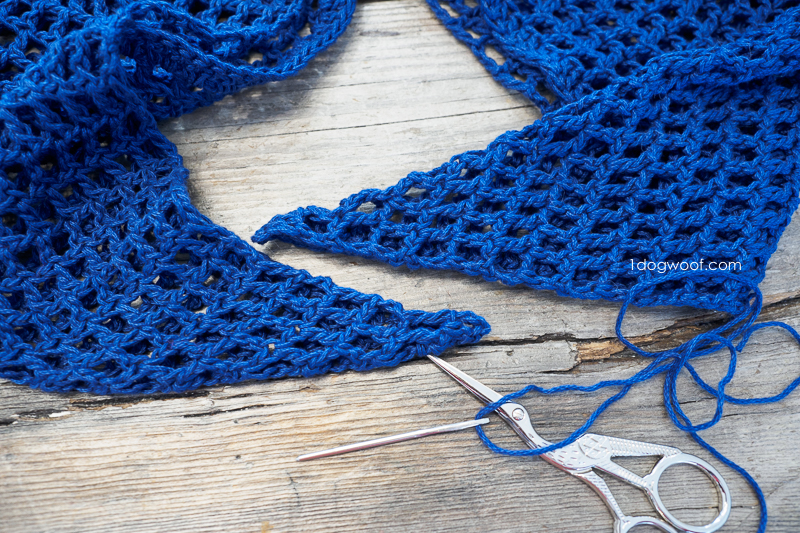
Fasten off and weave in ends.
ASSEMBLY
Once you have the rectangle complete, lay it out on a flat surface, and use your stitch markers to mark the long sides of the rectangle into thirds, at approximately 28 rows in from either edge.
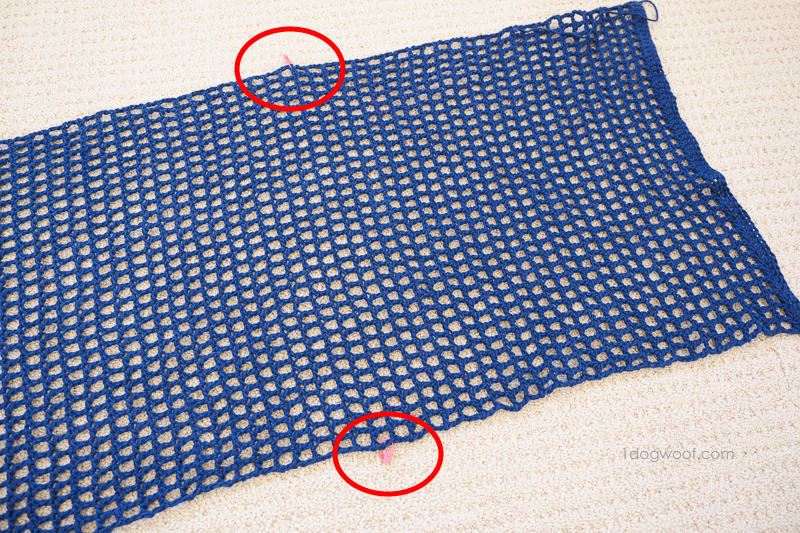
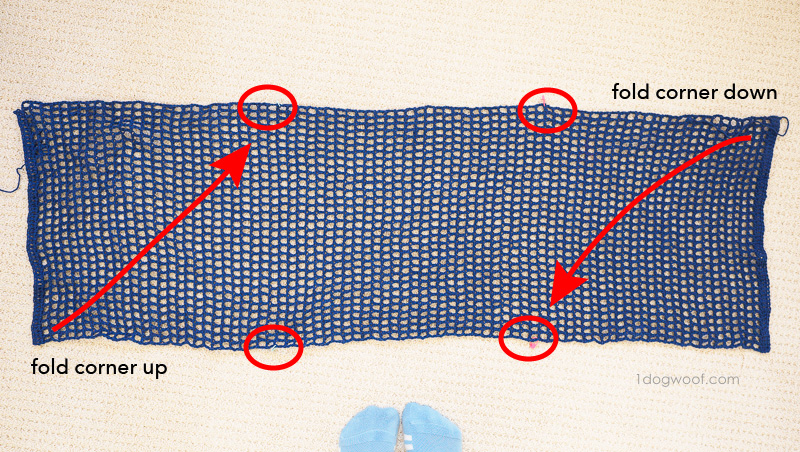
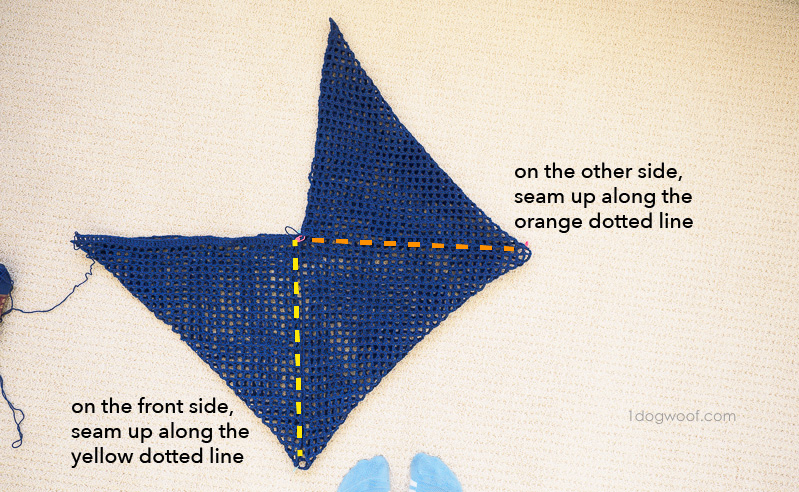
If you have your ratio correct, that means that you’ve marked 3 squares. Fold the bottom left corner up to the stitch marker, and the top right corner down to the stitch marker, as seen below.
Next, fold one side of the bag up to meet the other diagonal corner, along the yellow dotted line in the photo below.
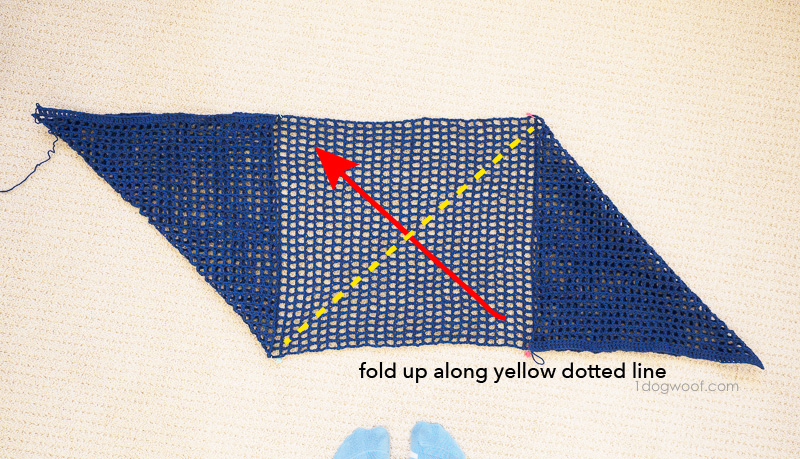
That’s the shape of your bento bag! Sew up the two seams, one on each side of the bag. You can use the mattress stitch for a quick invisible join.
Once the bag is seamed up, you’ll need to connect the top corners into a “handle”. I tried just knotting it together, but that was too bulky, so I laid the corners next to each other and whip stitched them together. You can choose how much or how little overlap you want on the corners when you sew, to create a short, or long handle.
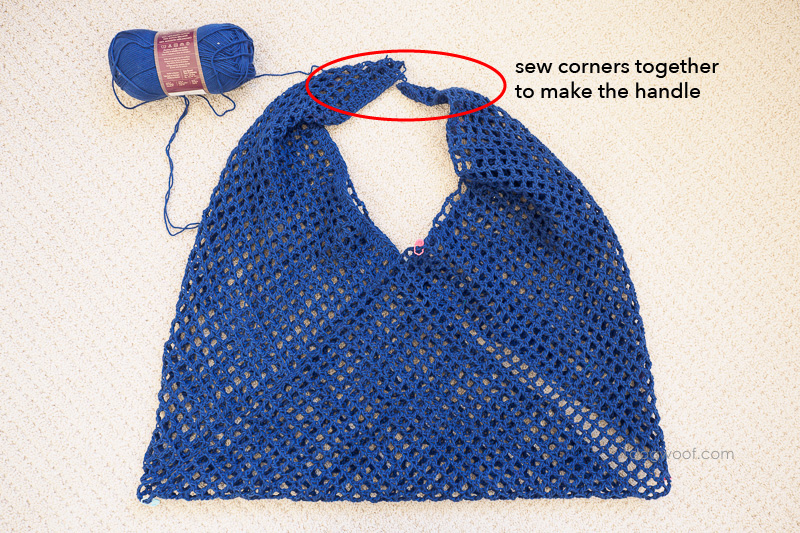
Optionally, I added a box bottom by approximating about 3 inches straight in from the corner, and sewing across to box that corner off. I didn’t cut off the extra corner as some like to do with fabric. I just turned the whole bag inside out so the extra piece is actually reinforcement for the bottom of the bag.
This was such a fun and easy bag to make! I can definitely see myself making other ones with the same shape but with different designs and different yarns. For now, what color will you be making yours?
Check out my pattern shops on Ravelry and Etsy where you can purchase printable PDFs of my latest crochet patterns. These PDFs are formatted without comments or ads, and have instructional photos at the bottom for optional printing.
I sometimes include affiliate links in my supply lists. Purchasing from these merchants earns me a small commission with no extra cost to you, and goes towards supporting One Dog Woof.
Please be respectful and do not sell or distribute this pattern in any way, especially as your own. Instead, share the original blog post link! You can sell finished products made from this pattern by giving credit to One Dog Woof as the pattern designer and linking to the blog post. If you have any questions regarding distribution or translation of this pattern, please see my Terms of Use. Thank you for your consideration!


I love this bag! I love the color! I love it! This is so much easier to make than I thought it would be. I like that this is not the typical bag crochet pattern. I am definitely adding this to my must make list! Thanks for sharing.
Thanks Chelsea!
I love your designs. Can’t wait to make this bag and I know exactly who’s going to get it! Love this!
Made it, Love it. Am assuming that once it has items in it it will stretch a little. Seems like mine is short in the handle area. But I still love it. Am starting another one tonight.
Wow! It’s easier than I thought. Thank you for sharing the tutorial!! Can’t wait to make this bag!
I’m pretty much a super newbie. Your instructions started with “Row 1: Work 63 foundation double crochet. Turn.” So, how many chain stitches do I need to make to start that?
Love love. Made one for my daughter and her boss just had tohave it. Making my girl a new one.fun to make fun to use thanks for the beautiful pattern
Chain 63 and then double crochet into those ????
Could you use worsted weight acrylic yarn. I have been trying to use my leftover yarn scraps. Thanks for the pattern.
Hi, I’m in the UK and can’t get the yarn you’ve recommended, could you please let me know what weight it is please (or DK, Aran, chunky?)
Many thanks
Did you see across both of the bottom corners to make the square bottom?
I also live in the U.k. and tried at least five, double knitting brands and three Aran weight yarns. Using from 3mm hook to 5.5mm crochet hook to try and get the correct tension. Unfortunately I have not been successful. My tension squares differed so much and I couldn’t get them big enough with D.K and would of been to stretchy using Aran yarn.
If I knew the size of the original finished bag it might help.
I want to do a smaller version of this. You mentioned the rectangle should be in the ratio of 3:1, so if I were to work on 42 foundations double crochet, how many rows should I be doing to make this work?
Great idea and pattern! I too believe in the fabric concept and have been contemplating. I am excited to try this?
Thank you so much for a fun project. The directions were easy to follow and my bag came out great! I’m feeling Christmas gifts…..Now trying a slightly smaller version : )
Use any weight 100% cotton yarn (with a hook size that works well and feels comfortable with the weight of the cotton thread/yarn). Cotton yarn is not stretchy at all.
The yarn should be shiny-ish, rather than matt and a bit fuzzy, AND should be tightly spun. The Lion brand cotton I used worked very well – it has a braided/plaited look, and is less ‘limp’ than a lot of the cotton I’ve used in other work. I think Paintbox cotton yarn would also work OK, though it’s a little finer. Both of these can be purchased online. I live in Australia and have bought them both online.
Work your 42 stitch foundation row and just keep going until you have a square. That is, until bringing a corner to its diagonal opposite gives you two equally sized triangles (or the length equals the width of your foundation row). Do the same number of rows twice more!
Gorgeous! I only had varying lengths of different colours of an appropriate cotton yarn, and loved the colour block approach. Just sewing it up now.
What are the width and height of the original rectangle? I started to make this but my rectangle is small, even with a size k hook it is only 20 in wide, it seems quite small to me.
Hi! If you are maintaining gauge, the rectangle should be 18″ x 56″