
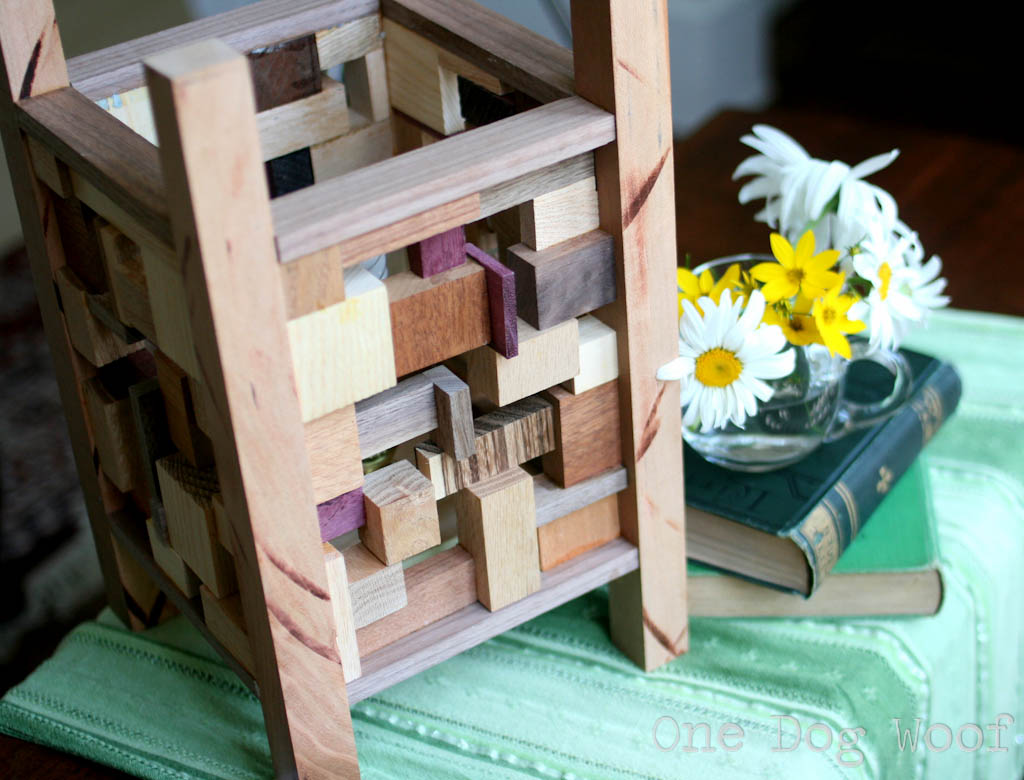
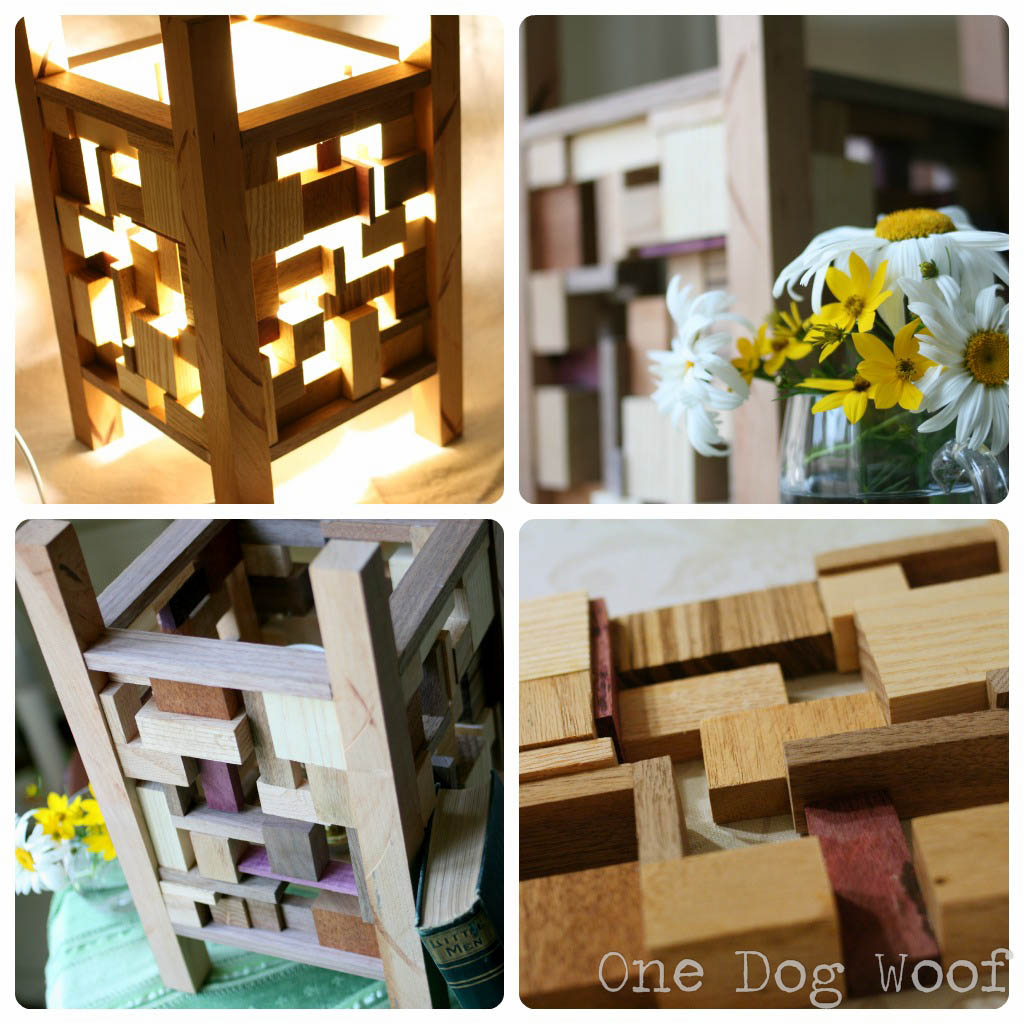
Here’s the tutorial for my scrap wood lantern, in case you have an armload of scrap wood you’d like to use up!
The brainstorming process for this project was a little bit crazy. Once I decided I wanted to use wood, I googled “wood scraps” just to look at some pictures. Originally, I looked at some segmented wood turning projects, but pretty much got shot down by my wood working friends (and Drew) for being completely off my rocker. So, finally, I caught a glimpse of a wood lantern somewhere on the interwebs, with no name, no title, no instructions, just a glowing image of a wood “thing” with holes in it. I figured since there were no rounded edges, this was at least “do-able”!
So here we go!
Supplies
Scrap wood pieces
lots of clamps
table saw
wood glue
Instructions
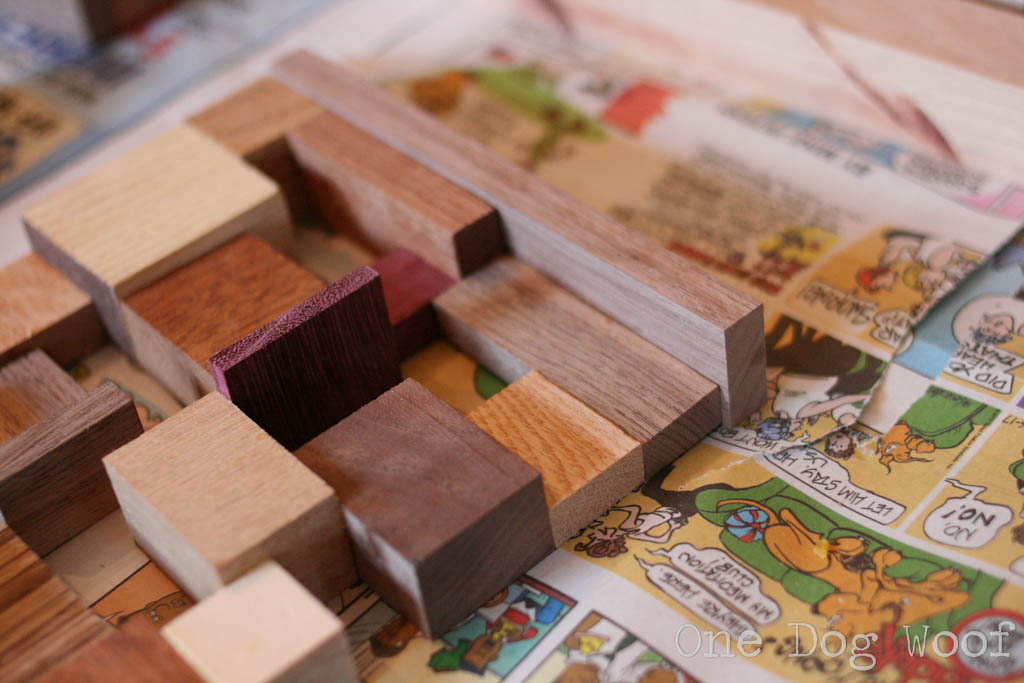
1. Collect a bunch of wood – preferably already square. By square, I don’t mean the shape, I mean, the that the sides and corners are not crooked.
2. Cut, rip, sand your pieces into assorted shapes and sizes. I didn’t have a plan, so I just cut enough wood to half fill a plastic bag.
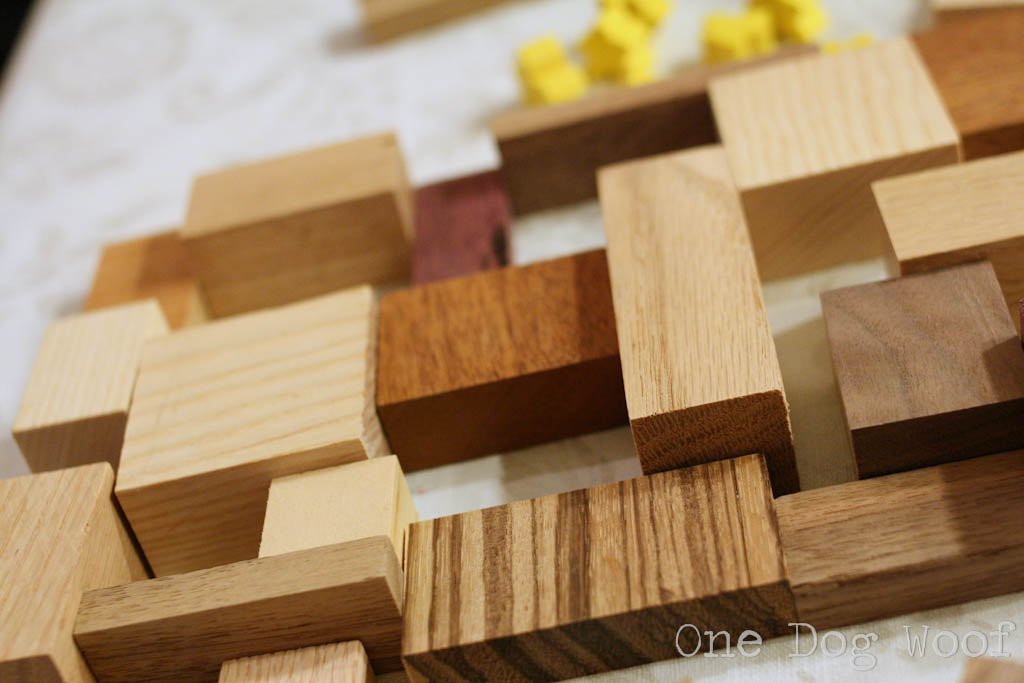
3. Start piecing your wood blocks together. Do it on a table so the inner side is flat. Try to keep enough variation in color, texture, wood grain in the design, and you can also try to piece it so that you never have to depend on an exact sizing. I pieced mine together so each piece sort of depended on the piece before it, and everything was slightly adjustable. Also, it is helpful to create a 90 degree frame to build up against, so you know your panel will be square. Ooh, also remember to take a picture of your panel before you take it apart to start glueing!
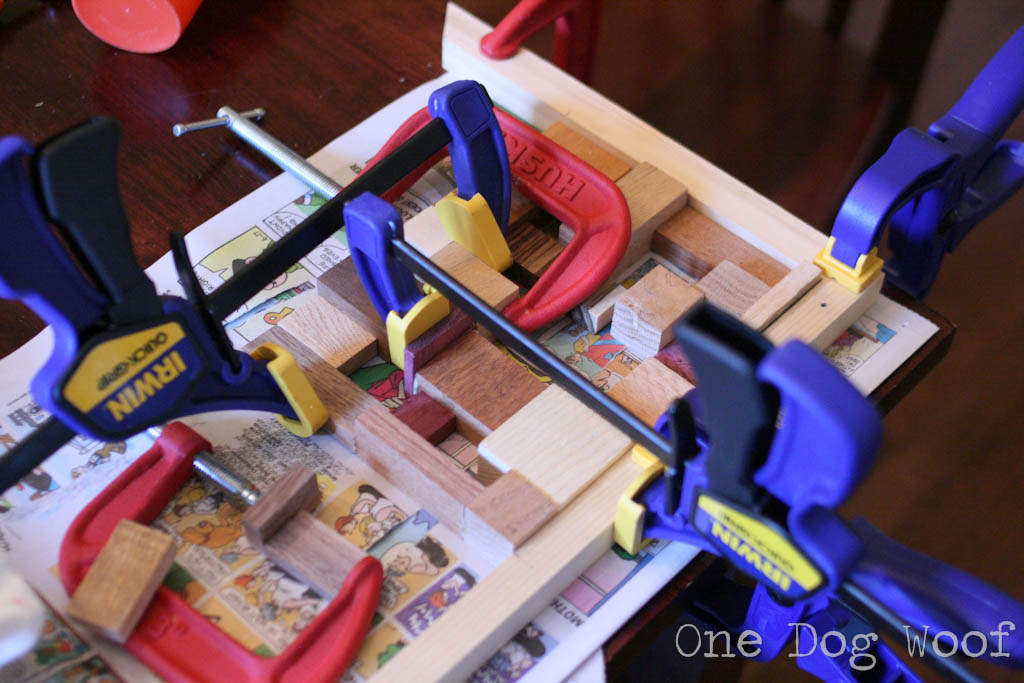
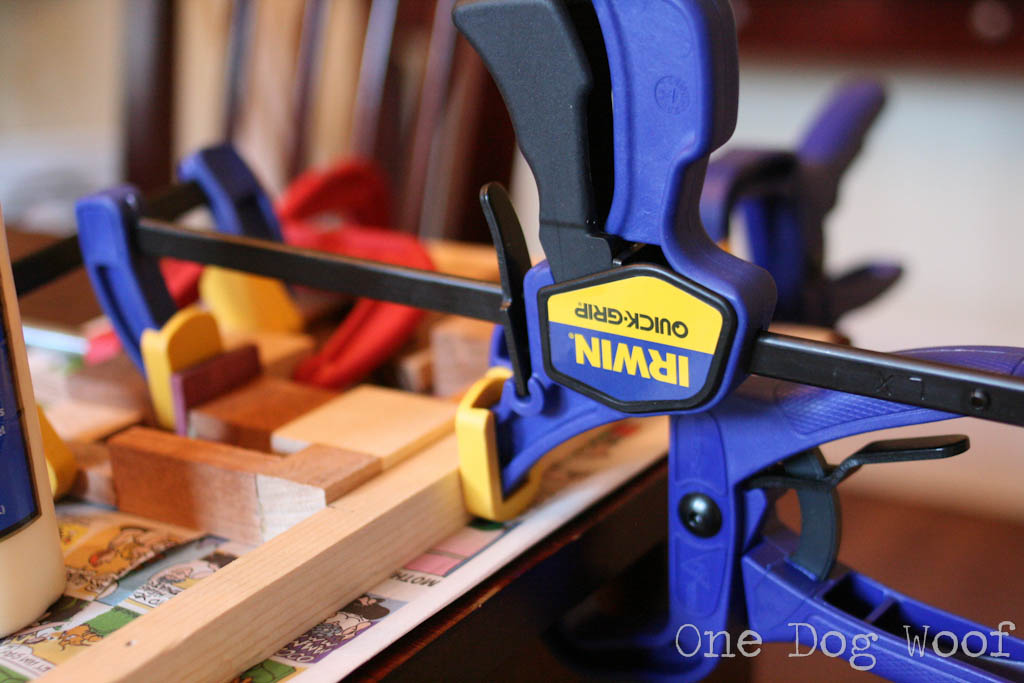
4. Start clamping and glueing! This took up the most time, since for every piece glued together, you need to wait 30 minutes for the glue to dry. I used a combination of several C clamps, quick grips and normal orange clamps to keep everything flat and square. It helps to clamp directly to that temporary frame to keep things square. Oy, how many times will I use the term “square”? Only later did I find out that being “square” is pretty much the stuff of nightmares for wood workers!

5. Once all 4 of your panels are glued together, you’ll need to take the whole panel through the table saw and …square it off! This is the step where you ensure all 4 panels are the same size and are completely flush on all sides.
6. Cut 8 top/bottom frame pieces. These have to be the same width as each panel. Glue the frame pieces to the top and bottom of the panel, and again, use the table saw to make each side flush.
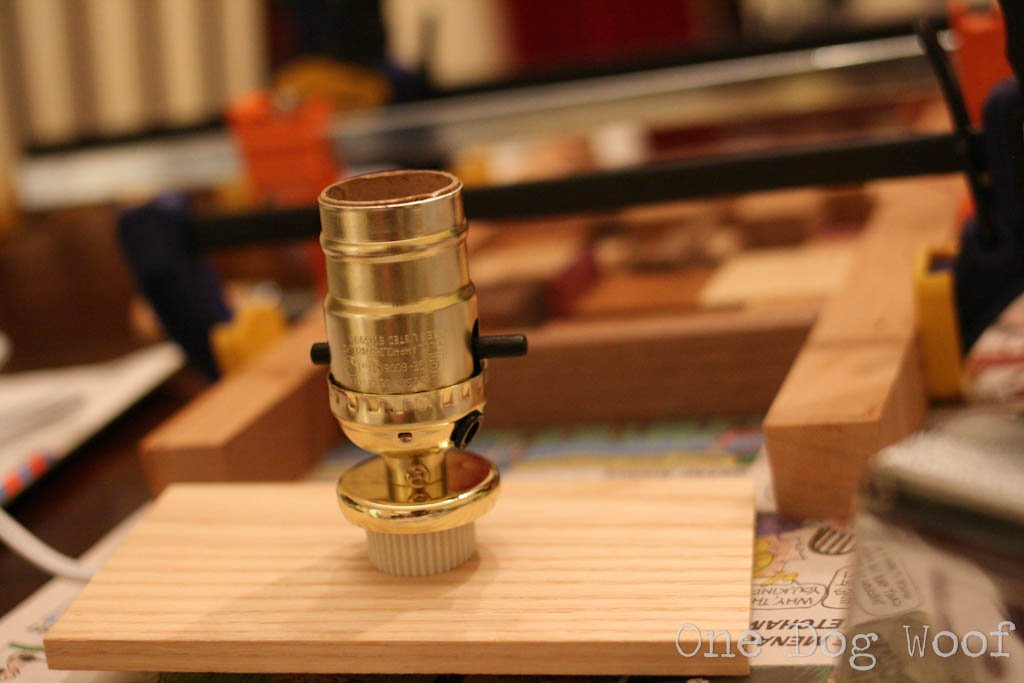
7. Now, time for the lamp! I used a basic lamp kit from a hardware store, and followed the directions on putting it together. The whole assembly was drilled into a wider piece of wood that would sit at the bottom of the lantern, between two facing panels. The lamp base doesn’t need to be thick, and it definitely shouldn’t be thicker than the bottom frame pieces you just glued on. The length of the lamp base is the same width as the panel.
9. Cut your 4 posts. I made them a little thicker – a little over 1 inch square. My panels were approximately 6 inches by 8 inches, with the addition of the top/bottom frames, so my posts were about 14 inches long, I think.
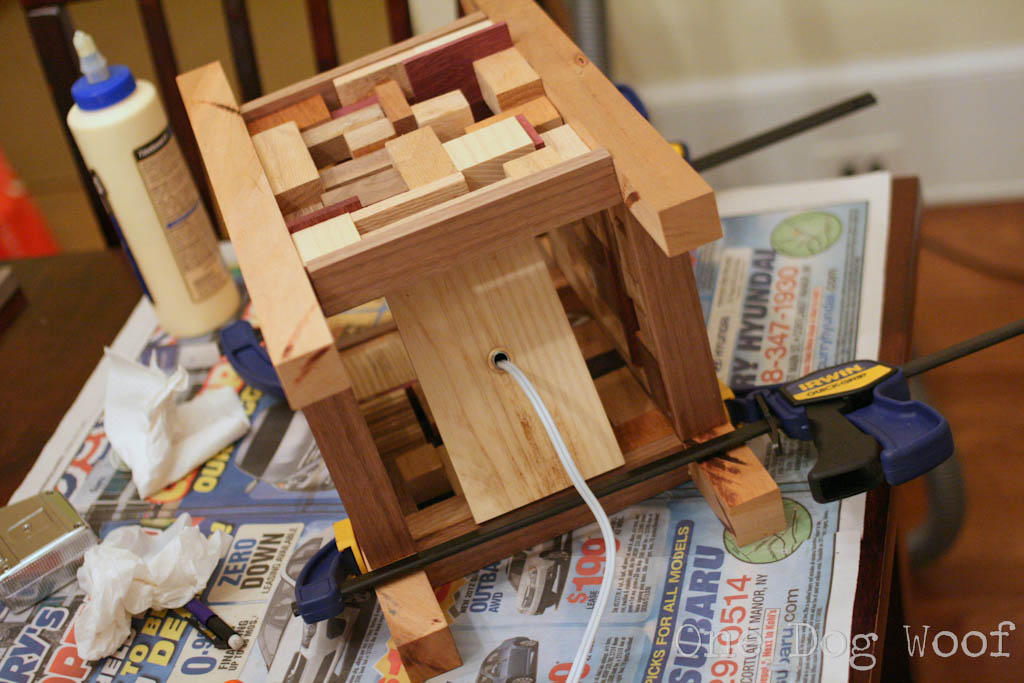
10. Final assembly. Measure on two posts how far up you want a panel to sit, and glue the panel to 2 posts. Do the same with the opposite side. Then, glue the remaining side panels into the structure. It gets a little tricky here because you also need to glue in the bottom piece where your lamp sits. This step is easier with 2 people and a lot of clamps!

11. Once everything is put together, you may need to make minor adjustments due to wobbliness or un-square-ness, sand off some dried bits of glue or add a clear stain. Or just plug it in and turn it on!


that is just beautiful ChiWei! congratulations!!
xo,
Kimberly
Ok – this is just incredible – really!!!
I can’t believe – way over my skill level
I’m your newest follower – would love to have
you follow back!
Hugs,
Suzan
This is Gorgeous! I just love the intricate pattern you created!
Hope you hop over to my under 300 followers blog hop @ http://pinkapotamus.blogspot.com/2012/07/under-300-followers-blog-hop-9.html
xoxo
Amie @ Pinkapotamus
ChiWei, you’re brilliant. You could sell these lamps! Love, love, love it!
It looks so pretty glowing from the inside! I never would have tout to put scraps together that way. Nicely done. 🙂
That should say THOUGHT not tout. Stupid iPad thinking it knows best…:P
So creative. I found this through the Create and Inspire linky party. I linked in a pork and apple curry.
Have a lovely week.
VERY original! I don’t throw away any wood scraps…this totally rocks!!!
How fantastic is that!! Thank you for sharing. Visiting from Chicken Scratch. Would love it if you would share this at my Make it Pretty Monday party at The Dedicated House tomorrow. http://thededicatedhouse.blogspot.com Wishing you a grand week. Toodles, Kathryn @TheDedicatedHouse
Wow, that looks great! Nice idea! Liz
I was just looking at a pile of scraps the other day trying to think of what I could do with them! Great idea. Found you through Salt Tree
That is really stunning!
This is awesome!
Thanks for linking to Take-A-Look Tuesday over at Sugar Bee Crafts – you were featured today!!
–Mandy, http://www.SugarBeeCrafts.com
It’s really beautiful. So fun and simple!
You are so talented! Featuring your lantern on Saturday! XO, Aimee
Thanks for linking us up on the Someday Crafts Facebook page. We will be featuring your project tomorrow on our blog! Stop back in and grab a featured on Someday Craft button for your blog!
Love this lamp, looks like a simple project but I know it wasn’t since it had to be “square”. I’d probably cut 3/4 of all the wood off trying to get it square~by the end,I’d probably have something the size of a Lego. :0) You did a great job. Visiting from It’s Overflowing~Congrats on your feature!
Such a cool lantern! You are so creative and so handy with the tools!
It looks so pretty and so creative idea, Great job
Ha! We have those same clamps. And this turned out fabulously. I’m going to have to share this with my hubby because we have a TON of wood scraps and I could totally see him getting into this. Excellent work!
Warmly,
Lauren
The Thinking Closet
This is beautiful lamp, ChiWei!
beautiful idea