
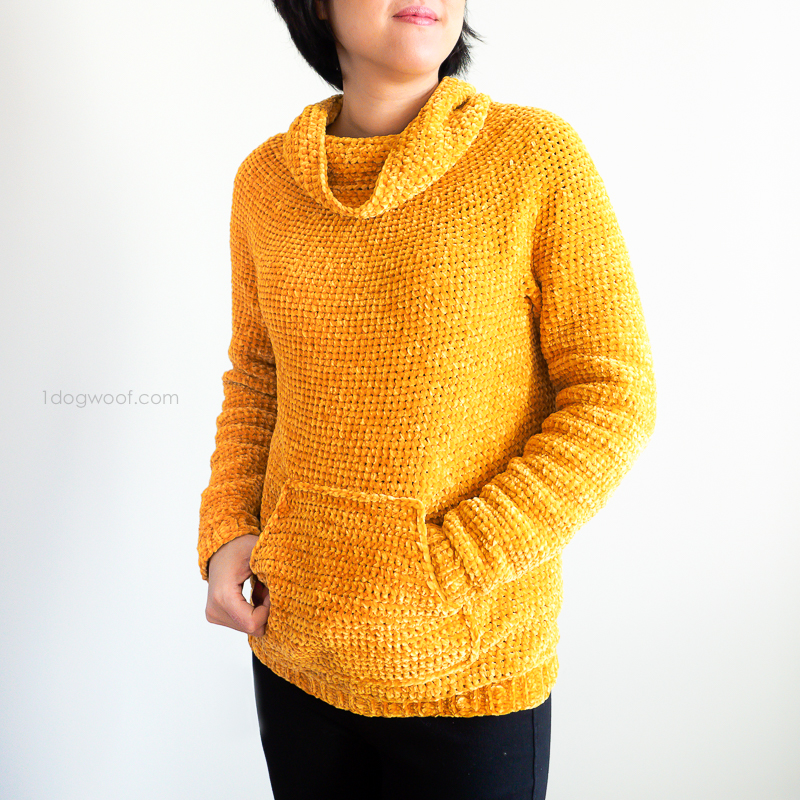
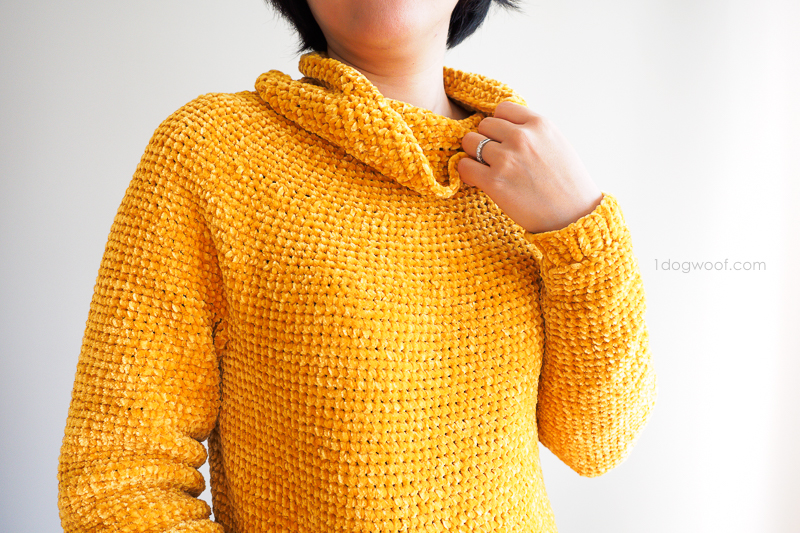
If you could make something to wear for an entire weekend of coziness, this velvet sweatshirt is it. I’m so excited to share this new design, the Mysa Velvet Sweatshirt Sweater, which is far and away my favorite garment design of my career so far. It’s worked in simple single crochet stitches from the bottom up, has a cowl neck and POCKETs, and is made with Lion Brand’s softest yarn, Vel-luxe. I kinda want a whole closet of these sweatshirts now!
I read online that ‘mysa’ is a Swedish word for cozy, or snuggle, similar to the Danish term ‘hygge’. And beyond just the cozy factor, the term can also be loosely translated as being comfortable with, either with someone, or with yourself. I especially love the idea that we can make something with our own hands, that reflects who we are and all our quirks. I thought about what I really wanted in my closet, and it was something not too tight, but not too over-sized, warm, but not scratchy, has a big turtleneck to pull up when I get fidgety, and has pockets for my phone and random toys I pick up around the house. And this is it! This design is all about comfort, being comfortable physically in a warm and cozy-soft sweater, but also comfortable with who you are, in a casual, no-nonsense way.
Yarn
For this velvet sweater, I used Lion Brand’s newest Vel-luxe Yarn. It’s listed as a CYC4, worsted weight yarn, made from 100% polyester. It’s ridiculously soft, doesn’t pill, doesn’t fuzz, doesn’t snag against your hands, and has my favorite cool-touch feel while still keeping you warm. The yarn moves through your hands and hook so quickly and easily, and you can see the stitches clear than you think. Lion Brand’s Vel-luxe line comes in 6 gorgeous colors that are vibrant and sophisticated, and would fit into any handmade wardrobe.
Construction
The Mysa Sweatshirt is worked using single crochets for the body and sleeves, and then half double crochets for the cowl neck. It uses a bottom-up yoke design, where you make the body and both sleeves, and then join them together into a round yoke. The yoke then goes round and round, and slowly decreases up to the neckline. From there, you increase again to create a loose cowl neckline, and work in unseamed rounds. Really, you can work the cowl as high up as you want or until your yarn runs out!
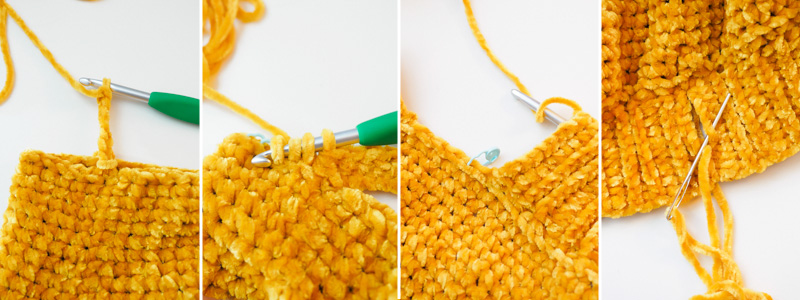
The pattern is written so that you start with the sleeves first. Work up 2 sleeves in seamed rounds; the seam will be on the underside of the sleeve. At this point, you can choose to make the sleeve the recommended length, or shorten/lengthen it to fit your body by omitting/adding rounds in the upper arm. Once you fasten off the sleeves, add stitch markers on either side of the seam. The stitches between your stitch markers are your underarm stitches and will be sewn to the body underarm stitches using a mattress stitch.
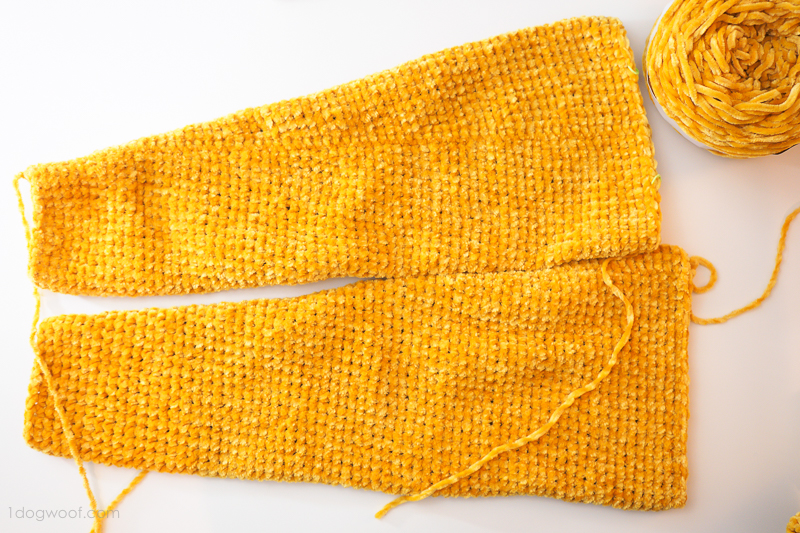
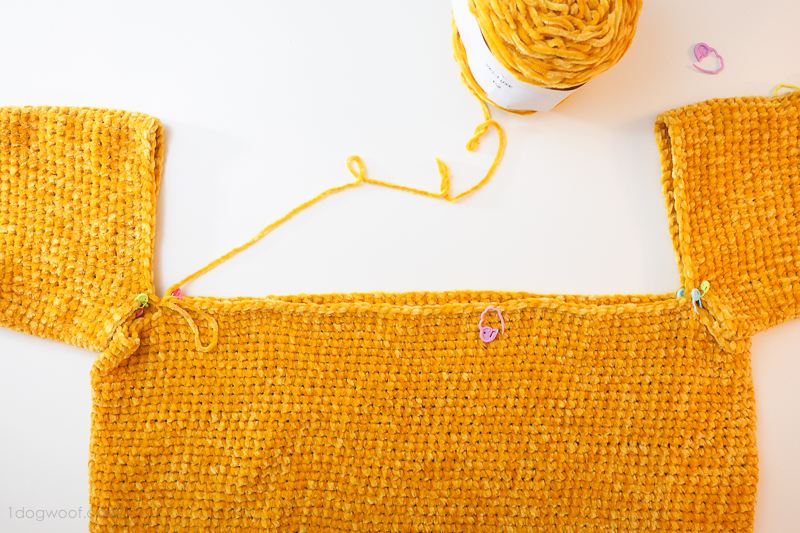
When you’ve completed the sleeves, you can work on the body. This is a great pattern to take on the go, because the body is worked in continuous rounds. If you are comfortable enough to not use stitch markers to identify each round, and can count your rounds at any given point, you can just crochet mindlessly away until you reach the recommended body length. Here, you can also make minor adjustments for the length of your sweater by adding or subtracting rounds to the body before moving on to the yoke.
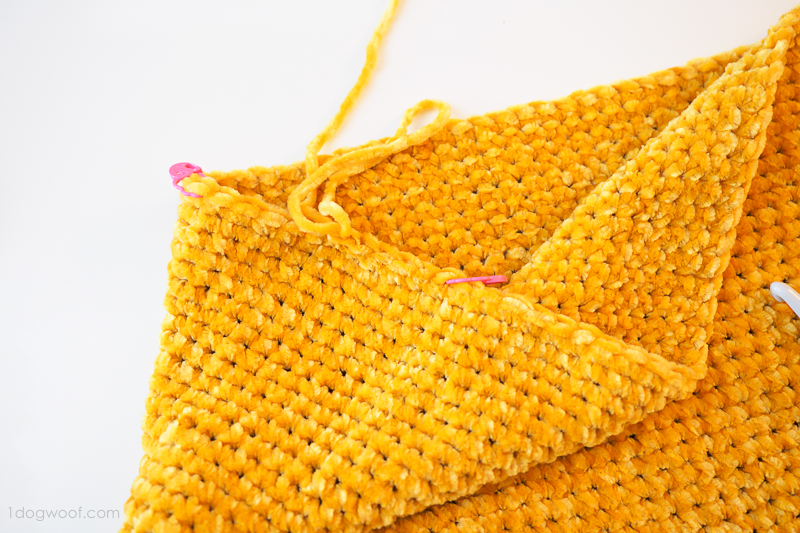
To connect the body to the sleeves, it’s helpful to add stitch markers on the body to identify the underarm stitches.
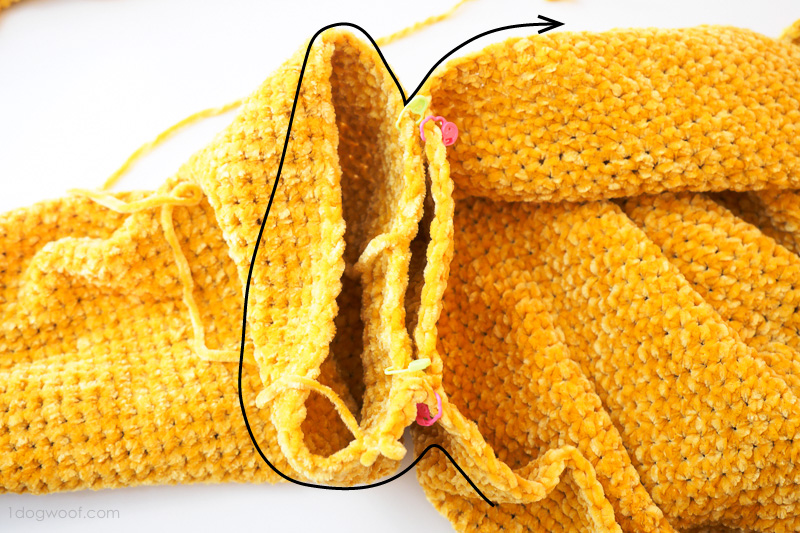
Then, on the first round of the yoke, which starts at the back left shoulder, you’ll work directly into the sleeve on the outside of the stitch marker, go around the sleeve, and single crochet into the body on the outside of that stitch marker, work across the front of the body, single crochet into the right sleeve, work around the sleeve, single crochet into the body while skipping the underarm stitches, and work across the back of the body. That first yoke round might be a bit tricky, but once the round is complete, the rest of the yoke is just single crochet stitches worked in continuous rounds, switching to half double crochets for the cowl.
After the bulk of the sweater is complete, attach yarn at the sleeve/body end and crochet a ribbed cuff around. I found this tutorial gave me the exact look I wanted, and each row of the ribbing was attached to the sleeve/body as you worked, so there was no additional sewing at the end! Here, you can make the ribbed cuff as deep as you’d like by increasing the number of starting chain stitches.
At this point, you can stop and pat yourself on the back for a sweater well made, or make a kangaroo pocket. The pocket is simply worked in rows, and then sewn on to the front of the sweatshirt. An easy alteration to try out is to omit the pocket and use that yarn to make an extra deep cowl. But really, why would you give up pockets?

Pattern Formats
The pattern below gives written instructions for the Mysa Velvet Sweatshirt Sweater in sizes XS to 2XL. If you’d like to print or download the pattern, you can purchase a PDF from my pattern shops. The digital PDF files are beautifully formatted, with all the information given below, but without ads or comments. Photos are included at the end of the file, so you can choose to only print the text instructions on the first few pages, or the entire pattern including photos. If you do decide to purchase a PDF file from any of my pattern shops, you’re supporting me as an independent designer and helping me bring you more patterns and tutorials to try out, so thank you!
——————————————
Purchase the PDF from Ravelry or Add to Your Ravelry queue
Purchase the PDF from Love Crochet
——————————————
Since this design was made specifically for Lion Brand’s Vel-luxe yarn, you can also purchase the entire crochet kit directly from Lion Brand. The kit includes the yarn needed for your size, in the color of your choice, and a print copy of the pattern.
Purchase the Mysa Sweatshirt Sweater Crochet Kit from Lion Brand Yarn
Pattern Time!
Supplies
- Lion Brand Vel-luxe (100% Polyester, 150g/5.3oz, 246yds/225m) – 4 (5, 5, 6, 6, 7) skeins
- K/6.5mm crochet hook for body – main hook
- I/5.5mm crochet hook for cuffs
- stitch markers
- tapestry needle
- scissors
Abbreviations
- st(s) – stitch(es)
- sl st – slip stitch
- ch – chain stitch
- sc – single crochet
- inc – work 2 sc in 1 st
- dec – work 2 sc together
- sm – stitch marker
- BLO – back loop only
- slst2tog – Insert hook into st, pull up loop. Insert hook into next st, pull loop up and through 2 loops on hook.
- slst3tog – Insert hook into st, pull up loop. Insert hook into next st, pull up loop. Insert hook into next st, pull loop up and through 3 loops on hook.
Pattern Notes
- Skill level: Easy (Beginner +)
- Gauge: 12.5 sts and 15 rounds per 4 inches of single crochet with larger hook.
- Sizes: Extra Small (Small, Medium, Large, 1X, 2X). Shown in Small size
- Length (not including Cowl): 25 (25.25, 25.75, 26, 26.5, 27) inches
- Width: 19 (20.5, 23, 24.5, 27.25, 28.75) inches
- Bust: 38 (41, 46, 49, 54.5, 57.5) inches
- Model bust is 34”. Positive Ease = 7 inches
- Pullover is worked bottom up, with cuffs added later
- Body is worked in continuous rounds.
- Sleeves are worked in seamed rounds. You can use the seamless join (https://youtu.be/EettEPzW8uI at 3:40 mark) to help keep your seams straight.
- Cuff tutorial here: https://www.emmyandlien.com/blog/tutorial-crochet-ribbing-htc-slip-stitch
- Foundation single crochet sts are often looser than regular single crochet sts, so you may need to use a smaller hook to achieve the desired gauge.
Mysa Velvet Sweatshirt Sweater Pattern Instructions
SLEEVE (Make 2)
Round 1: With I hook or other to achieve gauge, work 26 (26, 28, 28, 30, 30) foundation sc sts. Join to first sc with sl st.
Switch to K hook.
Round 2-6: Ch 1. Work 1 sc in each st around. Join to first sc with sl st. (26 (26, 28, 28, 30, 30))
Increase Section
Round 1: Ch 1. Work inc, 24 (24, 26, 26, 28, 28) sc, inc. Join to first sc with sl st. (28 (28, 30, 30, 32, 32))
Round 2-6 (5, 5, 4, 4, 4): Ch 1. Work 1 sc in each st around. Join to first sc with sl st. (28 (28, 30, 30, 32, 32))
→ Repeat the last 6 (5, 5, 4, 4, 4) rounds, 7 (9, 9, 11, 11, 13) more times. (42 (46, 48, 52, 54, 58))
→ Work 12 (11, 11, 14, 14, 7) rounds even in sc, for a total of 66 (67, 67, 68, 68, 69) sleeve rounds.
→ Fasten off and weave in ends.
→ Place a sm on the 5th (6th, 6th, 7th, 7th, 8th) st on either side of the sleeve seam.
Sleeve Cuff
See Figure 1.
→ At the bottom of the sleeve, make a sl st with the beginning tail in next st, fasten off tail and weave in ends.
Row 1: With I hook, join yarn at sleeve seam and ch 7.
Row 2: Starting from 2nd ch from hook, work 6 hdc. Join cuff to sleeve with slst3tog. Turn.
Row 3: Do not ch. Sk 1, work 6 sl st in BLO to end. Turn.
Row 4: Ch 1. Work 6 sl st in BLO. Join cuff to sleeve with sl st. Turn.
Row 5: Do not ch. Sk 1, work 6 sl st in BLO to end. Turn.
Row 6: Ch 1. Work 6 hdc in BLO. Join cuff to sleeve with slst3tog. Turn.
→ Repeat Rows 3-6 around the sleeve.
→ Try to end at Row 5 in the repeat. Cut yarn, and pull through last st. Use mattress st to seam up the cuff and weave in ends.
BODY
Round 1: With I hook or other to achieve gauge, work 118 (128, 144, 154, 170, 180) foundation sc sts.
Switch to K hook.
Round 2: Join and work sc in each st around.
Round 3-58: Continue to work 118 (128, 144, 154, 170, 180) sc around continuously (do not join rounds) until body is approximately 15 inches long (57 more rows)
Start of yoke: Place sm on the last st of Row 58. This is the start of the round, located at the back left shoulder. Sk next 8 (10, 10, 12, 12, 14) sts and place sm on 9 (11, 11, 13, 13, 15) st. These are the left side underarm sts. Count 49 (52, 60, 63, 71, 74) sts and place sm on the next st. Sk next 8 (10, 10, 12, 12, 14) sts and place sm on 9 (11, 11, 13, 13, 15) st. These are the right side underarm sts. 10 (12, 12, 14, 14, 16) sts each underarm.
Round 1: Join to sleeve with sc and continue working 1 sc in each of next 31 (33, 35, 37, 39, 41) sts around sleeve. Join to body with sc and continue working 1 sc in each of next 48 (51, 59, 62, 70, 73) sts along front of body. Join to sleeve with sc and continue working 1 sc in each of next 31 (33, 35, 37, 39, 41) sts around sleeve. Join to body with sc and continue working 1 sc in each of next 48 (51, 59, 62, 70, 73) sts along back of body. (32 (34, 36, 38, 40, 42) left sleeve sts, 49 (52, 60, 63, 71, 74) front body, 32 (34, 36, 38, 40, 42) right sleeve sts, 49 (52, 60, 63, 71, 74) back body, for 162 (172, 192, 202, 222, 232) sts total.)
Next 7 (8, 8, 8, 8, 8) rounds: Work 1 sc in each st around. (162 (172, 192, 202, 222, 232))
Dec Round 1: Work 1 sc, [3 sc, dec] 16 (17, 19, 20, 22, 23)x, 1 sc, [3 sc, dec] 16 (17, 19, 20, 22, 23)x. (130 (138, 154, 162, 178, 186))
Next 8 (8, 8, 9, 9, 9) rounds: Work 1 sc in each st around. (130 (138, 154, 162, 178, 186))
Dec Round 2: Work 1 sc, [2 sc, dec] 16 (17, 19, 20, 22, 23)x, 1 sc, [2 sc, dec] 16 (17, 19, 20, 22, 23)x. (98 (104, 116, 122, 134, 140))
Next 6 (6, 7, 7, 8, 8) rounds: Work 1 sc in each st around. (98 (104, 116, 122, 134, 140))
Dec Round 3, Extra Small Size only: Work 1 sc, [dec, 3 sc] 9x, dec, 2 sc, [dec, 3 sc] 9x, dec, 1 sc. (78)
Dec Round 3, Small Size only: Work [2 sc, dec] 26x. (78)
Dec Round 3, Medium Size only: Work 1 sc, [dec, 2 sc] 10x, [dec, 1 sc] 11x, [dec, 2 sc] 10x, dec. (84)
Dec Round 3, Large Size only: Work 1 sc, [dec, 2 sc] 4x, [dec, 1 sc] 29x, [dec, 2 sc] 4 times, dec. (84)
Dec Round 3, 1X Size only: Work [1 sc, dec] 44x, 2 sc. (90)
Dec Round 3, 2X Size only: Work [dec, 1 sc] 20x, [dec] 10x, [dec, 1 sc] 20x. (90)
All Sizes:
Next 4 (4, 5, 5, 6, 7) rounds: Work 1 sc in each st around. (78 (78, 84, 84, 90, 90))
Dec Round 4: Work [1 sc, dec] 26 (26, 28, 28, 30, 30)x (52 (52, 56, 56, 60, 60))
Cowl
Round 1: (Start of Cowl) Work [1 hdc, 2 hdc in next st] 26 (26, 28, 28, 30, 30)x. 78 (78, 84, 84, 90, 90))
Round 2-12: Work 1 hdc in each st around.
→ Work hdc to middle of back, then work 1 round of sc. Fasten off with invisible join and weave in ends.
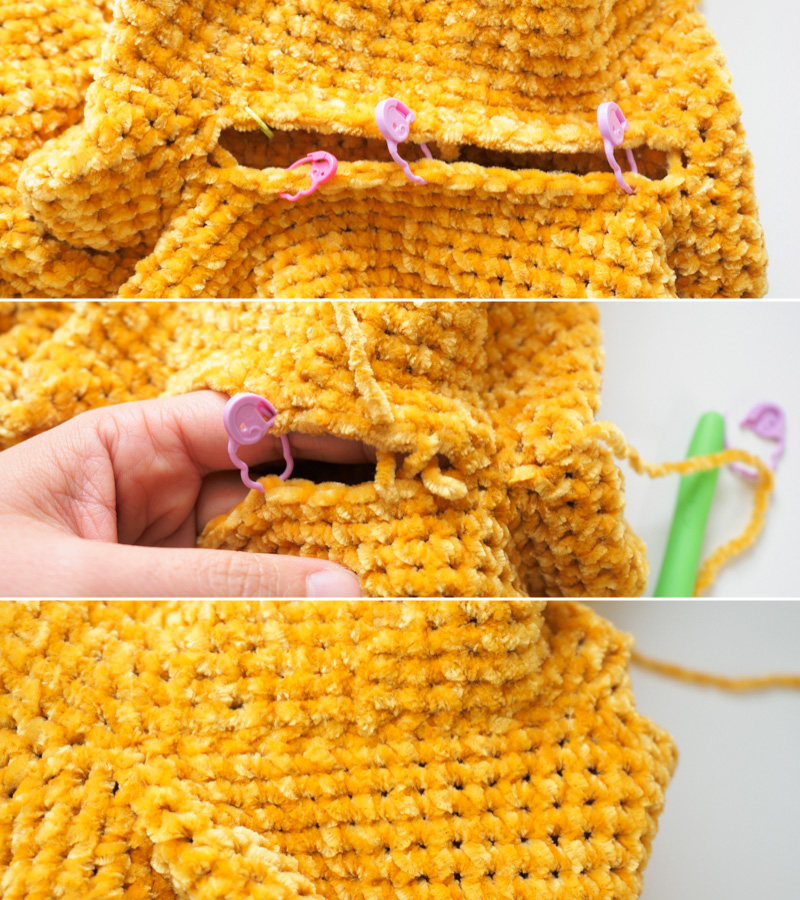
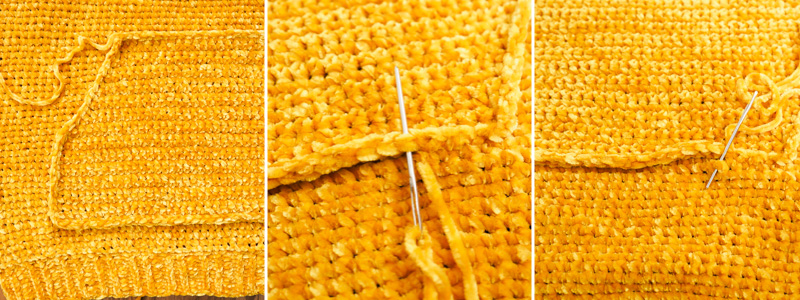
CLOSING UNDERARM
See Figure 2.
→ Line up sm of body and underarm.
→ Use a separate piece of yarn and mattress st to close the gap.
→ Fasten off and weave in both ends.
BOTTOM EDGING
See Figure 1.
→ At the bottom of the sweater, use beginning tail to even out the round and weave in ends.
Row 1: With I hook, join yarn at seam and ch 11.
Row 2: Starting from 2nd ch from hook, work 10 hdc. Join Bottom Edging to Body with slst3tog. Turn.
Row 3: Do not ch. Sk 1, work 10 sl st in BLO to end. Turn.
Row 4: Ch 1. Work 10 sl st in BLO. Join cuff to sleeve with slst2tog. Turn.
Row 5: Do not ch. Sk 1, work 10 sl st in BLO to end. Turn.
Row 6: Ch 1. Work 10 hdc in BLO. Join Bottom Edging to Body with slst3tog. Turn.
→ Repeat Rows 3-6 around the body.
→ Try to end at Row 5 in the repeat. Cut yarn, and pull through last st. Use mattress st to seam up the cuff and weave in ends.
POCKET (Optional)
See Figure 3.
Row 1: With I hook or other to achieve gauge, work 42 foundation sc sts.
→ Switch to K hook.
Row 2-12: Ch 1. Work 1 sc in each st around. Turn. (42)
Row 13: Ch 1. Work 1 dec, 38 sc, 1 dec. Turn. (40)
Row 14: Ch 1. Work 1 dec, 36 sc, 1 dec. Turn. (38)
Row 15: Ch 1. Work 1 dec, 34 sc, 1 dec. Turn. (36)
Row 16: Ch 1. Work 1 dec, 32 sc, 1 dec. Turn. (34)
Row 17: Ch 1. Work 1 dec, 30 sc, 1 dec. Turn. (32)
Row 18: Ch 1. Work 1 sc in each st around. Turn. (32)
Row 19: Ch 1. Work 1 dec, 28 sc, 1 dec. Turn. (30)
Row 20: Ch 1. Work 1 sc in each st around. Turn. (30)
Row 21: Ch 1. Work 1 dec, 26 sc, 1 dec. Turn. (28)
Row 22: Ch 1. Work 1 sc in each st around. Turn. (28)
Row 23: Ch 1. Work 1 dec, 24 sc, 1 dec. Turn. (26)
Row 24: Ch 1. Work 1 sc in each st around. Turn. (26)
Row 25: Ch 1. Work 1 dec, 22 sc, 1 dec. Turn. (24)
Row 26-27: Ch 1. Work 1 sc in each st around. Turn. (24)
→ Work sl sts evenly around all sides of pocket.
→ Fasten off with long tail.
→ Line up pocket approximately 3-4 rounds above the border, centered on the body.
→ Use tail and mattress st to sew top edge to body.
→ Use a long length of yarn or string and mattress st to sew bottom and sides to body. Leave angled/shaped section unsewn (Rows 13-27).
You’re all done! I hope you enjoy making this sweatshirt sweater, and even more enjoy the feeling of curling up in it on a rainy day, knowing you created that feeling of comfort all by yourself. High five!
If you like this pattern, you may also like my Wonderland Cardigan, another simple and snuggle-rific design to cozy up to!


Love the look of this pattern. I am planning to get the kit, but wondered why only 3 of the 6 colors of Vel Luxe are options with the kit. Is there any way you can ask Lion Brand about this – I would love to do this in Dusty Rose, but that isn’t an option. Help? I’m getting the pattern for sure if I can’t get the kit in the color I want. Love the look and ease of this pattern. Should go quickly, I would think. Thanks for sharing your creativity.
this is so beautiful love your patterns you are right this one is great can wait to make it
Sweatshirt is lovely, I don’t think I can access the velvet wool here in Australia yet. Lions brand is beautiful wool and have used boardwalk to make your wrap.
Awesome pattern! Thanks for sharing! I’ve never used the velvet yarn before. It looks so soft.
Hi, I love the look of the sweatshirt! Two questions – do you recommend the pattern for my second ever sweater? Easy enough for me? And secondly, is there a way to make the neckline less slouchy? Thanks so much for beautiful work.
One more questions! What size are you wearing in picture? I was thinking of sizing up to make it extra cozy? Thank you again, I really want to purchase kit from Lion Brand soon and get started!
Amazing! i can’t wait to try and make one for myself.. i love these kind of sweaters and looks like yours is the perfect fit for my taste!!!
I always want to buy this velvet yarn! Thank you for sharing the pattern!
Increase Section
Round 1: Ch 1. Work inc, 24 (24, 26, 26, 28, 28) sc, inc. Join to first sc with sl st. (28 (28, 30, 30, 32, 32))
Round 2-6 (5, 5, 4, 4, 4): Ch 1. Work 1 sc in each st around. Join to first sc with sl st. (28 (28, 30, 30, 32, 32))
*→ Repeat the last 6 (5, 5, 4, 4, 4) rounds, 7 (9, 9, 11, 11, 13) more times. (42 (46, 48, 52, 54, 58))*
hi, can you help me understand the pattern count? it says 42(46, 48, 42, 54, 58) if you repeat the last 5th round 9 more times how come the same rounds have different counts? anticipating your response. thank you! <3
Hi I really wanted to make this, but I wasn’t a fan of the collar, is there a way to not add it or would it mess up the patten?
In the arm section at the end of round 1, do you join or turn?
I am wondering the same thing. I don’t get how the counts work. After the increase round 6, do you increase each round? If so, how much and when?
How do you get a straight seam on the arm mine veers off to the right.
Kadie,
I have the same problem. My sleeves twisted and so did the body of the sweater. I’m not sure what I did wrong, but right now I’m attempting to correct it by blocking it. It may help a little bit but I’m not optimistic about it solving the problem completely. It’s going to take a while to dry so I won’t know for a couple days. Did you figure out what was happening with yours?
Joan
I am wearing size S 🙂
Hi Katrin, I’m sorry this is confusing. I’ll see if I can clear this up. Let’s say you’re working Medium. You’ll work Round 1, where you increase by 2 sts, and then work the next 4 rounds without increasing. Then for the repeat, it means you’ll work the last 5 rounds (increasing round + 4 non-increasing rounds) 9 times. So you’ll have increased 2 sts each of those 9 times, which is an increase of 18 sts overall. By the end of the repeat, your stitch count is 30 + 18 = 48 sts. I think the confusing thing is that you’re not just increasing a single round, you’re increasing a block of rounds – you’re increasing 2 sts every 6 (5, 5, 4, 4, 4) rows, however many times. I hope that helps!
Hi Gillian, you can add it or not, or improvise your own. I think you can stop right before the collar and add your own crew neck.
The sleeves are joined at the seam, not turned. I will add that note in!
Hi Linda,
You won’t increase every round. You’ll increase every 6th, or 5th or 4th round, as indicated. Each time you increase, it is only by 2 sts, one at the beginning and one at the end of the round.
If you find that your seam wanders, you can try the seamless join (https://www.1dogwoof.com/perfect-crochet-stripes-without-cutting-yarn/). You can see this method here (https://youtu.be/EettEPzW8uI) at around the 3:40 mark.
Hi Chiwei,
Oh my gosh that probably would have helped a lot. I couldn’t do anything about the twist after it was all completed. I put the pocket on and that helped to mask it somewhat. What I should have done was ignore the underarm marker and reconfigured them so there was no twist in the body. Thanks for your help. I do love the sweater. It is amazingly comfortable. Just what I wanted.
Joan
I love the look of this sweater. Can’t wait to try my hand at it
I love this pattern! Thank you so much!
I do have one question though. How far up on the arm does the sleeve go before you start the yoke? I’m trying to figure out if I need to add or remove rows on the sleeve.
Take Care!
I could be wrong but you could just not do the cowl neck that is the slouch part right???
Agreed I absolutely love the simple look of a comfy crocheted item
I wonder that, too, because my sleeves are already very long, without even doing the last repeat. (I did do a gauge swatch.) If I add another 6 or 7 or whatever inches for the yoke, a monkey could wear it. It would be helpful to have a diagram with measurements. Maybe there is a diagram in the paid pattern? I didn’t buy it, but if I knew there was a diagram with measurements, I would buy it. At this point, I’ve got the two sleeves and 15″ of body, and hesitating to continue. 🙁
Hi Robin, yes there is a measurement schematic in the paid PDF.
Though I have been crocheting for awhile, I still consider myself a beginner. I love the look of your pattern and am working on it right now.
You say this pattern is for beginners, but its difficult to understand and follow your increase and decrease instructions. Its as though you assume we have followed this type of instruction before (no offense intended) but I have not. Most of my patterns are detailed and this pattern seems as though it was written with just enough words to get the instructions down. (No offense meant, again). Does the pdf go into more detail? If it is written with clearer, more detailed instructions, then I’ll buy it. Thank you for taking the time to read this.
so lovely😍, thanks for sharing, I hope I can make the same sweater.
Some experience is necessary with making garments, so I’ve classified it as Beginner+ / Easy. The PDF has the same instructions, just without the ads! I don’t have any videos on increasing and decreasing with this style of crochet pattern, but there are a number of videos on YouTube that you could look up!
Should the gauge swatch be in made in the round like the pattern or flat? Thanks.
Because it is worked in the round the gauge swatch should also be done in the round 🙂
Round 2-6 (5, 5, 4, 4, 4): Ch 1. Work 1 sc in each st around. Join to first sc with sl st. (28 (28, 30, 30, 32, 32))
→ Repeat the last 6 (5, 5, 4, 4, 4) rounds, 7 (9, 9, 11, 11, 13) more times. (42 (46, 48, 52, 54, 58))
→ Work 12 (11, 11, 14, 14, 7) rounds even in sc, for a total of 66 (67, 67, 68, 68, 69) sleeve rounds.
Do these rows continue to increase ? Or does it stay at 28 stitches ( for small) all the way through
It continues to increase. At the end of the line for how many times you repeat the previous rounds are the new stitch counts.
How do you wash and dry this yarn?
Lion Brand recommends machine wash and lay flat to dry. I would also suggest putting it in a delicates bag if you are putting it in the washing machine.