
I received free product for this post, but all opinions, photos and disasters in the craft room are solely my own.
I was so excited to get the chance to play with some new product recently! Amy of Mod Podge Rocks fame, has a new product line coming out to be sold at Michaels, and I got first dibs on giving these Mod Podge Peel and Stick stencils and Podgeable glitter a try. Since I’m not very experienced (read: not at all experienced) in using glitter or stencils, I figure I’d stick with an easy project, just a simple greeting card.
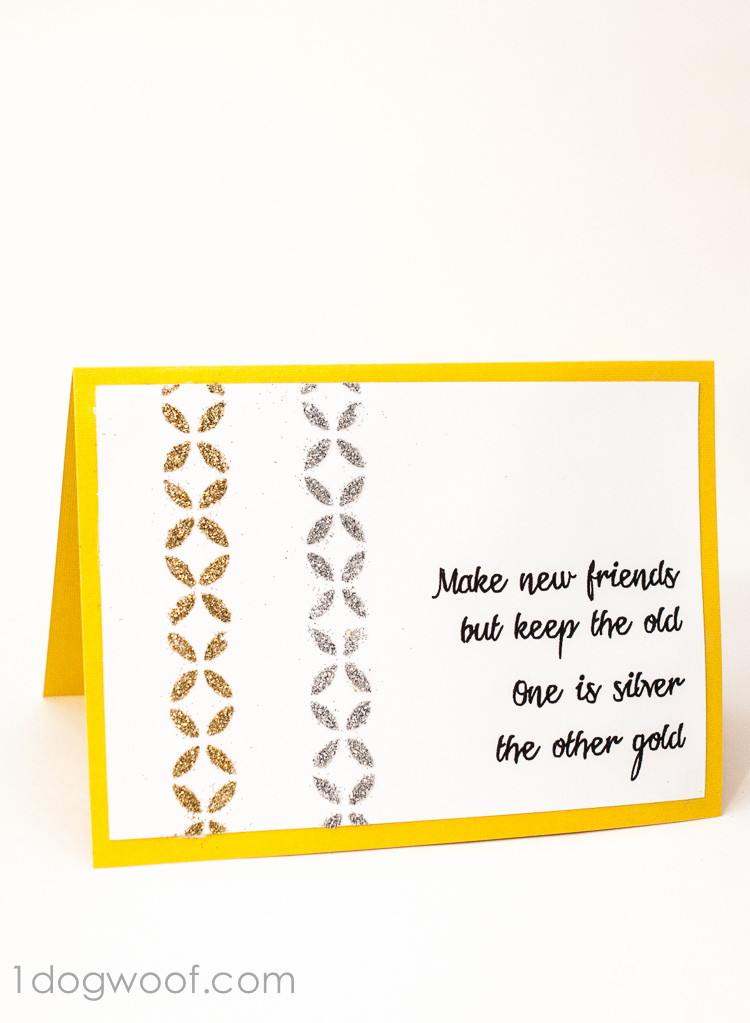
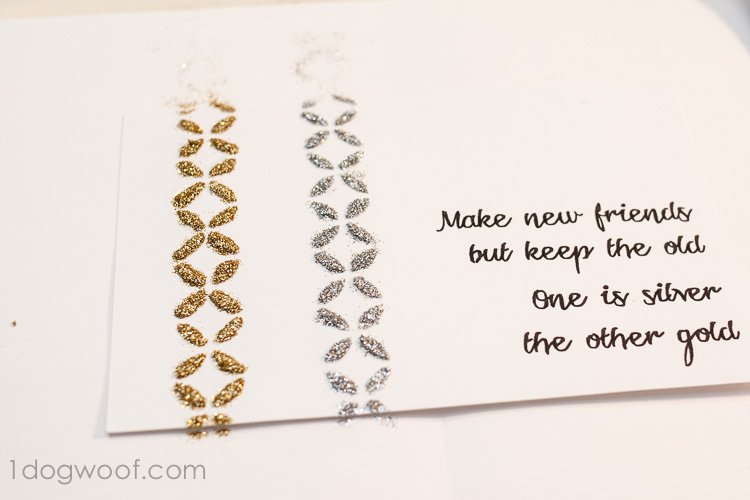
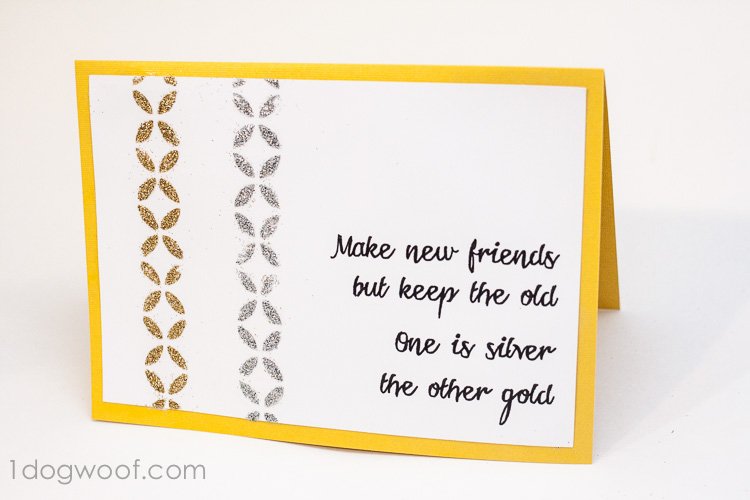
I wanted to use gold and silver glitter, and the first quote that popped into my head is this one about friendship. Maybe it’s the only quote that combines gold and silver, who knows? Growing up, my family always moved around a lot, so I never built up those “we’ve known each other since kindergarten” type of friendships. However, with the advent of Facebook and email, I have now been able to get back in touch with some old friends, so I can say “we’ve known each other for a long long time”, and share fond memories of school busses and high school chemistry.
And now, I’ve made such great friends through blogging, so I can really say that I have both “silver” friends and “gold” friends, and they all hold their own special places in my heart!
Ok, on to the crafting fiasco. Fiasco you say? Why yes, indeed. My inexperience with the mediums meant I went through a few craft fails before getting something I could even photograph. But hey, my fails are your gain, right?
The stencils themselves are fairly small, so it’s more appropriate for small projects. The instructions basically say to apply Mod Podge to the stencil onto your project, peel the stencil off, and then apply glitter. The Mod Podge Podgeable Glitter comes in a little “poofer” with a small nozzle, so you can more accurately poof your way to awesomeness. I sort of poofed my way into sparkly mess, so here’s a few tips I learned along the way.
#1. The stencil is small, so if you’re not going to use all of it, it’s best to tape it off, lest you get Mod Podge in areas where no Mod Podge should land.

#2. Don’t be afraid of the Mod Podge. Load it on. The instructions recommend the use of their spouncer, which works well, but I also just used my finger to dab the Mod Podge onto the stencil. You want a nice thick layer of Mod Podge for the glitter to adhere to.
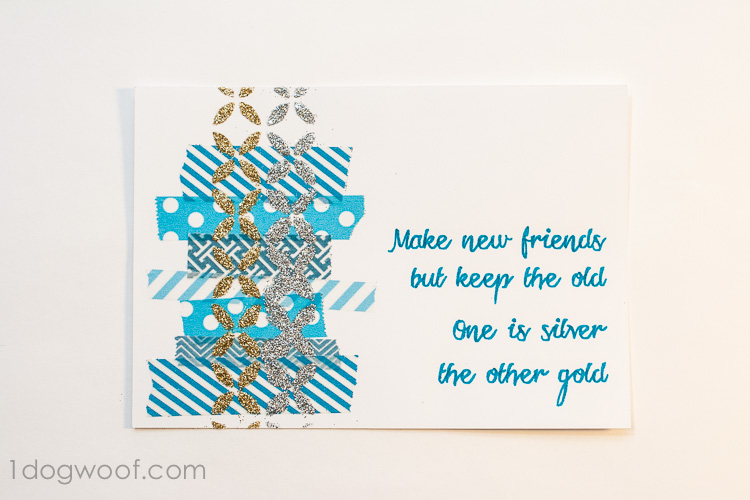
#3. DO NOT peel the stencil off right after applying the Mod Podge. I found that the Mod Podge tends to seep under the stencil (the stencil has adhesive, but doesn’t seal perfectly), so if you apply glitter after peeling the stencil off, you get VERY fuzzy edges. Sometimes, you lose the edge altogether. So, apply the glitter with the stencil in place. In the picture below, I applied the silver glitter after removing the stencil – notice how much messier it is than the gold glitter? Oh, and don’t mind the washi, that was just me experimenting.
#4. Don’t be afraid of the glitter. Poof and poof and cover every bit of the stencil. Create little mounds if you have to. It was hard to see whether I had used enough glitter, so I just loaded it on, and the results were better.
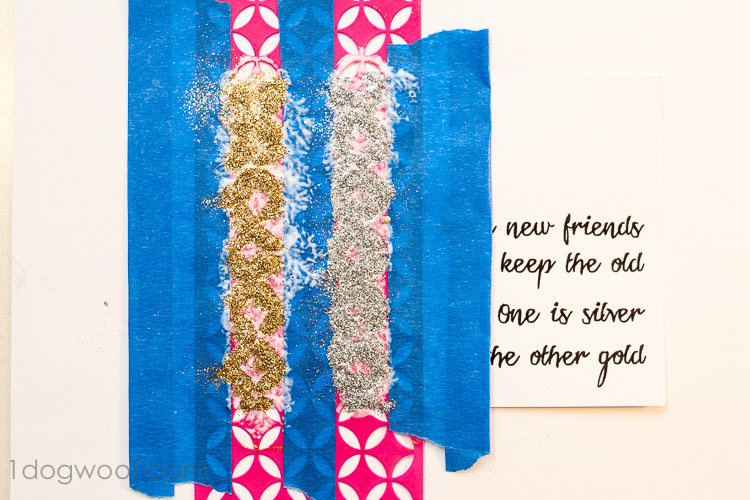
#5. Once the glitter is applied, very carefully peel and remove the stencil. Now you really should have little mounds of glitter. Leave it alone and let it dry. Once dry, brush off the excess glitter and you should have fairly clean lines.
Since I don’t use glitter often, I’m not sure if I should be expecting crystal clean lines or whether just the act of using glitter means I’ll have little shiny sparkles leftover everywhere – on my card, on my hands, on my desk, in my hair, on my pants, on the baby’s face … Still, I really like the shape of the stencil and amount of detail you can get by using the stencil, Mod Podge and glitter together.
Would you like to give it a try? Amy is generously giving away 1 stencil from the collection to one of my readers. The giveaway is for US only, and the stencil will be chosen at random, unless you have a strong preference, at which point you should leave a comment specifying the design of your choice. Also, please allow 1-2 weeks for shipping. Ok, on to the Rafflecopter!
If you’re like me and enjoy making paper crafts, check out some of my other paper projects, or if you haven’t done so already, follow along on my paper crafts board on Pinterest!
Apple Paper Punch Greeting Card
Simple Chocolate Valentine using Silhouette Sketch Pens

How to Make a Paper Dodecahedron

Happy Glittering!


I think this process would be wonderful to make thank you cards to have on hand throughout the year!
That’s a neat product. I love to make cards, so I’ll have to look for it in the stores. Your card came out very nice. I usually avoid glitter because it’s messy, too.
These are neat and a great idea for paper crafting. I would use the stencil to make cards for friends and family. I could also use it in my dollhouse miniature creations.
WOW your cards turned out fabulous!
Awesome, I love! You did such a great job – you are GOLD!! 😀
They say that glitter is the herpes of the craft world. And they are right. BUT, I love it anyway. It’s like a reminder of awesome craftiness. I would love the mod/floral stencil you used, or the ket stencil!
So lovely, ChiWei! What a great little card to send for Valentine’s Day. I can’t wait to try out these Mod Podge stencils!
Lovely card!
Love your new twist with the stencils, mod podge and glitter. Has given me an idea for a card. Thank you
Ooh and the wood grain would look awesome on a birdhouse/key cupboard I am in the middle of
Oh just saw it open to US people only, Im in the UK :(. Nevermind at least I can still be inspired by your ideas
What a beautiful card! Love the quote!
Great project and great tips on how to use the new stencil! thanks.
Thanks for all the tips. It’s great to know what works and what doesn’t when trying a new product. My favorite design is the one used in the demo, four petal flower?
There are so many things to do with these stencils. I love that Amy has her line. I don’t have a specific one that I would like.
Oh my gosh, you made me laugh out loud! But just think, after a while, you’ll just live in an environment infused with glitter all around 🙂
Thanks Melanie!
Thanks Tara!
Thanks Amy!
Thank you Marilyn!
Ooh, these would be great for dollhouse creations!
They are sold at Michaels, Kate. We all deal with the mess of glitter, though, don’t we? It just makes things pretty 🙂
That’s a great idea! I’m always short on cards right when I need them!
I wonder if it would work as well with glitter glue ?