
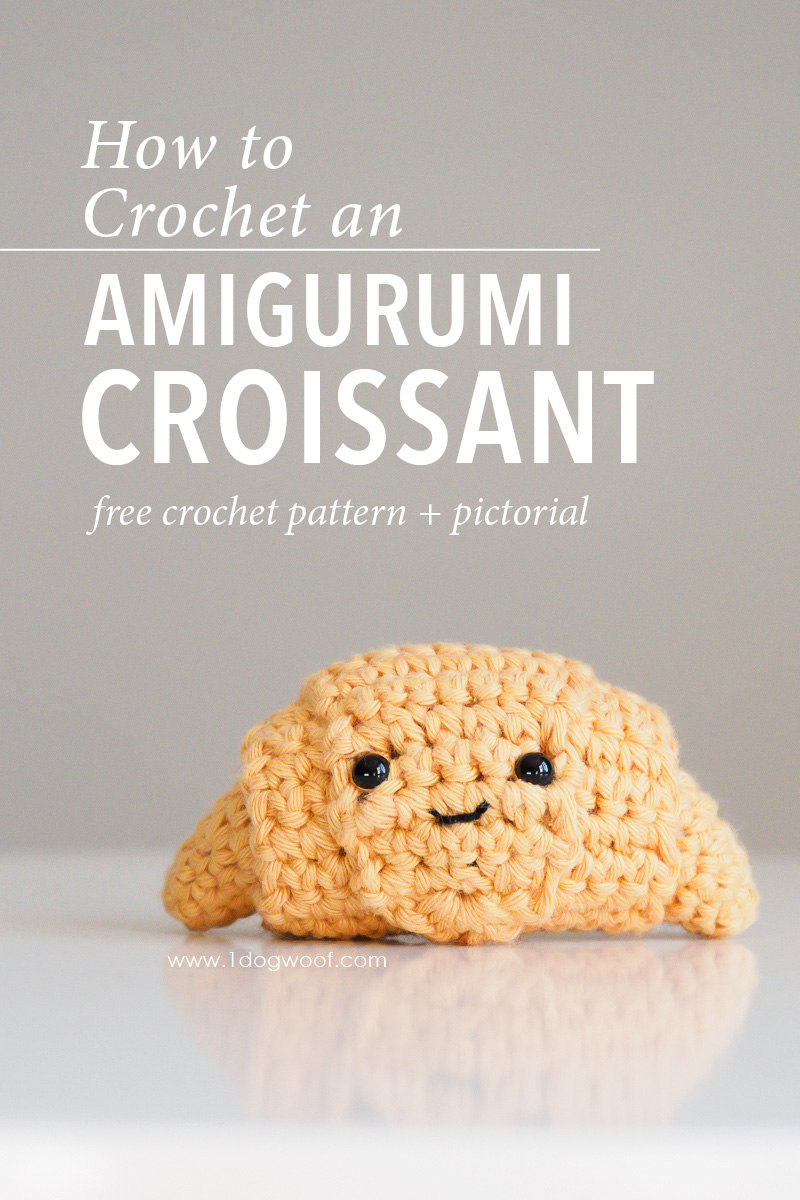
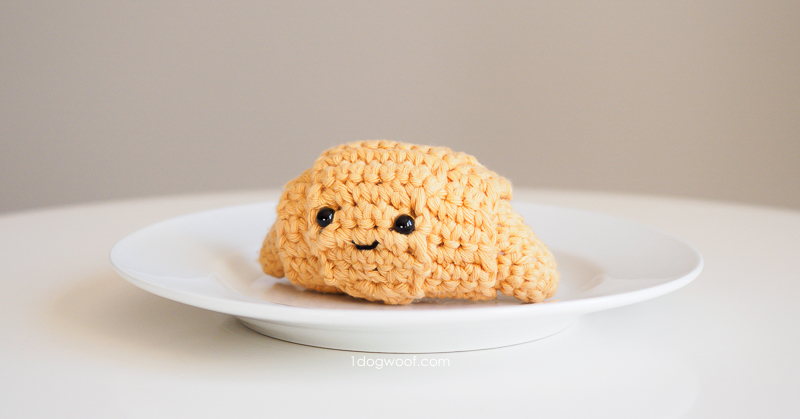
There’s just something about amigurumi and kawaii food that is just too cute to put into words. I’m so pleased with how this chubby amigurumi croissant came out!
——————————————
Purchase the PDF from Ravelry or Add to your queue
——————————————
The design of this amigurumi croissant definitely took a bit of thought, especially the body. I couldn’t figure out how to make a perfect crescent shape with a chubby middle, so in the end, I made two ends and sewed them together. The seam is hidden under the top roll piece that is wrapped around the body, so all you see is the flaky layers of the croissant!
For the most part, the stitches in the croissant are pretty basic. You either work in continuous rounds for the body pieces, or in rows for the top roll. It’s the assembly that gets tricky:
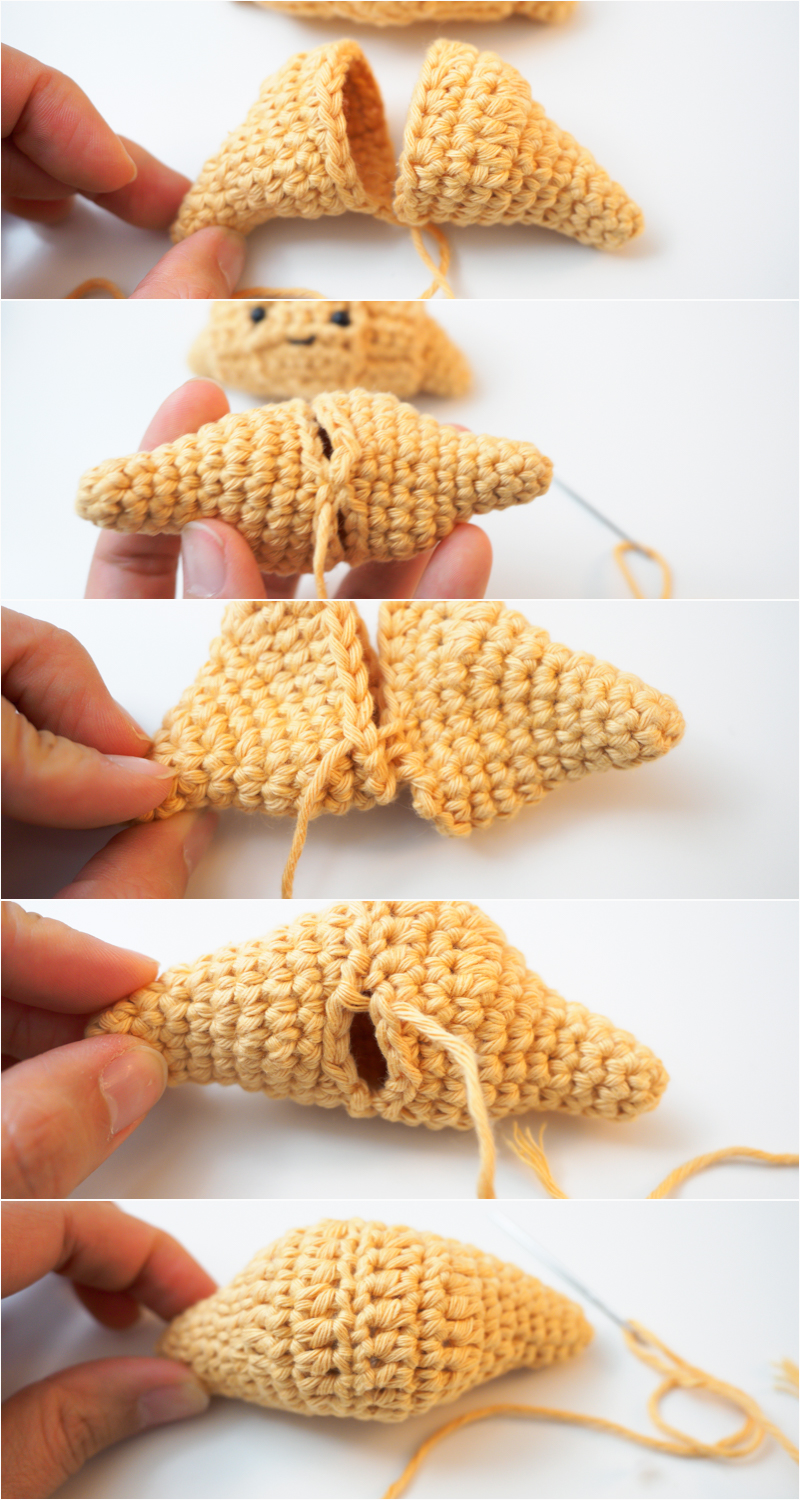
First, you’ll need to complete the body. Make 2 identical body pieces and fit them together to give you the characteristic curve of the croissant. You’ll want to make sure the “horns” are both curving in the same direction! The 2 “horns” are sewn together with a mattress stitch or whatever stitch you prefer. No one will see the stitching there. When you’ve sewn about 80% around, make sure to stop and stuff the amigurumi. Do not overstuff the body because otherwise, you won’t be able to get the roll to wrap around the body enough times.
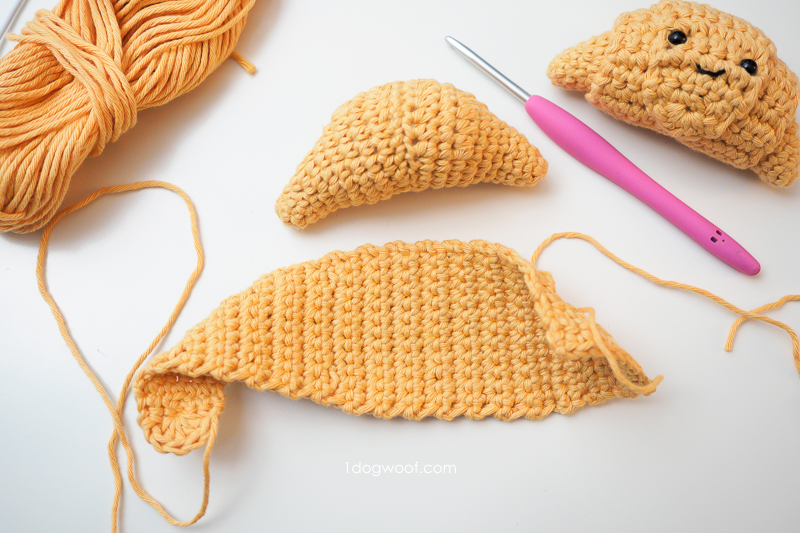
Next, make the long triangle shaped top roll piece (I have no better name for it) that’s going to wrap around the body. It’s totally normal for this piece to curl as you make it, as shown below. This is where it becomes important that the croissant isn’t overstuffed. The pattern for the triangle is designed to wrap around the body just enough that the narrow tip ends up in the front as the face. If your tension is too tight, or the body is overstuffed, you might find the piece too short. If that’s the case, you can always add on a few rows to the wide end of the triangle, or pull to stretch the piece out. It’s a little bit of guesswork.
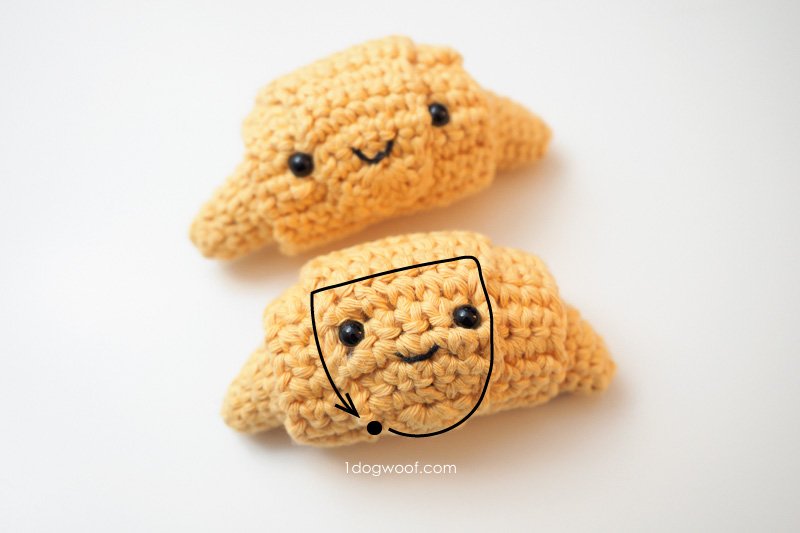
Where is the bottom? Place the croissant with the horns facing forward. You’ll want to sew the top roll not exactly where the croissant touches the table, but just behind it, and you’ll want to wrap that piece forwards towards you. The direction that you wrap is important!
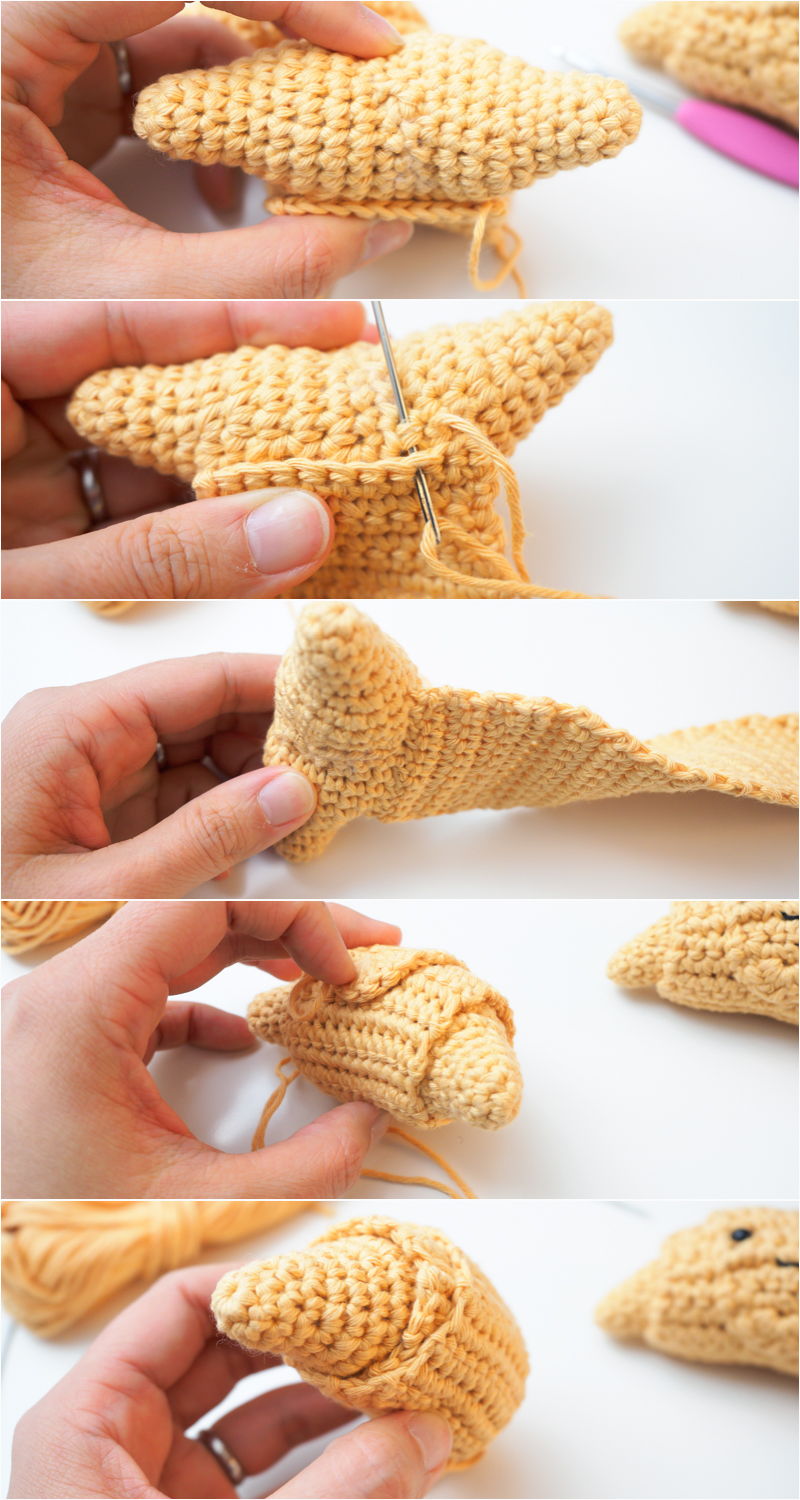
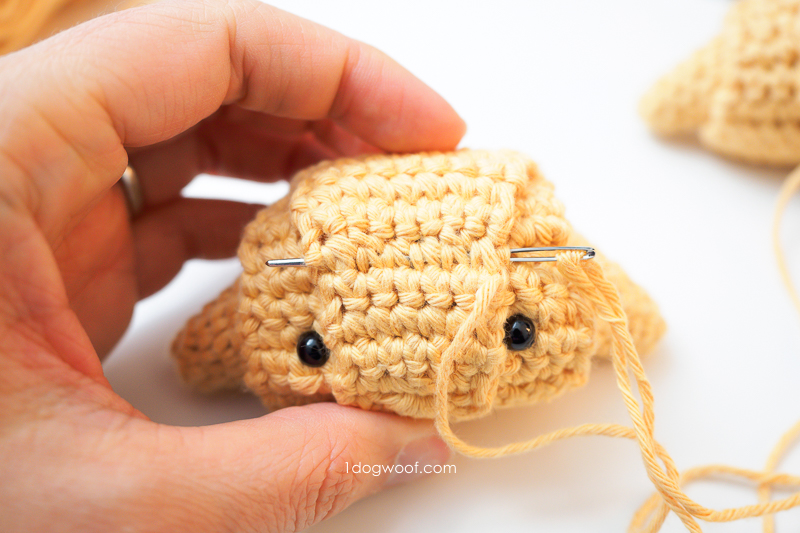
I know, we haven’t put a face on him yet! Wrap the roll piece around the body of the croissant and you’ll find that the narrow tip comes right over the top and faces the same direction as the horns. Now you can choose where to put the eyes – they can go in that top layer of the roll, or if the tip is already too narrow, you’ll want to attach the eyes to the layer right underneath. Either works. The safety eye backings are locked in just on the layer that you choose, and then when you re-wrap the roll around the body, you’ll see that you can push the backs of the safety eyes into the body of the croissant so that the eyes lay flat. At this point, you can sew on a mouth as well.
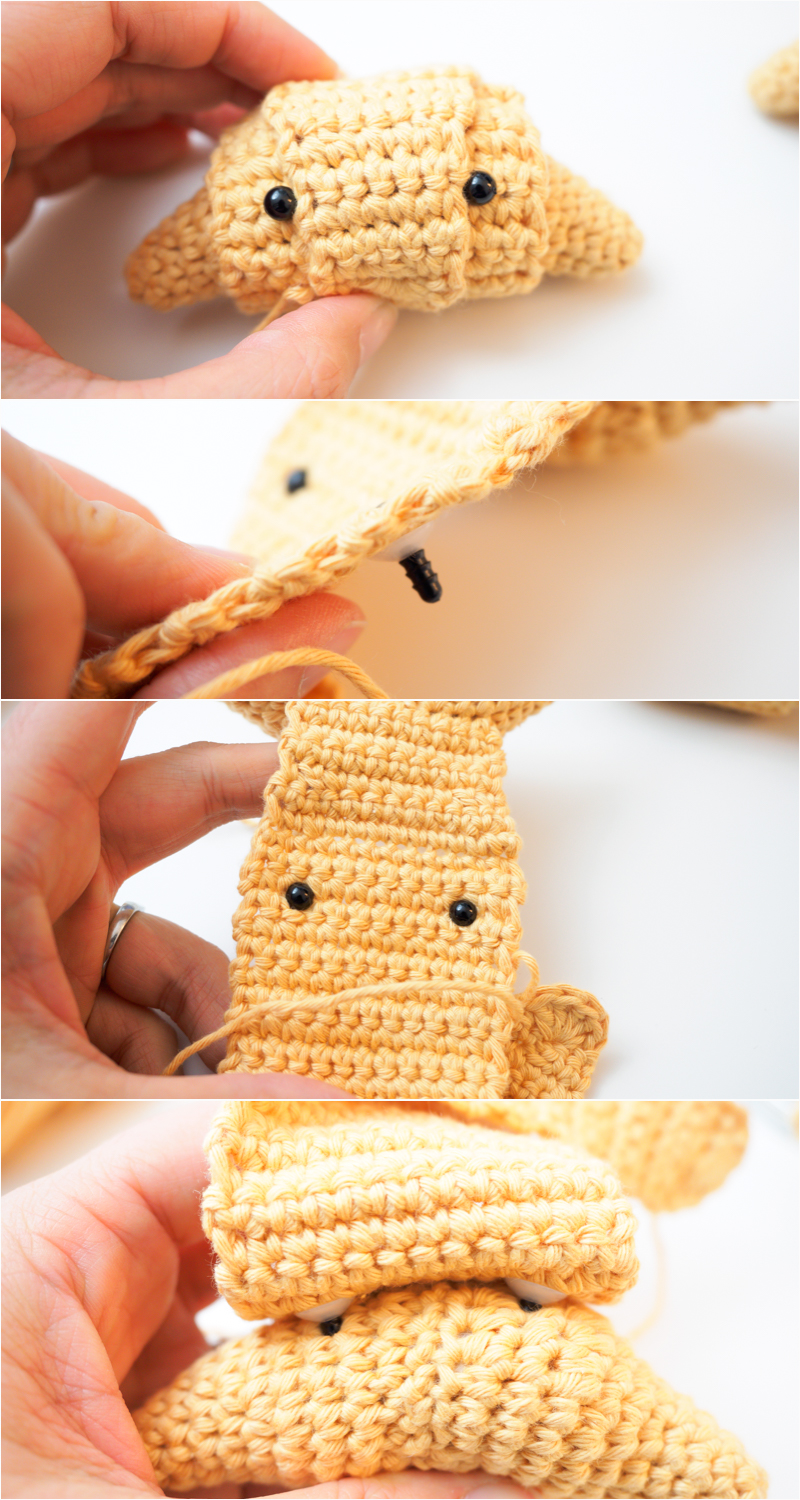
The final step is to secure these layers that you’ve rolled up. Take the end tail of the roll at the narrow tip and use that to sew the tip to the layer below it. You can sew up one side of the tip, then push your needle across the top of the face, and sew down the other side of the tip. Secure your stitches with a knot and lose the end of the tail inside the body of the croissant.
Supplies
- MC: Paintbox Cotton Aran in Melon Sorbet
- F/3.75mm crochet hook
- G/4.00mm crochet hook
- Cluster fiberfill
- 6mm safety eyes
- scissors
- embroidery thread or lightweight yarn in Black
- tapestry needle
Abbreviations
- st(s) – stitch(es)
- sl st – slip stitch
- ch – chain stitch
- sc – single crochet
- hdc – half double crochet
- dc – double crochet
- inc – increase: work 2 sc in same st
- dec – decrease: work 2 sc together
- BLO – back loop only
Pattern Notes
- Rounds in croissant body are worked with continously.
- Eyes are placed approximately 1.0-1.25 inches apart.
Amigurumi Croissant Instructions
CURVED BODY (Make 2)
- Worked in continuous rounds.
- Worked with F hook.
Round 1: Work 6 sc into a magic circle. (6)
Round 2: Work 1 inc, then 5 sc. (7)
Round 3: Work 1 inc, then 6 sc. (8)
Round 4: Work 1 inc, then 7 sc. (9)
Round 5: Work 1 inc, then 8 sc. (10)
Round 6: Work [1 inc, 4 sc] 2x around. (12)
Round 7: Work 1 inc, 4 sc, inc, 1 sc, inc, 4 sc. (15)
Round 8: Work [inc, 4 sc] 3x around. (18)
Round 9: Work 7 sc, hdc inc, 1 hdc, hdc inc, 1 hdc, hdc inc, 6 sc. (21)
Round 10: Work 1 sc in each st around. (21)
Round 11: Work 3 sl st, 3 sc, 9 hdc, 3 sc, 3 sl st. (21)
- On the first body piece, fasten off and weave in the tail.
- On the second body piece, fasten off with a long tail.
TOP ROLL
- Worked with G hook.
Row 1: Start with a long tail. Ch 13.
Row 2: Starting from 2nd ch from hook, work 12 sc. Turn. (12)
Row 3-16: Ch 1. Work 1 sc across. Turn. (12)
Row 17: Ch 1. Work 1 sc, dec, 6 sc, dec, 1 sc. Turn. (10)
Row 18-21: Ch 1. Work 1 sc across. Turn. (10)
Row 22: Ch 1. Work 1 sc, dec, 4 sc, dec, 1 sc. Turn. (8)
Row 23-25: Ch 1. Work 1 sc across. Turn. (8)
Row 26: Ch 1. Work 1 sc, dec, 2 sc, dec, 1 sc. Turn. (6)
Row 27-29: Ch 1. Work 1 sc across. Turn. (6)
Row 31: Ch 1. Work 2 sc, dec, 2 sc. Turn. (5)
Row 32: Ch 1. Sk 1, work 5 dc in 3rd st. Sk 1. Sl st into last st.
- Fasten off, leaving a long tail.
ASSEMBLY
- See photos above.
Arrange the 2 body pieces so that the endpoints meet each other. You should be able to see the curve of the croissant taking shape. Use the long tail on one body piece to mattress stitch the 2 body pieces together. Stuff the amigurumi before closing the body completely, making sure to push the stuffing into the ends of the croissant.
Use the beginning tail of the roll piece to sew the wide end of it along the bottom of the croissant body. The bottom is to either side of the curve of the croissant. Weave in ends.
Tightly wrap the roll piece around the body of the croissant so that the thin end ends up right along the top and curve of the croissant. Place eyes approximately 1.25 inches apart – it can either be on that topmost layer of the roll, or on the layer underneath, use judgment when placing eyes. Attach eyes with safety backing to whichever layer of the roll you chose and then re-wrap the roll around the body of the croissant. The back of the eyes can be pushed into the body of the croissant.
Sew on a mouth centered and just below the eyes.
Use the end tail of the roll piece to secure the thin tip/top most layer of the croissant to the layer underneath. You can work up one side, then thread the needle under the top layer across to the other side, and continue working down the other side. Tie a knot and weave in the ends into the body of the croissant.
Now that you have a pudgy little croissant, you can make yourself a whole breakfast buffet! Tag your creations with the hashtag #AmigurumiAdventCAL on social media, and check out my other amigurumi patterns on the Amigurumi Advent intro post!
Check out my pattern shops on Ravelry and Etsy where you can purchase printable PDFs of my latest crochet patterns. These PDFs are formatted without comments or ads, and have instructional photos at the bottom for optional printing.
I sometimes include affiliate links in my supply lists. Purchasing from these merchants earns me a small commission with no extra cost to you, and goes towards supporting One Dog Woof.
Please be respectful and do not sell or distribute this pattern in any way, especially as your own. Instead, share the original blog post link! You can sell finished products made from this pattern by giving credit to One Dog Woof as the pattern designer and linking to the blog post. If you have any questions regarding distribution or translation of this pattern, please see my Terms of Use. Thank you for your consideration!


Could you please explain how the last row of the ‘top roll’ works? ????????
Row 32: Ch 1. Sk 1, work 5 dc in 3rd st. Sk 1. Sl st into last st.
Thanks a lot!