
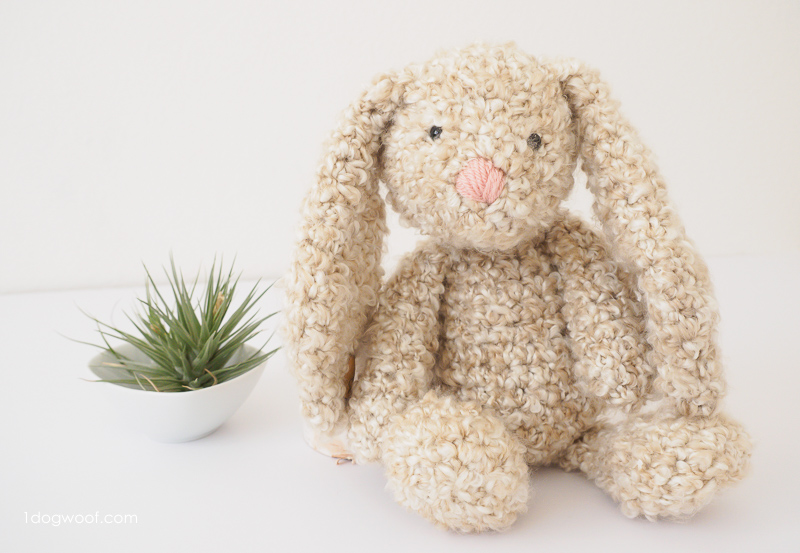
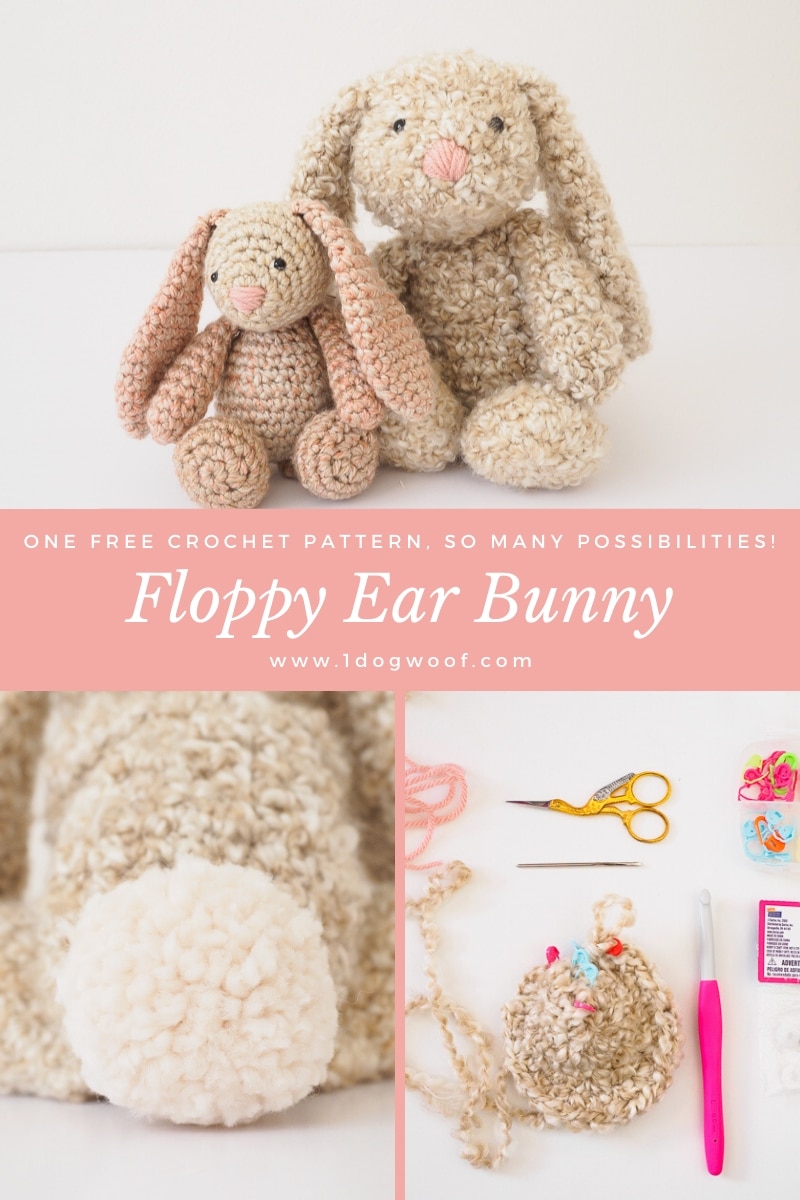
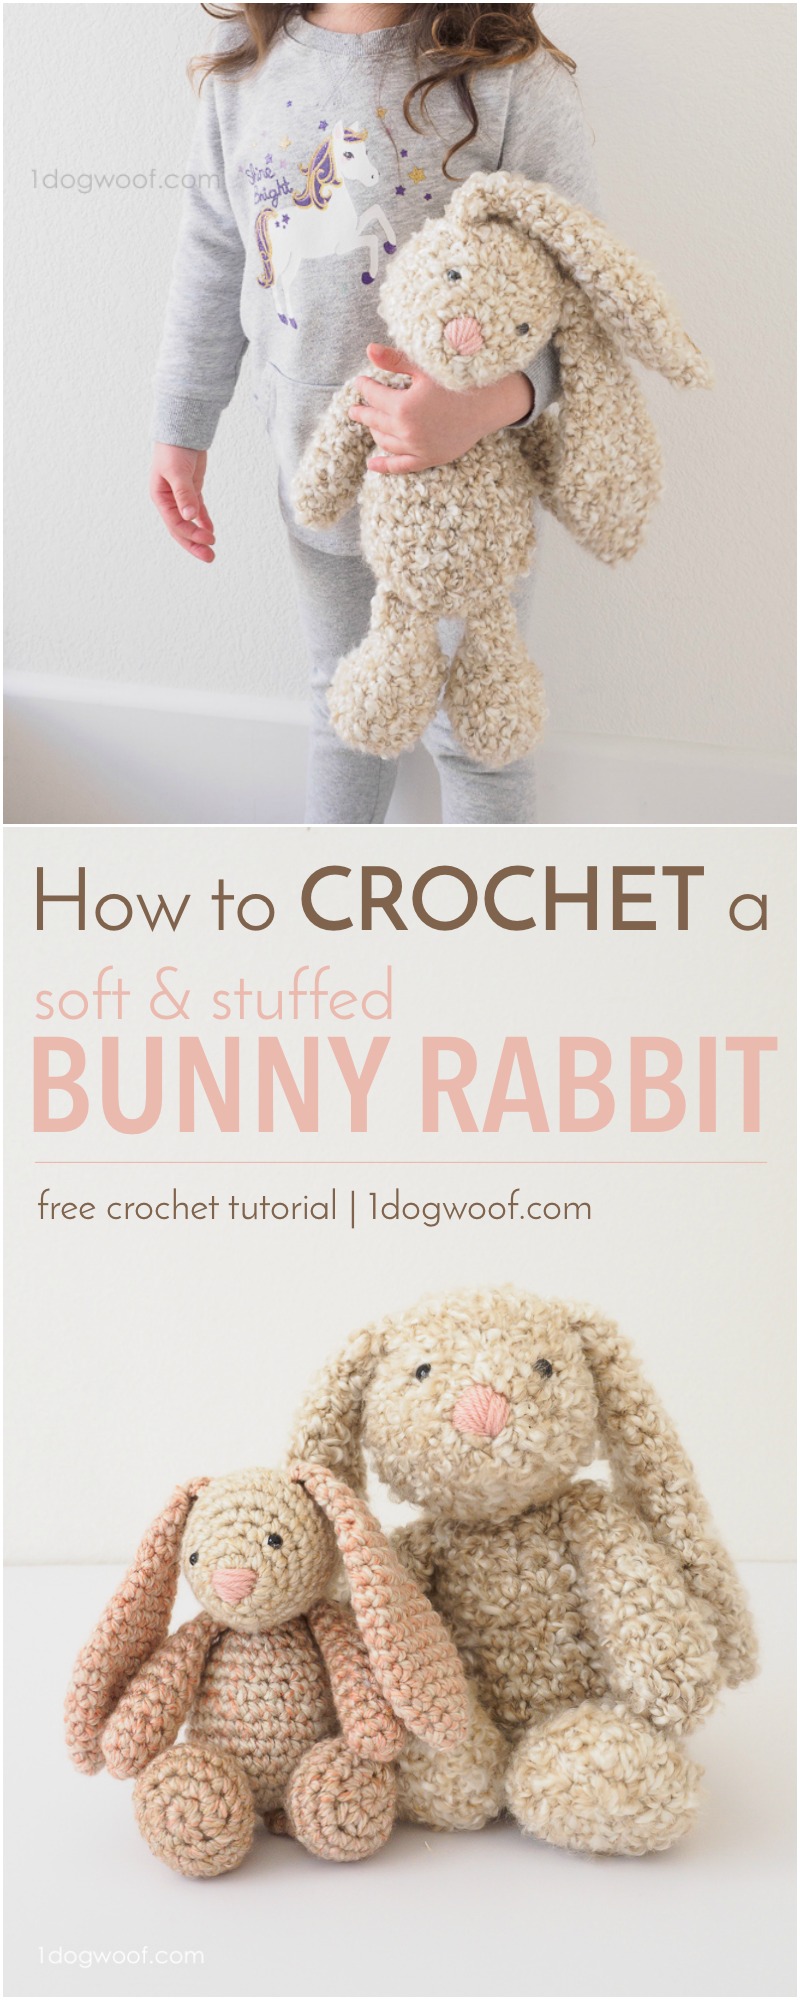
Whether it’s for Easter, a baby shower, or a birthday, there’s never a bad time for an soft and huggable floppy ear bunny. This free crochet bunny pattern can be made in a variety of yarns for different sized stuffed animals, from little babies that fit in the palm or your hand, to large furry friends perfect for bedtime snuggling.
Back in December, I made my daughter a Kira the Kangaroo stuffed toy for Christmas. I was rather proud of it, and Kira is beautiful, as is her little baby. But guess what? M doesn’t sleep with her, or her unicorn, or Bernard the shark. Instead, she drags around this floppy, squishy puppy dog stuffed toy that my husband actually bought for me way back when we were dating. Cue the lightbulb.
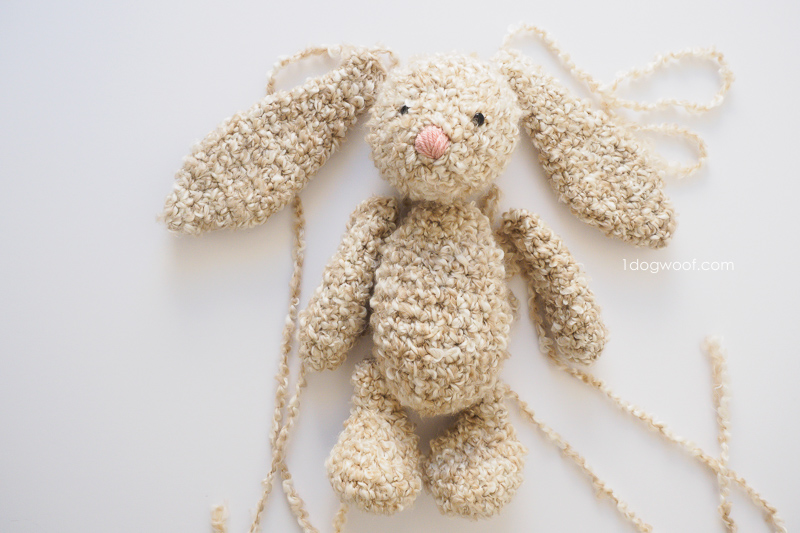
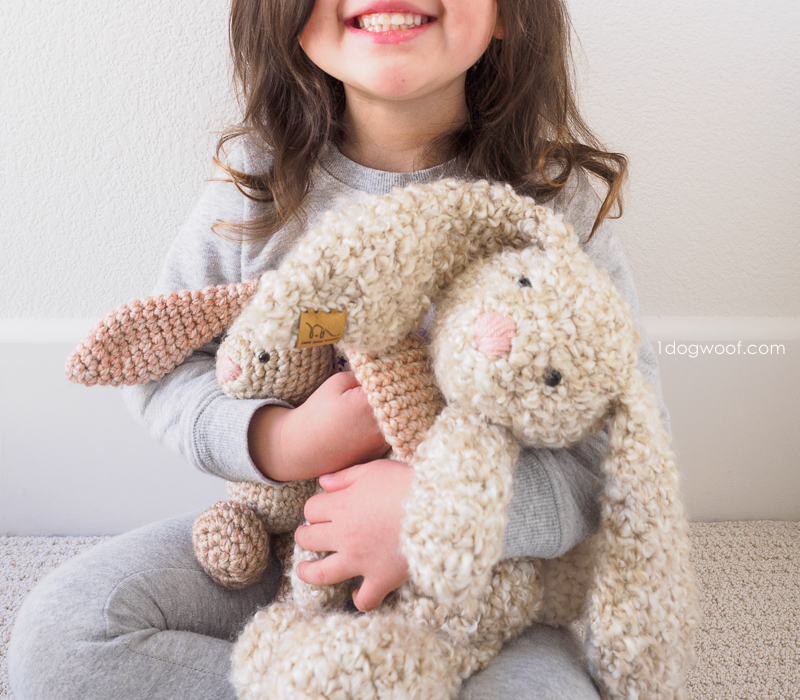
I wanted to create a vision of a child dragging a beloved and bedraggled stuffed bunny as she wanders around the house. Just a simply classic and timeless stuffed bunny.
Different Yarns for Different Crochet Stuffed Animals
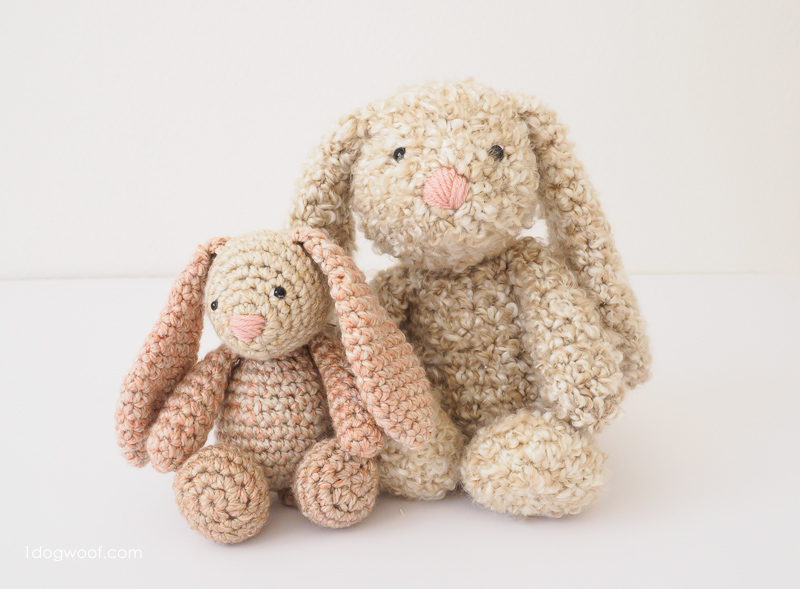
The large bunny shown in the picture below is made with Lion Brand Homespun Thick and Quick. The small bunny is made in Lion Brand Vanna’s Colors, which is discontinued. Because the Homespun can be difficult to work with, especially if you’re new to crochet, I do recommend working with a normal, twisted, worsted weight yarn first to get the hang of crocheting stuffed animals. Once you’re comfortable feeling your crochet stitches, you can make your crochet bunny in any kind of yarn for different effects. Homespun Quick and Thick has a wonderful curly cue feel, or try Lion Brand Go For Faux for something more furry!
Check out the video below to see how I worked up Stanley Duck with Lion Brand Baby Soft Boucle*, another fuzzy, squishy yarn that’s hard to see stitches with, but makes oh so perfect stuffed animals!
Working with Hard to See Yarn
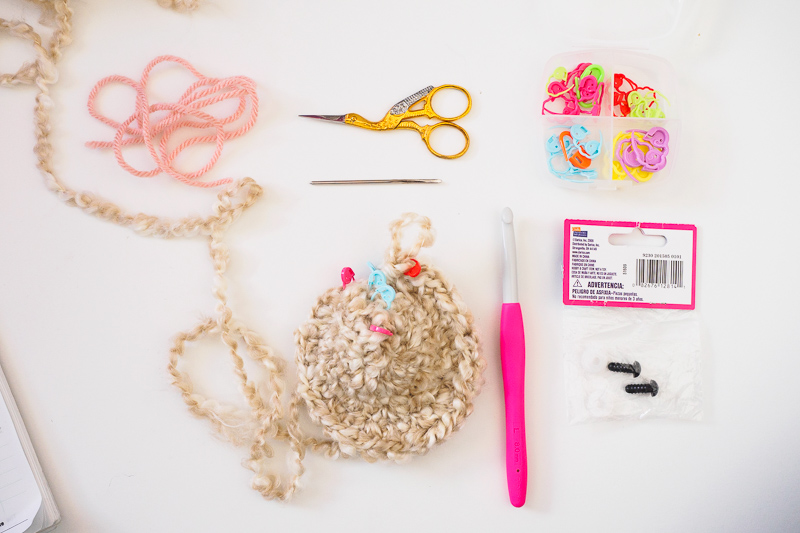
When working with yarn like Homespun Thick and Quick, make sure you’re using the right size crochet hook. You may need to play around with crochet hook sizes to ensure your stitches are loose enough to recognize by touch, and tight enough to prevent the stuffing from falling out. For the large, Homespun Thick and Quick bunny, I used an 8mm (size L) Clover USA crochet hook.
To help with navigating these hard-to-see stitches, I also used a lot of stitch markers, like Clover’s flexible quick locking stitch markers. My smaller, worsted weight crochet bunny was worked in joined rounds, which makes it easier to frog rounds while designing, but the Homespun bunny was worked in a continuous spiral, with the exception of the head, which was worked in joined rounds to maintain symmetry.
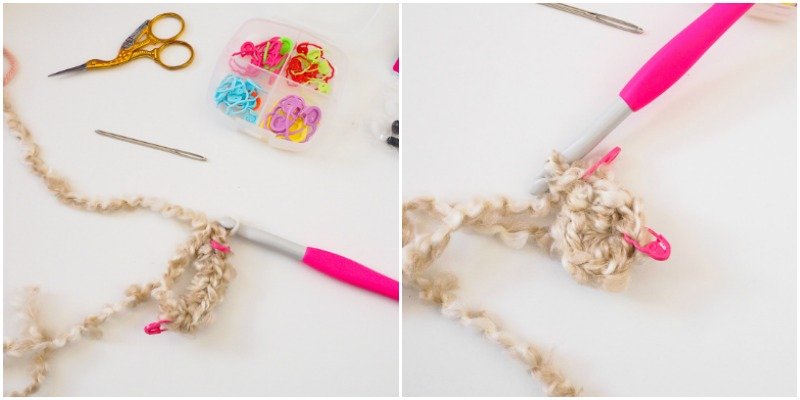
On the starting magic circle, lock a stitch marker on the first sc and the 6th sc, so that when you pull the magic circle in, you know where to work the first stitch of the 2nd round, as well as the last stitch of the 2nd round. Use the stitch marker as a guide to feel for exactly where to insert your hook, because you won’t be able to tell just from looking at it.

If you’re making the head and working in joined rounds, make the slip stitch join into the stitch indicated by your first stitch marker. Work a chain stitch, and an sc into the same stitch. Lock a stitch marker on this first sc. Continue working around and lock a stitch marker on the last stitch. Now use the first stitch marker to guide you on where to make the next slip stitch join. When working continuous rounds, it’s less important to have stitch markers on both the first and last stitch, but it’s still useful to help you keep track of your rounds. I actually started color coding with my stitch markers to keep track of how many rounds of 18 or 15 or 12 stitches I had worked, but that’s up to you. Just pull out all the stitch markers when you’re done with the piece.
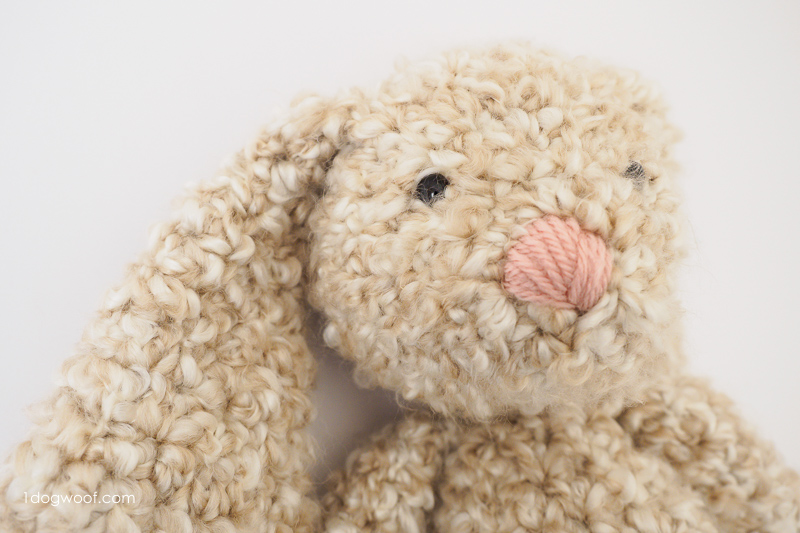
One great thing about using a hard-to-see yarn is that it’s usually very forgiving when it comes time to assemble your bunny. You can pretty much split the yarn and sew wherever you’d like, but to be super secure, make sure you’ve sewn through a full stitch, and not just the fuzz. The only issue to watch out for is when you’re installing the eyes. Safety eyes work well with tightly crocheted amigurumi, but because these stitches are so loose, the eyes can pop out easily, even when it’s “locked”. When you’re adding the eyes, make sure to insert the eye through an actual stitch itself, splitting the yarn in that stitch. Do not attach it in the space between rows or stitches, as those gaps are too big. Make sure it can’t pop out on its own before locking the backing in place.
Completing Your Crochet Bunny
As for stuffing the bunny, just keep it light. Use a regular polyfill stuffing, not the loose anti-clumping type. You definitely want a bit of clumping here so that no tidbits of fluff come out between the stitches. You can stuff the head a bit tighter than the rest of the pieces in order to give it more definition, but still keep it light and squishy. All the pieces are supposed to be soft, bouncy and floppy, so don’t worry about getting everything perfectly in place or symmetrical – this is meant to be a love toy, not a display toy.
Lastly, make a pom pom and sew it to the bunny bottom. This helps her sit up (kind of). Plus, it’s a pom pom, and who ever says no to a pom pom? I used Lion Brand Wool Ease Thick and Quick wrapped around a Clover Pom Pom Maker to create a thick and fluffy pom pom. Here, you can also use any yarn you’d like, but I preferred a different texture to emphasize the tail.

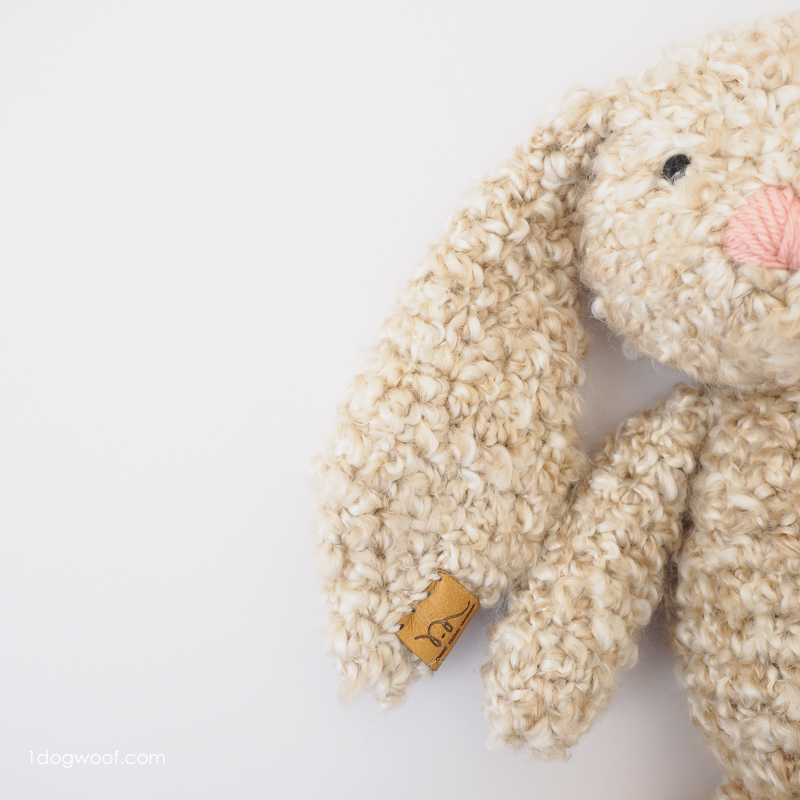
If you’re gifting your stuffed bunny, you may want to add a maker’s tag to the ear. You can find beautiful maker tags from Angie and Britt, or All This Wood.
This classic crochet floppy ear bunny is simple, plain and perfect. Feel free to dress her up, but I like my stuffed animals unadorned and easy to hug.
——————————————
Related:
Baby Humpback Crochet Whale Stuffed Animal
——————————————
Where to Find the Classic Stuffed Bunny Pattern
Keep scrolling down to get the free Classic Stuffed Bunny pattern. Or, if you prefer a printable and downloadable version, you can purchase an inexpensive, ad-free and comment-free PDF from Etsy or Ravelry. The PDF file is full of easy to read text and instructional photos, and is available for download immediately after payment.
Add the Classic Stuffed Bunny to your Ravelry queue.
——————————————
Related:
Classic Crochet Bunny in Spanish, translated by Maria @KnittingIsCool.
——————————————
Supplies
- 1 ball: Lion Brand Homespun Thick and Quick (227g/8oz, 160yds/146m, 6 Super Bulky)
- small length of pink yarn
- 1 Clover USA crochet hook L/8.00mm*
- 9mm safety eyes
- Clover Quick Locking Stitch Marker Set
- polyfill stuffing
- scissors
- tapestry needle
Abbreviations
- sl st – slip stitch
- ch – chain stitch
- sc – single crochet
- hdc – half double crochet
- sc2tog – single crochet decrease: Insert hook into front loop of next st. Without yarning over, insert hook into front loop of next st. Yarn over. Pull through 2 loops on hook. Yarn over, pull through remaining loop on hook.
- sc3tog – Insert hook into front loop of next st. Without yarning over, insert hook into front loop of next 2 st. Yarn over. Pull through 3 loops on hook. Yarn over, pull through remaining loop on hook.
- hdc2tog – half double crochet decrease
Pattern Notes
- The bunny head is worked in joined rounds, with the first sc worked into same st as join.
- The other pieces are worked in continuous rounds.
- If working with Homespun Thick and Quick, make sure to attach the eyes through (splitting) the yarn, and check that the eyes are secure before locking it in.
- The ear is unstuffed.
Floppy-Eared Stuffed Bunny Crochet Pattern
Head
Round 1: Work 6 sc in a magic circle. Join to first sc with sl st. (6)
Round 2: Ch 1. Work 2 sc in each st around. Join to first sc with sl st. (12)
Round 3: Ch 1. Work 1 sc in each st around. Join to first sc with sl st. (12)
Round 4: Ch 1. Work 1 sc in each of next 2 st. Work 2 sc in next st, 1 sc in next st. Work 2 sc in each of next 4 st. Work 1 sc in next st, 2 sc in next st. Work 1 sc in each of next 2 st. Join to first sc with sl st. (18)
Round 5: Ch 1. Work 1 sc into first st. Work 2 sc into next st, 1 sc in each of next 5 st. Work 2 sc in each of next 4 st, 1 sc in each of next 5 st. Work 2 sc in next st, 1 sc in last st. Join to first sc with sl st. (24)
Round 6-9: Ch 1. Work 1 sc in each st around. Join to first sc with sl st. (24)
Stop here to embroider on the nose right on Round 1, and attach the eyes approximately between Rounds 3 and 4, centered around the nose.
Round 10: Ch 1. Work [1 sc in each of next 2 st, and 1 sc2tog] 6 times. Join to first sc with sl st. (18)
Round 11: Ch 1. Work 1 sc in each st around. Join to first sc with sl st. (18)
Round 12: Ch 1. Work [1 sc in next st, 1 sc2tog] 6 times. Join to first sc with sl st. (12)
Stop here to stuff the head before the hole gets too small. Stuff the head a little more full, but not tightly.
Round 13: Ch 1. Work 6 sc2tog. Join to first sc with sl st. (6)
Cut yarn, leaving a yarn tail. Pull yarn through last st. Sew yarn tail through front loops of each of 6 st. Pull tight, fasten off, weave in ends.
Body
Round 1: Work 6 sc in magic circle. (6)
Round 2: Work 2 sc in each st around. (12)
Round 3: Work [1 sc in next st, 2 sc in next st] 6 times. (18)
Round 4: Work 1 sc in each st around.(18)
Round 5: Work [1 sc in each of next 2 st, 2 sc in next st] 6 times. (24)
Round 6-9: Work 1 sc in each st around. (24)
Round 10: Work [1 sc in each of next 2 st, and 1 sc2tog] 6 times. (18)
Round 11-12: Work 1 sc in each st around. (18)
Round 13: Work [1 sc in next st, 1 sc2tog] 6 times. (12)
Round 14: Work 1 sc in each st around. (12)
Round 13: Work 6 sc2tog. (6)
Cut yarn and fasten off, leaving a long tail for sewing. Stuff lightly.
Ears
Round 1: Work 6 sc in magic circle. (6)
Round 2: Work 1 sc in each st around. (6)
Round 3: Work [1 sc in next st, 2 sc in next st] 3 times. (9)
Round 4: Work [1 sc in next 2 st, 2 sc in next st] 3 times. (12)
Round 5: Work [1 sc in next 3 st, 2 sc in next st] 3 times. (15)
Round 6-8: Work 1 sc in each st around. (15)
Round 9: Work [1 sc in next 3 st, sc2tog] 3 times. (12)
Round 10-11: Work 1 sc in each st around. (12)
Round 12: Work [1 sc in next 2 st, sc2tog] 3 times. (9)
Round 13-14: Work 1 sc in each st around. (9)
Round 15: Work [1 sc in next st, sc2tog] 3 times. (6)
Round 16-17: Work 1 sc in each st around. (6)
Ch 1. Squeezing the last round together, and working through all 4 loops, work 2 sc across. Cut yarn, leaving a yarn tail for sewing, and fasten off.
Arms
Round 1: Work 6 sc in magic circle. (6)
Round 2: Work [1 sc in next st, 2 sc in next st] 3 times. (9)
Round 3-4: Work 1 sc in each st around. (9)
Round 5: Work 1 sc2tog. Work 1 sc in each st around. (8)
Round 6-7: Work 1 sc in each st around. (8)
Round 8: Work 1 sc2tog. Work 1 sc in each st around. (7)
Round 9-10: Work 1 sc in each st around. (7)
Stop here to stuff the arm lightly.
Round 11: Work 1 sc2tog. Work 1 sc in each st around. (6)
Ch 1. Squeezing the last round together, and working through all 4 loops, work 2 sc across. Cut yarn, leaving a yarn tail for sewing, and fasten off.
Feet & Legs
Round 1: Work 6 sc in magic circle. (6)
Round 2: Work 2 hdc in next st, 2 sc in each of next 2 st, 2 hdc in next st, 2 sc in each of next 2 st. (12)
Round 3: Work 2 sc in each of next 2 st, 1 sc in each of next 3 st, 2 sc in each of next 3 st, 1 sc in each of next 3 st, 2 sc in next st. (18)
Round 4-5: Work 1 sc in each st around. (18)
Round 6: Work 1 sc in each of next 5 st, sc2tog, hdc2tog 2 times, sc2tog, 1 sc in each of next 5 st. (14)
Round 7: Work 1 sc2tog, 1 sc in each of next 2 st, sc2tog 3 times, 1 sc in each of next 2 st, 1 sc2tog. (9)
Round 8: Work 1 sc in each of next 3 st, 1 sc3tog, 1 sc in next st, 1 sc2tog. (6)
Stop here to stuff the feet lightly.
Round 9-10: Work 1 sc in each st around. (6)
Ch 1. Squeezing the last round together, and working through all 4 loops, work 2 sc across. Cut yarn, leaving a yarn tail for sewing, and fasten off.
Assembly
- Ears are attached approximately between Rounds 7-8 on either side of the head.
- Body is attached to head in line with the ears and with the nose pointing directly forwards.
- Arms are attached to the body in line with the ears, approximately 1 row down from where the body attaches to the head.
- Legs are attached to the bottom of the body bisecting the center point
- Pom pom tail is optional and attached at your discretion.
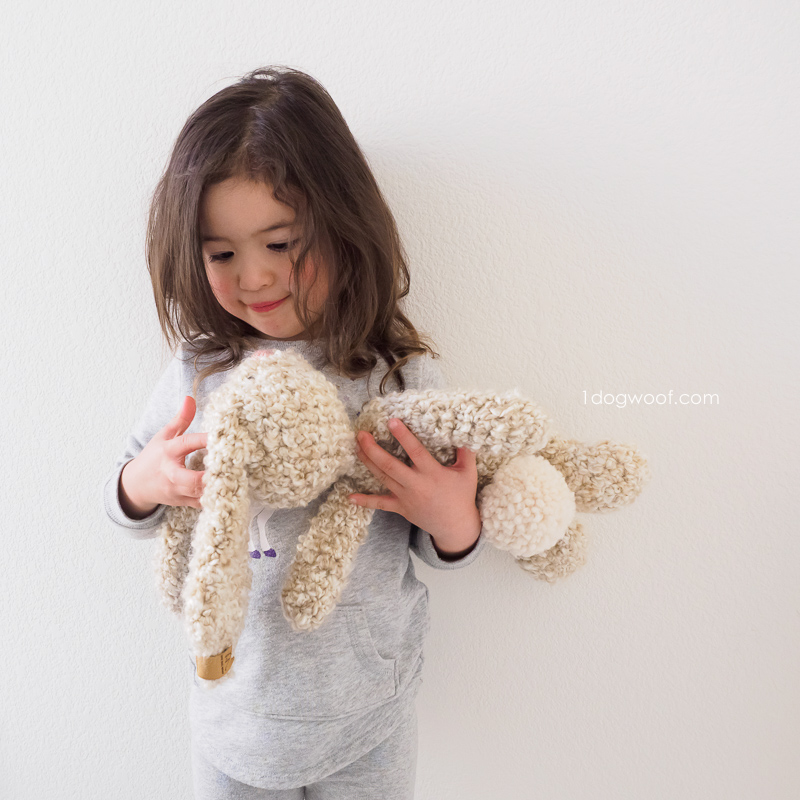
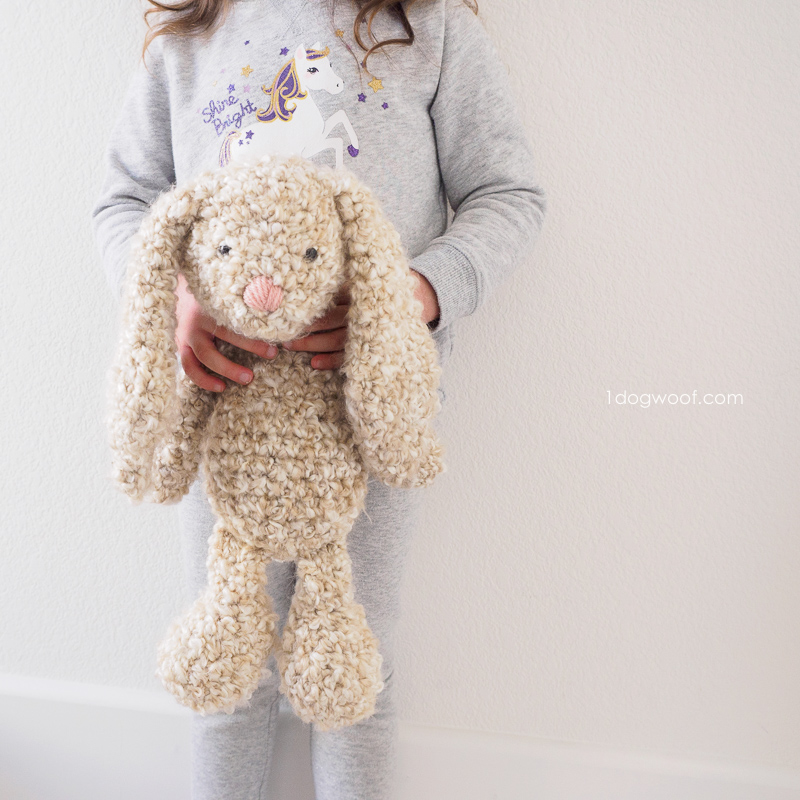
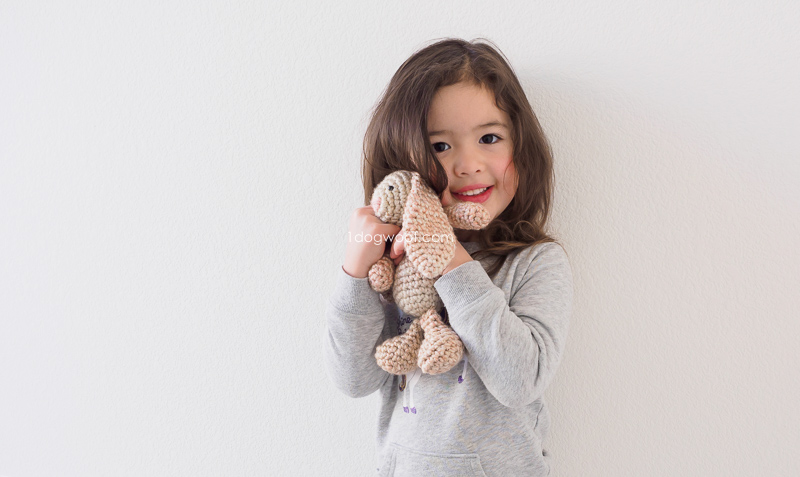
I had shared on Instagram that M just seemed to know what I was making, even though I was barely through making the head of a single bunny. So after all was said and done, I let her have at it to see how she’d react to these new stuffed animals. I think she likes them!

Please share your stuffed crochet bunny with me on Facebook (One Dog Woof) or Instagram (@1dogwoof)! Remember to tag your post with #1dogwoof!


This is one of my favorite crocheted animals ever! You are so right about traditional amigurumi being not so cuddly. It was genius to create this! Thank you for your generosity in sharing the pattern!
Adorable! And the bunnies are cute, too. 😀
I have never used the safety eyes but maybe you could place a piece of fabric or felt on the inside of the head to add a little backing to the eyes and help keep them from pulling through?
I love this bunny! That you so much for sharing!
Oh my goodness that yarn looks SO hard to work with. You deserve a medal!!
This is a great pattern! Thank you so much for sharing. I didn’t have any Homespun in my stash, but really wanted to make one right away, so I used Lion Brand Wool Ease Thick and Quick and it worked up really well. The Wool ease isn’t as floppy and soft as I imagine the Homespun will be, but I think it still turned out great. I ALMOST had enough yarn using 1 skein, except for half of an ear. So I made the rest of that ear using a contrasting color with the main color at the tip of the ear. It looks pretty cute and I’ll use the 2nd color to make the pom pom tail to match, so it’ll all tie in together. Thanks again. I will be making these on repeat. So easy and quick and makes a great gift.
I’ve been thinking about what to make with Homespun Thick and Quick! This is perfect, especially since my baby will be born next month! Thank you so much! If I change the ears, can I possibly use the same pattern to make a teddy bear?
Oh Wow! I have been seeking a soft rabbit pattern for a month now and happened to bump into your pattern online today. This is perfect for my 3 little Grt-GD’s for Easter and a smaller version for my Grt-GS. Now all I need to do is buy some yarn. Oh happy day and thank you!
Ren in Az
Do you have a tutorial on making this bunny
Love this bunny and have all the parts completed, but I am looking for placement of nose. What rows?
Thank you,
Penny
I made this bunny today out of regular Lion Brand Homespun. All the pieces are done, I just have to put him together in the morning. With this yarn he’s about the size of your original one. I used the “Barley” color and he’s going to be so cute!! Thank you so much for a fabulous pattern!
Wonderful Suggestion .. im making two of these for my neighbors toddler’s , all finished except sewing him together …
Thank you for your very clear pattern instructions. First ever bunny almost ready and had no problems following your pattern.
Just finished this for my youngest granddaughter for Easter. Thank you very much for the super easy pattern. And I agree, that Homespun Thick and Quick yarn is not the most enjoyable to work with, but very forgiving. It made such a sweet, squishy and soft stuffed bunny, she’s going to love it. Thanks again!!
This Bunny is so cute! Is there a video tutorial for it? I’m a beginner and would love to make it but would definitely need to follow along with the video.
Ek wil graag weet..hoe lank is die “Bunny” wanneer voltooi is.?Lengte?
Thank you so much for yet another wonderful creation and for your generosity in sharing your design process with us! I’m so glad & grateful to finally, after years of hoarding it, have the perfect project for the soft, shiny & extremely curly yarn in my stash, & it’s even the right colour for my 3 grandchildren’s new bunnies this Easter – if I am quick & studious enough! Thanks again xxxx
Need to stuff something. Don’t crochet tight or pull out the sewing machine. Grab a knee hi panty hose, get it as close to color. Then fill and tie off. Works great for adding beads too.
Enjoy
Yes it will work. You could also google for a stuffed bear pattern. I know there are plenty out there.
Thank you for sharing this pattern! The instructions were well laid out and easy to follow. Grumpa crocheted this as an Easter gift for his 18 month old granddaughter. After looking at all the other bunny designs online my wife picked yours for me to make and this little guy turned out perfect. Again, thank you for shaing.
Footnote to my previous comment. Since this is for my 18 month old granddaughter I used soft black yarn for crocheted eyes instead of purchased ones. They turned out beautifully.
So I ended up featuring two of your projects on my Baby Girl Crochet Pattern round up https://catastrofebella.com/2017/03/19/free-baby-girl-crochet-patterns/. I just loved how floppy this pattern was in comparison to all the other stuffed animals out there. I’m truly excited to try this pattern out! Thanks for sharing.
I’m hoping that someone can help me with this; my OCD is getting the better of me! I’m trying to figure out eye placement. On rounds 4 & 5 of the head it says to “Work 2 sc in each of next 4 st.” This will make the head wider on opposite sides. Are these wider sides the top & bottom or are they the sides of the face? Help will be greatly appreciated!
Please describe how to make a make a magic circle. Thank you.
Joanna
A picture is worth 100,000 words in this case. Search for it on YouTube. It will make so much more sense! Good luck!
Can you work the head in spiral rounds without joining? I always get confused with joined rounds.
Hi there – I am attempting to make this and I have completed the head and the body – but they are way too small – I am using all the exact same products and hook size – is there any way to make this beautiful bunny bigger?
Thank you so much for the floppy bunny pattern! I made this for my 3 year old niece and it was the biggest hit at the party! I also stitched on the eyes with soft black yarn and I love that the whole bunny is soft and squishy! I will definitely be sharing your pattern 🙂 Thanks again!
Thank you so much for your help and for making this lovely pattern available for free! You are a very talented lady!
Thank you for this cute bunny pattern! I am making, evidently, the smaller one. Is there a pattern for the larger one or did I just overlook it? Thanks!
Joanie C.
I went back and read your post and saw where the difference in size is because of using two different yarns. ????????
Thanks for creating this pattern and sharing, my head is floppy, is the body supposed to be closed before attaching?
Thank you again for the wonderful pattern. Just finished bunny # 1, a practice bunny, in white worsted. Just darling! Bought my Lion Brand yarn and am ready to make the bigger bunny. The directions were clear and concise. Always admire and appreciate that! The photos are great and so helpful too. And you are a talented designer. I am looking forward to a new pattern for summer.
This is so adorable! But after reading your whole story, I don’t think I’m going to try it yet. As a beginner, I think this yarn would drive me to tears!
Just about finished with the bunny, thanks for sharing, Bunny is working up quicker than I thought it would!. Thanks again
There are great tutorials on You Tube for this!
https://www.youtube.com/watch?v=sLUaywX0-WE
This yarn is a bear to work with but so cute worked up. It is worth it. I just finished my third one. ????????
It takes me about 5-6 hours.
Mine too still super cute but my head droops too.
You’re welcome!
Hi Penny, the nose is stitched right onto round 1 of the head 🙂
I’m so glad you like it!
Yay! Glad to hear it!
It’s sooo forgiving, isn’t it? The mess is built in, lol!
Hi Reyna, I’m sorry, I don’t have a video for this bunny.
I love it when our hoarding pays off! So, is it time to go get new yarn to replace the ones you used? lol!
Ooh, the panty hose idea is great! I want to add beads to my next stuffie for sure!
You’re so welcome! And I’m glad it turned out great!
Thank you for the share!
Hi Linda, the seam is on the bottom of the head, so the 2sc in each of the next 4 st is the top of the head, to give it the differentiation of the head and the snout. Hope that helps!
Hi Joanna, you can see a tutorial here: http://www.1dogwoof.com/crochet-in-the-round-magic-circle-and-chain-2/, and I’m also working on a video tutorial!
Hi Susy, one way is to double up on the yarn 🙂
Hi Joanie, the pattern for both the small and large bunny is the same. It’s just the yarn that makes the difference!
I don’t close off the body, but you can if you want to.
Thank you so much!
Ha, it nearly drove me to tears the first 5 times I started the bunny!
Hi! Can anyone recommend a yarn that is similar to the Lion Brand homespun but is made out of cotton or wool? I love the way the bunny looks but have an acrylic phobia:)
Thank you so much for this fabulous pattern- quite possibly my favourite ever! I have made four of these beautiful bunnies in four different colours for my grandchildren for Easter and I’m sure they will love them. The yarn was initially quite tricky to work with but I quickly learned to judge where the stitches are by feel rather than sight and it got easier. Thank you again for the inspiration.
Okay, I’m nuts, my first amigurumi ever crocheted, and I choose to work with this yarn, which is a bear to work with, but makes gorgeous projects. It was like crocheting blind, by feel only. However, forgiving for missed stitches too. Made this bunny for 1 year old Birthday gift on Easter. I will be making several times again as it is so soft and cuddly!! I didn’t have an L 8mm hook, so I used an N 9mm. Thank you!!
How long does one of these take?
I’m thinking of doing different ears and making it a dog. Glad I’m not the only one looking to adjust the animal! I’m just wondering if I want to do anything different around the nose/mouth area.
This is super adorable…I so want to make! Going to have to order me some Homespun from the states! Thanks for the pattern!
This was my first stuffed animal and younpattern was very easy for me to follow! I do plan on purchasing the PDF! I plan on using this pattern to make bunnies to donate to a battered women’s shelter for the kids to cuddle!
SO cute!! And I love the fluffy yarn. Can’t wait to get started on this 🙂
Love, love love this pattern!
I have made all the parts and ready to assemble but wanted to verify how to sew the head to the body. You left the body open correct? When sewing the head to body, should the opening kinda form a neck in between the body and head?
Yup! That prevents it from getting TOO floppy 🙂
I just finished 2 of these and absolutely love them! Thank you SO much for sharing!
I have two new grandbabies and another due September. I hope I can learn to make this by next Easter. If so, I’ll let you know. So excited because it looks beautiful and cuddly!
That’s what I planned to do. I plan to just come back and stitch over the top of the basic stitch. Is that what you did? Trying to avoid All Choking Hazards. Thanks for any advise you can give me.
Hi,
Thank you so much for this lovely pattern. Managed to work up the bunny really quickly. I just had a question when you come to the end of the arms and the legs, I ended up flattening the top part of legs and arms when doing the 4 2sc in each stitch. However from your pictures yours don’t look flat. Is this correct? Thank you
Hi. Love this pattern but I’m hopeless with the yarn so need some practice.
Just wondering where you get your leather tags made?
Thanks!
I to would want to make my bunny bigger. Do I just use a. Bigger hook and elongate my stitches by adding a couple of extra rows in the center of all appendages ?
OMG! I just can’t thank you enough for this pattern, it’s just perfect for my new niece 🙂
I just have a tinny question though, the color you used for the big bunny is “pearls”, right?
And also, I loved the idea of doing part of the ear and the pompom on another color.. I have to steal it ????.. hope you don’t mind
Seriously, thanks again for the pattern, it’s super clear and great
Yes! This colorway is Pearl, gorgeous right?
Thank you SO much for sharing the pattern. It has such good instructions, came out beautiful and the floppy bunny is loved to bits!
Love, love, love! I didn’t have homespun yarn, the body, head and arms are bernant blanket and I used a multi color pink, purple and whitish for ears and feet! I want to keep her so bad! Can’t say love it enough!!
Hi there! Im going to buy the yarn to make this but is 1 skien definitely all i need? I dont want to run out but at £10 each i dont want to buy 2 skiens if i dont need them! How much yarn did you have left over?
Bunny looks beautiful!
I just made this last night and have to say thank you thank you thank you! I was a little nervous about the yarn, but stitch markers are the answer to keeping track of the stitch count. The yarn is perfect for this cuddly bunny.
I made it for my grand sons 2nd birthday, but I might make one for myself , I love it so much. The pattern is well written and easy to follow. I still get a bit nervous with the “assembly” part of doing these kind of projects, I guess it’s just a matter of doing more and getting more comfortable with it.
The pattern is great, I love it, thank you again.
This is the cutest thing ever! I wish I could show you the bunny I made from this pattern. My husband thinks it looks like a misfit toy, but I think it’s very cute. Multicolored yard sparkly buttons for eyes, and yes a big fat Pom-Pom. No one should ever say no to a Pom-pom. Love this! Thanks for sharing! My daughter is going to love it for her birthday!
hands down for the beautiful bunny pattern, this is the most beautiful bunny patterns i have ever come across with. I cant take my eyes off from this bunny. Thanks for coming up wit this pattern.
xx
Hannah
That is a great idea. I am going to try thst
Do you sew the closing of the head to the closing of the body ?
My bunny head looks like a snake cause its elongated.
Can you help me .
Where the stitches easier yo see with yhis yarn.
Me too
Great I woulf love to see the tutorial
Hi, is one ball enough for the bunny? Just checking as I have to buy online and want to make sure that I’ve purchase enough in one transaction.
thanks
I love this rabbit. The last time I picked up a crochet hook was … erm too many years to mention but this pattern is so easy to follow and had me hooked from row one. Thank you so much. I have one perhaps very silly question but how do I size up the rabbit using this pattern?
I think I’ll make a pink one for my granddaughter and a baby blue one for my grandson!
This is so cute! I’m thinking about making two for a colleague — one for her kid and one for baby on the way! How easy would you say it is to wash these stuffed animals?
This pattern is amazing. My only issue is that the yarn is so damn fluffy I can’t tell where my stitches are, where I’m supposed to be putting the crochet needle or how many stitches I’ve made in a row. Luckily, because the fabric is so fluffy, screw ups are hardly noticeable but I would like to get it right. Any tips for working with this yarn so I can keep to the pattern?
Thanks!
How do I know the nose is right? I mean, you said embroider the nose right and I’m just not sure what you ment. I’m a little stuck now.
Same question lol
I don’t get how to make the nose and eyes
Hi!
I love your kangaroo. I have been looking on your site to find it. I do not think I am looking in the correct spot. Could you direct me to it? Thank you
I would like to know the finished size. I started one and it seems smaller then the one the little girl is holding on. Thanks.
Hi! I love this bunny but it is way smaller than yours. I am using the same yarn and same size hook. Can you tell me why yours is bigger? What I may be doing wrong? Thanks!
CAUTION: Same Lion Brand Thick & Quick yarn, same hook, but the bunny is so much smaller than what is photographed. Unless, of course, the little girl is a tiny thing! lol… I like the head size, but the body could definitely be much larger and longer. I’d hate to frog the body, but I really want a larger bunny. Word to the wise.
How many skeins did it take? I think that yarn would make a super soft bunny! Would love to see a picture.
I have been reviewing online more than three hours today for
windows7 starter snpc oa original pricing help & Classic Stuffed Bunny Crochet Pattern for Easter, yet I never found any
interesting article like yours. It is pretty worth enough for me.
Personally, if all web owners and bloggers made good content as you did,
the internet will be a lot more useful than ever before.
I used all left over yarn. I can’t post pics here, sorry.
I have however made this pattern with so many yarns and always less than one skein. They range so much in size and I just love all of them!!
I love this pattern but the Homespun looks intimidating. I want to start with regular worsted, like you did. Did you use two strands of Vanna?
Cutest bunny ever! I just finished making all the pieces and just need to stitch it all together. Question: what yarn did you use for the pom pom?
I been browsing online more than 6 hours today for 1/2 Price Pro Calgary Painting & Classic Stuffed Bunny
Crochet Pattern for Easter, yet I never found any interesting article like yours.
It is pretty worth enough for me. In my view, if all web owners and bloggers made good content
as you did, the net will be a lot more useful than ever before.
Yes, mine is smaller too. I’d like to make a bigger one, but do t want to use a bigger hook.
What color Homespun yarn to make one exactly like yours????
Hi I hope I’m not duplicating this question (I read through and didn’t see it anywhere).
do you make your own leather tags or have them made for you? I want to do something like that on the things I make for my kids and grandkids.
Thanks in advance!!
Made this and LOVE it! Was wondering if you have the pattern for the bigger bunny?
Hi I just have a question. For the head of the bunny. Pattern said Rd.1 make 6sc in magic circle and then Rd.2 is Ch1. 2sc in each st. around. Sl St in the first ch to join (12st.) how can that be only 12st.
Isn’t 1ch+ (2sc time 6st=12st) = 13st? Or am I reading the pattern wrong. I am still new at crochet but I love your bunny pattern!
I just finished making two of these in the Thick and Quick yarn in Blossom Pink and Glacier Blue for my new twin nieces. They were done much more quickly than I expected, I have to say, and they’re both sturdy, perfectly squishy, and downright adorable. Thank you so much for sharing this pattern! It’s perfect.
I LOVE this look! I can’t wait to try it! Thank you so much for sharing all your experiences in learning how to create this pattern.
Judy
I love this bunny…I am getting ready to assemble…I used bernet blanket yarn for mine and crocheted the eyes rather than safety eyes. This is for my 2yo grandson and I just don’t trust anything but yarn or thread. My only question, at this point is…the placement of the head on the body…is it centered on the body?
THe chain would usually be counted as one st, so you would chain one and sc in the same space then two sc in the remaining five stitches.
I hope that helps
The chain would usually be counted as one st, so you would chain one and sc in the same space then two sc in the remaining five stitches.
I hope that helps
Made this for my niece’s first birthday; turned out perfectly and she fell asleep today cuddling it. Love the pattern, very easy to follow. Thank you so much for sharing!
I have several skeins of this yarn…in a tote…in a closet. I tried to make a blanket and it was a total loss. SO with your hints and tips, I’m going to try again! Thank you so much for all your hard work!!! And the most awesome floppy bunny pattern!
I love this pattern and I’m working on my second bunny now. But the last one I made I used the same fuzzy yarn you did and it ended up being tiny. My second one I’m using Bernat Blanket Yarn and it’s a little bit bigger, but still isn’t as large as yours looks. What is the size of the larger bunny?
How large was your bunny? I used Bernat yarn and it’s just not as large as I would like
Not as large as I would have liked it either. I didn’t measure it…sorry
This was my first amigurumi EVER and it turned out so adorable! I am so excited about the finished product. This yarn was very forgiving and allowed me to kind do whatever I wanted when assembling the bunny! Thanks for such a lovely and easy to follow pattern 🙂
Can you tell me the finished size of this bunny?
Hi there to all, the contents present at this site are in fact amazing for people experience, well, keep up the nice work fellows.
I didn’t close off the head and attched to the body, it’s not terribly droopy, but any ideas on how to strenghten it?
I love this pattern, making for a friends twin girls, then….for my granddaughter. Thank you so much!!
Hi, I love this pattern! My expertise is limited and I have several questions. Afraid someone else might have asked you and I missed the answers. In your notes, at the beginning of Bunny head, “slip stitch,chain stitch and single crochet in the same stitch.” Is this for round one only, or continue with subsequent rounds? Does bunny head have a rather up- side versus the down-side?
Thank you so much, love your patterns, and might have to buy more yarn, wearing this skein our!
Thank you for the cutest bunny ever. Can you believe that the same pattern works knitted as well? I did it, and here is the result: http://strickwerk.heliotropium.de/der-niedlichste-hase-der-welt-gestrickt-haekelanleitung/
Hi.
oh my god ! this is so cute *…*
can i double the stitch counts to have a bigger sweet bunny???
I’m honestly not sure. I would suggest using thicker yarn before adjusting the pattern itself.
I just finished up with the head and it measures 6 1/4 X 5 1/2
Seems way too big but idk what went wrong?
I have same Yarn and same size hooks.
Thank you so much for the adorable bunny directions!!! I made it for my nieces baby, while we were camping. The neighbors dog loved it, thankfully not to hard, it was still perfect and my niece loved it too!
I’m having such a hard time with this pattern. Idk what I’m doing wrong. Do I join during the chain or the first single crochet?
is this pattern for the large bunny?
Just wondering why my bunny doesn’t seem as big as the one shown? Is this a different pattern? I tried to look for a comment in the above emails but didn’t have any luck.
Thanks,
Amazing thank you! Took two tries for me, my first one was a bit derpy because I didn’t count THAT well. But my daughter doesn’t care, she loves it anyway. The second one I counted EVERY stitch and it’s perfect! So ready to be a baby shower gift. I needle felted the eyes and nose to make it totally baby safe. Worked great on the homespun yarn!
I just made this and it turned out adorable! Thank you so much for sharing the pattern. It worked up really quickly because of the chunky yarn.
Hi,
Adorable bunny! Followed the pattern and it turned out great, but a little small. I hoped it would have the same size as the fluffy big one in the pictures. I would love to make the big one! Do you have the pattern for this? Still not figured out how to enlarge a pattern.. Can you help me out?
Hi everyone and Thank you for the pattern first of all
Just wondering I have started this patterns head and body and its more the size of the little one with worsted weight yarn .
im just wondering if I did something wrong your is this pattern for the small bunny or the larger fluffy bunny.
Thanks again and God Bless
I made this bunny, and it is sooo cute! I have to say that it looks alot bigger in your pictures than it is actual size. Is one of the bunnies in the pictures larger??
Thank you for this pattern. I am going to make another one for my friend when her baby comes in the spring 🙂
I love this bunny and would like to make it first in regular yarn. I’m also thinking I could make eyes the same way the nose is made. Just sew with black yarn. What do you think?
Thank you so much for this fabulous pattern. I’ve made more bunnies now than I can count (well, a lot of them). When gifted they are a HUGE hit. Everyone, and I mean everyone, raves and loves them. I have donated four (so far, plan to do many more now that holidays are over) to local police–to carry in patrol cars for kids in distress. Thank you again for the fantastic creation!
I know. The bunny ears per this pattern is very small. I think there has been an error
Hi
This is just zdiezvle. I love it. I want to make one with SCHEEPJES SWEETHEART SOFT which is a funny yarn as in description says Super Bulky, it’s not really also recommended hook size is 3-3.5mm.
Would it work?! ☺️
Thank you
I have started working this up, and it seems like the pattern is for the small size bunny in the photos; not the fuzzy bunny. Do you have the pattern for the larger bunny?
I just can’t get my initial stitch count right. You say to do a sc in the same stitch as the join. So on rnd 2, do the chain and first sc count as your first 2 sc? Does the ch 1 always count as a sc?
This has been answered, thank you!!! The chain 1 counts as the first sc ????????
So stinkin adorable. I’m a beginner and I think right now, that this is too much for me until I can do some and get used to the stitches and lingo. I love the duck. Great job on the tutorial
Lea
Hello, thank you for sharing this adorable bunny. I started to make the fluffly one, just have a question, in the picture it looks kind of big. And my head that I finished its like the pink (smaller) one. Do the description is to make small bunny or the one that is big? If yes, why mine is small?
Do you have a similar pattern for a dog?
I’d like to make a puppy toy like this – thoughts on how to make it more dog-like?
Hey, there thanks for the post. I would like to suggest you visit at http://www.webestools.com/profile-90559.html to know regarding different pipes.
I have the same problem. I’ve have used the Lionbrqnd Wool Ease Thick & Quick and the correct sized hook, so I don’t know why it is so much smaller than the fluffy one in the picture. A bit disappointing really.
No, it’s a small bunny.
I started making this pattern but was disappointed with how small the head of the bunny is. I’m curious how I can make the larger sized bunny that is featured in your pictures.
help! I am in the midst of the bunny. I have made the head which turned out pretty large (hopefully i did it right). I have an easy time getting that technique down but when i have switched to the body and am doing the continuous rounds, i keep losing my place and the numbers are never right. It remains to be seen if this part is going to turn out.
My question is, if i end up needing to rip it out, can i complete the remaining body parts in joined rounds instead or will the bunny not turn out.? Thanks for your help.
I have tried watching youtube videos already. Still struggling.
This is the first crocheted item I have ever made. I bought the pattern and it was very easy to follow for a beginner. I made it in about 7-8 hours. I could have made it much quicker but since I have never crocheted before I had to youtube how to do basic stitches and the magic circle. Even with having to learn new techniques, I wasn’t overwhelmed by the pattern at all.
I made it for my son’s first Easter using Yarn Bee Cotton XXL yarn. It’s very heavy but soft and floppy. I’m happy to give up the light weight feel of a stuffie to be able to use cotton yarn.
Do you have any suggestions for easy to find cotton yarn that’s super soft, but not so heavy?
Thanks for the pattern! I love it!
I’ve just bought your bunny patten and am getting the Homespun thick and quick sent to me. Just want to confirm if I use this wool will if make the large bunny?? Regards Karcn
I would also like to make the bigger bunny – could you advise how to increase the pattern?
I will echo the same concerns as everyone else…. this pattern is NOT for the large bunny shown in the photos!
I’ve used the exact same yarn, exact same hook, with moderate tension and I was very disappointed to find the head is only as large as my closed fist instead of as large as it is in the photo.
Extremely disappointing as a friend asked me to make them this exact bunny for their child’s birthday and I’m unable to deliver.
This is the cutest pattern! I’ve been making a bunch of these out of Bernat Blanket in arctic white to sell as a fundraising project for kittens I’m fostering and they’re selling like hotcakes! Thank you so much, your pattern is helping out 2 week old kittens by helping me give them a happy, safe, fun place to grow up.
I love the bunny. Mine turned out great. How do you make the Pom Pom tail? Did you use the same yarn as the bigger bunny?
Great pattern and easy to follow! Just a bit disappointed that it worked up so small compared to the main photo. I had a customer ask me for this exact rabbit and I lost her business due to it being the smaller size. Just wish it was advertised better.
I dislike homespun so much. Darn me and my naiveness to buy 12 skeins of it when I first started crocheting. I love this pattern and keep coming back to it with the homespun to make the perfect bunny. I have made it with a regular worsted yarn and my boy loved it.
I have all my pieces done. Is there a video on how to stitch them together? This is my first experience! Thank you.
I love this!!! Very cute pattern and very easy to read. I made a small one with regular yarn and now I’m about to stitch together the pieces of one made from two strands of Bernat velvet. I love it! I hope to try one in the homespun because it looks adorable but I’m kind of afraid it will be hard. Oh ya, I lengthened the legs a little on the big one because they seemed a little short (on the small one ) to me.
Thank you so much for this pattern! I’m a crochet newbie but this pattern was easy to follow and so I ended up crocheting 2 of those bunnies for my daughters in very short time. Can’t wait to crochet the dapper cat, bought the pattern from your etsy store. 🙂
Greetings from Germany!♡
Thank you! I’m doing mine in velvet and it is turning out super cute and soft. I bought the pattern on etsy even though it is free, but I’m not sure what Ch 1. Squeezing the last round together and working through all 4 loops work 2 sc across means :/
Hi, this pattern is super cute, but it didn’t hold up well. (I used the Homespun Thick and Quick yarn) The head got really flimsy and the whole bunny stretched out with in days of making it…Is there a way to make it hold together better? By the way, I love all your patterns!
one page is missing…supplies abréviations etc
Hi there, I made this bunny and absolutely love him. A beautiful pattern! I had picked up the thick and quick homespun yarn last year and finally made him last week. I went to make another and wasn’t able to find the same colour yarn. Do you remember the name of this colour by chance? Hopefully it hasn’t been discontinued. I’m desperate to find it again! Thanks 🙂
How do you keep the pompom tail from coming apart during play and washing?
My bunny leg/foot looks short.
I thought it was my mistake. I counted my rows over and re did the foot still looked wrong . Short. Thanks for your input.
I just love your pattern, I have made 10 of these for grandchildren with lion brand pearls. I feel like they all came out the same size but I had different amounts of yarn left of a skein. Some the size of a larger grapefruit and some the size of an orange or some smaller. Have you had any issues with the amount left ? Thanks
I think it’s the color Pearl.
I agree. Mine looks very small compared to the above picture. I’m going to rewrite the pattern to make it larger
Thank you so much for this pattern! I’ve made 3, all for a “first grandchild”—mine, my sister ‘s, and a dear friend’s. They all look a little different, probably due to my counting being off while watching TV, as well as the challenges of Homespun yarn! But each one is sooo cute! The pattern and the yarn are both very forgiving. Thanks again for your generosity.
Merci pour ce merveilleux modèle, je regrette infiniment que tous ces beaux tutos ne soient pas en Français, car je cherche depuis des semaines le tuto en Français de ce lapin précisément , dont je suis tout simplement tombée amoureuse .
La plus part des modèles que j’apprécie sont en Anglais , que je électrise un peu mais bien sûr pas avec des termes techniques pour le crochet ou le tricot. A mon plus grand regret, pourriez-vous me dire comment faire pour recevoir ce tuto en Français, j’aimerais tellement le faire pour mes petits-enfants, qui sont déjà grands mais qui aiment les doudous surtout ce qui sont faits mains , par la Mamie .
Encore milles mercis pour vos doigts de fée et votre imagination que j’admire ! Bonsoir Ariane
Bonsoir, vous pouvez faire traduire sur votre page internet. Je fais comme ça.
Je lis le tour avant de le commencer pour m’assurer qu’il est compréhensible et correct et c’est parti !
Did you or can you make a YouTube video making this bunny? I do so much better with videos than I do with written patterns.
This is my second bunny from this pattern using the recommended thick and quick yarn. If you can’t get to the store to buy safety eyes, you can make them from a small piece of black yarn using this tutorial: https://www.youtube.com/watch?v=uJEdqfDUWsw. I did about 12-13 loops for a bigger eye and fastened it in. Looks good. Thank you for a great pattern!
Is this in US or UK terminology please?
These are beautiful!
Hi. I really like this buuny .ITs very cute.I want to try in worsted weight 4n. what size of a hook should I use. Will it be a small bunny . I am making the classic bunny pattern.
I loved this bunny! I made it with Pipsqueak yarn in white and it was so soft and cuddly, it made the perfect gift for my newborn niece. I used the yarn with worsted weight white yarn as a double strand which helped distinguish the loops and fill the holes. I embroidered the nose and eyes to be baby safe, and I made a pom pom tail which helped prop the bunny up when seated too. Only changes I made were to extend the body and arms by a couple rounds, and next time I’d extend the end of the legs a couple rounds too. Pattern worked up pretty quickly. Thanks so much for sharing it!
Thank you for this really easy pattern! Bunny turned out just great (I used Bernat Roving, which was a little hard but I’ll be making other bunnies with other softer yarn). This one is a gift for a friend going through chemo now – I know she’s going to love it! Thanks again!
this is one of my favorite patterns! I am thinking of making it from velvet yarn – has anyone tried that?
How do you attach all the parts together?
Did you ever get a reply to this?
Yes and it’s beautiful. I wish I could submit a photo of the one I just finished.
You can use mattress stitch to join your pieces: https://www.youtube.com/watch?v=4_fKBfybaZI&t=5s
You can add pics of your projects on Ravelry, or tag me on social media!
Hi, I do not have a video on stitching the pieces together. The yarn is built in such a way that there’s quite a lot of flexibility in how you attach the pieces, since any stitches will not be defined well.
How do you attach the head to the body? If I’m reading it right, you close up the head completely, so do you put it on top of the body and connect it the the six stitches of the body?
Is this easy enough for me if I just started amigurumi? I would like to use an easier yarn 🙂
Thanks
If you use a less fluffy yarn it would make it much easier!
Yes that’s right.
Hi, do you have a video tutorial on how to make this bunny?
Hi, unfortunately, I do not have a video tutorial for this project.
Hi I’m looking for the pattern and cannas choice yarn colors for the small bunny , I’m not seeing anything. I might be able to find the yarn . Thanks for any help 😊
The pattern is the same for both sizes of bunny, the size changes based on the yarn and hook size you use to make it. Vanna’s Choice is hard to find since it has been discontinued, if you do a Google search there appear to be some retailers that have some colors available but they may not have the exact ones I used.
And also did you use 2 strains for the small bunny ?
Hi can I get the vannas choice colors you used on the small bunny ? Thank you
Hi Lori, unfortunately, that color has been discontinued a few years ago.
It was a single strand of aran weight yarn. There are lots of beautiful aran weight options available – you can try KnitPicks too.
I am making one from thick white velvet at the moment. Its so big! The body needs to be extended a little to balance it out but its so soft and plush. Do it!!
I guess I’m not making myself clear , sorry, I’d like the name of the color you used in vannas choice yarn . Thank you
I love this pattern. My 3yo daughter claimed it before it was finished. I’m already making a second one. Thanks for the super cute bunny pattern!
so surprised to find you in the current issue of country woman. But sad to find out the pattern the bunny is not free. very miss leading in it sure would be nice to make.
The pattern is available for free, it’s at the bottom of the blog post (just above these comments!). I charge a fee for a printable PDF as the free version pays me through the ads on the blog post.
Okay, I just love this. I’m trying to hold back from making 20. As a left handed person I’ve struggled for years to find resources to help me learn. This was my FIRST project I’ve ever completed. I messed up the head by increasing in the wrong chain- good lesson on using stitch markers. But it still looked fine so I stuck with it! Also used the head and arms pattern to create a bear lovey for my youngest. Used a yarn bee romantique yarn that gives it a fuzzy “loved” look. Thank you for providing a pattern that not only was easy to follow but also explained the reasoning behind each technique!
Sorry I’m a complete newbie to crochet but just wondered is this in UK or us?? And if in us what size hook would I use as I’m in UK!!!! Sorry this makes me sound so silly lol…. But I would love for this to be my first project x
All the terminology used in 1 Dog Woof patterns is US terminology, but almost always both the US and metric hook or needle size is given – 8 mm for the bunny!
The Vanna’s Choice yarn is now discontinued, so I do not know the color that I used. Sorry!
Hey, looking forward to making this bunny… Just want to confirm that the head and body are indeeed the same pattern? In the pictures it seems like the body is larger 🙂
Hi dear, how tall is the finished bunny? This is so gorgeous 😍
Thank you for the pattern. I’ve been searching for a floppy ear bunny for a couple of years. I had bought one retailed bunny each for two nieces and they absolutely love them. I have new nieces and wanted to get them one also. I haven’t been able to locate any, so I began searching for a crocheted version. Thank you. Your pattern is just the right one. Can’t wait to start right after the baby blankets.
Hi Wilma,
They are not the same pattern, they do have the same number of rows, but they are different. How you full you decide to stuff each will also affect the finished shape!
The larger bunny shown is about 18 inches, but the finished size will depend on the yarn and hook size you decide to use.
SILLY QUESTION: IN THE SUPPLIES SECTION, WHAT DOES THE “6 SUPER BULKY “MEAN? WHAT IS THE 6 REFERRING TO?
Hi Paula,
Craft Yarn Council uses numbered classifications for the different weights of yarn. 6 is their classification for super bulky weight yarn. On yarn labels, especially from bigger brands sold at craft stores, there’s usually a little symbol of a yarn ball with a number on it indicating the Craft Yarn Council weight classification.
Hi! Thank you so much for making this pattern! I’m a beginner at crochet and so far have only worked in rectangles so this might be a silly question but I have just finished the head and body and both have come out very elongated and skinny on the end. On the body it’s not a huge deal because it seems like that’s kind of how it’s supposed to go but the head is a little funky. It’s fine in the front where the snout is but the back of the head is very long and almost becomes a little pointy at the end. Any tips on how to fix it and have that not be a problem again? Thanks!
I purchased this pattern from Etsy. It worked up great but came out smaller than I expected from the picture. Is thee another pattern for the llarger bunny?
The size depends on the yarn and the hook you use, if you use a bulkier yarn with an adjustment in hooksize, it will make a larger bunny:)
Hi Margot! Maybe try tightening your tension a little so that the stitch height is a little reduced! Hope that helps!
I just finished one with velvet yarn. Super cute and soft
I have made this pattern several times with a worsted weight and a weight 5 yarn. Have loved it. Decided to go for the Homespun Thick and Quick. Was able to get the pieces made up, but am having a dilly of a time connecting them. Any suggestions?
Hi did you use the color “pearls” for the Lion Brand homespun version?
i have
Hi, yes!