
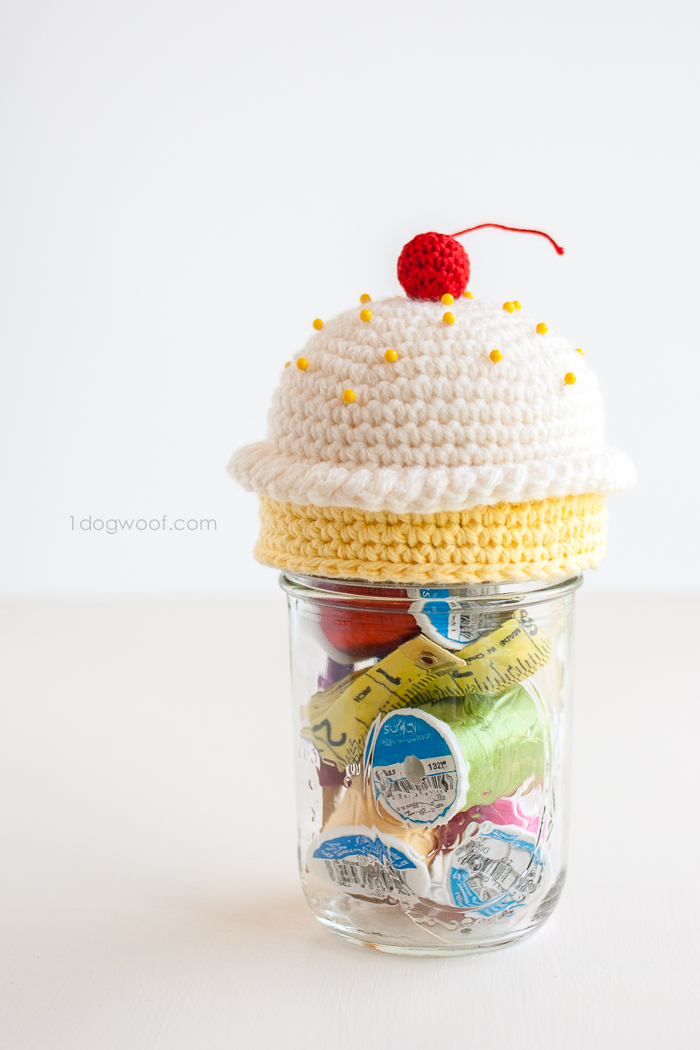
A long time ago, I think sometime last year, a friend of mine sent me a photo and asked if I could make her a cupcake pincushion that could sit atop one of those mason jar sewing kits. After much thought and much procrastination, here’s what I think is a great gift for crochet and sewing enthusiasts, a “crochet cupcake pincushion mason jar sewing kit”. (A mouthful, right?) Thanks for the great idea Elizabeth!
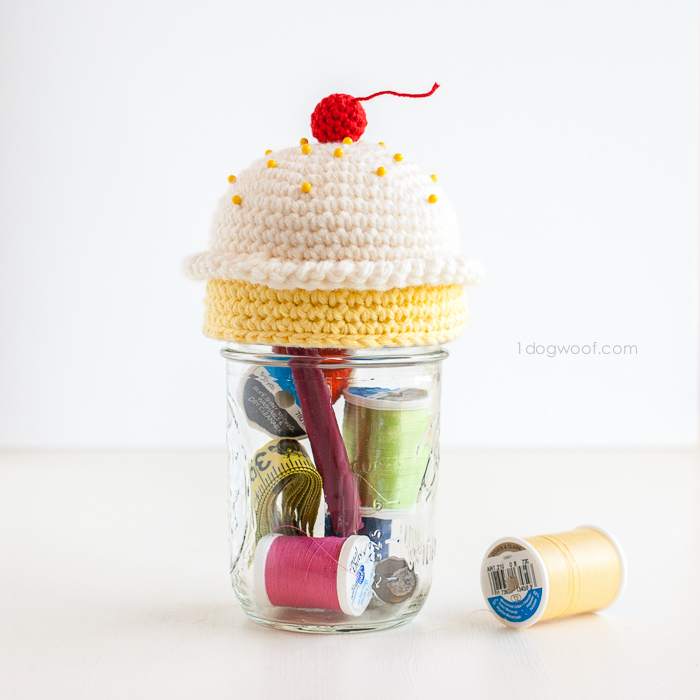
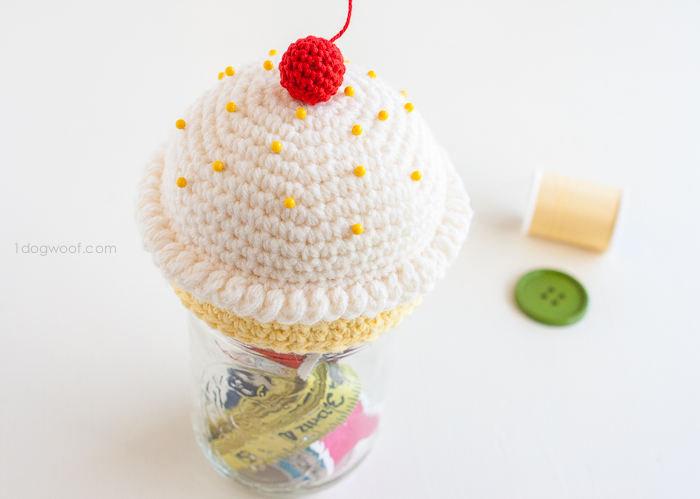
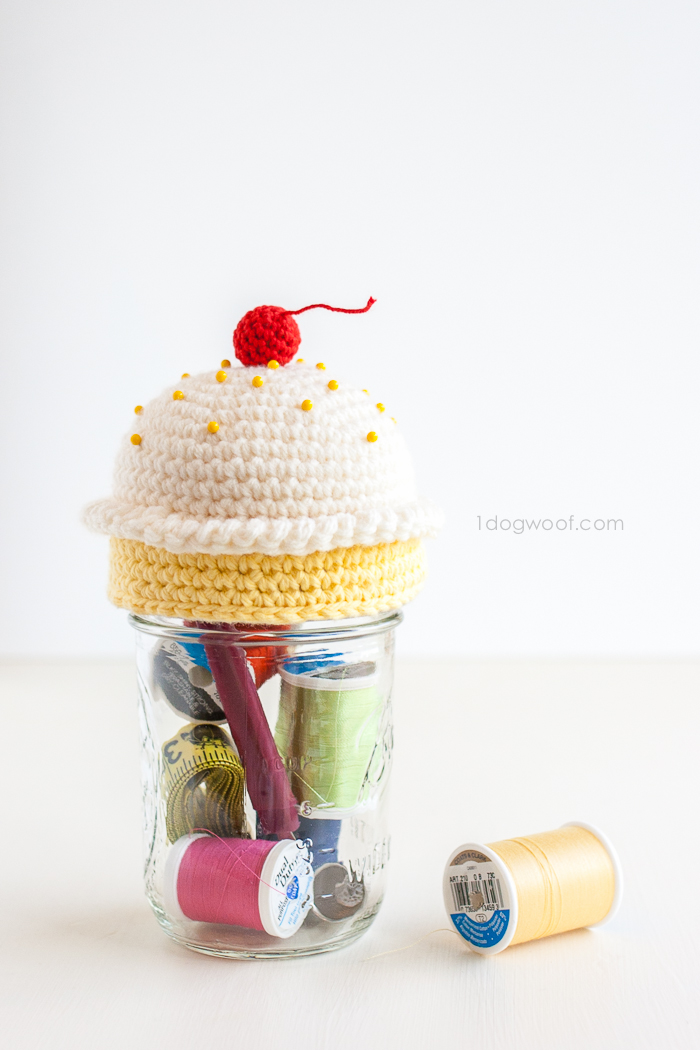
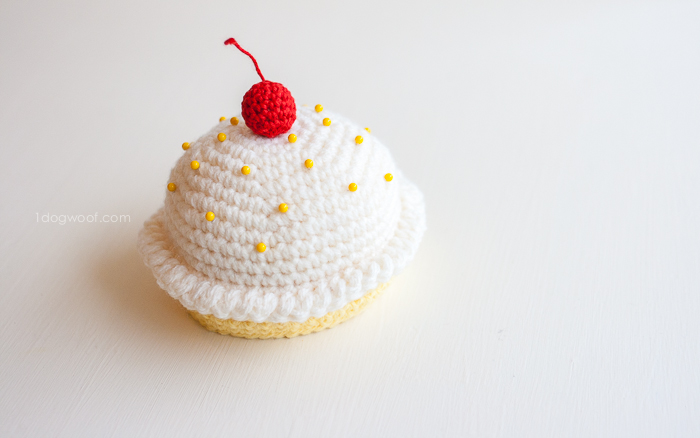
In the mason jar sewing kits you’ve seen around the internet (I’ve made a few myself!), the pincushion part is squashed between the lid and the ring cap. I blew up the pincushion part so that the cupcake base sits over and around the entire mason jar cap, and is topped by crochet frosting. And what cupcake is complete without a cherry to finish it off?
This pattern uses only basic stitches. I think the hardest part was deciding between a vanilla cupcake or a chocolate cupcake, and what kind of frosting I wanted! Like my other free patterns, please do not sell or distribute the pattern in any way. You are welcome to sell finished products from this pattern.
Oh, one more thing, this pattern is designed to fit large mouth mason jars, if that question comes up.
Supplies
G hook (4 mm)
C hook (2.75 mm)
Worsted weight yarn for the cupcake base and frosting. (This is a great scrapbusting project!)
Lion Brand BonBon Yarn in red for the cherry
One 5/8″ wooden bead
scissors
embroidery needle
hot glue
fiberfill stuffing
Abbreviations
sc : single crochet
hdc : half double crochet
dc : double crochet
sl st : slip stitch
sc2tog : single crochet 2 stitches together to decrease in a round
Instructions
CUPCAKE BASE
Round 1: Using the G hook, work 8 sc into a magic circle. Join round with a sl st. (8)
Round 2: Ch 1. Work 2 hdc into each stitch around. Join round with a sl st. (16)
Round 3: Ch 1. Work *1 hdc into next stitch, 2 hdc into next stitch* 8 times. Join round with a sl st. (24)
Round 4: Ch 1. Work *1 hdc into next 2 stitches, 2 hdc into next stitch* 8 times. Join round with a sl st. (32)
Round 5: Ch 1. Work *1 hdc into next 3 stitches, 2 hdc into next stitch* 8 times. Join round with a sl st. (40)
Round 6: Ch 1. Work *1 sc into next 4 stitches, 2 sc into next stitches* 8 times. Join round with a sl st. (48)
Round 7: Ch 1. Work 1 sc into each stitch around, back loops only. Join round with a sl st. (48)
Round 8-10: Ch 1. Work 1 sc into each stitch around. Join round with a sl st. (48)
Round 11: Ch 1. Work 1 sl st into each stitch around. Join round with a sl st. (48)
CUPCAKE FROSTING
Round 1: Work 6 sc into a magic circle. Join round with a sl st. (6)
Round 2: Ch 1. Work 2 sc into each stitch around. Join round with a sl st. (12)
Round 3: Ch 1. Work *1 sc into next stitch, 2 sc into next stitch* 6 times. Join round with a sl st. (18)
Round 4: Ch 1. Work *1 sc into next 2 stitches, 2 sc into next stitch* 6 times. Join round with a sl st. (24)
Round 5: Ch 1. Work *1 sc into next 3 stitches, 2 sc into next stitch* 6 times. Join round with a sl st. (30)
Round 6: Ch 1. Work *1 sc into next 4 stitches, 2 sc into next stitches* 6 times. Join round with a sl st. (36)
Round 7: Ch 1. Work *1 sc into next 5 stitches, 2 sc into next stitches* 6 times. Join round with a sl st. (42)
Round 8: Ch 1. Work *1 sc into next 6 stitches, 2 sc into next stitches* 6 times. Join round with a sl st. (48)
Round 9-12: Ch 1. Work 1 sc into each stitch around. Join round with a sl st. (48)
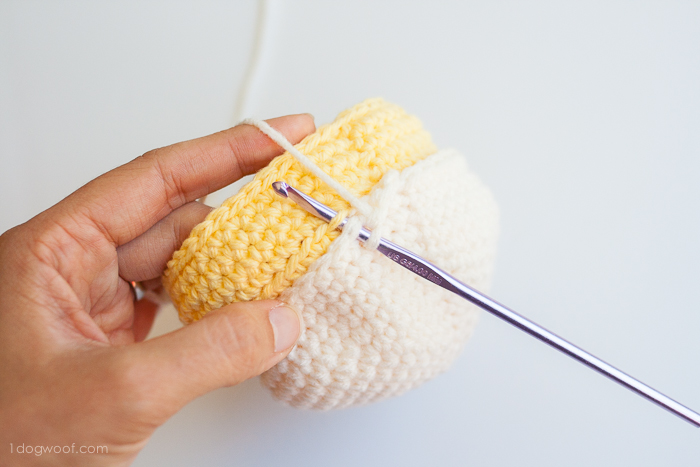
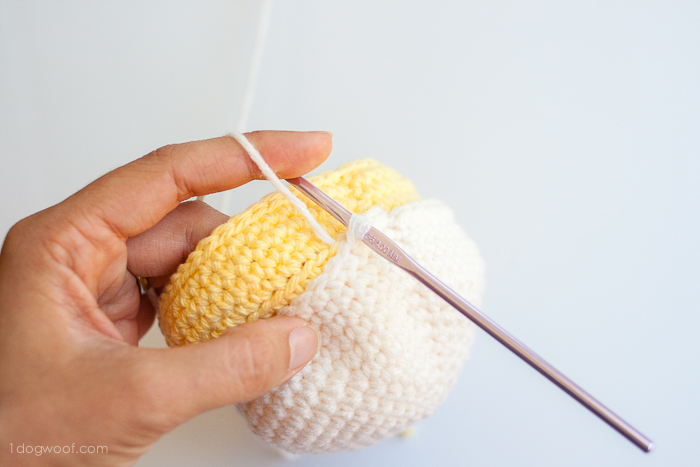
To join the base with the frosting,
Round 13: Ch 1. Working through both loops in the frosting and front loop of Round 7 from the cupcake base, work 1 sc into each stitch around. Join round with a sl st.
Before you complete the round, fill the pincushion with the fiberfill stuffing. Be generous with the stuffing, since it IS a pincushion!
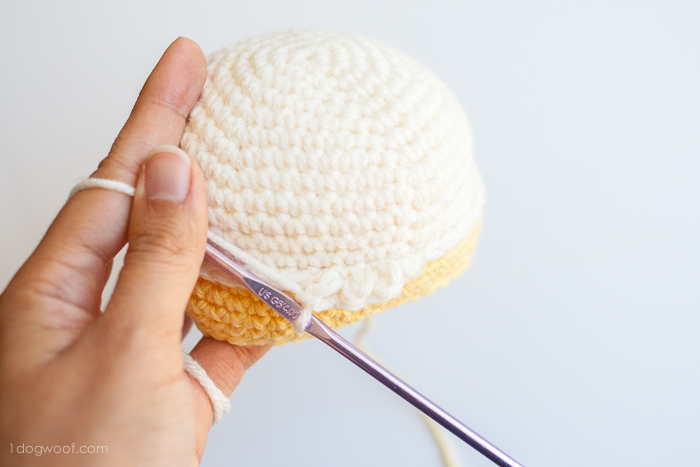
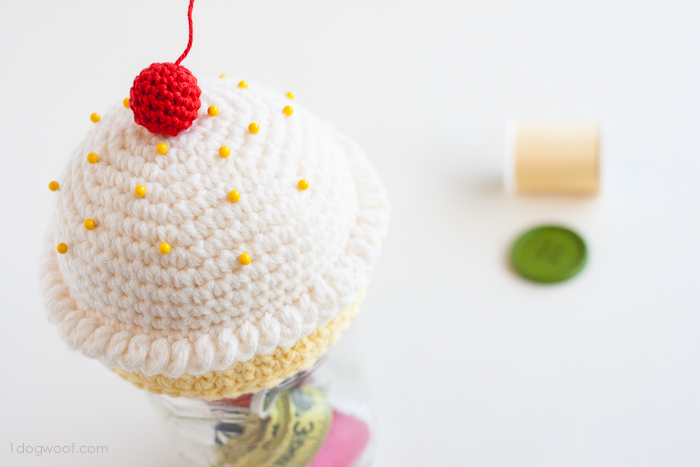
Round 14: Ch 1. Turn. Work (1 sl st + 1 dc) into each stitch around. Join round with a sl st. Fasten off and weave in ends.
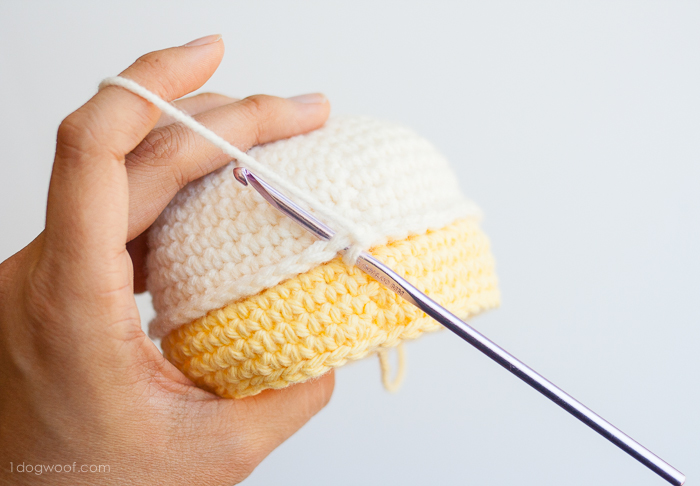
Here’s what the edging looks like after a few stitches.
CHERRY
Worked in continuous rounds.
Round 1: Using the C hook, work 6 sc into a magic circle. (6)
Round 2: Work *1 sc into next stitch, 2 sc into next stitch* 3 times. (9)
Round 3: Work *1 sc into next 2 stitches, 2 sc into next stitch* 3 times. (12)
Round 3-6: Work 1 sc into each stitch around. (12)
Insert the wooden bead here and work the following rounds around the bead.
Round 7: Work *1 sc into next stitch, 1 sc2tog* 3 times. (9)
Round 8: Work 2 sc2tog, or as few or as many as is needed to close off the sphere. Fasten off, leaving a small bit of yarn as the “stem”.
Hot glue the cherry onto the top of the cupcake.
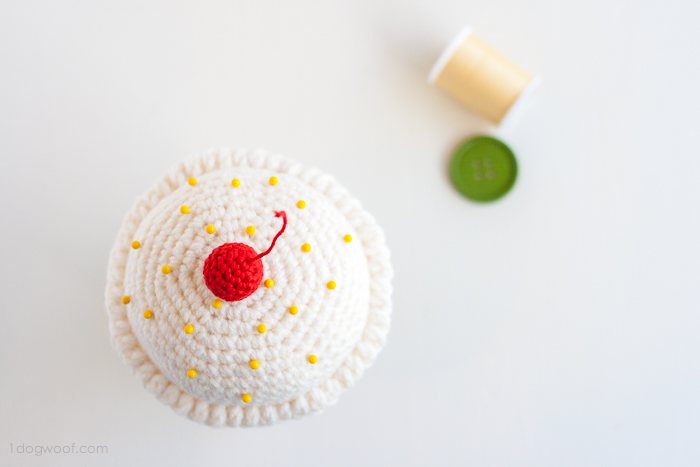
If you’re giving this away as a gift, it might be fun to pre-stock the pincushion with some colorful pins to act as sprinkles!
It’s also optional to hot glue the cupcake to the mason jar lid. I found that it was enough to put the cupcake on the closed mason jar, sort of like a big hat. And of course, you’ll want to fill the mason jar with all sorts of sewing goodies!


Gosh~ What a clever idea. So cute—thank you.
Adorable! This would be absolutely perfect for my sister who loves anything cupcake related!
Mercedesabam
I absolutely love this! I have already made one using chocolate “cake” and strawberry “icing”. Is there anyway I can get you to add it to your Raverly page so we all can show them off? I am getting so many compliments on it. Thank you so much for this! I have many friends who sew that I can gift this to. 🙂
I love this! It looks so cute and is totally practical! Thank you for sharing!
I just put it up on ravelry : http://www.ravelry.com/patterns/library/cupcake-pincushion-mason-jar-topper
Thank you!
Thank you! I love to crochet, but it is sometimes hard to make the perfect gift. I am going to make several of these for gifts for Christmas. Love them!!
Wonderful idea and pattern! Thx
Brilliant!! I shall be making many for Christmas gifts, after all, it is June.. Time to start thinking Christmas right? LoL. I am curious though, what size mason jar did you use?
Great idea!
This is so cute, it would make a great gift for a crafty friend!
This is so adorable!! I love when form and function meet. 🙂
This is super cute! Thank you so much for sharing. I can’t wait to try it!
I would love to make your cupcake pincushion, but I see that you have included two different size hooks to use. I couldn’t find any instructions as to which I should use on each section. Please inform me so I can get started. Love your work!
This is such a cute project! I think the pattern was so well written and fun to make. I reviewed the pattern on my blog as part of my cupcake pattern series. I made it for myself, but this would be such a cute gift for any occasion! I plan on making a few more to give as gifts. The finished result is so sweet and it looks great on my desk. Lovely, fun project! Thanks for sharing!
Pattern clearly states use the G hook for the cupcake and the C hook for the cherry.
When in doubt just read the pattern:))
Thank you for such a darling usable pattern. Your site is FANTASTIC!
Love this pattern. I checked sizes of mason jars. All I find are regular mouth and wide mouth. Would wide mouth work?