
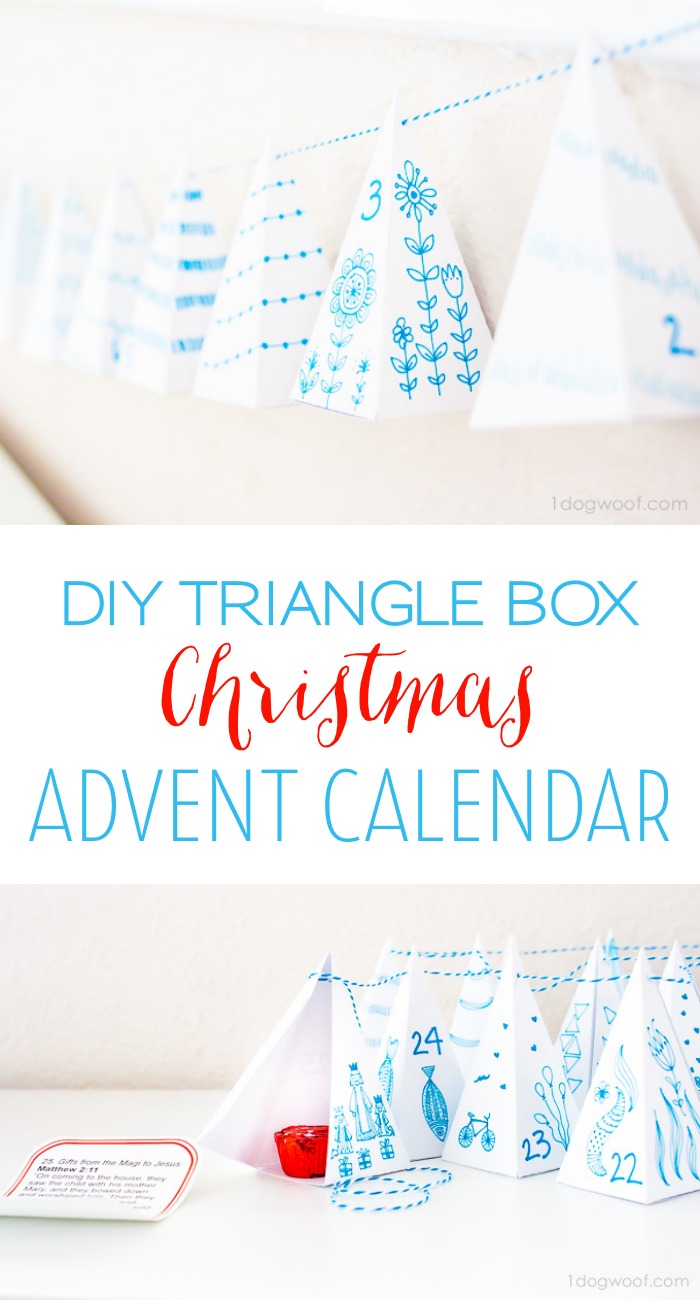
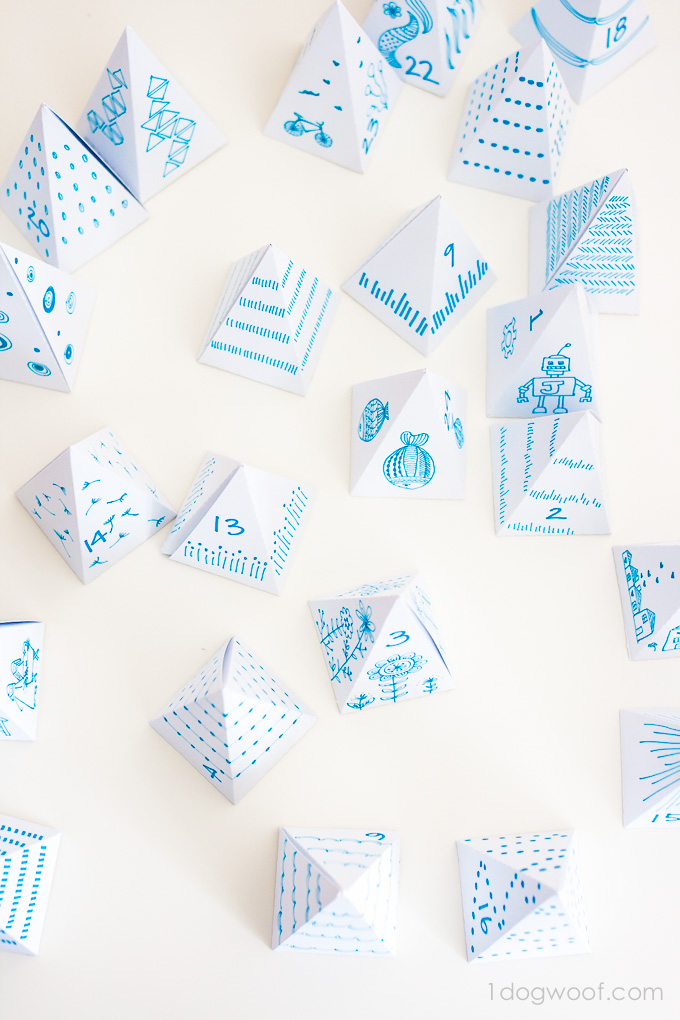
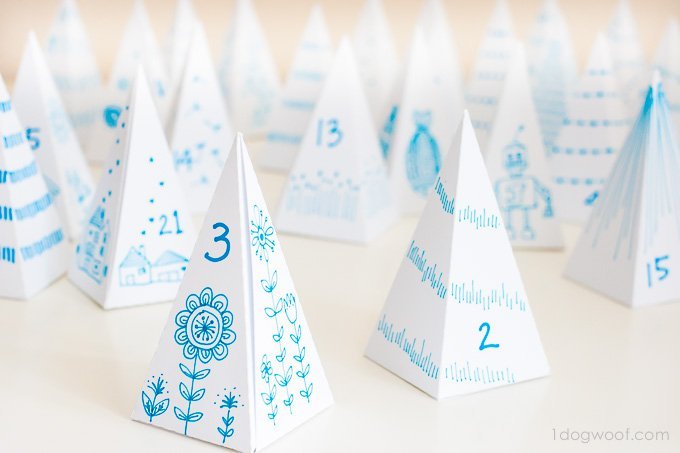
Now that I come home in the dark after work, I have to do all of my house projects on the weekends. Hey, I’m not complaining. At least I’m not driving to work in the dark, which is what I’d be doing if I were in snowy NY right now. We were pretty productive this weekend, getting our hallway finished and putting up an advent calendar to boot! My trusty Sihouette Cameo has settled into its new home on my desk and I churned out over 25 of these triangle boxes to make my Triangle Box Advent Calendar.

Yes, over 25 boxes, because I kept screwing up the decorating, or thought of something better. But, overall, this was a quick project – I did it while somewhat watching Elf (yeah!) and finished before the movie ended, so I could soak up the singing and the happy ending.
All you need for this easy advent calendar is the triangle box template, cardstock, glue and a marker. I recommend a fine felt tip pen since you can create much more detailed work, but a regular Sharpie works fine too. And yes, I was in a pretty doodly mood, having felt rather inspired after drawing on my copper striped tray, so I decided to pick one color felt tip pen and go nuts with the designs.
Supplies
cardstock
PDF template or Silhouette cut file
fine point felt tip pens
glue
string & large needle (optional)
1. Cut out the triangle box template using a Silhouette Cameo or by hand. Only cut on the solid lines and fold on the dotted lines. If you are using the Silhouette cut file, the dotted lines will be perforated for easier folding. If not, a ruler helps keep your folds crisp.

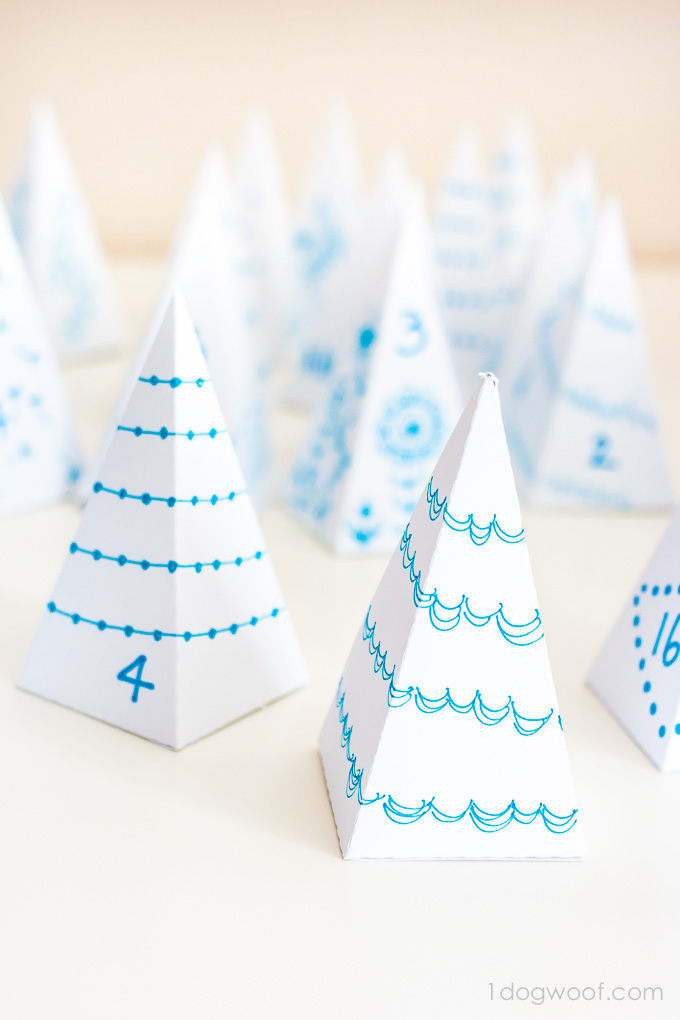
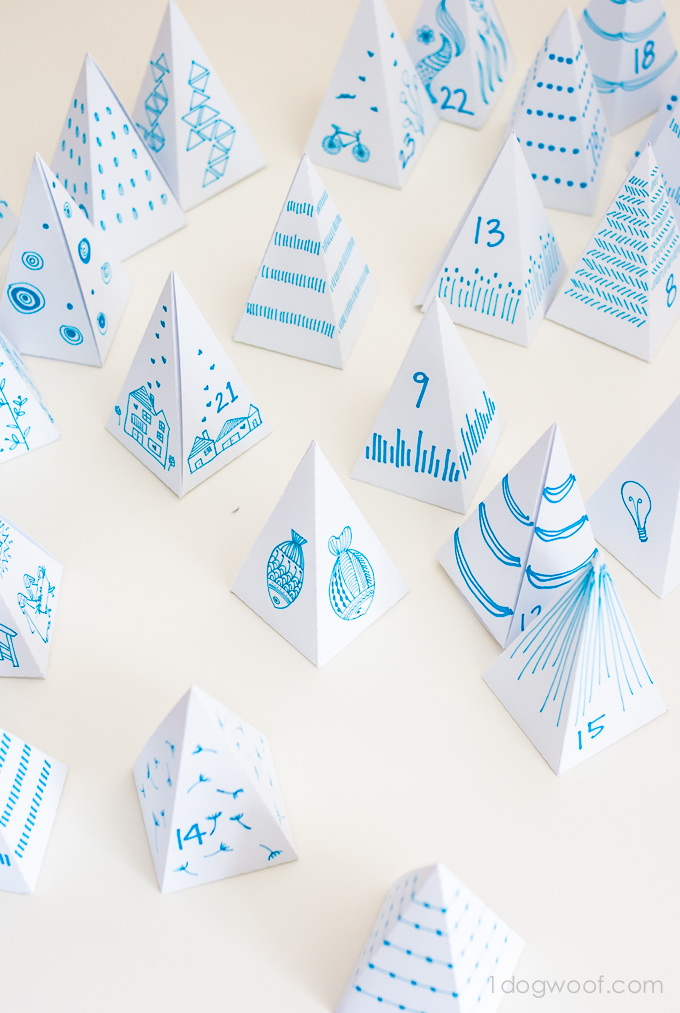
2. Before you glue the flaps to the bottom of the triangle, DECORATE! This is the best part! The world is your oyster! I really don’t have any instructions for you on this, since it’s completely up to you how simple or complicated, rustic or modern, you want to make it. I chose to draw abstract patterns on some of mine to look like modern Christmas trees, and then I drew some cute little pictures on others. The blue and white gives me a bit of a “Frozen” feel, but I considered metallic markers, and sequins as decorations too. It’s totally up to you!
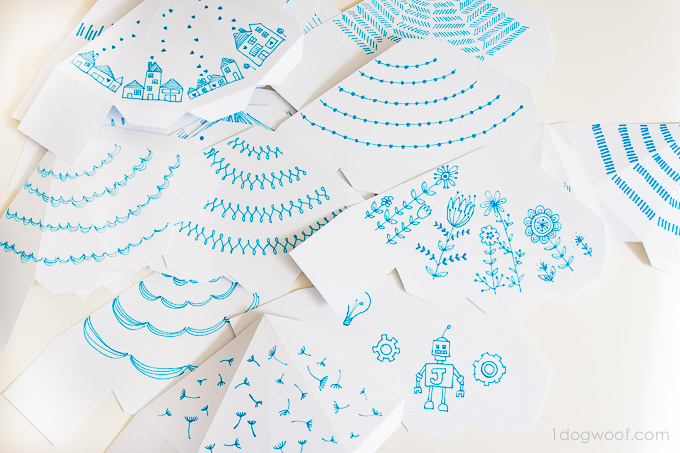
Tip: As you decorate, remember to leave room for your advent numbers. I forgot on a few of mine and had to squeeze them in there. If I could do over, I’d probably be more consistent in my number placement, but then maybe I’d feel restricted in my designs. I dunno. Just something to keep in mind.
3. Once you’re done decorating, glue two of the small flaps to the bottom panel. You’ll want to leave one triangle panel free so it’s like a little door. Why?
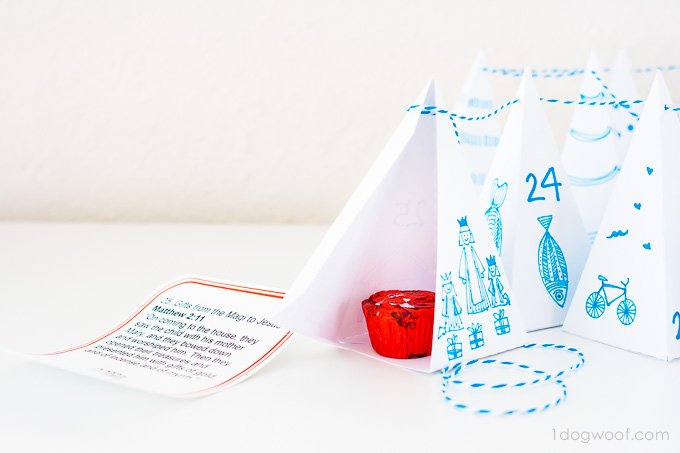
For treats, of course! Most of the time, the flap will stay closed without glue, and it’s a perfect place to store a bit of candy, a treat, or a slip of paper (fortune-cookie style) with Scripture or fun activities. Really, this design is very flexible to fit whatever your family’s custom.
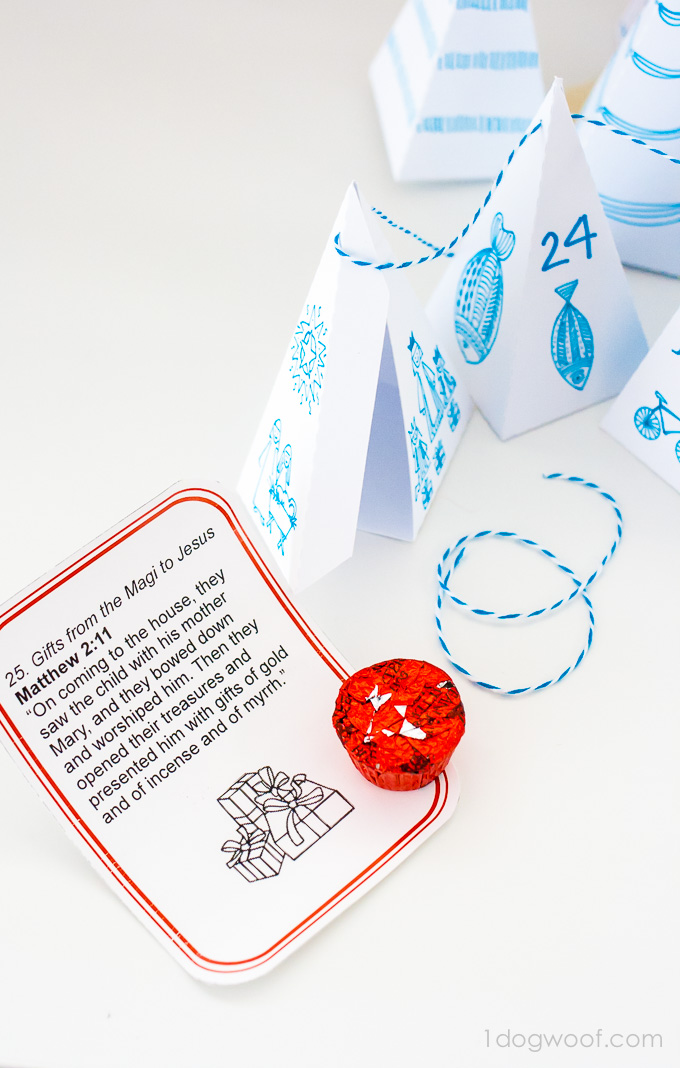
If you’re looking for good Scripture verses, I have a printable available that tells the Christmas story over the course of 25 days. The original instructions say to print on cardstock, but if you’re using it for this project, print on regular thinner paper so you can roll it up to fit inside the box. Tie it with a bit of ribbon for a scroll-like effect and it’ll feel like you’re unwrapping a bit of the Christmas story every day!
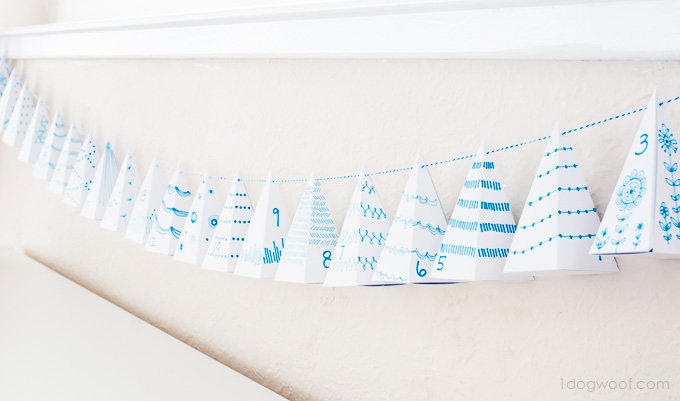
Finally, the method of display is also up to you. You can leave them all on a desk or table if you’d like. Or, take a needle and some thread, and make a garland by sewing through the tops of each box.
This was a really satisfying project because it was quick and ended up looking really good and I could let loose with my doodling creativity. Granted, I screwed up a couple boxes with some ugly doodles, but it’s just paper. Cut out a new template and start over! Lastly, I think the kids will enjoy the treats I’ll be hiding in these boxes, but only after we read the verses I’ll also be tucking inside!

You can download the templates here:
PDF | Silhouette .studio cut file
* affliate links


Love this and the doodling.
I love this! perfect for filling with notes and fun things. Pinned it!
Great job! I’m picturing J up on a chair opening all of these and swiping the treats…. 😉
This is a great idea. I love how you made these.
Thank you!
That’s why there’s no treats in them yet 🙂 And yes, he’s already excited about how they all open, but I don’t think it’s occurred to him that there’s going to be candy in each one. I’m also going to fill it with a small piece of paper with a bible verse, so learn a lesson, get a treat!
Thanks for the pin Emily! And yes, it is perfect to fill with all sorts of goodies!
Thanks Carolyn! The doodling is rather relaxing and gives me a sense of accomplishment, lol.
Love how yours came out! Wish I was there with you guys- the template I found wasn’t the same and seem more complicated. Yours are so cute and creative!
Just beautiful! Pinning! Visiting from tatertotsandjello link party!
cheers
Ursula
Thank you!
Thanks Patricia! Are you able to use PDFs in the Cricut? We’ll need to get together another night 🙂
In love with this Advent Calendar…so clean and pretty!!
Thanks for sharing at Monday Funday this week 🙂
Thanks for the feature Meredith!
This is beautiful. We have featured it on Mommy Moment.
I fell in love with this project! Thank you very much for this amazing tutorial. I made already my first version and I can’t believe it’s all made by me! Garland will be sewn tomorrow but below you can see the triangles!
You can see the picture at https://bit.ly/2OpGlLS