
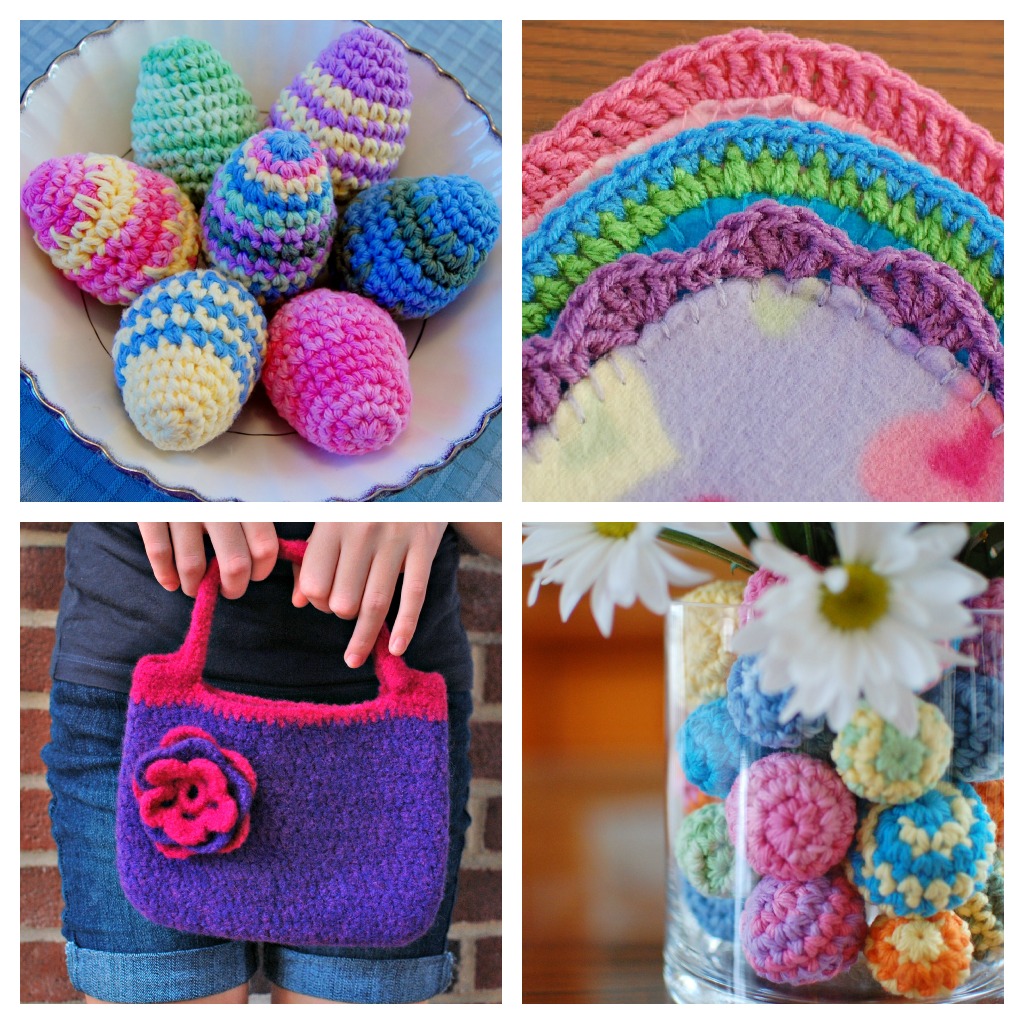
I’m so happy to have Kara here as a guest poster today! I absolutely love her patterns and tutorials and crochet references. If you haven’t gotten around to saying hi, head over there and look around – you’re gonna fall in love!
Hi everyone! I am so excited to be a part of ChiWei’s crochet along. This is going to be so much fun, and I am so excited about working up the pretty Double Strand Infinity Cowl.
Let me introduce myself … my name is Kara and I blog over at Petals to Picots, where I share my passion for crochet with free patterns, peeks at my works in progress, and lots of tips and tricks.
And today, I am here to share one of those tricks with you … making a magic ring.
The magic ring is also called a slip ring, adjustable ring, magic loop, or magic ring, and it is used as an option for starting work in a round. The magic ring is so awesome because it allows you to pull the the hole in the center of your work closed, which is great when making things like hats, amigurumi, granny squares, flowers, and other motifs.
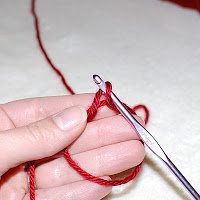
To make a magic ring, make a loop with the yarn around your fingers with the tail end of the yarn behind the working yarn (the yarn coming from the skein) and leaving a tail about 6 inches long (see Fig. 1). Hold the place where the yarn overlaps between your thumb and forefinger (Fig. 2).
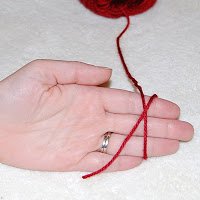 |
| Fig. 1 |
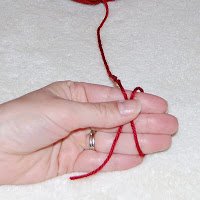 |
| Fig.2 |
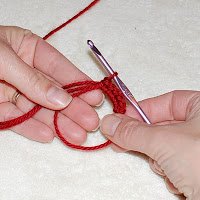
Insert your hook through the loop (see Fig. 3) and bring through a loop of the working yarn, one loop is now on the hook (see Fig. 4).
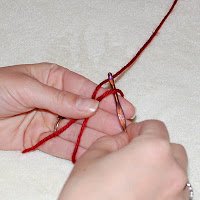 |
| Fig. 3 |
 |
| Fig. 4 |
Work the first round as instructed by your pattern. In most cases you will chain 1 and make a number of single crochets into the loop (see Fig. 5). Join and pull on the tail end of the yarn to tighten (see Fig. 6).
 |
| Fig. 5 |
 |
| Fig. 6 |
I also made a handy little video to help you out …
© Copyright 2012 by Petals to Picots
Please refer to my Terms of Use for copyright details.
Thank you so much, ChiWei, for having me over and for putting together this awesome CAL!

Thanks Kara! Next Monday, we’ll be going over and understanding the cowl pattern so that those of you who are new can get started. I know many of you have already started (or finished!) the cowl, which is awesome! I can’t wait for the link party in a couple of weeks where you can all show off your finished projects!


Thanks, Kara, for a great tutorial 🙂
Thanks, ChiWei, for inviting a great guest 🙂
Thanks Kara for showing how to do the magic ring. A few months ago I found a video tutorial on line but she went so fast & didn’t really show what she was doing very well. Your instructions are perfect!
You are very welcome! I hope it was helpful 🙂
I am so happy to hear that it was helpful! Thanks for your sweet comment 🙂