
Personally, I don’t like giving gift cards. I think a gift card can cut both ways – it gives the recipient the flexibility to purchase something for herself, but it can also signal a lack of thought in gift-giving. But I also understand that there are times when you just don’t know what to get, even after giving it a lot of thought. So, gift cards can be your graceful way out. In cases like that, a beautiful crochet unicorn gift card holder is the perfect wrapper. We all know that person who loves unicorns, or someone who has those magical qualities of putting up with us. Plus, everyone needs a unicorn in their life, either this one, or her larger unicorn sister. And after making this, no one can say you didn’t put time, thought, effort and love into giving that gift!
I’ve decided that it’s good to have little projects on hand, like this Unicorn Gift Card Holder, to keep me motivated in the face of some large and daunting yarn fiascos, like blankets and sweaters. This little guy came about as I was thinking about my Snowman Gift Card Holder on the drive to work one day, and wondering if I should make a summer version. I mentioned it at the office, and a friend suggested that I should make a unicorn one, because they’re so hot these days, especially after Starbuck’s unicorn frappucino.
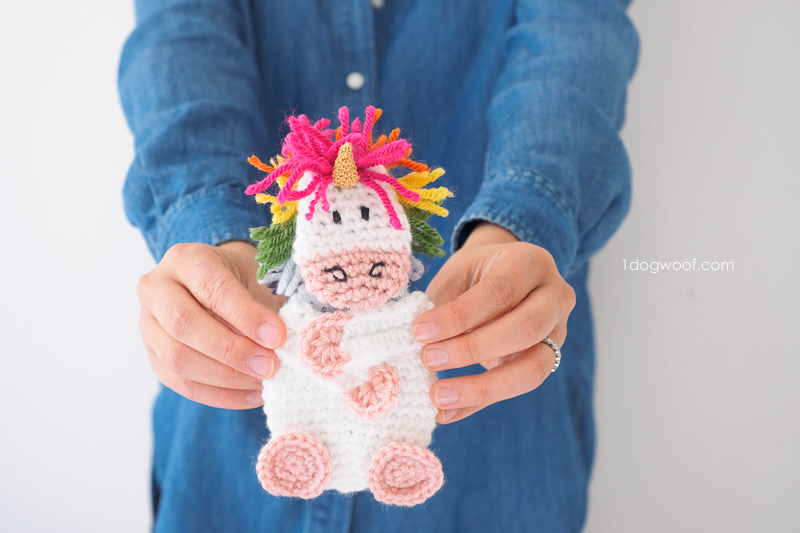
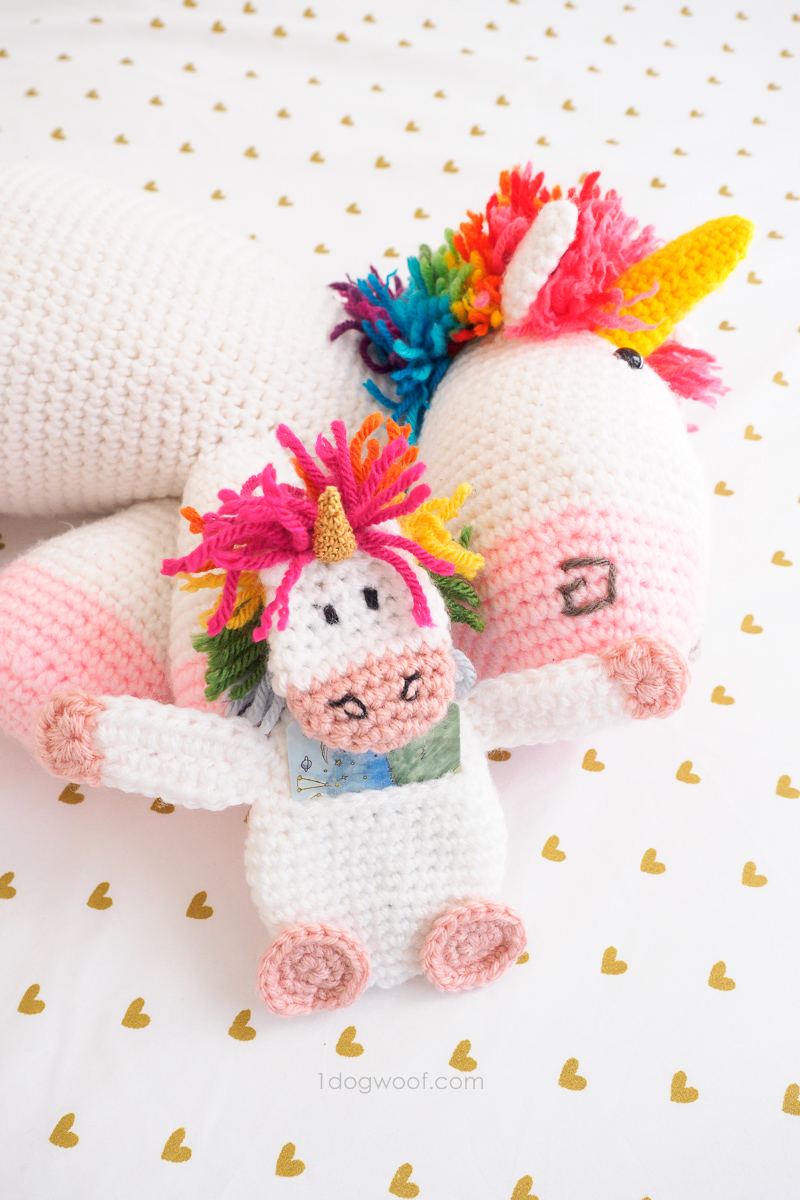
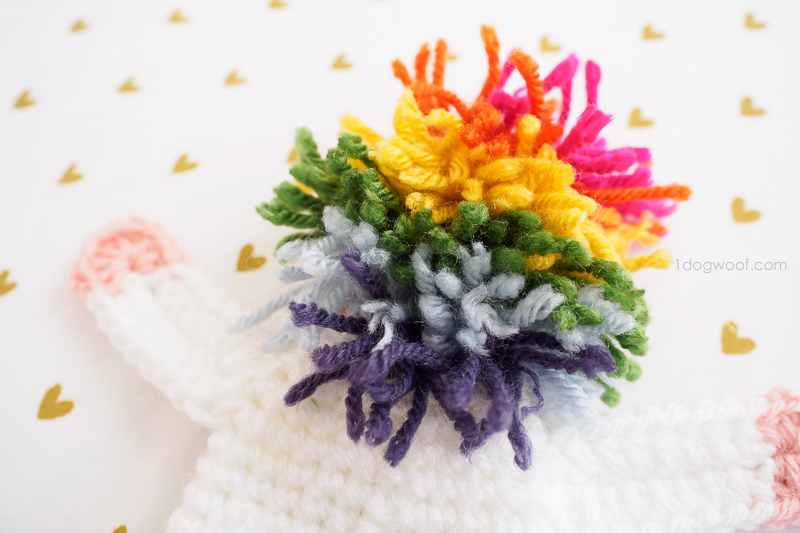
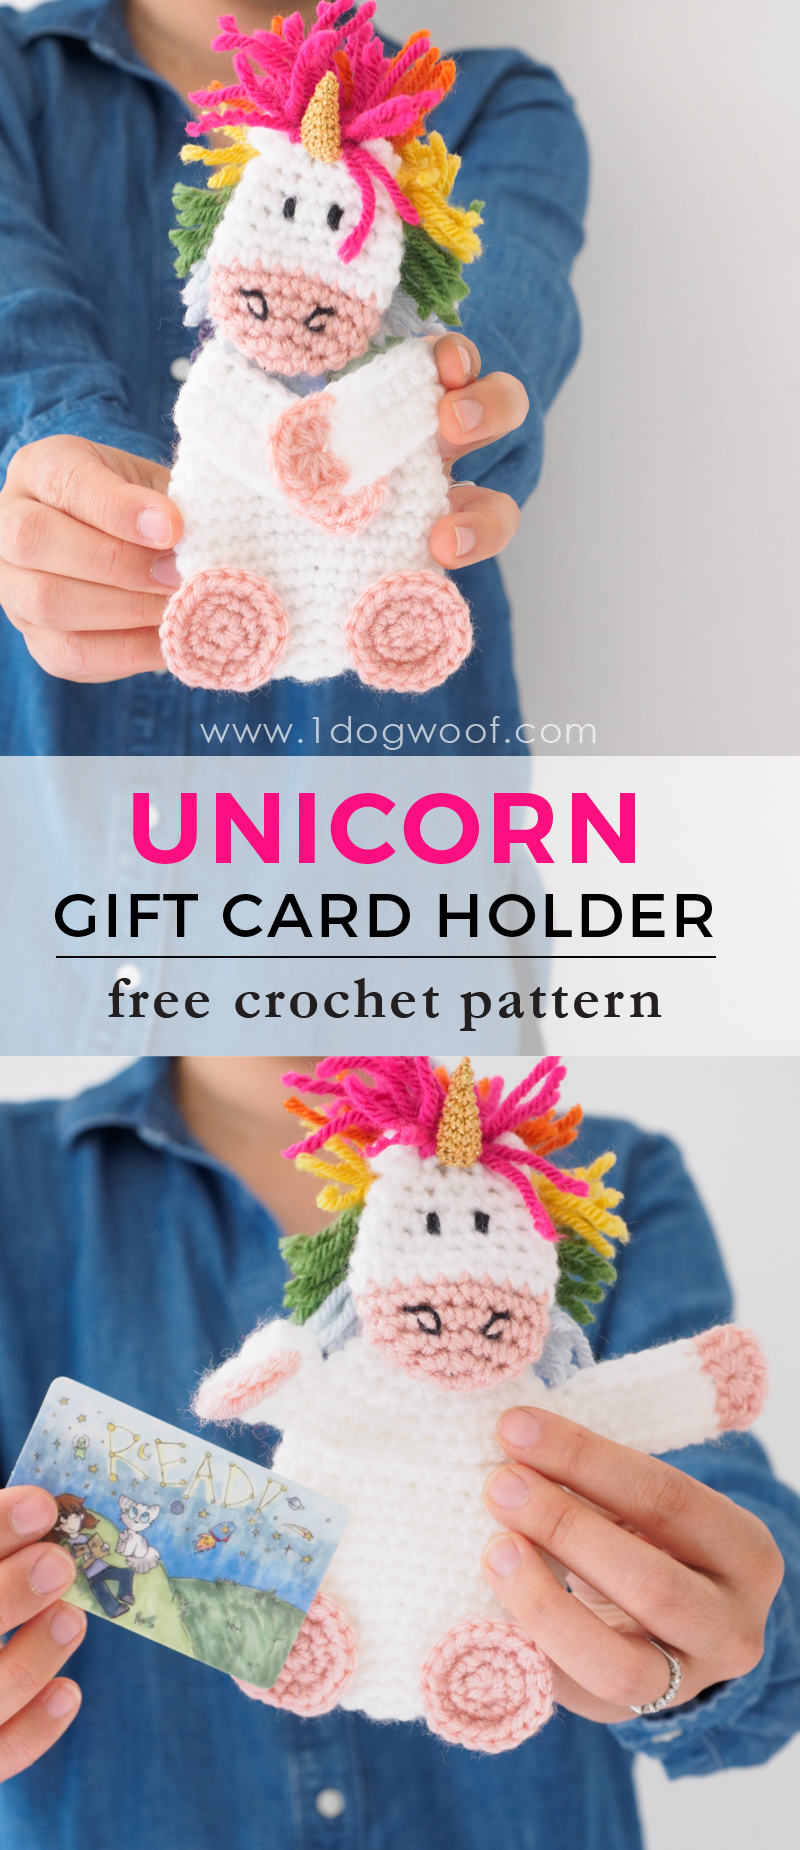
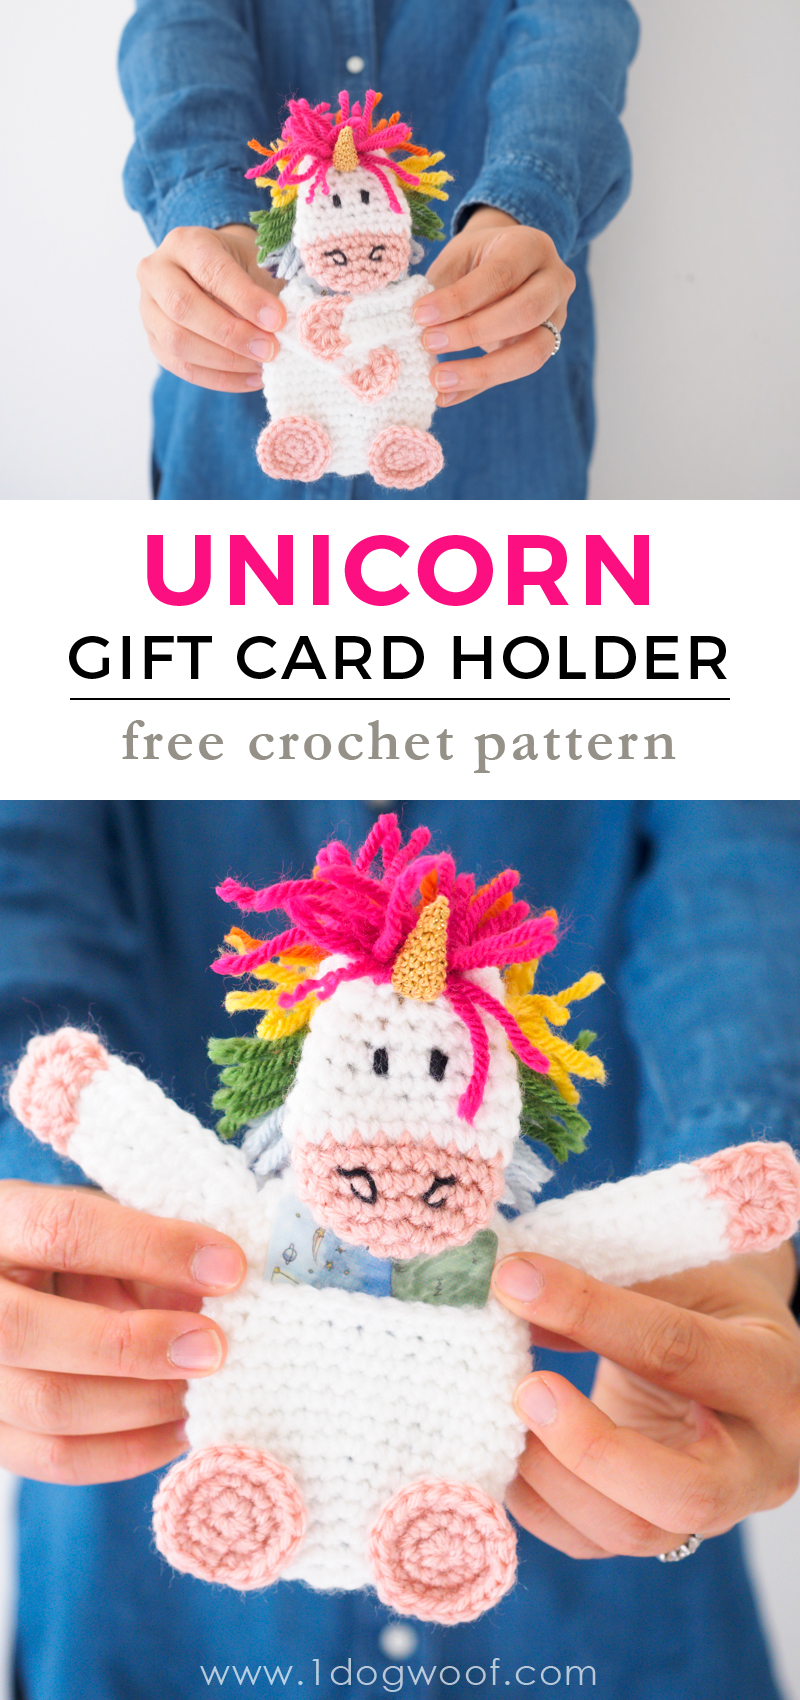
This unicorn gift card holder is modeled after my stuffed unicorn and has the same basic look, along with the same rainbow mane. The difference is that, this unicorn is made to hold a card, so even though the head and body are worked in the round, they are unstuffed and flattened out. I used Lion Brand Vanna’s Choice yarn, which offers a great variety of bright, vibrant colors. And yes, I had all these colors in my stash!
The order in which the pieces are made doesn’t really matter, as they are all assembled bit by bit. The eyes and nostrils are carefully embroidered on to the head before closing the head off. In the instructions below, I say to add the ears on separately, but if you’re clever with your yarn, you could pull the yarn through the head, lock a chain stitch where the ears are, and then crochet the ears directly onto the head without cutting and starting over. I just fiddled with it until it worked.
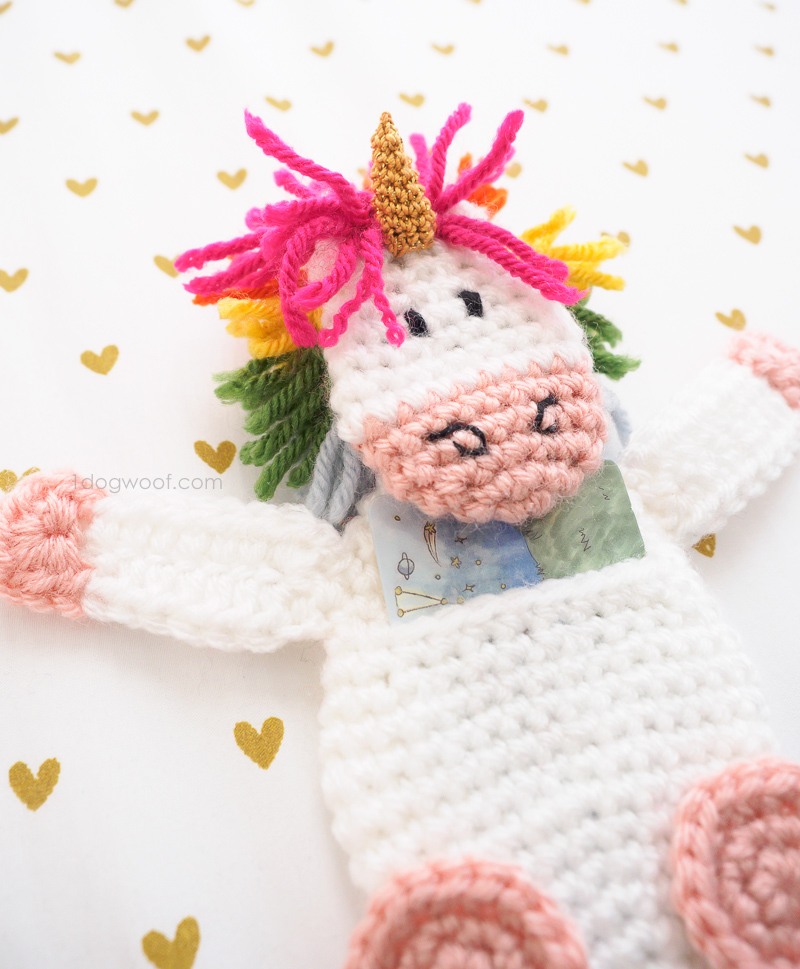
The horn was a beast to make, mostly because it was so small! I used some glitter crochet thread I had already, but any fine yarn will do, like Lion Brand BonBons yarn. For the horn, I decided to start with a foundation single crochet round because I couldn’t quite see my chain stitches if I did it the other way. You can start any way you’d like! The trick to a sharp point on the horn is to use this method of closing up amigurumi, but instead of pulling it back through the horn, you want to emphasize the ‘bump’ and pull upwards and outwards to get that pointy tip. You’ll need to draw the yarn back through the horn in order to fasten it off, but doing so lightly won’t make the horn stubby.
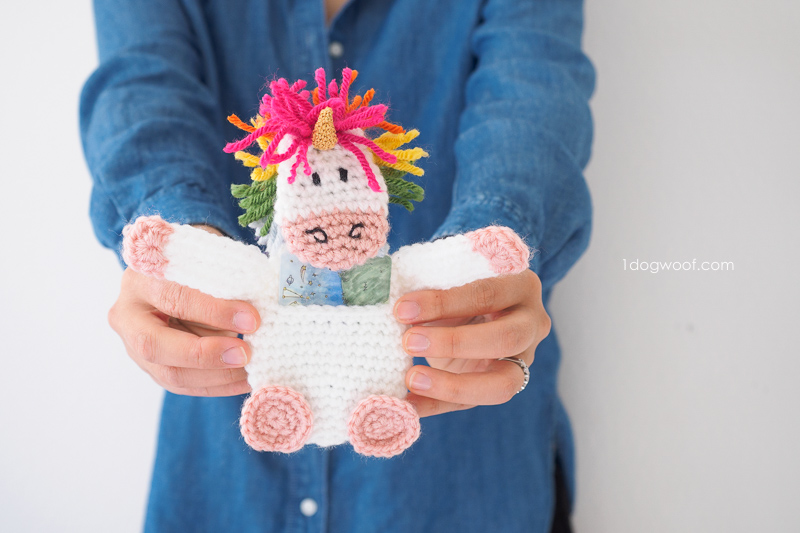
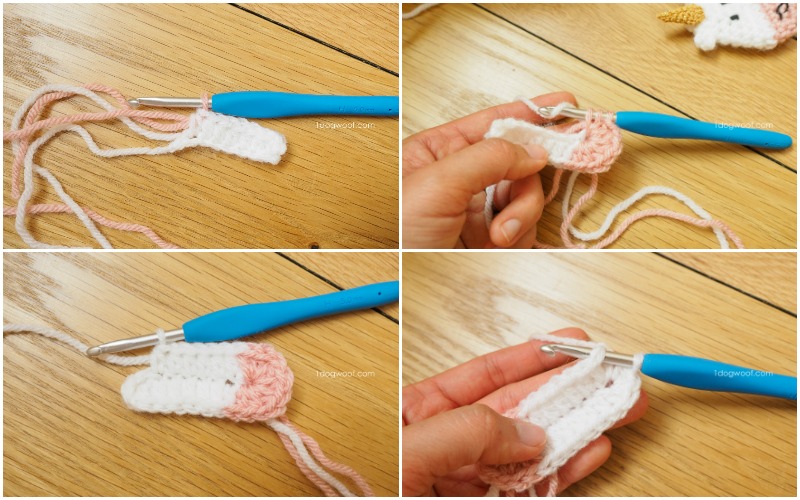
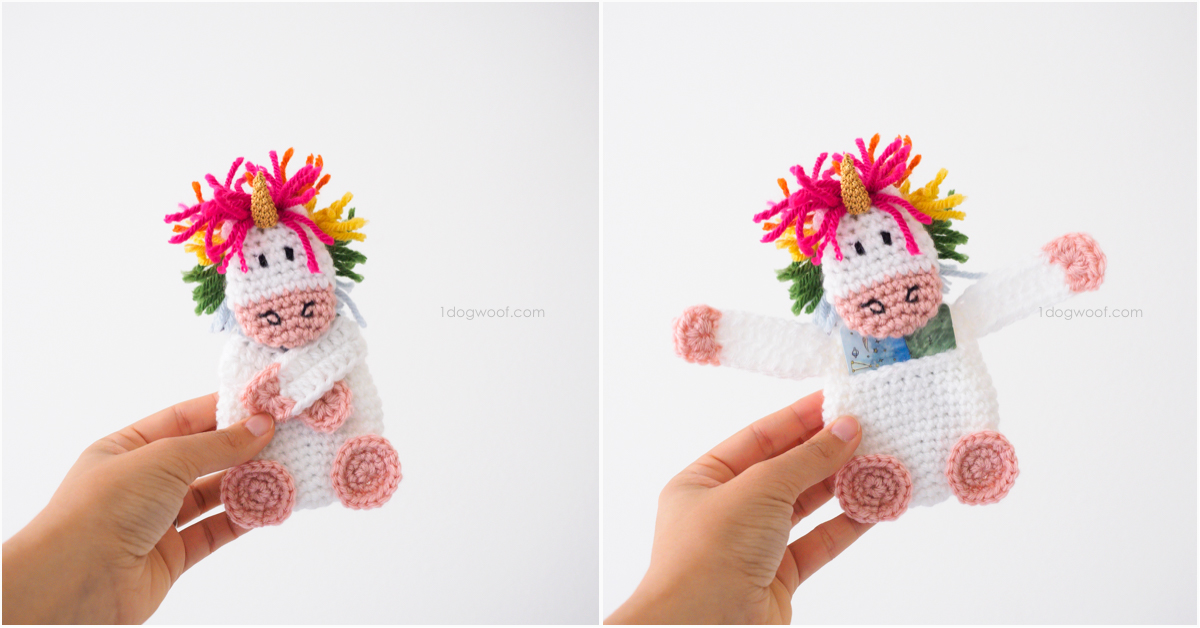
The 2 arms are identical, with the back of the piece being the inside of the arm. This just means that you’ll attach the arms at different points to the body. Sew the left arm onto the body starting at Round 17, attaching downwards the feet. Sew the right arm onto the body starting at Round 14, attaching upwards towards the head. Each arm starts with chain stitches in white, then half double crochet stitches until the last stitch, when you switch to the pink/hoof color yarn. Work the hoof stitches all in the last chain stitch, then switch to white to work back up the arm. I carried both the pink yarn tail and the white active yarn through the hoof stitches. I also used the tails to close up any holes and gaps left in my work.
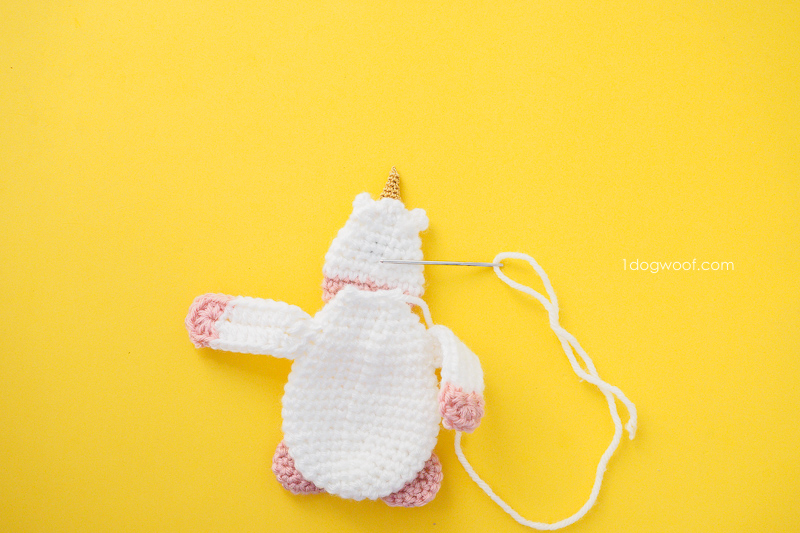
The head and body pieces are both flattened, and the head is completely closed up, so use the yarn tail on the body to connect the body to where the pink and white sections join on the head. This allows the head to flop a bit and also helps the gift card stay in place and maybe even hide it a bit.
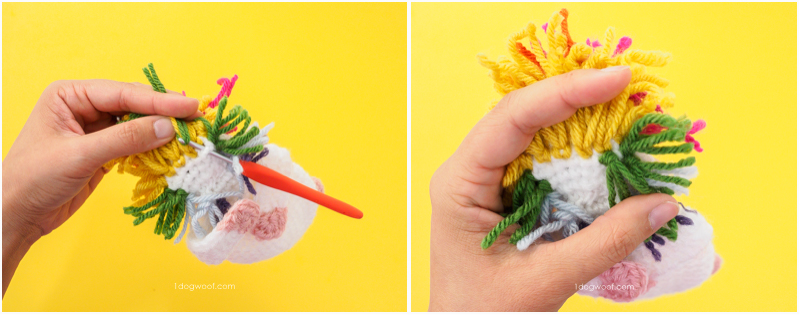
Lastly, cut a bunch of colored yarn sections to use for the mane. Hold 2 yarn pieces together and tie a larks knot to stitches on the head to create a fuller mane. Using 1 yarn piece gives a bit of a straggly look. I tried for approximately 2 rows of each color, skipped the row where the body joins the head, and tied one more row of mane hair below the body join.
This project is small but it does take time because of all the different pieces that need to be sewn together. The mane also takes quite a bit of time and patience. But once you’re done, you have a pocket full of cuteness!
If you’d like to print this pattern, you can purchase an inexpensive, ad-free and comment-free PDF from or Etsy. The PDF file is full of easy to read text and instructional photos, and is available for download immediately after payment. Or, if you’re on Ravelry, add this project to your Ravelry queue!
I know some of you crochet for yourselves and friends and family, some of you don’t crochet, and some of you sell finished items from my patterns. For those of you who have Etsy shops and are willing to custom make this pattern for others, I’d love if you can take a moment to become part of my One Dog Woof Artisans Community! All you need to do is fill out this shop form with information about your shop, and it will be added to this spreadsheet for others to find you. I get requests all the time from people looking for finished products, and I’d love to send business your way!
Makers – add your shop here!
Buyers – interested in finding someone to make a One Dog Woof project for you? Check here!
Supplies
- 1 skein of Lion Brand Vanna’s Choice in White (100g/3.5oz, 170yds/156m, 4 Medium)
- Scrap lengths of Lion Brand Vanna’s Choice in Pink, Raspberry, Rust, Mustard, Kelly Green, Silver Blue, Purple
- 1 Clover USA crochet hook H/5.00mm*
- 1 Clover USA crochet hook B/2.25mm*
- Scrap lengths of Lion Brand BonBon Yarn (2 Fine) in Black and Yellow, found in the color-way Beach
- scissors
- tapestry needle
Abbreviations
- sl st – slip stitch
- ch – chain stitch
- sc – single crochet
- hdc – half double crochet
- sc2tog – single crochet decrease: Insert hook into front loop of next st. Without yarning over, insert hook into front loop of next st. Yarn over. Pull through 2 loops on hook. Yarn over, pull through remaining loop on hook.
Pattern Notes
- Skill level Intermediate for complexity of small pieces and joining.
- Gauge doesn’t matter on this project.
- Overall size is approximately 8 inches tall.
- Pattern is worked in seamed rounds, from the bottom up.
- Project is worked in the round, but flattened when finished, not stuffed.
Crochet Unicorn Gift Card Holder Instructions
BODY
Round 1: Work 6 sc into a magic circle. Join with sl st to first sc. (6)
Round 2: Ch 1. Work 2 sc into each st around. Join with sl st to first sc. (12)
Round 3: Ch 1. Work [1 sc into next st, 2 sc into next st] 6 times. Join with sl st to first sc. (18)
Round 4: Ch 1. Work [1 sc into each of next 2 st, 2 sc into next st] 6 times. Join with sl st to first st. (24)
Round 5-6: Ch 1. Work 1 sc in each st around. Join with sl st to first sc. (24)
Round 7: Ch 1. Work [1 sc into each of next 3 st, 2 sc into next st] 6 times. Join with sl st to first st. (30)
Round 8-11: Ch 1. Work 1 sc in each st around. Join with sl st to first sc. (30)
Round 12: Ch 1. Work [1 sc into each of next 3 st, 1 sc2tog] 6 times. Join with sl st to first st. (24)
Round 13: Ch 1. Work 1 sc in each st around. Join with sl st to first sc. (24)
Round 14: Ch 1. Work 1 sc in each of next 8 st. Ch 8, skip 8 st. Work 1 sc in each of remaining 8 st. Join with sl st to first st. (24)
Round 15-16: Ch 1. Work 1 sc in each st around. Join with sl st to first sc. (24)
Round 17: Ch 1. Work [1 sc into each of next 2 st, 1 sc2tog] 6 times. Join with sl st to first st. (18)
Round 18: Ch 1. Work [1 sc into each of next 4 st, 1 sc2tog] 3 times. Join with sl st to first st. (15)
Round 19: Ch 1. Work [1 sc into each of next 3 st, 1 sc2tog] 3 times. Join with sl st to first st. (12)
Round 20: Ch 1. Work 1 sc in each st around. Join with sl st to first sc. (12)
Flatten the body and close off the opening with sl st across.
HEAD
Round 1: In pink, work 6 sc into a magic circle. Join with sl st to first sc. (6)
Round 2: Ch 1. Work 2 sc into each st around. Join with sl st to first sc. (12)
Round 3: Ch 1. Work [1 sc into next st, 2 sc into next st] 6 times. Join with sl st to first sc. (18)
Round 4-5: Ch 1. Work 1 sc in each st around. Join with sl st to first sc. Switch to white. (18)
Round 6-7: In white, ch 1. Work 1 sc in each st around. Join with sl st to first st. (18)
Round 8: Ch 1. Work [1 sc into each of next 4 st, 1 sc2tog] 3 times. Join with sl st to first st. (15)
Round 9: Ch 1. Work 1 sc in each st around. Join with sl st to first st. (15)
Round 10: Ch 1. Work [1 sc into each of next 3 st, 1 sc2tog] 3 times. Join with sl st to first st. (12)
Stop to embroider on eyes on Round 9 and nostrils on Round 3 using thin black yarn (Lion Brand BonBon yarn).
Round 11: Ch 1. Work [1 sc into each of next 2 st, 1 sc2tog] 3 times. Join with sl st to first st. (9)
Round 12: Ch 1. Work [1 sc into next st, 1 sc2tog] 3 times. Join with sl st to first st. (6)
Cut yarn and pull through last stitch. Sew end through front loops of each of 6 st around. Pull tight to close off the head.
Fasten off and weave in ends.
EARS (Make 2)
- Flatten out the head. Join white yarn on either side of the head at Round 11.
- Ch 2. Work 1 hdc into same st as join.
- Fasten off and weave in ends.
HORN
Round 1: Using thin yarn (Lion Brand BonBon in Yellow), work 9 foundation single crochet stitches. Work in a continuous spiral.
Round 2-3: Work 1 sc in each st around. (9)
Round 4: Work 1 sc2tog, 1 sc in each remaining st around. (8)
Round 5: Work 1 sc2tog, 1 sc in each remaining st around. (7)
Round 6: Work 1 sc2tog, 1 sc in each remaining st around. (6)
Round 7: Work 1 sc2tog, 1 sc in each remaining st around. (5)
Cut yarn and pull through last stitch. Sew end through front loops of each of 5 st around. Pull tight upwards from the horn to create the sharp tip.
Fasten off and sew ends back through the center of the horn.
Use either tail end to sew horn to the head at Round 11 of the head. Weave in remaining ends.
ARMS (Make 2)
- With white yarn, ch 10.
- Starting from the 3rd ch from hook, work 1 hdc in next 7 st. Switch to pink.
- With pink yarn, work [2 hdc, ch, 3 hdc, ch, 2 hdc] in last st. Switch to white.
- With white yarn, work 1 hdc in next 6 st, 3 hdc in last st.
- Join to first hdc with sl st.
- Cut a long tail for sewing to the body, and fasten off.
FEET (Make 2)
Start with a long tail for sewing to the body.
Round 1: Work 6 sc into a magic circle. Join with sl st to first sc. (6)
Round 2: Ch 1. Work 2 sc into each st around. Join with sl st to first sc. (12)
Round 3: Ch 1. Work [1 sc into next st, 2 sc into next st] 6 times. Join with sl st to first sc. (18)
Fasten off and weave in ends.
ASSEMBLY
- Attach each feet to body at approximately Round 4 of body.
- Attach each arm to either side of the body so that the ‘armpit’ lines up with the slot for the gift card. The first stitch for the right arm starts at ~Round 14. The first stitch for the left arm starts at ~Round 17.
- Attach the body to the back of the head piece where the pink and white yarn join, at Round 6.
- Add rainbow mane by tying lark knots in each stitch at the back of the head.
Please share your work with me on Facebook (One Dog Woof) or Instagram (@1dogwoof)! You can tag your post with #1dogwoof. Enjoy!
Check out my pattern shops on Etsy and Ravelry where you can purchase printable PDFs of my latest crochet patterns. These PDFs are formatted without comments or ads, and have instructional photos at the bottom for optional printing.
I sometimes include affiliate links in my supply lists. Purchasing from these merchants earns me a small commission with no extra cost to you, and goes towards supporting One Dog Woof.
Please be respectful and do not sell or distribute this pattern in any way, especially as your own. Instead, share the original blog post link! You can sell finished products made from this pattern by giving credit to One Dog Woof as the pattern designer and linking to the blog post. If you have any questions regarding distribution or translation of this pattern, please see my Terms of Use. Thank you for your consideration!


First of all I must say how much I love your work and free patterns. You are truly talented. My main reason for this comment though is to inform you that someone is using your photos in order to sell their own work. I thought you might want to know about this… Here is the address of the seller and listing.
http://www.ebay.co.uk/itm/crochet-baby-blankets-hats-and-comforter-/162515020353?hash=item25d6a66a41:g:6goAAOSwsXFZFHMX
http://www.ebay.co.uk/usr/mominzahee-0?_trksid=p2047675.l2559
Regards
Catherine
the unicorn gift card holder is absolutely precious! perfect for the grandchildren. you could add a loop on the back and hang it on the Christmas Tree and when the card is gone it could be a keepsake for their future Christmas Trees.
Thanks for sharing this, its really a good giveaway and perfect project for me to try. I have just started sewing and crocheting six months back and so far i have made small items. Really much thanks for the comprehensive post. I will try this on the weekend.
What a very talented lady you are! Thank you so much for the free tutorials. My grandchildren love to look at your blog and then tell me what they want me to make them. I love this gift card idea. I thought I might modify it to hang on the Christmas tree with a photo behind the gift card, or something similar.
Thank you for such a cute pattern. Made it for my granddaughter for her birthday. Going to make more for sure!
Thank you so much for sharing your talent. My granddaughters will love these
Thanks for a great video!
My grandchildren have adored all of the hats I’ve made using your well-written instructions! Thank you for sharing!!!!!!
Banking is an industry that handles cash, credit, and other financial transactions. Banks provide a safe place to store extra cash and credit. They offer savings accounts, certificates of deposit, and checking accounts. Banks use these deposits to make loans.