
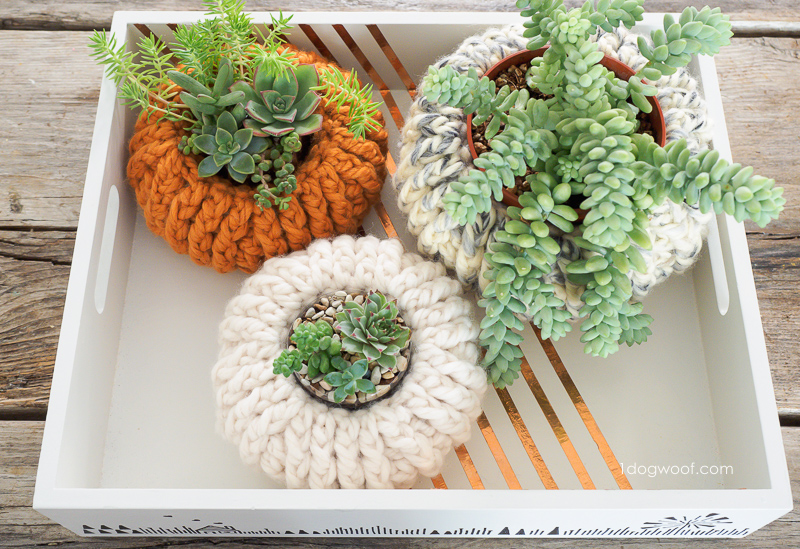
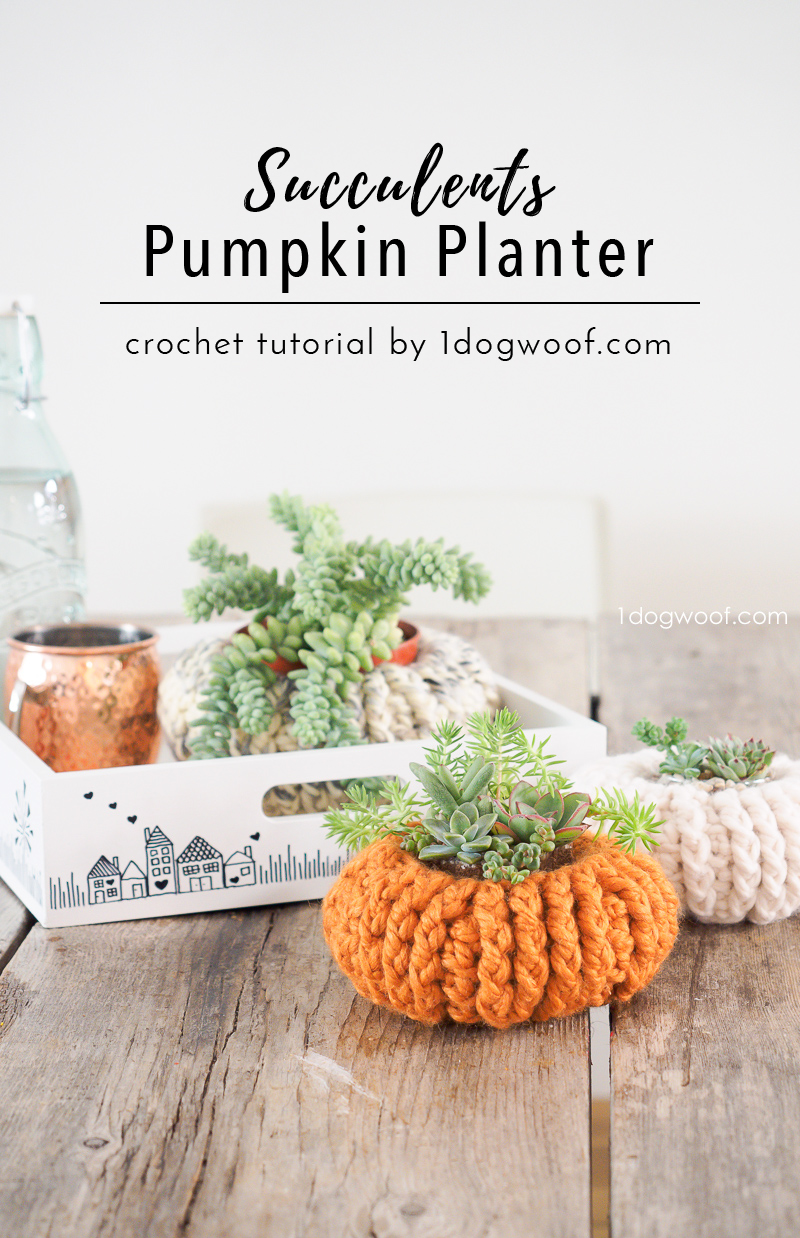
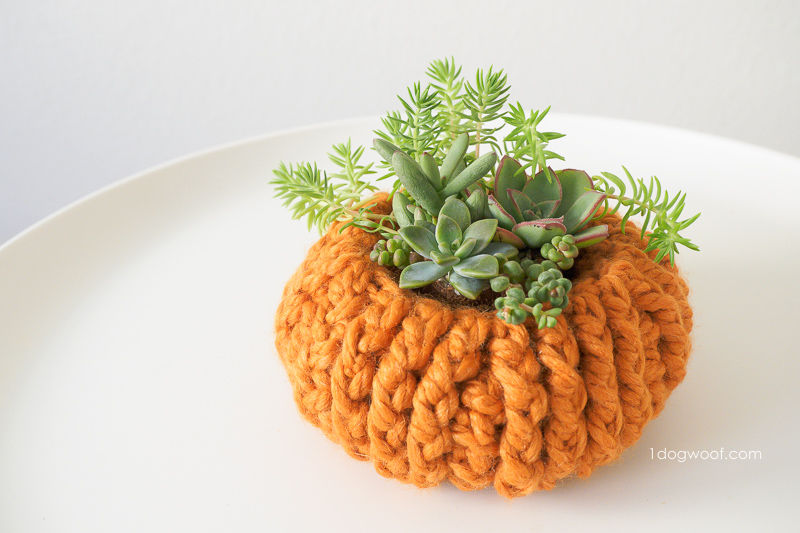
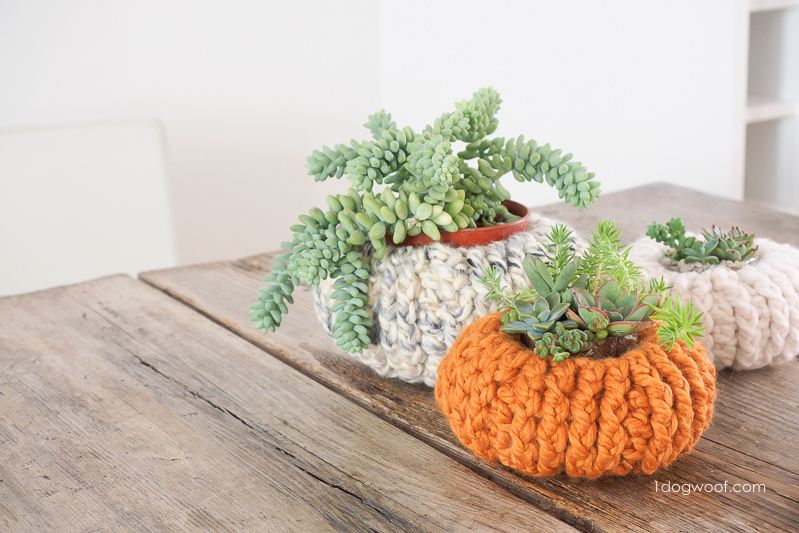
I was browsing Instagram the other day and saw a set of white pumpkins that had succulents in them, and all the bells and lights in my brain went off, screaming at me to make a crocheted one. I experimented with a white succulent pumpkin planter, but it wasn’t as recognizable, so I made a few more in different colors, including the traditional orange. I guess even if it doesn’t look like a pumpkin, it works great as just a cute bowl!
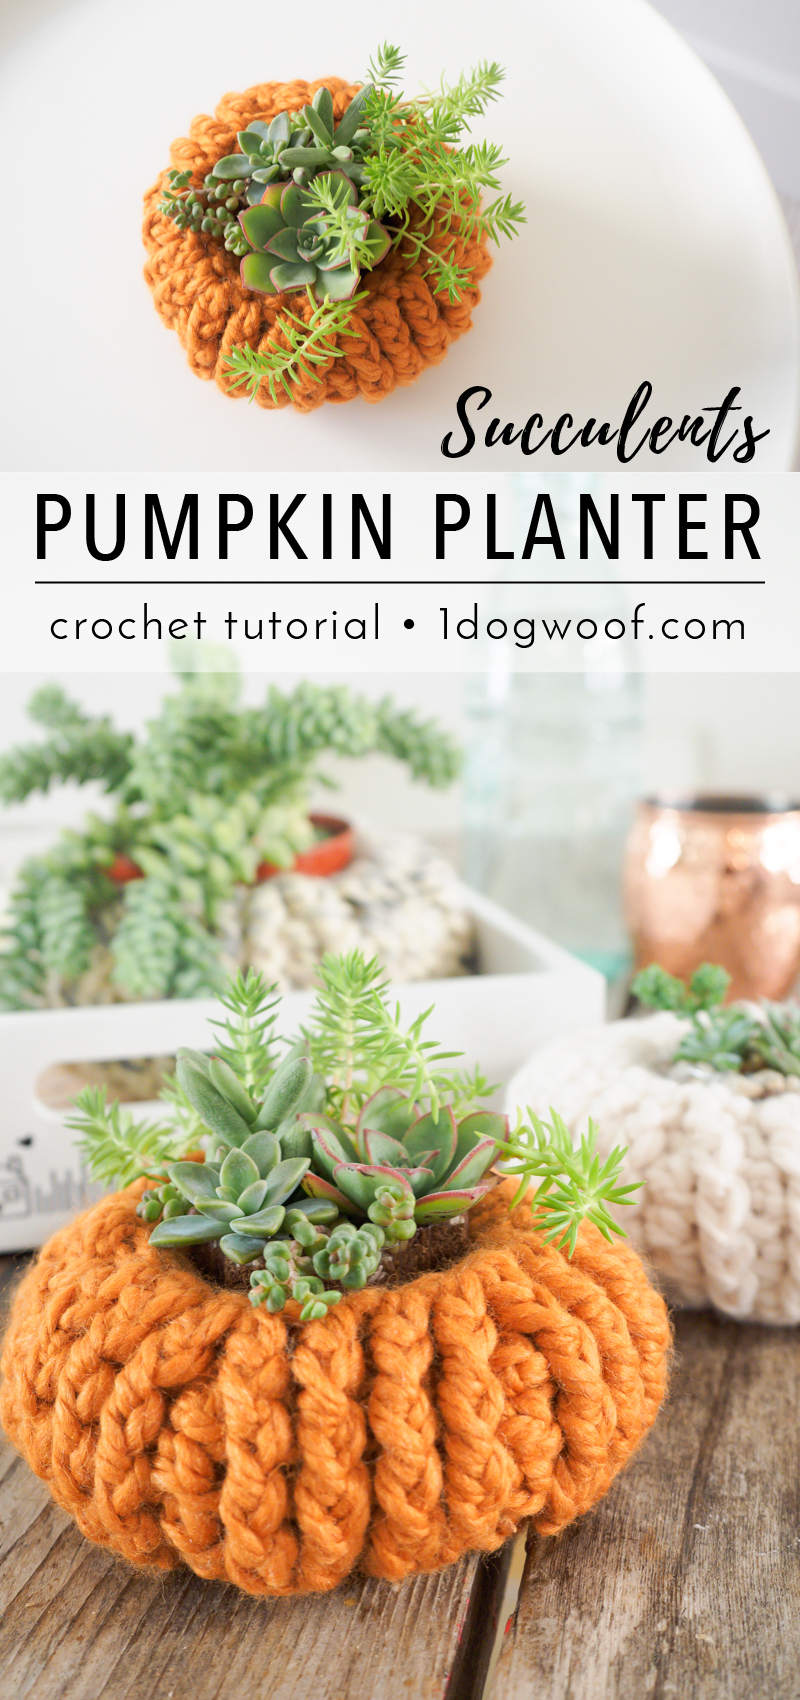
This project uses Lion Brand Wool Ease Thick and Quick. The smaller pumpkins use less than 1 skein, and I made them using leftover cakes of yarn from my stash. The larger pumpkin uses almost an entire skein, so it’s best to start with a new skein of yarn. The colorway I used was Moonlight.
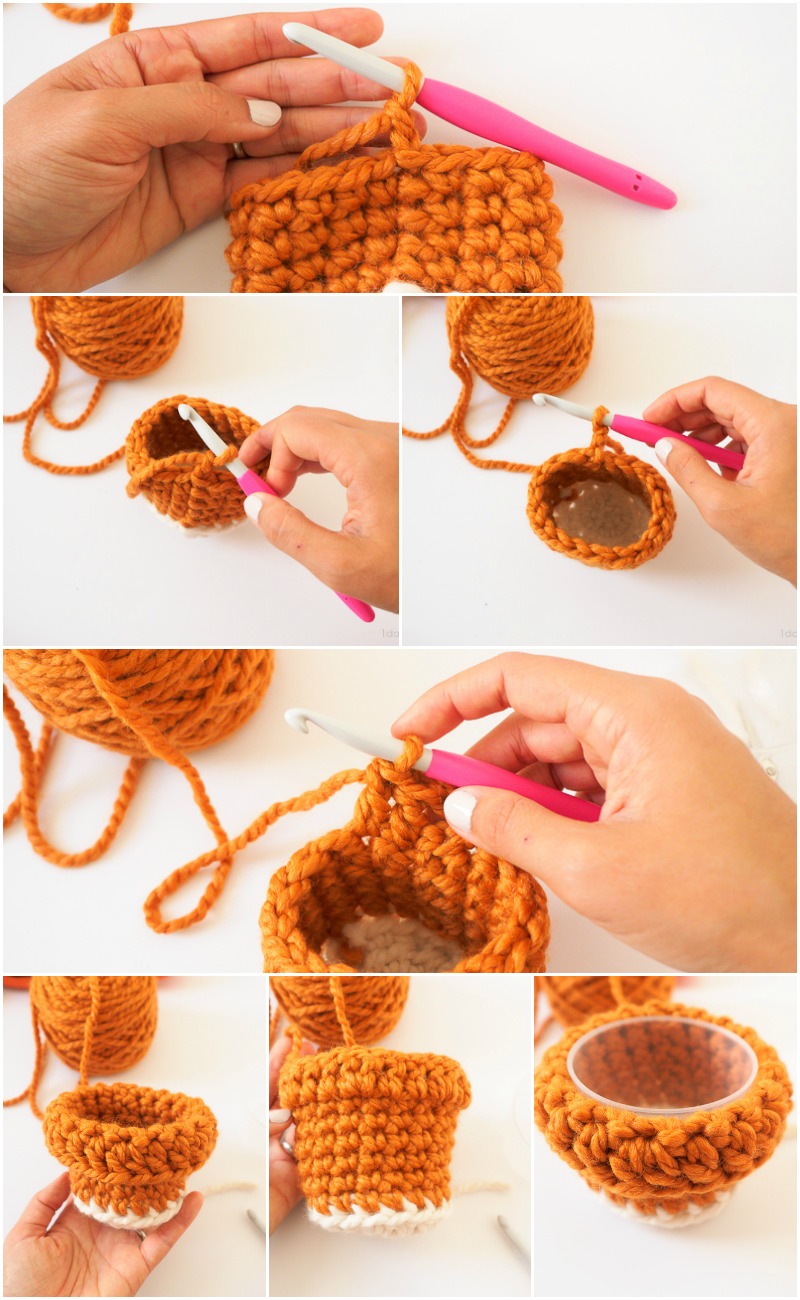
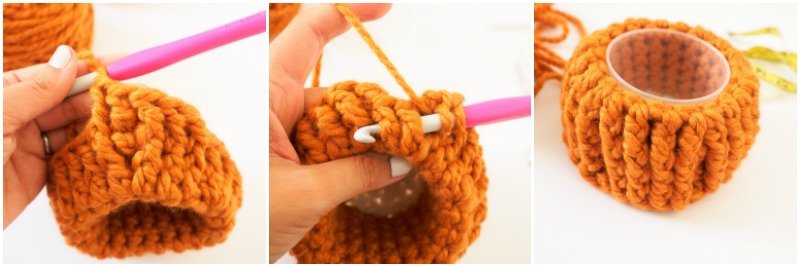
After some experimentation, I decided the best way to ensure I can fit my succulents in was to create the pot first, and then make the pumpkin around it. I could have made it in two separate pieces, but that would have meant yarn ends, and I try to avoid extra yarn ends at all cost, so I decided to work the outside of the pumpkin upside down, so the seams would all end up at the bottom. Sounds confusing? No worries, I’ve included lots of pictures below!
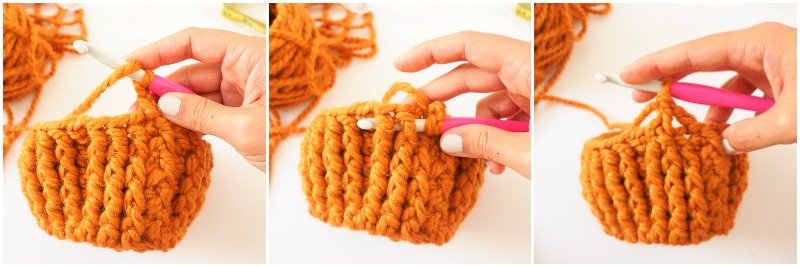
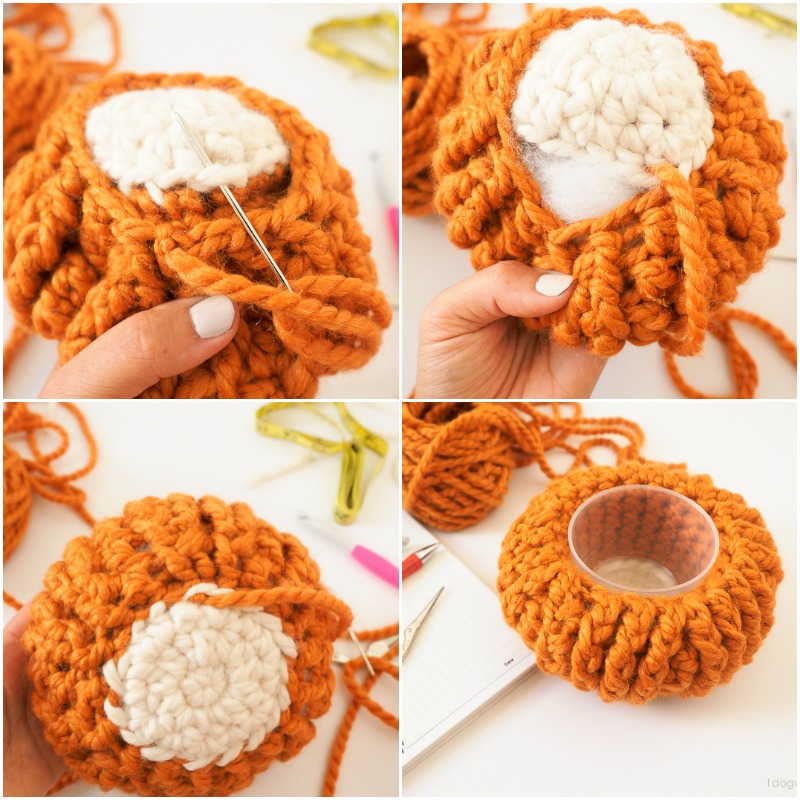
First, start with a simple basket or cup or whatever you want to call it. This holds your succulent pot. When you get to the right height, you’ll want to close the round, and then turn as if you were working a row instead of a round. Now you’ll be working “backwards” in relation to the cup section you just finished. The outside of the pumpkin is worked using front post double crochet stitches in order to create the puffy cheeks of the pumpkin, along with the creases. Once you finish a few rounds, flip that side down and you’ll see your pumpkin forming. It’s not chubby yet though! When you’ve finished the required rounds for the outside of the pumpkin, it should look longer than the cup on the inside. Sew the active edge that you’re working on, to the edge of the cup on the inside, and stuff the pumpkin as you go. In effect, you’re creating a donut with a bottom!
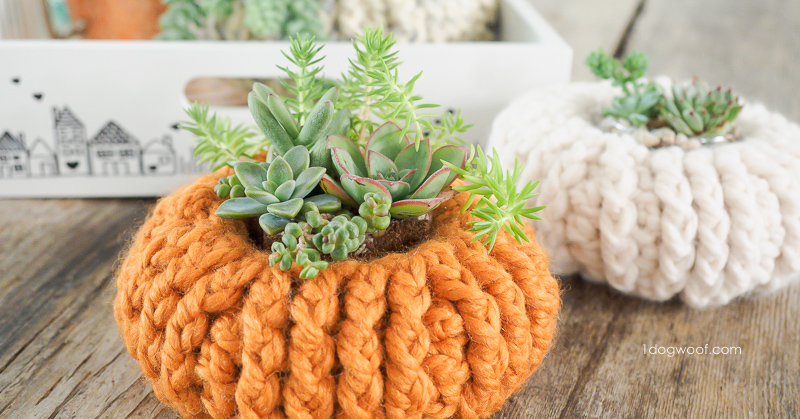
For the succulent itself, I cut off the last 2-3 inches of a plastic water bottle and used that as my planter. Be sure to cut some drainage holes at the bottom of the water bottle, and be careful! My succulent soil is a 50-50 combination of coconut coir* and pumice*. I purchased my pumice from Bonsai Jack (both from their shop and from Amazon) instead of from the local nursery because I find their pumice is evenly sized and pre-rinsed, which makes it really easy to use. I also bought their pastel top dressing, which is a much higher quality, and prettier, than the top dressing I find in the nurseries around my house.
For these particular arrangements, I popped in a few cuttings from my larger plants and secured it with the top covering. Since they are cuttings, I won’t water them for a few weeks, and will remove them from the pumpkin planter when I do as the water runs out easily through the soil mixture.
The larger pumpkin planter I made actually fits a full 4″ pot, so if you’re not comfortable making your own succulent arrangement, you can purchase a 4″ succulent from your local nursery and pop it right in! Don’t worry, you’ll get addicted to succulents in no time!
I hope the pictures below help you make your own pumpkin planter! Here’s a quick video I put together.
SUPPLIES
- 1 skein of Lion Brand Wool Ease Thick and Quick
- 1 Clover USA crochet hook L/8.00mm*
- scissors
- tapestry needle
- polyfill stuffing
ABBREVIATIONS
- sl st – slip stitch
- ch – chain stitch
- sc – single crochet
- dc – double crochet
- BLO – back loops only
- fpdc – front post double crochet: insert your hook around the post of the double crochet stitch instead of through the top 2 loops, yarn over, pull up a loop, yarn over, pull through 2 loops on hook, yarn over, pull through remaining loops on hook.
PATTERN NOTES
- Skill level Easy.
- Gauge doesn’t matter on this project, as long as it’s tight enough to prevent the stuffing from coming out.
- Pattern is worked in seamed rounds.
- First st in each round is worked into same st as join.
Succulent Pumpkin Planter Instructions
SMALL PUMPKIN (large pumpkin instructions in [ ])
Round 1: Work 6 [8] sc into a magic circle. Join with sl st to first st. (6 [8])
Round 2: Ch 1. Work 2 sc into each st around. Join with sl st to first st. (12 [16])
Round 3: Ch 1. Work [1 hdc in next [2] st, 2 hdc in next st] 6x around. Join with sl st to first st. (18 [24])
Round 4: Ch1. In BLO, work 1 sc in each st around. Join with sl st to first st. (18 [24])
Round 5-9 [11]: Ch1. Work 1 sc in each st around. Join with sl st to first st. (18 [24])
Round 10 [12]: Ch 2. Turn. Work [1 dc in each of next 2 st, 2 dc in next st] 6x [8x] around. Join with sl st to first st. (24 [32])
Round 11 [13]: Ch 2. *Work 1 fpdc in each of next 3 st. Work both a dc and a fpdc into the next st – the dc is worked into the top loops, the fpdc is worked around the post.* Repeat from * 5 [7] more times. On the last fpdc, be sure to work through both the post of the last stitch, and the ch 2 from the beginning of the round. Join with sl st to first st. (30 [40])
Round 12-15 [14-17]: Ch 2. Work [1 fpdc in each of next 3 st, 1 dc in the top loops of next st, 1 fpdc in next st] 6x [8x] around. join with sl st to first st. (30 [40])
Round 16 [18]: Ch 2. Skip 1st dc. Work 1 fpdc around the next 2 st to make a decrease. *Work 1 dc in the top loops of next st, 1 fpdc in each of next 2 st.* Repeat from * 4 [6] more times. Work 1 dc in the top loops of next st, then work 1 fpdc around the last st and the first st together to create the last decrease st. Join with sl st to first st. (18 [24])
Round 19: Ch 1. Work 1 sc in each st around. (24) -> large size only.
Cut a long tail and fasten off.
Use the mattress stitch to sew Round 16 [19] to the front loops of Round 3 (you worked into the back loops earlier). Stuff the pumpkin as you go.
Close off and weave in ends.
Carefully insert your succulent planter into the pumpkin, and then fluff it up as necessary.
If you add this to your fall decor, please share with me on Facebook (One Dog Woof) or Instagram (@1dogwoof)! Remember to tag your post with #1dogwoof!
Check out my pattern shops on Etsy and Ravelry where you can purchase printable PDFs of my latest crochet patterns. These PDFs are formatted without comments or ads, and have instructional photos at the bottom for optional printing.
I sometimes include affiliate links in my supply lists. Purchasing from these merchants earns me a small commission with no extra cost to you, and goes towards supporting One Dog Woof.
Please be respectful and do not sell or distribute this pattern in any way, especially as your own. Instead, share the original blog post link! You can sell finished products made from this pattern by giving credit to One Dog Woof as the pattern designer and linking to the blog post. If you have any questions regarding distribution or translation of this pattern, please see my Terms of Use. Thank you for your consideration!


0 Comments