
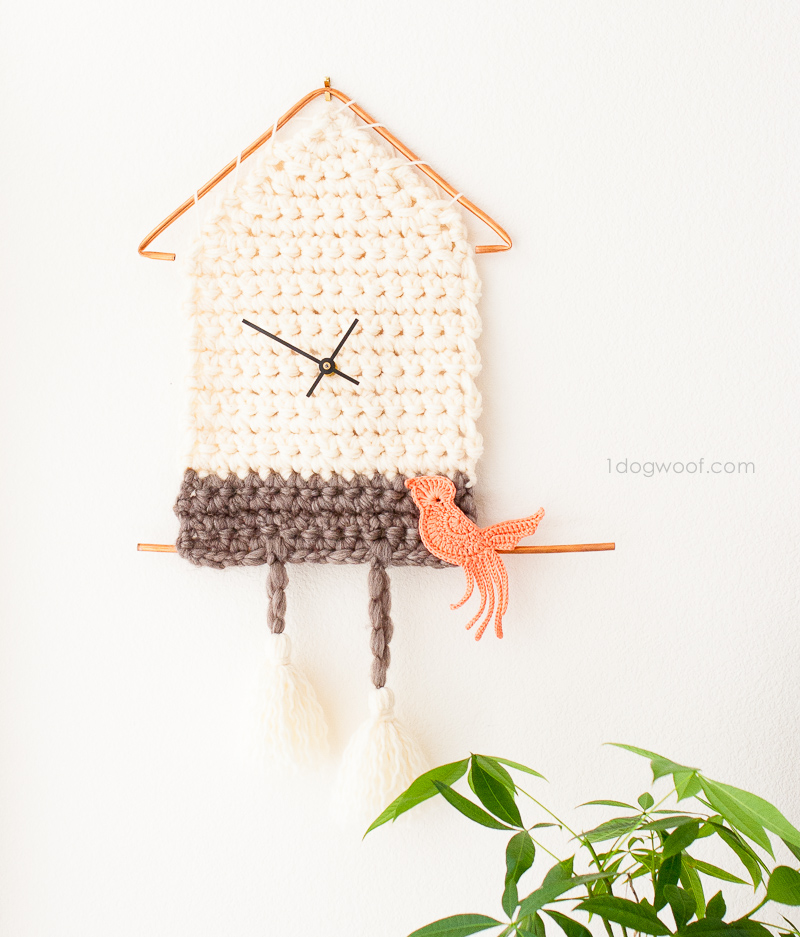
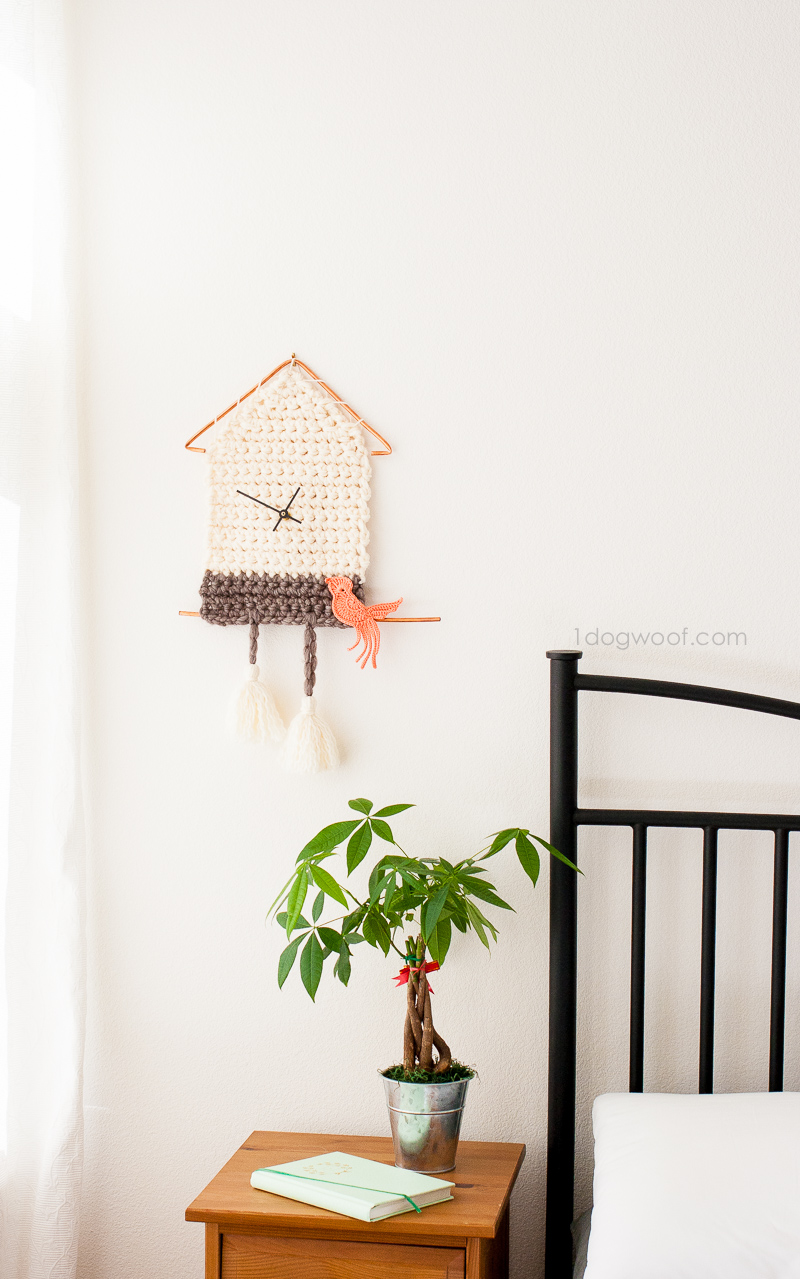
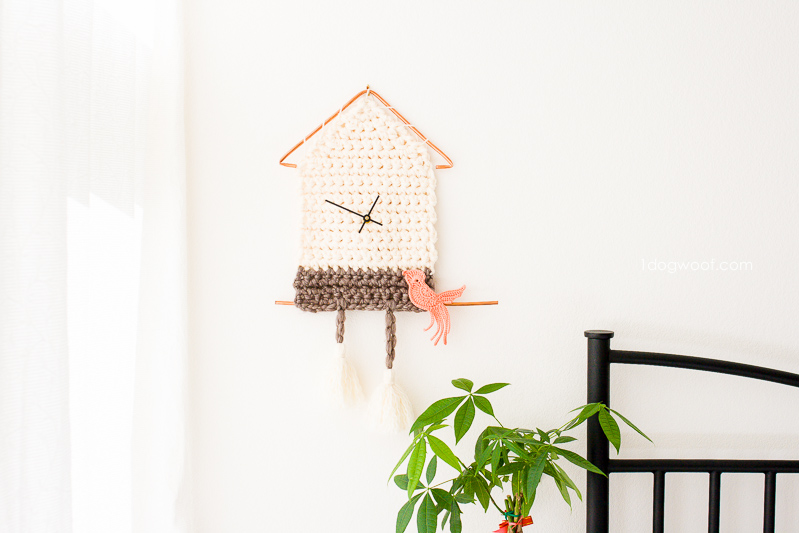
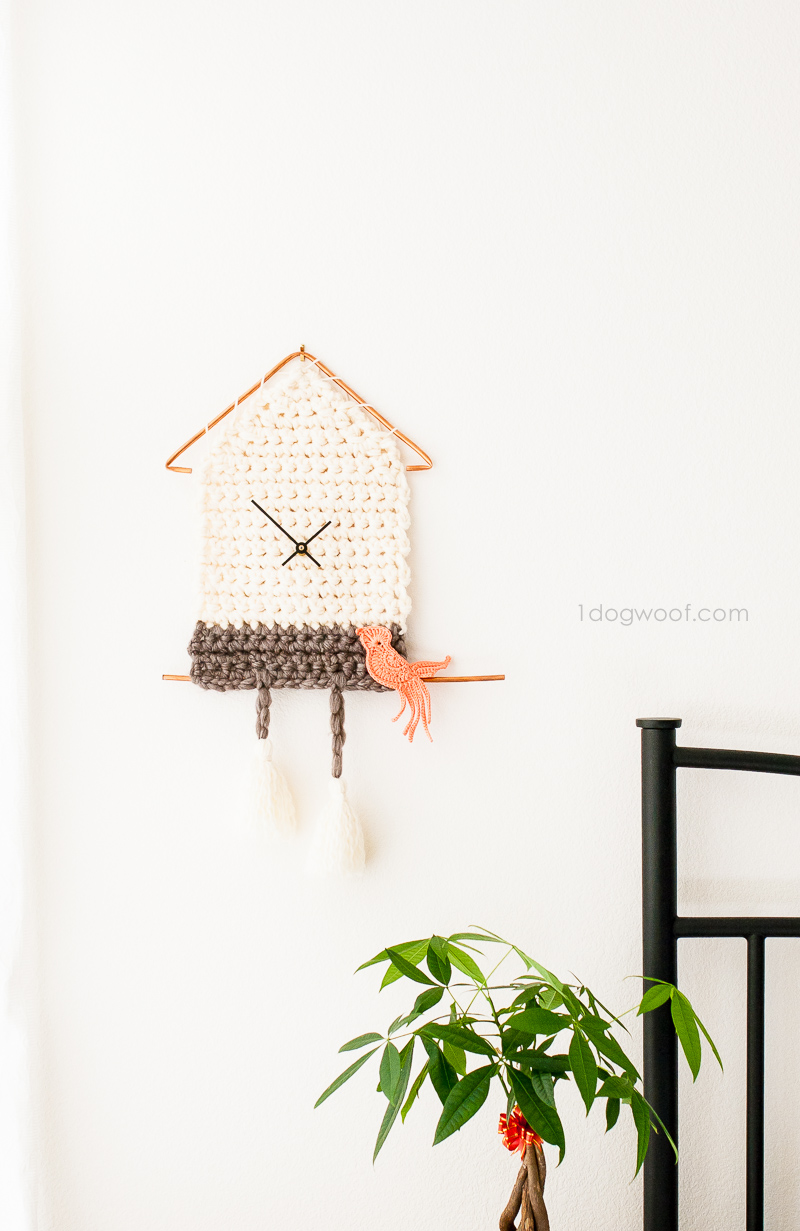
If we can have wooden clocks and metal clocks and clocks that knit scarves, why not have a clock made from yarn? I’m excited to share with you my yarn cuckoo clock wall hanging today, and show you what a fun and easy project this is!
I’ve seen so many different yarn wall hangings around lately, but was most recently inspired by Jessica’s woven wall hanging over at Mama In a Stitch. At the same time that I was crushing on her work, I was trying to teach J how to tell time. It was more that he wanted to watch a TV show, and I wanted him to wait until the long hand reached a certain number. I remembered that I had once created a customizable coloring-page cuckoo clock, so it occurred to me that it may be possible to create a yarn cuckoo clock as well!
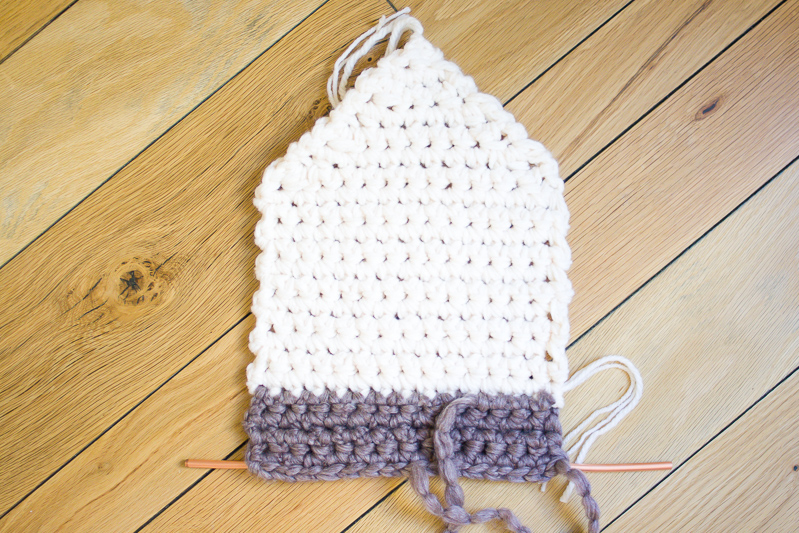
After several sketches, I came up with a super minimal “cuckoo clock”. I didn’t want to crochet an actual bird as part of the house design, so I just left it hanging out on the side, which allowed me to keep the house part super simple. For the house, I used 3 strands of scrap natural-colored yarn held together. If you don’t have random scraps of yarn, 2 strands of chunky yarn should also work. The bottom was a single strand of Patons Cobbles.
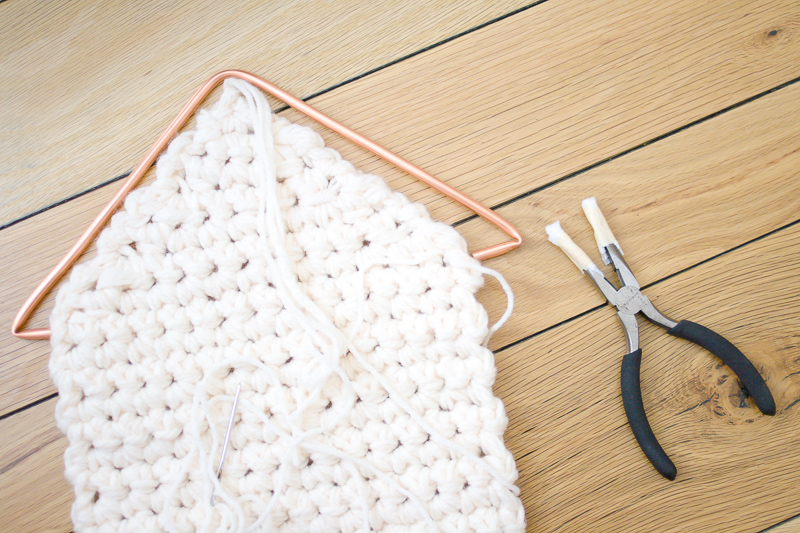
Then came the question of how to hang this thing! I love the use of driftwood and was considering using that or some branches, but I couldn’t figure out how to make it bend for the roof, so I fell back on the other material I’ve seen in different projects – copper! I bought a coil of refrigerator copper tubing from Home Depot and cut it into a 15 inch length (base) and a 17 length (roof) using a hacksaw while using a vice to hold the tubing in place. But remember that copper is really soft! If you’re using a vice, make sure to pad it with a rag or you’re going to get scuffs on the tubing. Once the ends are cut, sand them down with coarse sandpaper to wear down the sharp edges, and then sand with fine sandpaper to polish the ends. Be careful not to scuff the rest of the tubing with the sandpaper!
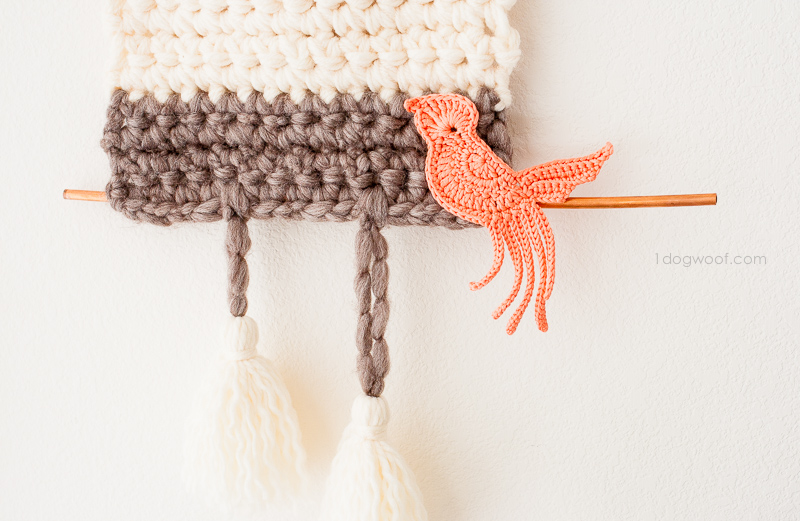
The shorter section of tubing is used as the branch for the cuckoo bird, and gives the house a little bit of extra weight. I worked the last row of single crochet around the copper tubing, but you can also just insert the tubing through the last row after you’ve finished the crochet. It’s in there securely but not so tight it can’t be pulled out.
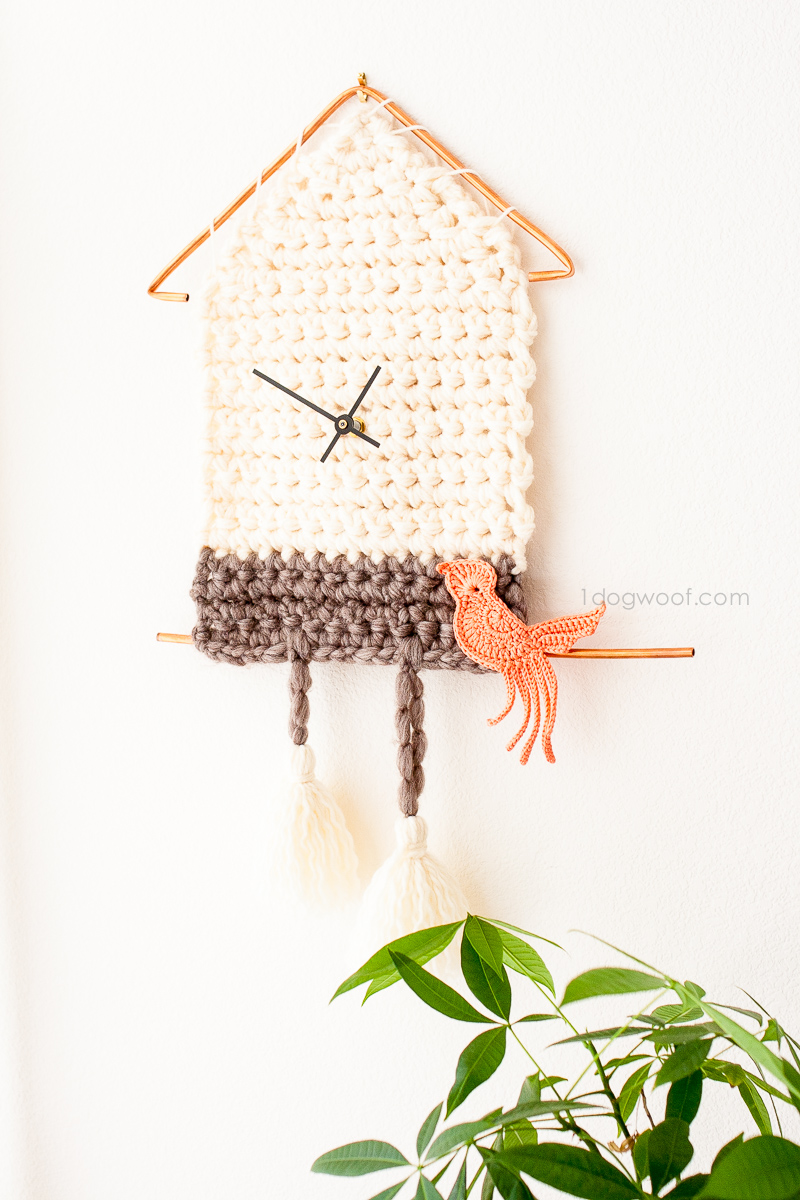
For the longer section, I bent the peak of the roof by hand, and then bent the eaves using a pair of needle-nose pliers that I padded with masking tape to avoid scuffing. There’s really no exact way to do this – I just eye-balled it and went for it. My package of tubing was 10ft, so I figured I had back-up if I screwed up.
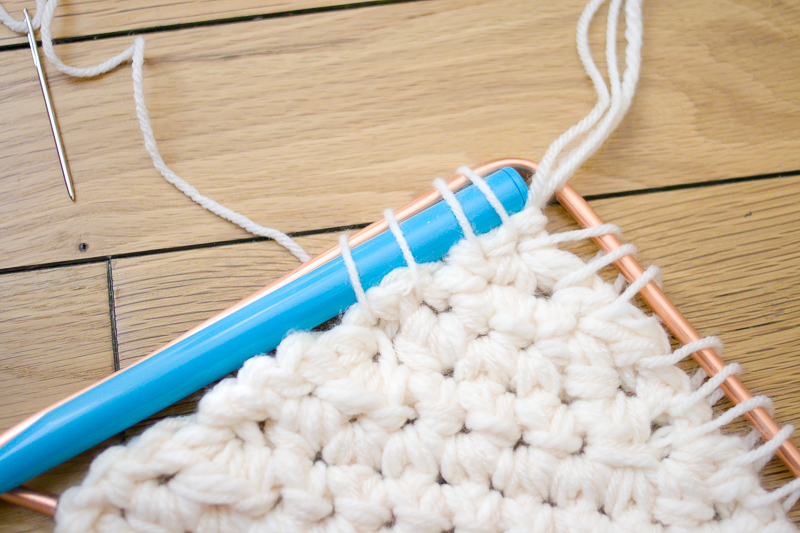
To connect the house to the tubing, I tied a length of yarn to a stitch right at the corner of the roof and the wall, and then “sewed” the tubing on. I tried to use a large crochet hook to keep my spacing equidistant, but I realized I had too many stitches, so in the end, I just made 3 big, loose stitches on each side to hold the tubing in place.
The birdie was made from a pattern I found on Etsy from Golden Lucy Crafts. It’s such a gorgeous bird, isn’t it? I used a slightly shiny mercerized cotton yarn I picked up from a vendor at the Craft and Hobby Association Trade Show that I went to earlier in the year. I also tried making a regular cotton version but decided the shine gave it an extra oomph.
For the pendulum(s), I decided yup, I wanted two, and debated between tassels and pompoms. At CHA, I also got a sample of Clover USA’s large tassel maker and decided this was the perfect opportunity to give it a try! I made 4 before I ended up with 2 that I liked, and to be honest, I don’t know how else to make tassels, so thank goodness for Clover’s tassel maker! The tassels are attached to the body using a simple lark’s head knot, and the yarn ends are split to give it more body.
Of course, the last step is to add the clock mechanism! I don’t know about you, but I never really like the clock kits I find in the craft stores, so I purchased a clock kit with modern 3 inch hands from ClocksbyColonial on Etsy. I picked a long 3/4″ shaft so the clock hands sit well above the yarn. A shorter shaft means the clock hands sit closer to the clock mechanism, and it can get caught in the yarn. Otherwise, the assembly is super simple. Just pick a stitch in the middle of your clock face and install the clock kit! Here’s a tip: The clock mechanism is black, and my yarn is white, so I actually stuck a small white piece of paper between the yarn and the clock mechanism so you can’t see the black from the front (you see the white paper, but it blends in with the yarn). And I think that’s it!
The instructions below just give the pattern for the house, since I’ve described the rest of it up here.
Supplies
- Bird applique crochet pattern from Golden Lucy Crafts on Etsy
- Clock kit parts from ClocksbyColonial on Etsy
- 1/4″ by 10ft Copper Soft Type Refrigeration Coil
- CloverUSA Large Tassel Maker*
- Bernat Softee Chunky yarn in Natural*, 1 skein
- Spinrite Cobbles yarn in Moon Rock*, 1 skein
- P (10mm) crochet hook for the house
- F (3.75mm) crochet hook for the bird
- scissors
- embroidery needle
- hacksaw and vice
- needle-nose pliers
Abbreviations
- sl st – slip stitch
- ch – chain stitch
- sc – single crochet
- dc – double crochet
Pattern Notes
- The ch 3 at the beginning of rows counts as a dc st.
- Use 2 or 3 strands of chunky yarn for an extra chunky, textured look.
- When switching colors from A to B, you can either fasten off color A and start color B with a standing sc, or use my invisible stripes method: make the last ch st with color A, pull up a ch st with color B, and pull the color A ch tight so it gets absorbed into the work. Then all you’re left with is a ch st of color B! Either method works, so I didn’t specify the interchange in the instructions below.
- To incorporate the base copper piece, you can either work the sc around the copper tubing, or insert the copper tubing through the stitches.
- Create two tassels using Clover USA’s tassel maker in large, using the largest size allowed. The tassel is created using color A for the body and color B for the hanger.
- Tassels are attached to the house using the lark’s head knot
- The bird is a paid pattern from Golden Lucy Crafts and is sewn onto the house using its own yarn ends.
Yarn Cuckoo Clock Wall Hanging Instructions
Row 1: Work 1 sc into a magic circle. Pull tight. Turn.
Row 2: Ch 1. Work 2 sc in st from last row. Turn. (2)
Row 3: Ch 1. Work 2 sc in each of the 2 st from last row. Turn. (4)
Row 4: Ch 3 (counts as st). Work 1 hdc into same st. Work 1 sc into each of next 2 st. Work 1 hdc + 1 dc in last st. Turn. (6)
Row 5: Ch 3 (counts as st). Work 1 hdc into same st. Work 1 sc into each of next 4 st. Work 1 hdc + 1 dc in last st. Turn. (8)
Row 6: Ch 3 (counts as st). Work 1 hdc into same st. Work 1 sc into each of next 6 st. Work 1 hdc + 1 dc in last st. Turn. (10)
Row 7: Ch 3 (counts as st). Work 1 hdc into same st. Work 1 sc into each of next 8 st. Work 1 hdc + 1 dc in last st. Turn. (12)
Row 8: Ch 3 (counts as st). Work 1 hdc into same st. Work 1 sc into each of next 10 st. Work 1 hdc + 1 dc in last st. Turn. (14)
Row 9: Ch 1 (does not count as st). Work 1 sc in each st across. Turn. (14)
Row 10-20: Ch 1 (does not count as st). Work 1 sc in each st across. Turn. (14)
Row 21: Using color B, work 1 sc in each st across. Turn. (14)
Row 22-23: Ch 1 (does not count as st). Work 1 sc in each st across. Turn. (14)
Row 24: Ch 1 (does not count as st). Work 1 sc in each st across, with each st worked over the copper tubing. Fasten off, weave in all ends.
Follow the assembly descriptions at the beginning of the post!
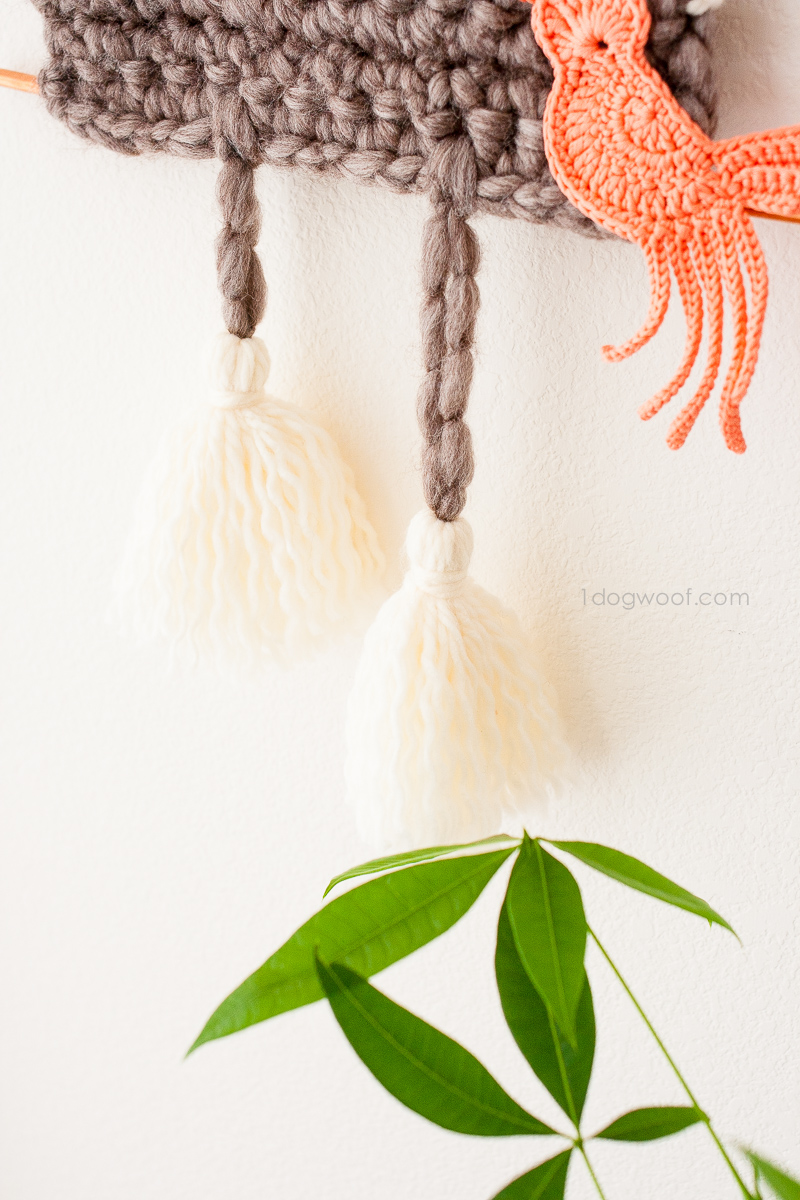
Here’s an up close photo of the tassels. They remind me of the curly perm I used to crave as a child, since I always had thick, stick-straight hair. The tassels are so bouncy and fun!

This was a bit of a crazy project to work on, but I loved how fast it worked up! And best of all, I just like that it’s unique … and used copper!
Share your completed projects with me on Facebook (One Dog Woof) or Instagram (@1dogwoof), or just follow along to see what yarn shenanigans I’m up to!
Check out my pattern shops on Etsy and Ravelry where you can purchase printable PDFs of my latest crochet patterns. These PDFs are formatted without comments or ads, and have instructional photos at the bottom for optional printing.
I sometimes include affliate links in my supply lists. Purchasing from these merchants earns me a small commission with no extra cost to you, and goes towards supporting One Dog Woof.
Please be respectful and do not sell or distribute this pattern in any way, especially as your own. Instead, share the original blog post link! You can sell finished products made from this pattern by giving credit to One Dog Woof as the pattern designer and linking to the blog post. If you have any questions regarding distribution or translation of this pattern, please see my Terms of Use. Thank you for your consideration!


Hi! I really want to do this for my daughter’s room but I’m a beginner and only used to working in a circle. Do you have a tutorial that shows where to work the first hdc? I’m confused as to which stitch this goes in 🙁 It’s the first part of row 4!
This is wonderful! Thank you for sharing. 🙂