
This is a Sponsored post written by me on behalf of Krazy Glue. All opinions are 100% mine.
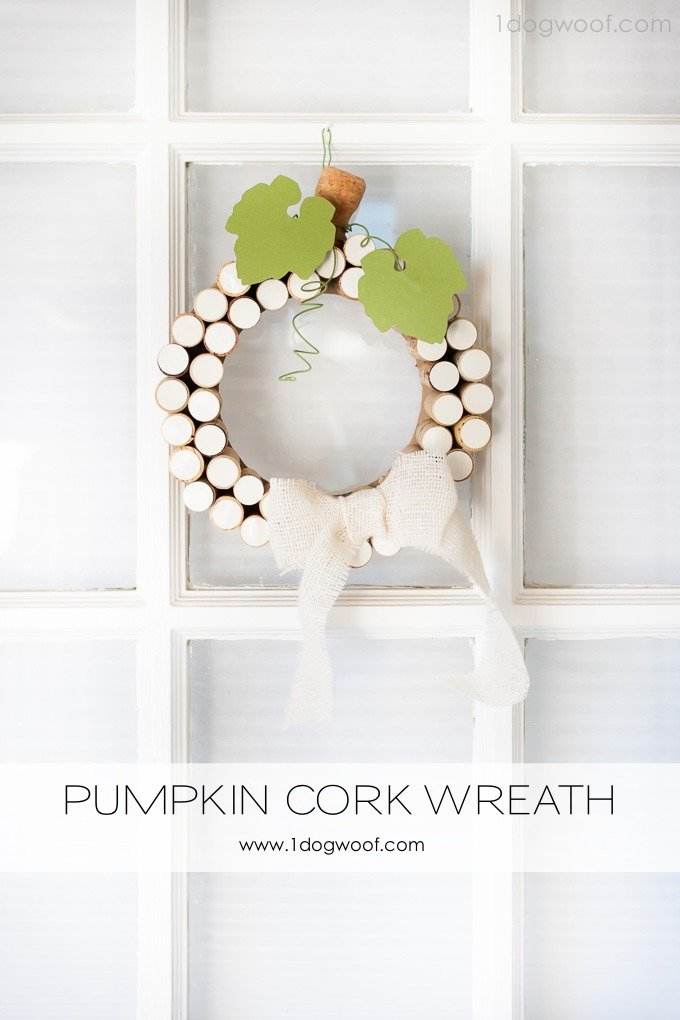
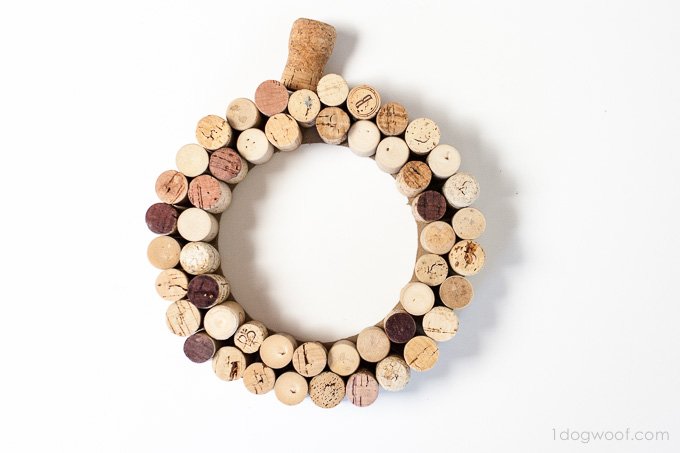
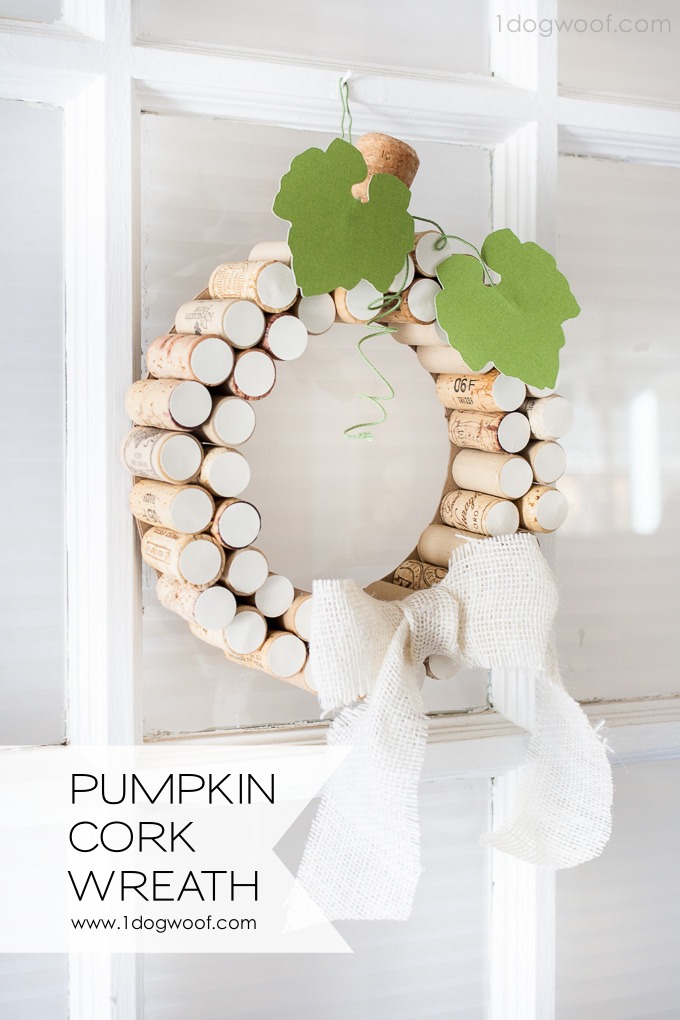
There once was a blogger (that’s me) who knew a restaurant manager and asked him for some wine corks. Considering how many bottles the place goes through in an evening, it wasn’t long before I had two bags worth of corks. Unfortunately, one of them got thrown out during the move. What can you say, we were downsizing, and I hadn’t touched those corks in months and months. I wanted to keep them, but was given the stare-down-evil-eye by my “so-tired-of-my-craft-stuff” husband. Besides, Napa and Sonoma are right here, I can drink my way to more corks, right? (Not really.) So I had this bag of corks and no idea how to use it, until now with my white pumpkin cork wreath, because I’m rolling right along with the Halloween and Fall crafts right now.
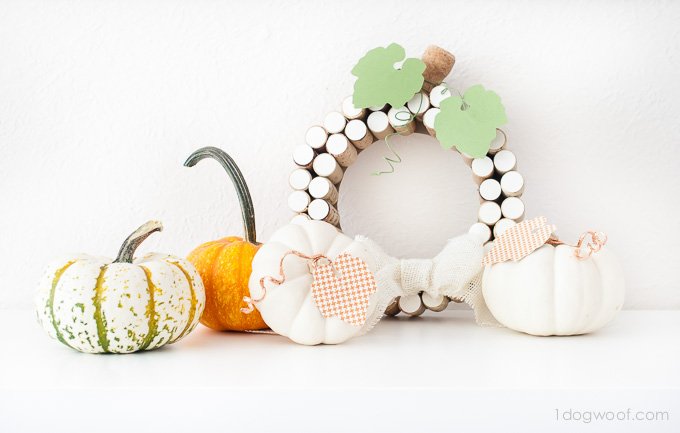
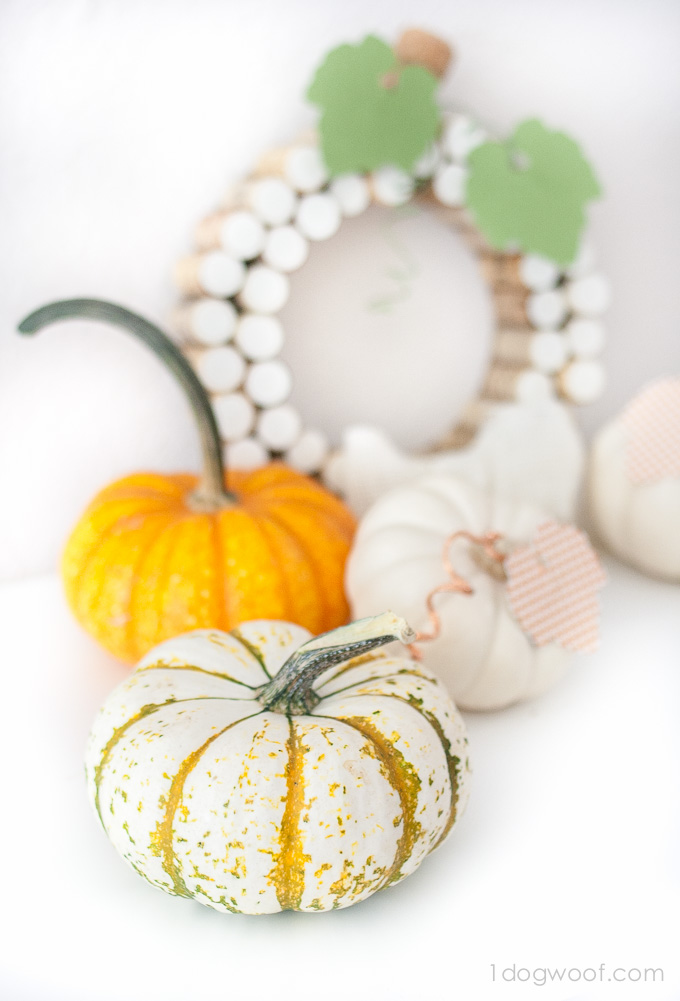
There’s my cork pumpkin making friends with the other baby pumpkins I’m collecting.
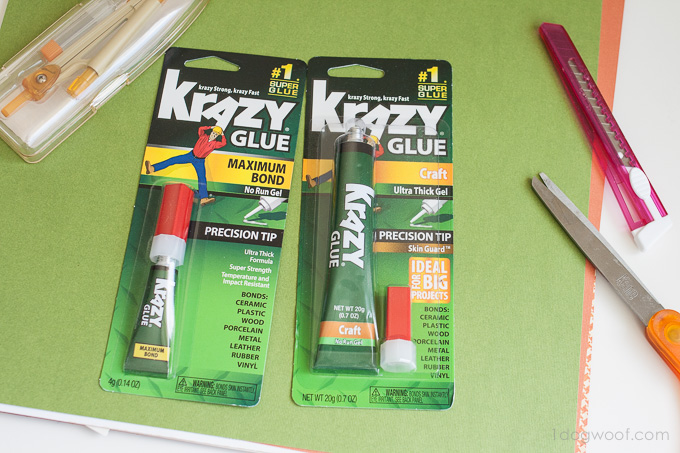
For this project I used supplies I had around the house, and got the chance to work with Krazy Glue’s Krazy strong, Krazy fast new Craft Glue line.
Supplies
Lots of wine corks, both synthetic and real are fine.
a piece of sturdy cardboard, or layers of thin cardboard glued together
white and green colored cardstock
floral wire
Krazy Glue
scissors
compass
utility knife
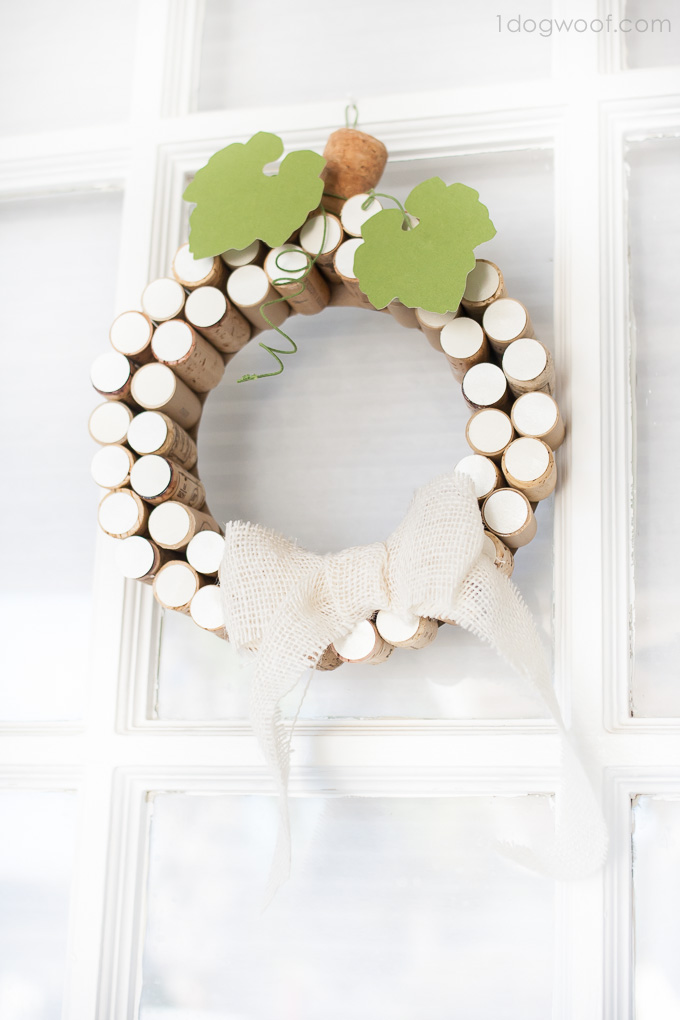
Pumpkin Cork Wreath
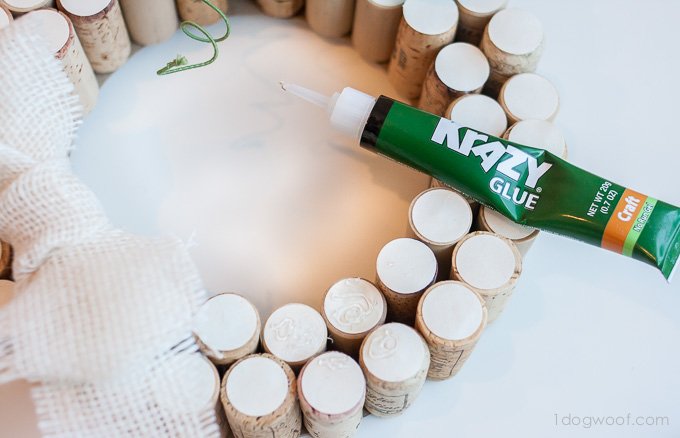
1. Start off with a wreath form. I cut two forms out of old cardboard that were about the strength of cereal boxes and glued them together. The forms are 8 inches in diameter and the inner ring is 5.5 inches in diameter. 2. Glue on the corks with Krazy Glue! I’ve tried cork projects before and had used a glue gun to attach corks to each other or to a form, but I could never get it to stick. Maybe I’m just not very good with a glue gun, but I’d get globs everywhere, strings of hot glue all over my hands and the project and then the corks just popped right off. It was maddening. Don’t mess with a craft blogger in the middle of a craft fail, you know?
But with the Krazy Glue Craft glue, things worked out way better. Waaay better. Like, I did this whole thing during LM’s nap, better. The glue is gel-like, not runny, so you can see exactly where you apply it and you can feel it bond when you press the cork into the cardboard. I constructed the wreath with the corks standing up on their flat end, so I was able to let the glue set while they just kinda stood there. It does take a few minutes for the glue to really adhere, but that’s also good when you get it on your fingers. I felt something tacky on my fingers once and was able to clean it off before I lost skin (and thanks to Krazy Glue’s Skin Guard formula). Oh yeah, and I used both synthetic and real corks, and the glue worked great on both.
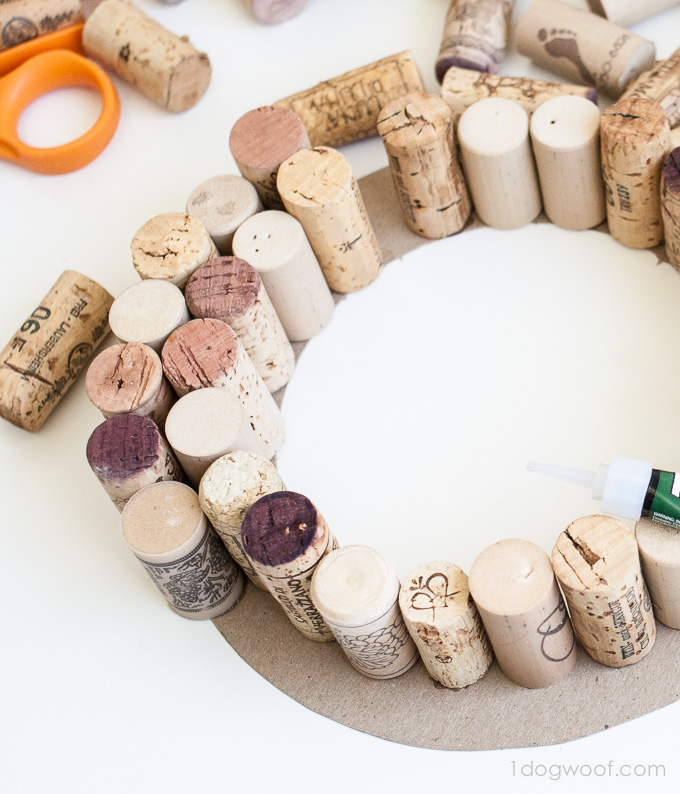
The applicator on my tube of Krazy Glue was small enough to use on the corks, and even to squeeze a few drops in between corks to glue them to each other. The gel formula didn’t drip when I put the tube down, and I didn’t have glue strings all over my cork project. Once all my corks were glued on to the cardboard, I let it sit while I took a break. And I didn’t have to worry about a neglected glue gun setting the house on fire.
3. Now you get to decorate your pumpkin! I wanted a white one, so I punched out circles with a 3/4″ inch circle punch out of cream cardstock. I don’t know if you can tell, but the cardstock was shimmery, just for a little added fun. I used Krazy Glue Craft glue to stick the circles onto the cork ends. The super gel-ness of the Krazy Glue was able to fill in the gaps on the cork’s uneven surface and nailed that paper circle down.
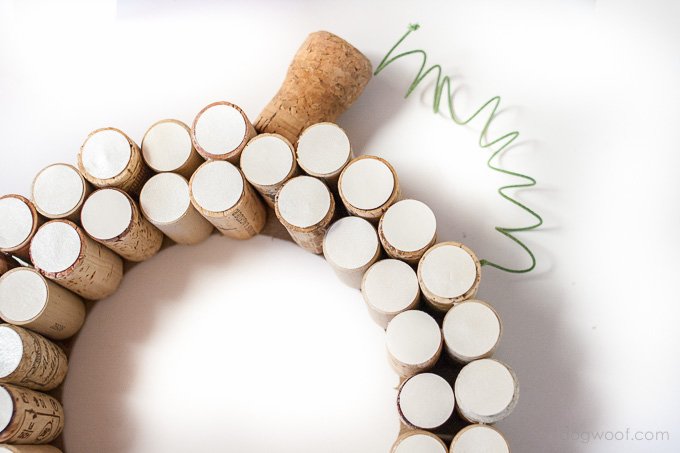
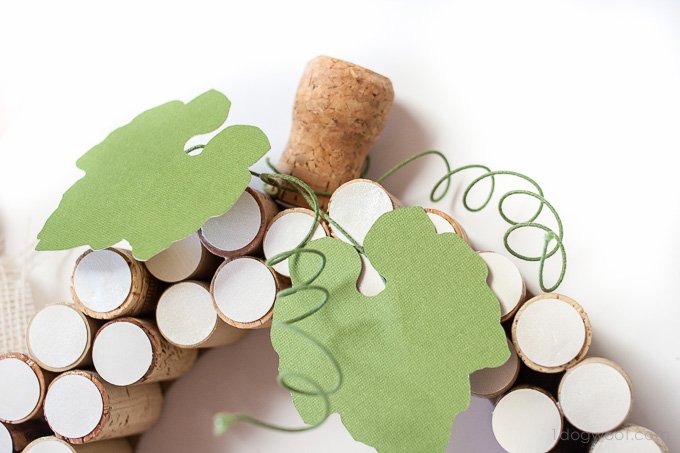
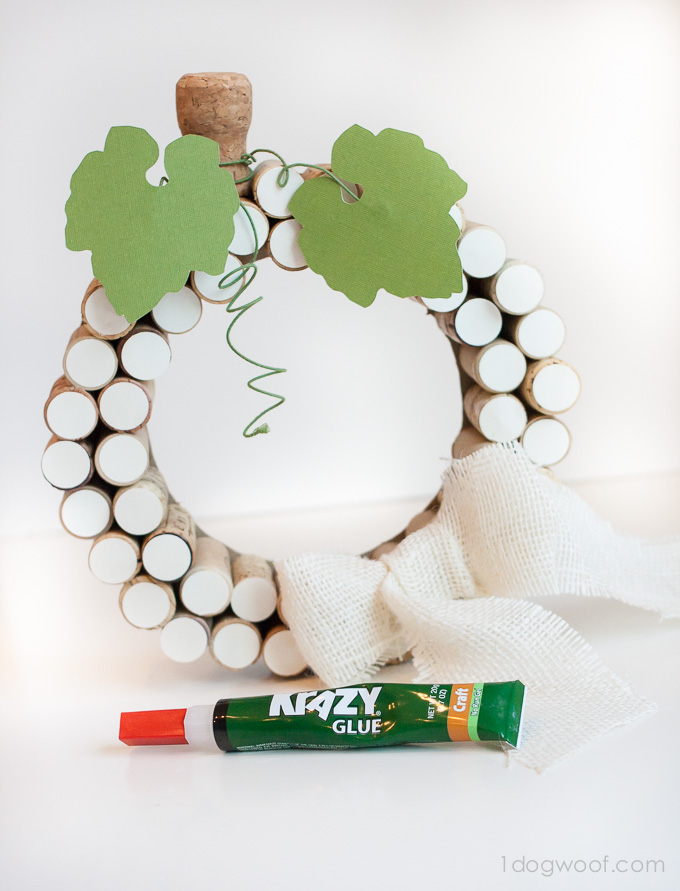
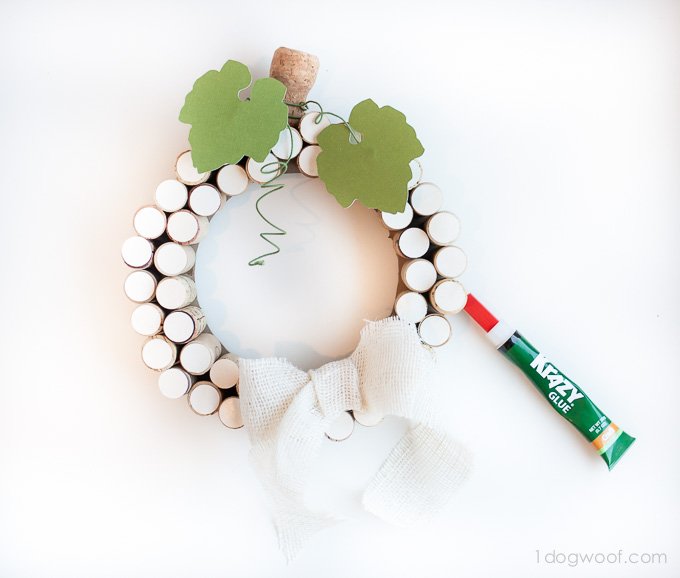
4. Cut out some pumpkin leaves and wind some floral wire around the top. I traced a pumpkin leaf I found online and cut two out with my Silhouette Cameo (cutting through my mat in the process, doh!). The leaves were taped to some floral wire, which I curled around some chopsticks and then were Krazy Glue’d onto the pumpkin.
5. Cut out some ribbon or burlap, make a bow, and glue it to the pumpkin to finish off the wreath. Again, I used the Craft glue so that the gel can fill in the gaps between the burlap and the cork.
So, in this project, I used Krazy Glue to adhere the following materials – (plastic and wood) cork to cardboard, paper to cork, wire to cork, wire to paper, burlap to cork – and it all stuck! Nothing fell apart at any time. And the baby was still sleeping! Win win win and feeling good!
What do you think? Pretty nifty for what ended up being a FREE project for me, right? The “free” is just an indication that I have WAY too much stuff in my craft stash – I mean, floral wire, really?
What would you make if you could create masterpieces in minutes?


I love this wreath!!! It’s so super cute!! I love the white!!!
Hi this is sooo darling and unique. Haven’t seen a pumpkin cork wreath yet and I love the originality. Cute cute CUTE!!! Lisa
Super cute idea!
Your wreath turned out beautifully! Very classy!
Simply beautiful!!!
Love how this turned out, ChiWei! You are always so innovative. Lovin’ those curly Qs too. (Time to start collecting corks.)
What a fun idea! So elegant! It goes nicely with your white pumpkins with copper too.
Oh, so PRETTY! I love this wreath. Pinning!
Thank you Crystal!
Thank you so much!! It’s such a compliment to be told I did something original 🙂
Thank you!
Thank you Marilyn!
I’d wiggle my eyebrows at you and insinuate that we should open a bottle(s) of wine together for the purpose of collecting corks, except you can’t see me. But we’ll have a virtual glass together!
Thank you!
Thanks Amy! It’s always nice to finish two projects at once 🙂
Thanks for the pin Leigh Anne!
I love this, it’s gorgeous!!
This is so pretty! I can tell you put so much time and effort into it.
What a great idea! I love that it is white 🙂 Pinning.
I would love if you share it with my fall themed party Big Autumn Bash:
http://milaslittlethings.com/2014/10/big-autumn-bash-the-link-party.html
xx
Mila
milaslittlethings.com
[email protected]
Hello,
I would love to crochet your pink infinity scarf and make it a little longer. You recommend to chain 99. How do you convert that to a longer scarf. I am looking at about 150 – 160 chains. I have tried and torn out several times.
Thank you so much for you time,
Carol Doll
Carol, I don’t remember the exact pattern, but I think you need chains in a multiple of 3. So 150 should work.
Thanks Melanie!
Thanks Adrianne!
This is SUCH a cute idea!
Adorable! Great way for me to use my cork stash!
I LOVE this! I really need to find someone who drinks wine that will send me their corks. lol Or just make friends with the bartender at a local restaurant, like you did. This would go perfectly on my mantel.
I love the look of this ~ so pretty!
So clever and adorable! Pinned! 🙂
Too pretty for words… I am featuring you tomorrow on the blog!
Oh my, what a cute idea. Genius!
Great Information sharing. I am very happy to read this article.