
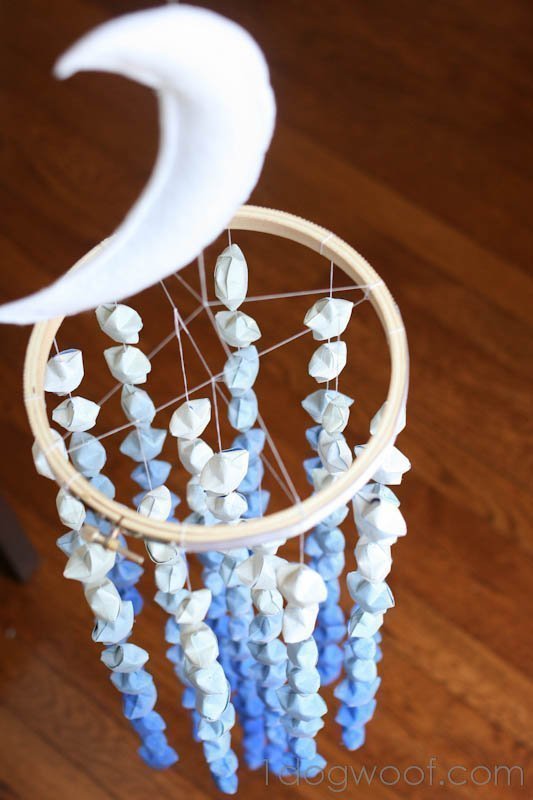
Here’s my Ombre win from SYTYC – a Lucky Star Ombre Mobile. I love that J now points to it at bedtime and says “Moon!” and “-Tar!”
I’m going to lose, or I’m going win. Someday, I will get back to the business of blogging randomness, but for now, I’m just chugging along, another week, another craft :-).
I had seen photos of ombre mobiles on Pinterest that were made from paint chips, so I knew I liked the effect of the ombre in mobile form. I had also seen pictures of lucky stars that were dyed and hung up in garlands, so I decided to put the two ideas together to create my Lucky Stars Ombre Mobile.
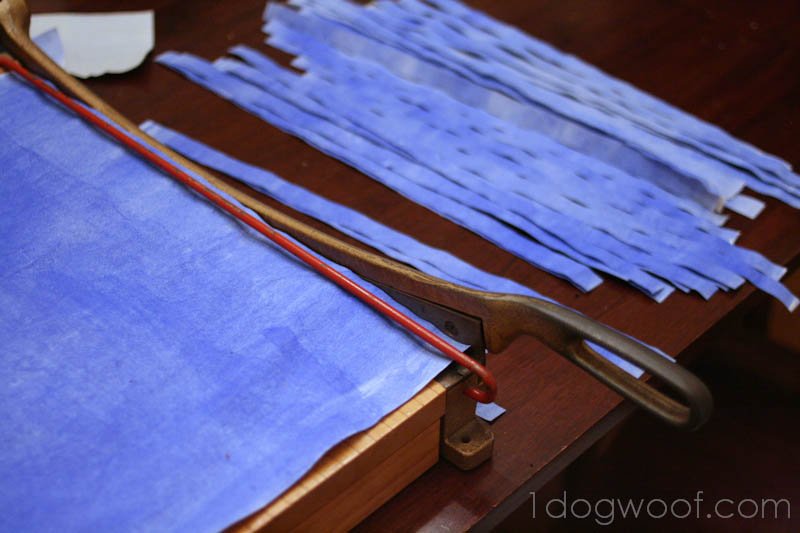
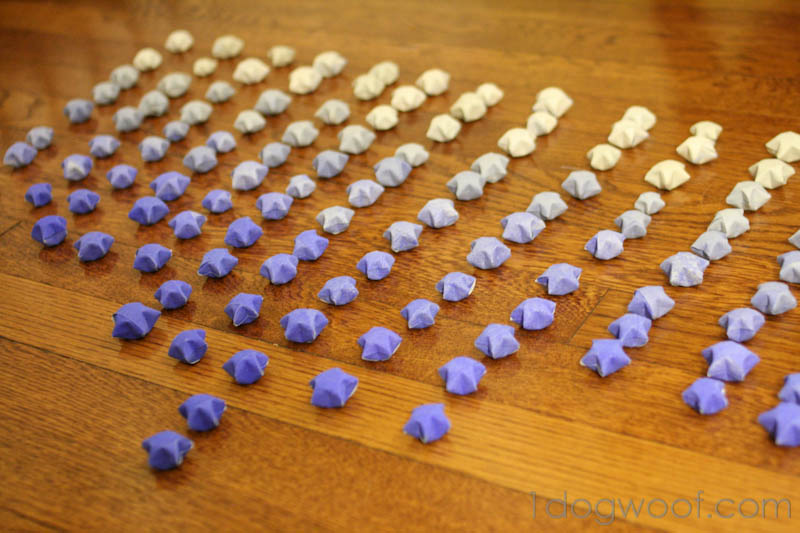
Lucky stars are usually made with long strips of origami paper, but I didn’t have the time nor the confidence that I was going to find exactly what I wanted, so I tried to make my own. J has a big roll of craft paper that we had bought at Ikea, so I tried a Martha Stewart tip about spray painting an ombre effect on the paper using watercolors. To be honest, that didn’t work very well, except for the really color saturated bits. For the light shades, it was easier to just paint on a light watercolor wash.
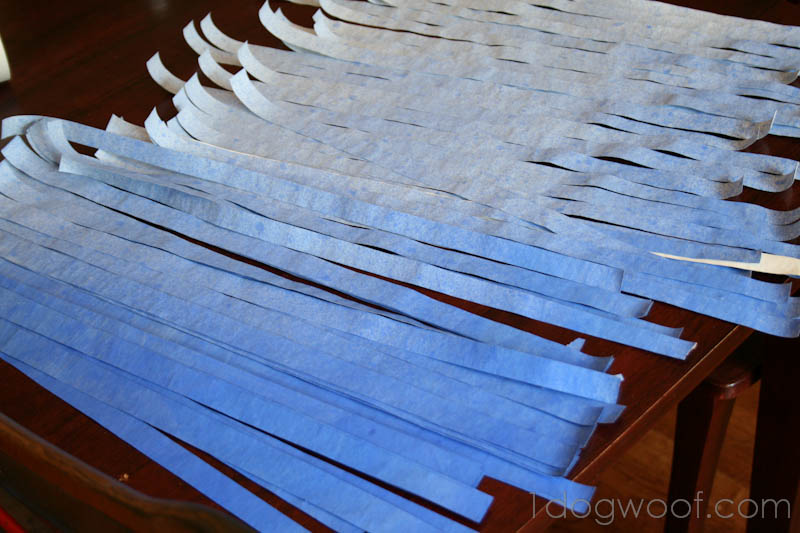
Then cut your now-ombred paper into strips. There is some trial and error involved, as you figure out a good width vs length ratio to create a sturdy puffy star. Sometimes, the strip was too wide and didn’t have enough heft to “puff” out the star, and sometimes, the strip was too thin, which made for a super plump star and made it impossible to stick a needle through. I think my strips were about 20 inches long, and a little over a half inch wide. I painted several swatches of paper, cut them all out and only chose the shades that worked best with each other.
Once you have the strips, start folding stars. Here’s a great pictorial with more detailed instructions than I could ever put together. Because you cut the strips along the gradient, you should have light to dark colored strips and therefore, light to dark colored stars.
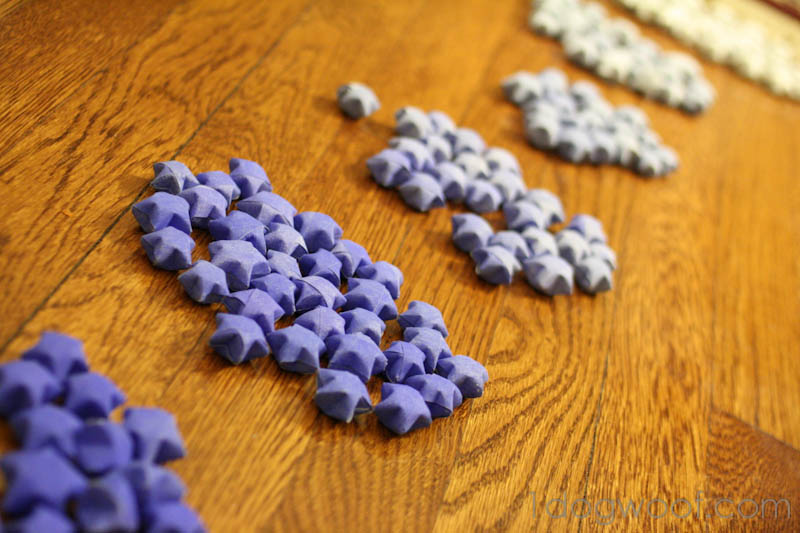

Arrange the stars in columns the way you would want them to hang in your mobile.
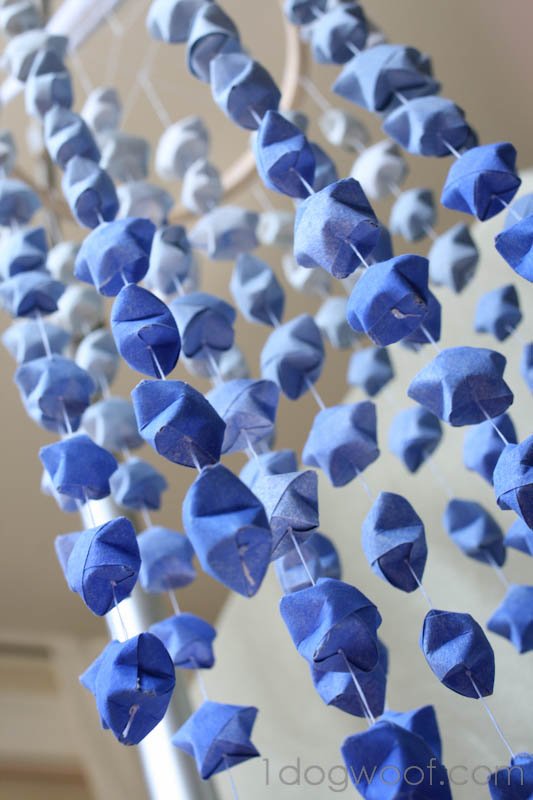
Cut a long length of thread, tie a knot at the bottom and thread the darkest star in the column. Give it an inch of separation, tie another knot and thread the next star up. Continue tying knots and threading stars, from the darkest to lightest. Once you’re at the top, tie the thread around your mobile base; in this case, it was a 6 inch wooden embroidery hoop from Hobby Lobby.
Cut out two white crescents. Sew them together and stuff lightly to make your moon.
The assembly in my case was a bit haphazard. I hung the moon from a thread, and then hung 4 threads from the moon to attach to the embroidery hoop. The embroidery hoop then had all the columns of stars hung from it.
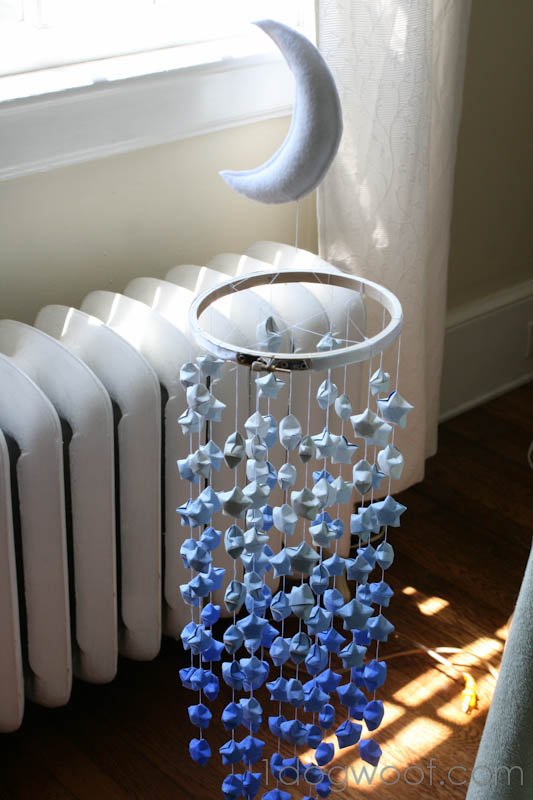
As a final touch, I glued a silver ribbon around the outside of the embroidery hoop, for a little bit of bling (?) and to hide the thread ends.
It was a pretty simple project, and it was a great way to keep my hands busy while watching a chick flick! Speaking of chick flicks, my new thing is Korean soap dramas. Talk about time sucks!


Holy smokes! This is amazing! It’s decided– I’m commissioning you to construct my future child’s mobile.
That is amazingly beautiful. I love it, I want it! All my children are too old for mobiles, but I can not wait for a new baby in the family to try this.
I saw it and went, “oh man I’m totally not winning this week!” I love it! You knocked it out of the park for Ombre week.
its very beautiful..loved it.. I am your new follower
soumya
http://mycraftgallery.blogspot.in/
You are invited to share this with Show Your Stuff blog hop:
http://juliejewels1.blogspot.com/2012/07/show-your-stuff-34.html
Wow, this is just gorgeous! Really, really love this!!! Liz
Seriously stunning! I am so impressed! I know that our readers will love it, too. If you get a chance we would love for you to link up this craft at our weekly Bowdabra Showcase. http://bowdabrablog.com/2012/08/04/saturday-showcase-craft-projects-13/
nice! love it
This is amazing!
really cool
This is beautiful! Looks time consuming to make all those stars…. but the finished product is totally worth it!
Gorgeous!! I love that you did it while watching a chick flick! One of my favorite ways to complete a project! 🙂
So cute!
this is absolutely incredible.
This is so cool. I don’t know if I would ever have the patience for all that paper folding, but the effect is amazing!
New follower and I LOVE this project! TFS
~Pam~
@ http://www.pjstreasures.blogspot.com
Thanks so much for letting me share your Lucky Star Ombre Mobile on I’ve Got The Monday Blues, today! You are so talented and patient to make each and every star. LOVE it!
xoxo
I would love to know how many stars you made. I’m planning on making this for my new born second cousin 🙂
Hi Kayla! To be honest, I have no idea how many stars I made. I know I made more than what I used! There were variations in colors and sizes and quality, so I just spent an evening making stars, and then chose the best ones to use in the mobile. Plus, it’ll depend on how long you want it to hang. It’s a lot of stars, but they work up really quickly and extras are always fun to store in a jar as decoration!
No babies here but will give it a try regardless…Very cool!
May be time consuming…but that’s ok…looks great!!
Thanks for sharing and the great tutorial!
Thanks Charlotte. It’s a nice mind-numbing project 🙂
This is amazing! I have created a similar one but rotating around a central origami disco ball using reflective candy wrap and colored led lights 🙂