
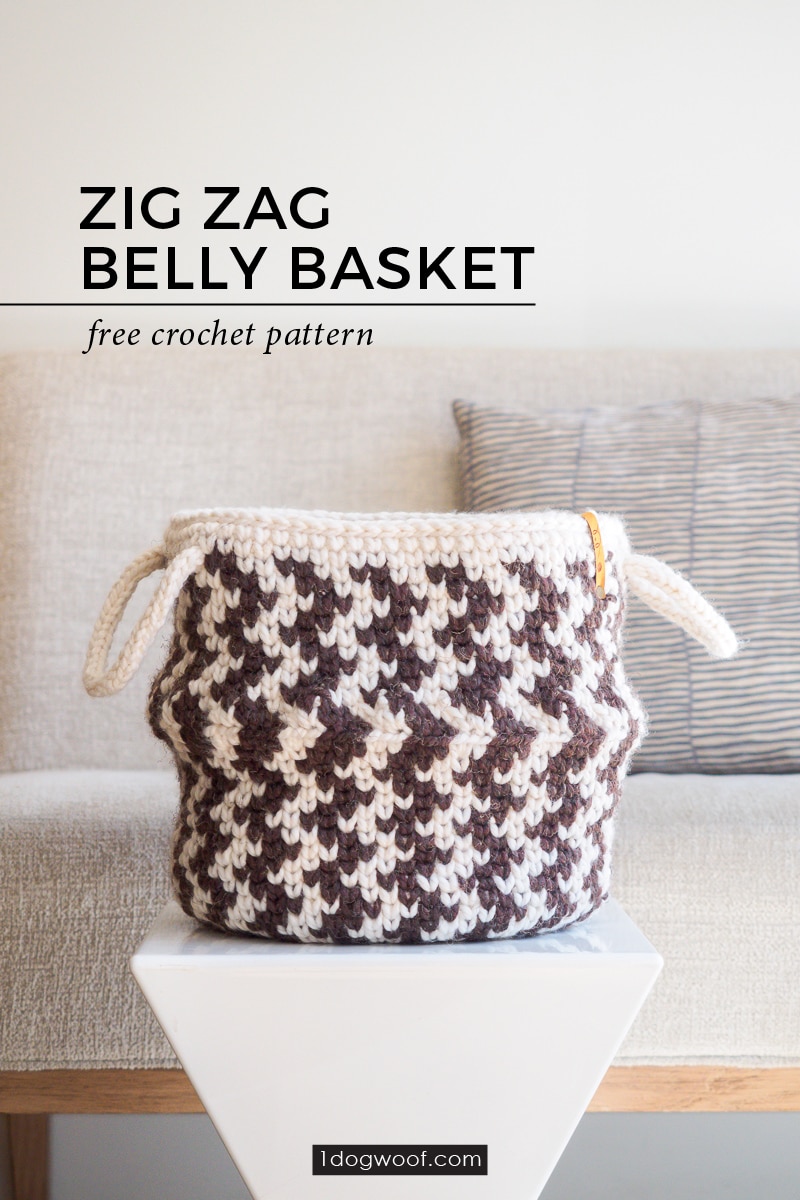
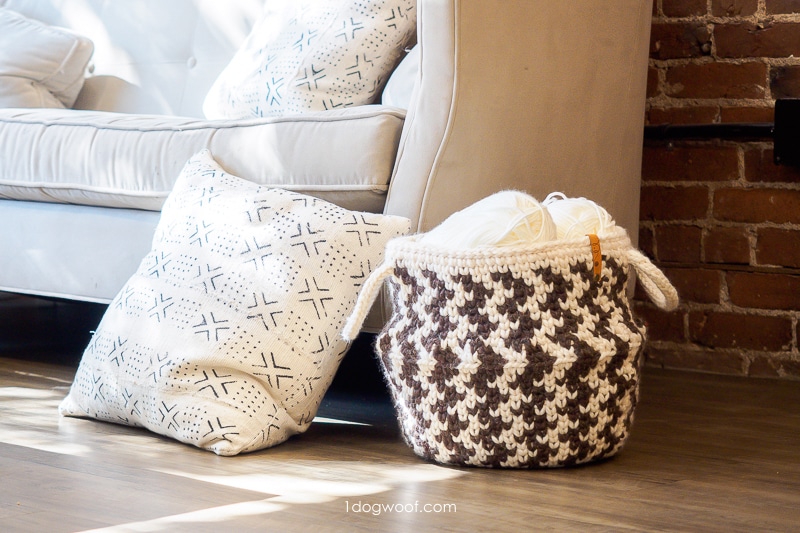
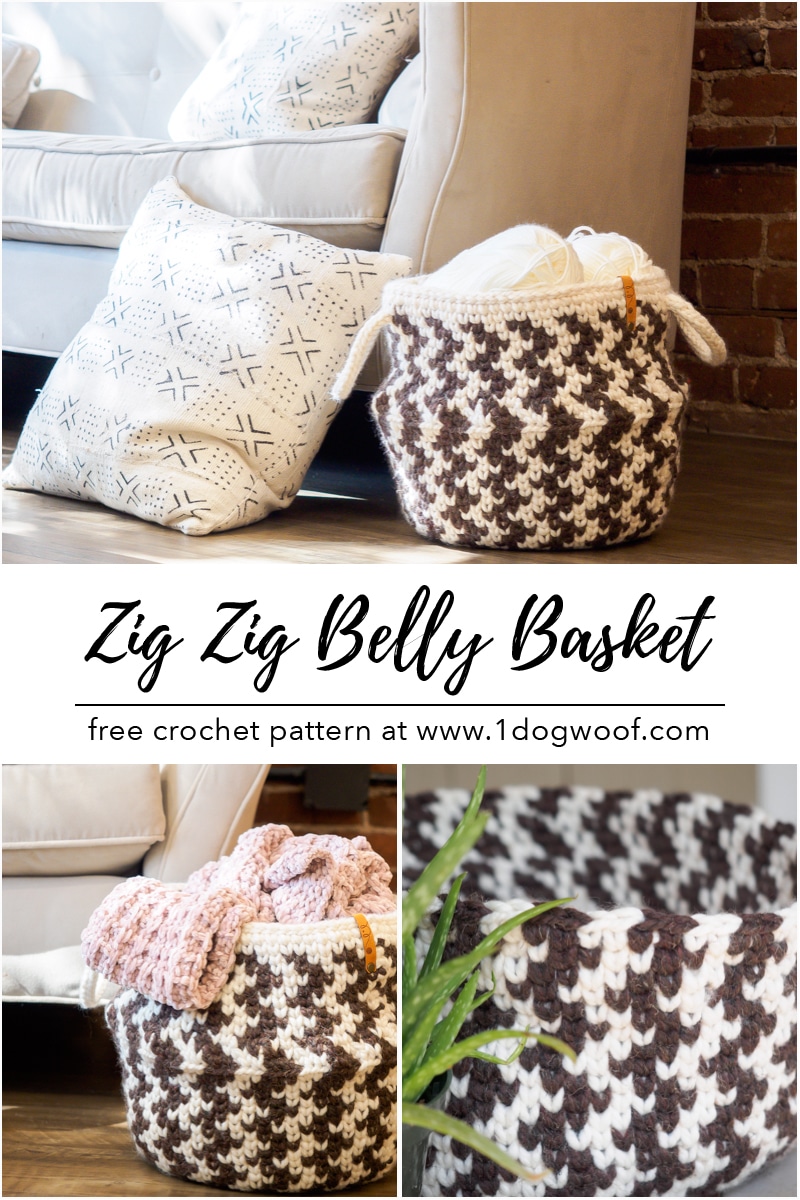
You know me, can’t leave well enough alone. I can’t just crochet a plain ol’ belly basket, I have to crochet a zig zag STRIPED belly basket, just to add some spice to life. And why not? Using two different yarns is great for adding color and interest, and helps with any stash-busting goals you might have.
The Yarn
For this project, pick your two favorite colors of Lion Brand Wool Ease Thick and Quick, one of my favorite chunky yarns. It’s preferable to have two contrasting colors so as not to muddy the zig zag pattern, but hey, maybe two similar colors will create a surprising ombre look. (If you do try it, drop me a note over on Instagram by tagging your photo with @1dogwoof!)
You’ll need 2 balls of each color, using most of the 2 balls of your main color (MC), and about 1.5 balls of your secondary (C1) color, in case that helps you with your de-stashing. If you’re buying new, this is a great opportunity to buy the Lion Brand Wool Ease Thick and Quick Bundles, which is really 2 balls of yarn in 1 big ball. This way, you’ll only need one of those Michaels or Joann Stores 40% coupons to get a nice discount on each color!
——————————————
The Zig Zag Striped Belly Basket is also available as a:
Full kit from Lion Brand Yarn.
Choose between the given colors for the basket and you’ll receive both the yarn and a printed copy of the pattern. There’s often discounts on kits too – subscribe to my email list to get the latest discount code for kits and yarn from Lion Brand!
——————————————
The Construction
The striped belly basket is worked up using waistcoat stitches, with some quick increases right around the middle, followed by some quick decreases to get you right back to the regular shape of the basket.
First, let’s talk about the waistcoat stitch. It’s the same motion as a single crochet, but instead of being worked under the 2 loops as you would with a normal single crochet, a waistcoat stitch is worked into the center of the V created by the previous round of stitches.
You’ll start with single crochet stitches in your main color for the basket bottom, so those rounds are simple and straightforward. The when you pick up your second color, you’ll start the waistcoat stitch. Because both strands of yarn are held in the back of your stitches all the way around, you’ll always be working your single crochet around the unused color to hold it in place.
Click Here to Save This On Pinterest!
Next, let’s talk about working with 2 colors. Switching between two colors constantly can tangle your yarn pretty quickly. One way I keep my yarns tangle-free is to put one ball of yarn to my left, and one ball of yarn to my right. If I bring the left yarn over to the right and twist the yarns, I have to twist it back on the next color switch so that it’s back on my left side. Sticking to this routine not only keeps my yarn from getting tangled, it creates an interesting pattern on the inside of the basket. You can take a look at this color-changing video if you need a bit more help.
Once you get to the increases and decreases, things feel like they’re getting tricky, but again, just stick to the idea that whatever you do, you have to be able to un-do it. Since you increased your MC stitches from 2 stitches to 3 stitches, you have to decrease those MC stitches from 3 to 2 during your decrease rounds. At the end of your increase and decrease rounds, you should once again have 2 stitches of MC alternating with 2 stitches of C1. It will become more apparent once you work a few rows to see the pattern!
At the rim of the basket, you’ll work a round of slip stitches to give the top of the basket some structure and if necessary, pull in any looseness that may have occurred. I don’t know about you, but as I got more used to the color pattern, my tension loosened up, and the top of my basket was looking a bit floppy. The slip stitch round really helped straighten out that rim and made it neat and tidy.
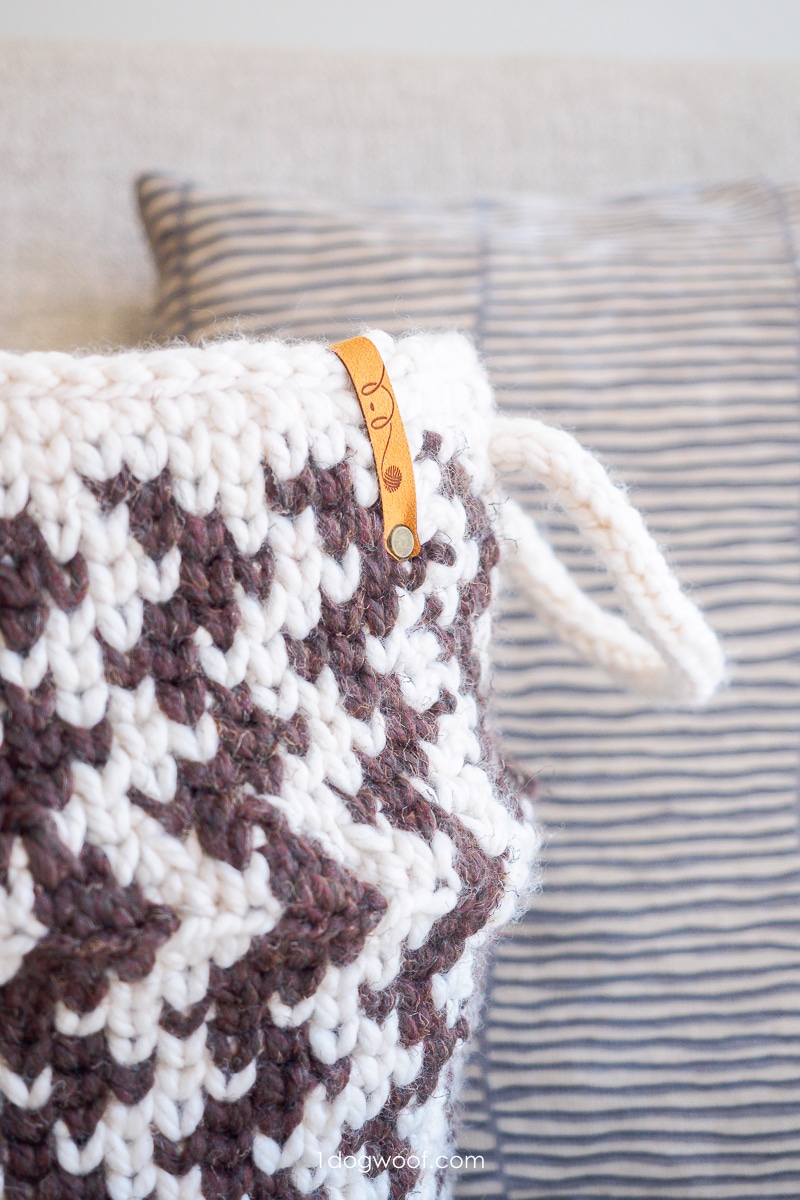
Finally, for handles, you can make i-cord ones as shown, or get creative with rope or leather handles!
Oh, and finally finally, add a leather tag for that extra bit of polish. I love these especially because they are a screw in tag and don’t need to be sewn. That also means that I can cater to my own indecisive self and place and replace them anywhere I want to get the perfect look. You can find the ones I used over at Angie and Britt.
——————————————
Purchase the Zig Zag Striped Belly Basket PDF from my Etsy shop.
——————————————
The Zig Zag Striped Belly Basket Pattern
Supplies
- Main Color (MC) : 2 balls of Lion Brand Wool Ease Thick and Quick
- Solids (170g/6oz, 106yds/97m)
- Prints/Stripes/Metallic (140g, 5oz, 87yds/80m)
- Alternate Color (C1) : 2 balls of Lion Brand Wool Ease Thick and Quick
- Solids (170g/6oz, 106yds/97m)
- Prints/Stripes/Metallic (140g, 5oz, 87yds/80m)
- L – 8.00 mm crochet hook for basket base
- M/N – 9.00 mm crochet hook for basket sides
- J – 6.00 mm crochet hook for basket handles
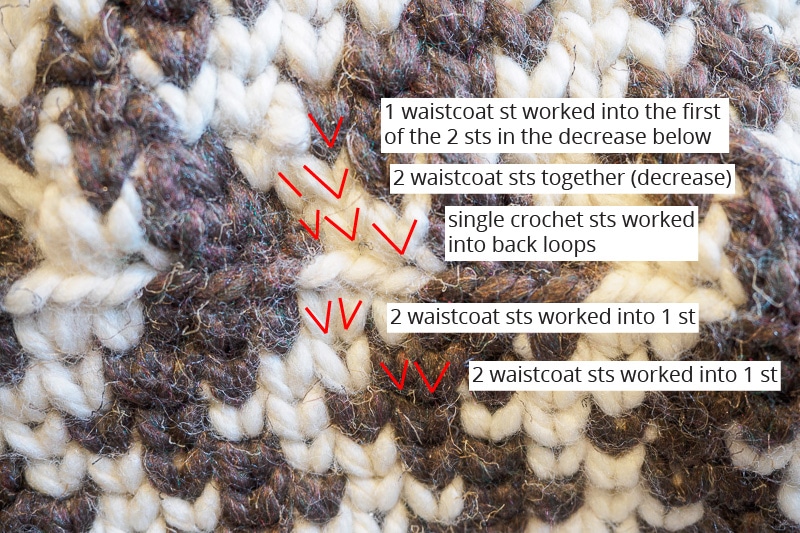
- cable holder/knitting needle/even wooden skewer for the i-cord
- Tapestry needle
- Scissors
Abbreviations (US terminology)
- MC – main color
- C1 – second color
- st(s) – stitch(es)
- sl st(s) – slip st(es)
- ch – chain stitch
- yo – yarn over
- sc – single crochet
- wcs – waistcoat stitch – single crochet worked into the V of the stitch below
- inc – increase stitch: work 2 sts into the same st. Use sc unless otherwise noted.
- dec – decrease stitch: work 2 waistcoat sts together by inserting hook into V of first st, yo, pulling up a loop, inserting hook into V of 2nd st, yo, pulling up a loop, yo, pull through both loops on hook.
——————————————
Related:
——————————————
Pattern Notes
- Skill level: Easy
- Gauge: 8 sts and 9.5 rows in 4 inches of single waistcoat crochet
- Finished size: 37.5 inches circumference at the top, 12 inches high
- The belly basket is worked from the bottom up in seamed rounds.
- The bottom of the basket is worked using regular single crochet stitches worked in the round. Once you start using 2 colors, work in single waistcoat stitches around, unless otherwise noted at the increases.
- When working with 2 colors, the unused color is held in the back and carried along in each stitch. You can prevent the two colors twisting by always holding the same color on the top and the other the bottom as you work.
- Waistcoat stitches are single crochet stitches worked into the middle of the V of the single crochet stitch in the row below, and NOT under the two loops that you normally work into. When closing up a round, remember to also work into the middle of the V of the first single crochet stitch of the round.
- Inserting your hook for a waistcoat stitch can get a bit tricky, especially because you’re also carrying yarn behind the stitch To make it a little easier, keep your tension loose, keep the left leg of the single crochet a bit loose, and try to work under the carried yarn.
- Chain 1 as the beginning of rounds do not count as a stitch.
Instructions for Zig Zag Striped Belly Basket
Body
Start with MC, and 8.00 mm crochet hook. Keep tension tight for the base.
Round 1: Work 6 sc into a magic circle.Join to first sc with sl st. (6)
Round 2: Ch 1. Work 2 sc in each st around. Join to first sc with sl st. (12)
Round 3: Ch 1. Work [1sc, inc] around. Join to first sc with sl st. (18)
Round 4: Ch 1. Work [2 sc, inc] around. Join to first sc with sl st. (24)
Round 5: Ch 1. Work [3 sc, inc] around. Join to first sc with sl st. (30)
Round 6: Ch 1. Work [4 sc, inc] around. Join to first sc with sl st. (36)
Round 7: Ch 1. Work [5 sc, inc] around. Join to first sc with sl st. (42)
Round 8: Ch 1. Work [6 sc, inc] around. Join to first sc with sl st. (48)
Round 9: Ch 1. Work [7 sc, inc] around. Join to first sc with sl st. (54)
Round 10: Ch 1. Work [8 sc, inc] around. Join to first sc with sl st. (60)
Round 11: Ch 1. Work [9 sc, inc] around. Join to first sc with sl st. (66)
Round 12: Ch 1. Work 4 sc, 1 inc, [10 sc, inc] 5x, 6sc. Join to first sc with sl st. (72)
Round 13: Ch 1. Work 1 sc in each st around. Join to first sc with sl st. (72)
Start colorwork, working in waistcoat stitch and using 9.00 mm crochet hook.
Round 14: Using MC, ch 1. Work [2 wcs in MC, 2 wcs in C1] around. Using C1, join to first wcs with sl st. (72)
Round 15: Using C1, ch 1. Work [1 wcs in C1, 2 wcs in MC, 1 wcs in C1] around. Using C1, join to first wcs with sl st. (72)
Round 16: Using C1, ch 1. Work [2 wcs in C1, 2 wcs in MC] around. Using C1, join to first wcs with sl st. (72)
Round 17: Using C1, ch 1. Work [1 wcs in C1, 2 wcs in MC, 1 wcs in C1] around. Using C1, join to first wcs with sl st. (72)
Rounds 18-25: Repeat Rounds 14-17, 2 more times. (72)
Rounds 26-28: Repeat Rounds 14-16. (72)
Round 29: Using C1, ch 1. Work [1 wcs in C1, 1 wcs in MC, 1 waistcoat inc in MC, 1 wcs in C1] around. Using C1, join to first wcs with sl st. (90)
Round 30: Using MC, ch 1. Work [3 wcs in MC, 1 wcs in C1, 1 waistcoat inc in C1] around. Using C1, join to first wcs with sl st. (108)
Round 31: Using MC, ch 1. Work [3 sc in MC, 3 sc in C1] in back loop only, around. Using C1, join to first sc with sl st. (108) Note: On this round, you’re working regular single crochet stitches into the back loop of the stitch below, NOT waistcoat stitches.
Round 32: Using C1, ch 1. Work [1 wcs in C1, dec across next 2 sts in MC, 1 wcs in MC, dec across next 2 sts in C1] around. (72)
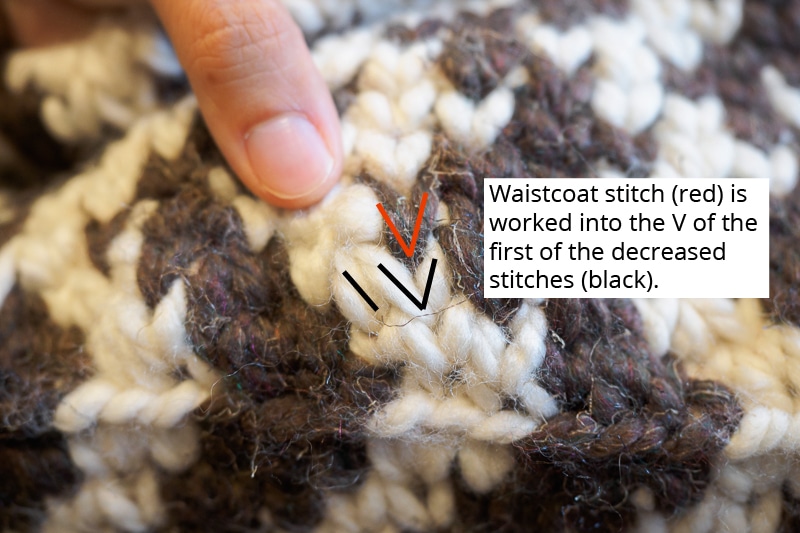
Round 33: Using C1, ch 1. Work [2 wcs in C1, 2 wcs in MC] around. Using C1, join to first wcs with sl st. (72) Note: Working a waistcoat st into a decreased st can be a little tricky. It’s easiest to work into the V of the first of the 2 stitches that were single crocheted together. (shown below)
Round 34: Repeat Round 17. (72)
Rounds 35-38: Repeat Rounds 14-17. (72)
Rounds 39-41: Repeat Rounds 14-16. (72)
Rounds 42-43: Using C1 all the way around, ch 1, and work 1 wcs in each st around. Join to first wcs with sl st.
Round 44: Using C1, work 1 sl st in each st around. Note: Be careful of how tightly or loosely you work your slip stitches. If they are too loose, the top of the basket will be floppy. You’ll want to work your slip stitches just tight enough to pull in any looseness at the top of the basket, without closing it in too much.
Fasten off, cut and weave in ends.
Handles
Using C1, and 6.00 mm crochet hook.
Crochet (2) two 16 inch i-cords as follows:
Using the smaller hook, ch 3. Insert hook into 2nd ch from hook, yo and pull up a loop. Insert hook into last ch, yo and pull up a loop. You should now have 3 loops on your hook.
Step 1: Slip the left 2 loops onto a knitting needle or cable holder. Yo, and pull through remaining loop on hook.
Step 2: Slip one loop off the cable holder, yo, and pull through 1 loop on hook.
Step 3: Slip last loop of cable holder, yo, and pull through 1 loop on hook. You should again have 3 loops on your hook.
Repeat Steps 1-3 until i-cord is approximately 15-16 inches.
To finish, yo and pull through all 3 loops on hook. Fasten off and cut yarn.
Insert ends of i-cord from outside to inside on opposite sides of the basket, between rows 41 and 42, with ends approximately 8 sts apart. Tie all ends into knots on the inside of the basket. Cut any remaining ends.
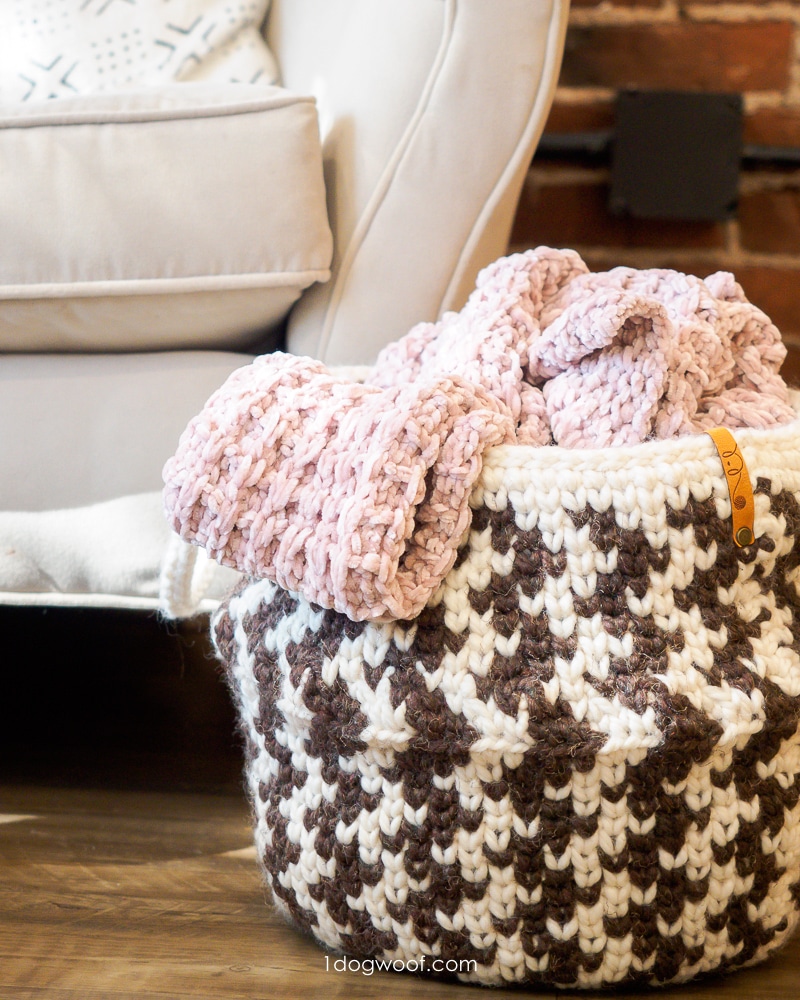
And that’s it! You now have a gorgeously striped belly basket. I think it makes a stunning addition to a room, don’t you?


I love this pattern! Can’t wait to try it. If I wanted to make a version without the “belly”, would I just continue repeating rounds 14-17? Is there a structural purpose for the belly, or is it just aesthetic?
What a cute basket! Thank you for the pattern!
Thanks for this great pattern! Looks really adorable.