
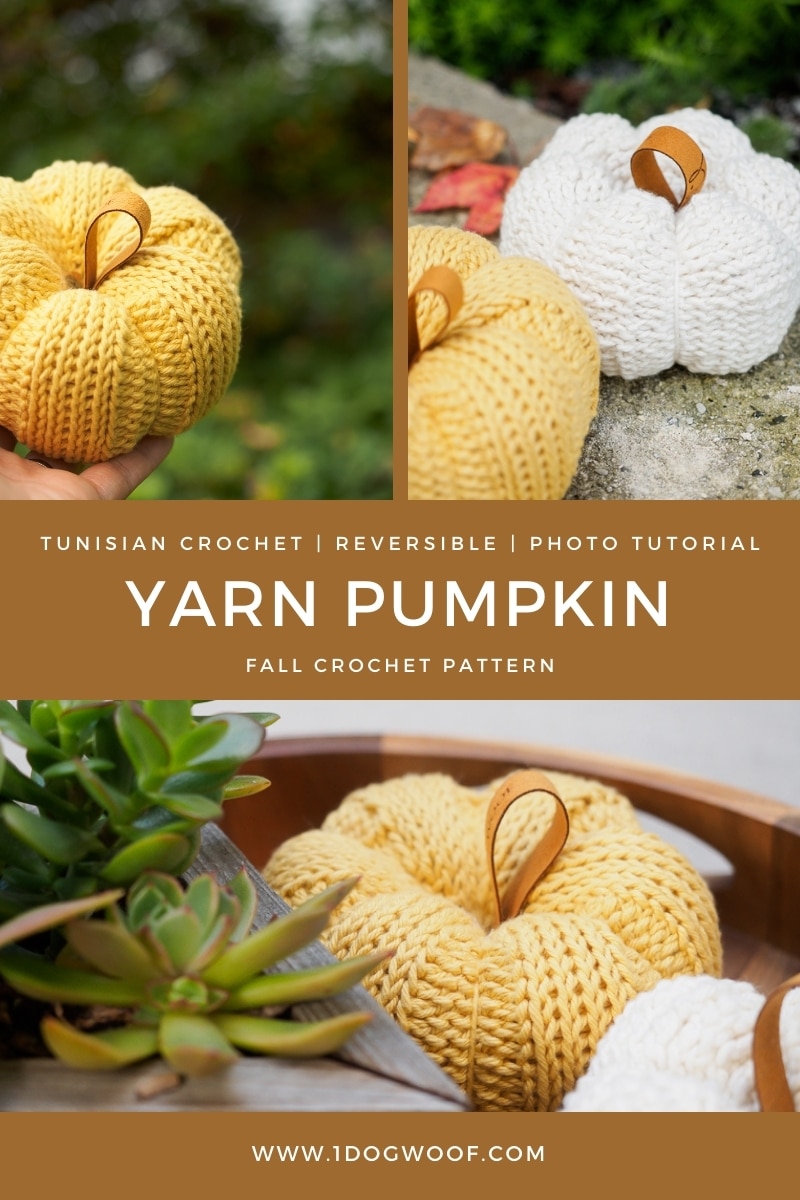
‘Tis the season … for pumpkins! This Tunisian Crochet pumpkin is full of texture and personality, is easy to make, and looks knit enough for crocheters who are looking for that knit ribbed look.
Click Here to Pin it For Later!
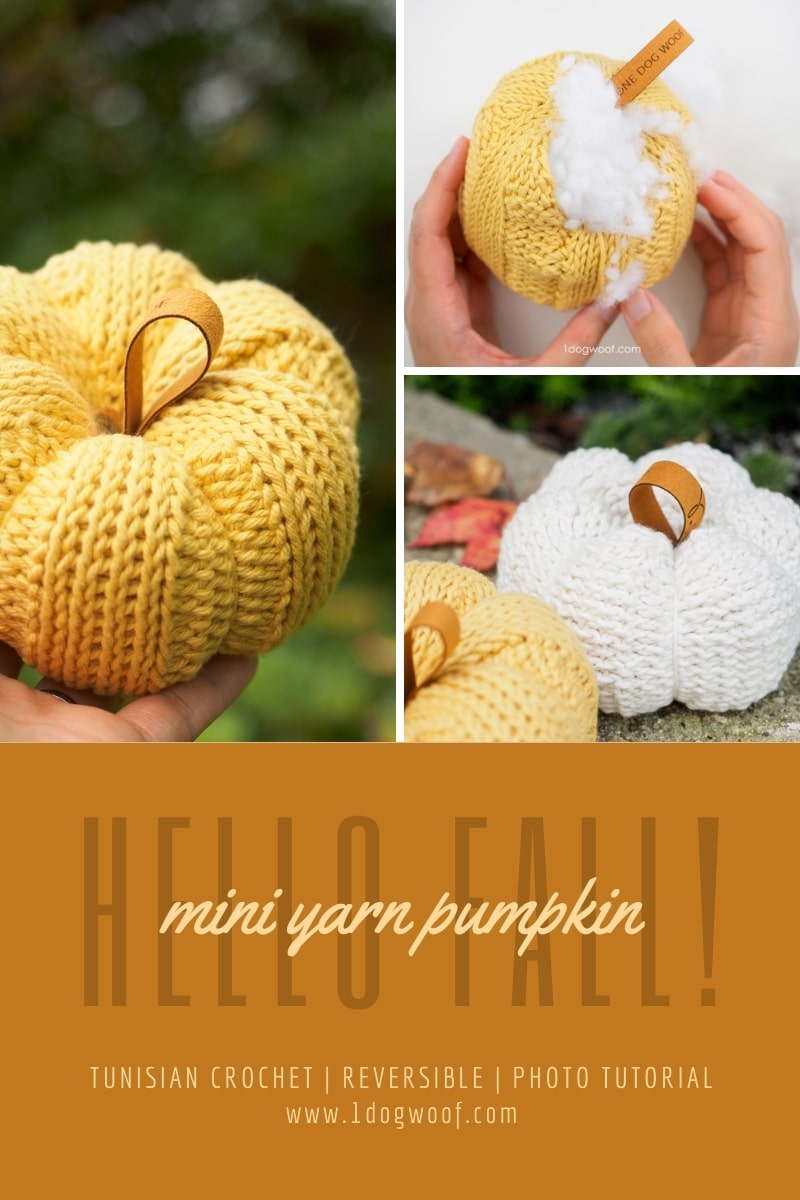
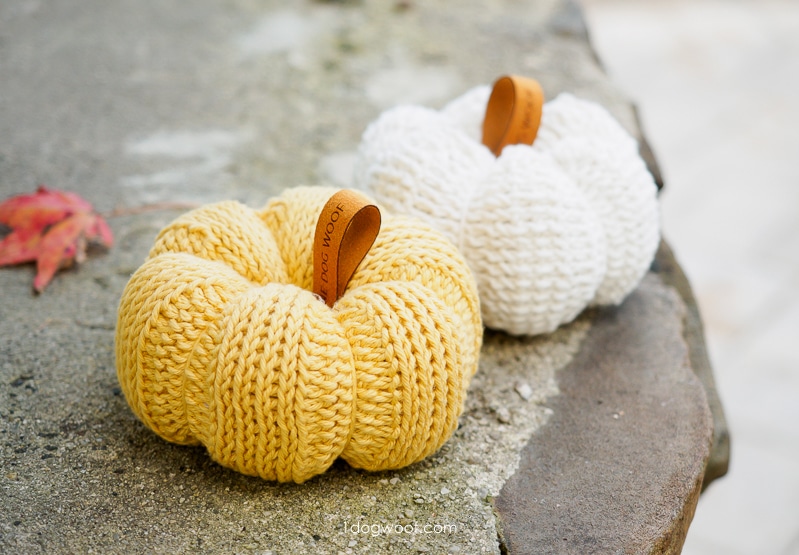
If you know me, you know I like to add my own twist to projects. I mean, isn’t that the best part about design. We have control over our creative destinies! There are a lot of crochet and knit pumpkins out there, but I wanted to add a Tunisian Crochet version to the pumpkin patch. The best part is, both sides of the Tunisian Crochet fabric is so unique, you can make 2 very different looking pumpkins from a single pattern.
A Cotton Pumpkin
For this project, I used WeCrochet / Knit Picks Dishie Yarn. It is a worsted weight, 100% cotton yarn that comes in a plethora of gorgeously rich and sophisticated colors. You can buy Dishie in balls, in a larger cone for more continuous work, or even in a twine-looking twist. The colors work so well with each other, and really covers the entire spectrum. The yarn itself is incredibly soft unlike other cotton yarns, is easy on the hands as you work, and still feels sturdy enough to be made into workhorse projects like scrubbies and washcloths.

Tunisian Crochet Pumpkin Construction
Unlike a more typical crochet pumpkin, this pattern is worked in rows, not rounds. I’m still unfamiliar with working Tunisian Crochet in rounds, but found that working in rows actually works perfectly. As with other seamed projects, you work an extra selvedge stitch on either side of the main pattern, and then work a vertical crochet mattress stitch to seam the edges and hide the selvedge. The end result shows a near seamless rib.
Working in rows keeps the project fairly simple. You start with basic Tunisian increases, work your ribbed pattern even, and then end with basic Tunisian decreases. The increases and decreases are there to help you cinch the top and bottom of the pumpkin so you don’t have a lot of bulk which can make the ends difficult to close.
——————————————
In Case You Missed It:
Crochet Succulent Pumpkin Planter
Copper Paper Embellished Pumpkins
——————————————
To Flip or Not to Flip
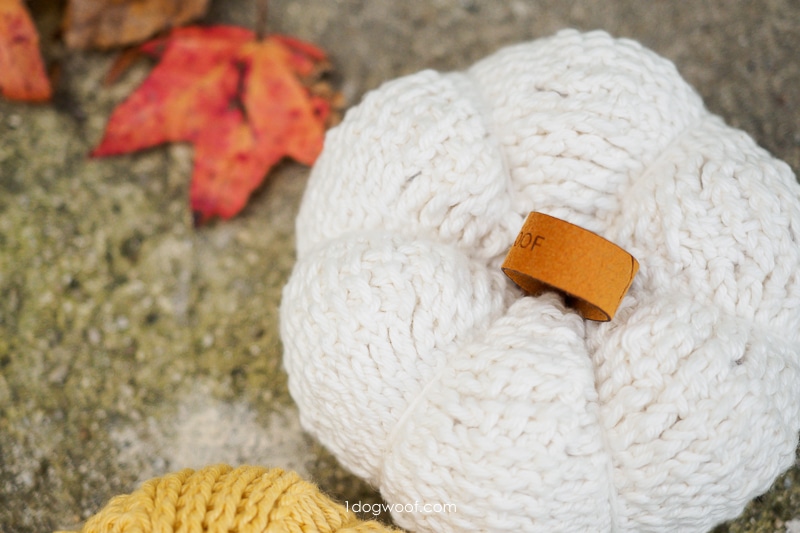
My favorite part about this crochet pumpkin is choosing which side of the Tunisian Crochet fabric to display. On one side, you have a wide and sophisticated knit-look ribbing. On the other, you get the super textured bumpy ridges that looks so organic and unique. Both sides make beautiful pumpkins and they each look so different!
You do need to make this decision before you seam up the pumpkin, since your mattress stitch is worked with the right side facing out. If you seam the edges and then decide to flip the pumpkin inside out, you’ll get a ridge of selvedge stitches sticking out.
Tunisian Crochet Pumpkin Instructions
SUPPLIES
- 80-100 yds / 73-91m of WeCrochet Dishie yarn (3.5oz/100g, 190yds/174m) in your choice of color
- I/5.5mm tunisian crochet hook
- scissors
- tapestry needle
- polyester fiberfill stuffing
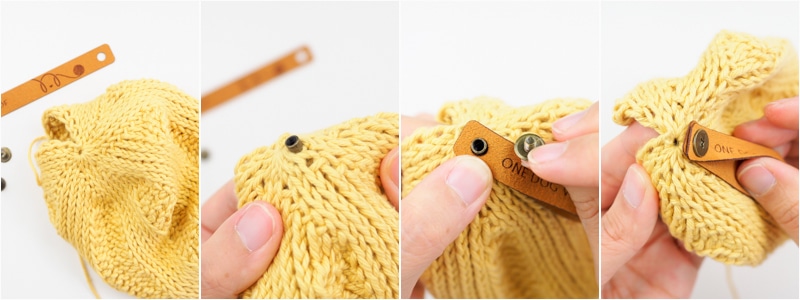
- Optional: leather tag or stick for pumpkin stem
FINISHED SIZE
Gauge: 18 sts and 20 rows in 4″/ 10cm
Finished size: 5″ / 12.7cm in diameter, 2.5″ / 6.3cm tall, not including stem
Abbreviations
- st(s) – stitch(es)
- sl st(s) – slip stitch(es)
- ch – chain stitch
- sc – single crochet
- yo – yarn over
- lp – loop
- Tks – tunisian knit stitch: insert hook from front to back between front and back vertical bars and under all strands of horizontal bar, yo, and pull up a loop.
- Tps – tunisian purl stitch: with working yarn in front, insert hook from right to left under vertical bar of stitch, yo, and pull up a loop.
- inc – (increase stitch) tunisian increase stitch: insert hook under 2 strands of horizontal bar between two stitches, yo and pull up a loop.
- Tss2tog – (decrease stitch) tunisian simple stitch 2 together: insert hook under the next 2 vertical bars, yo, and pull up a loop through both bars.
Pattern and Construction Notes
- This pattern can be used with any type of yarn. You’ll need to adjust your hook size to be one or two sizes larger than the recommended hook size because Tunisian crochet tends to be tighter than regular crochet.
- The stem of the pumpkin can be made with anything you have on hand – a cinnamon stick, a small stick from your yard, a leather tag sewn on, or a crochet i-cord sewn on. The possibilities are endless!
- Work all return passes as a basic return pass.
Instructions
Start with a 6-8″ / 15-20cm tail, ch 14.
Foundation Row: Work basic foundation row and return pass.
Increase Section
Row 1: Work [2 Tks, inc 1] 6x, draw up lp in last bar. (20)
Row 2: Work [3 Tks, inc 1] 6x, draw up lp in last bar. (26)
Row 3: Work [4 Tks, inc 1] 6x, draw up lp in last bar. (32)
Row 4: Work [5 Tks, inc 1] 6x, draw up lp in last bar. (38)
Row 5: Work [6 Tks, inc 1] 6x, draw up lp in last bar. (44)
Row 6: Work [7 Tks, inc 1] 6x, draw up lp in last bar. (50)
Ribbed Section
Row 7: Work [5 Tks, 3 Tps] 6x, draw up lp in last bar. (50)
Repeat Row 7 until work from Row 7 (total Ribbed Section) measures 4″ / 10cm.
Decrease Section
Row 1: Work [6 Tks, 1 Tss2tog] 6x, draw up lp in last bar. (44)
Row 2: Work [5 Tks, 1 Tss2tog] 6x, draw up lp in last bar. (38)
Row 3: Work [4 Tks, 1 Tss2tog] 6x, draw up lp in last bar. (32)
Row 4: Work [3 Tks, 1 Tss2tog] 6x, draw up lp in last bar. (26)
Row 5: Work [2 Tks, 1 Tss2tog] 6x, draw up lp in last bar. (20)
Row 6: Work [1 Tks, 1 Tss2tog] 6x, draw up lp in last bar. (14)
Row 7: Work sc in each st across.
Cut a long tail (around 1 yd/1m) and fasten off.
Assembly
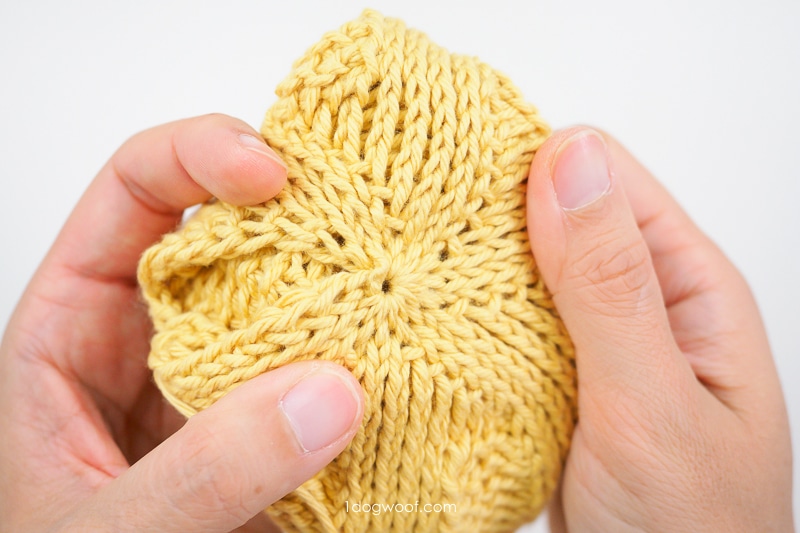
Thread the beginning tail onto a tapestry needle. Insert the needle from back to front in each stitch of the beginning edge. Pull to cinch tight, secure with a knot, and weave in ends.
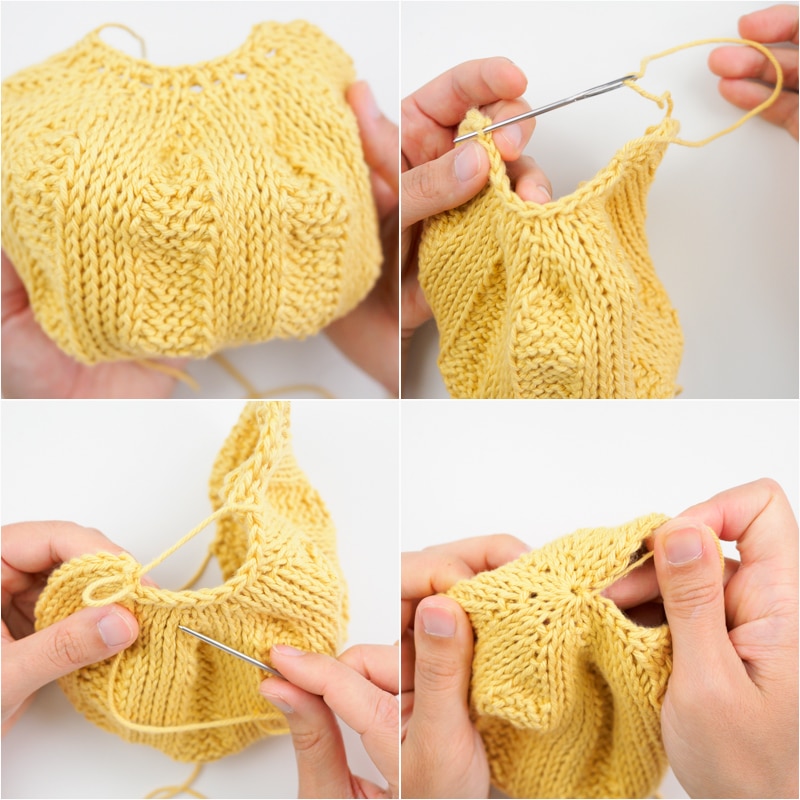
Repeat with the other end: Thread the end tail onto a tapestry needle. Insert the needle from back to front in each single crochet st across the edge. Pull to cinch tight and secure with a knot.
At this point, choose which side you want to be the Right side of the pumpkin – the front or the back of the tunisian crochet fabric. If you want the back side of the tunisian crochet fabric to be the Right side, turn the piece inside out.
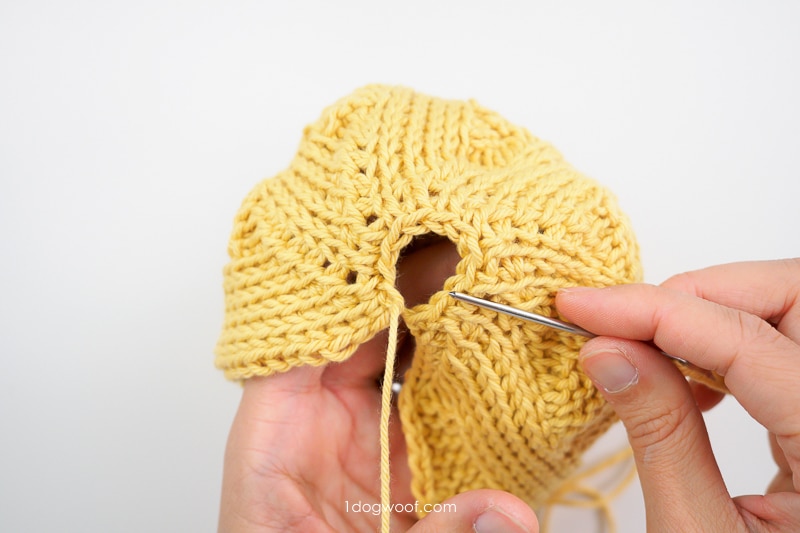
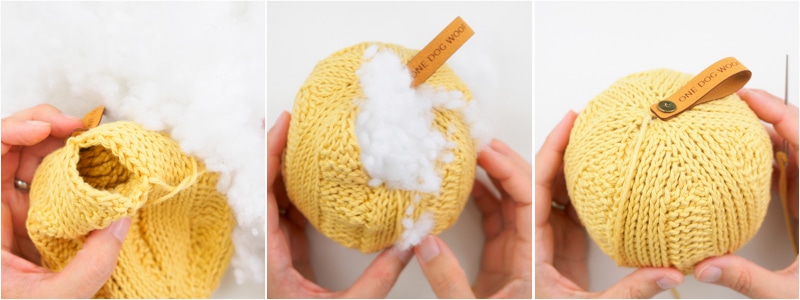
Use a mattress stitch to seam the two side edges together, leaving a 1.5″ / 3.8cm wide hole for stuffing.
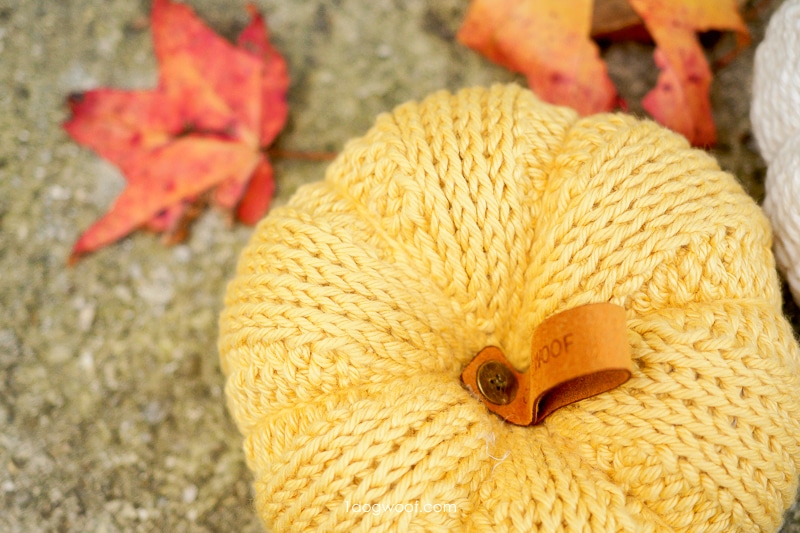
Before stuffing the pumpkin, choose which is the top of the pumpkin, and add your stem just to the side of the center point.
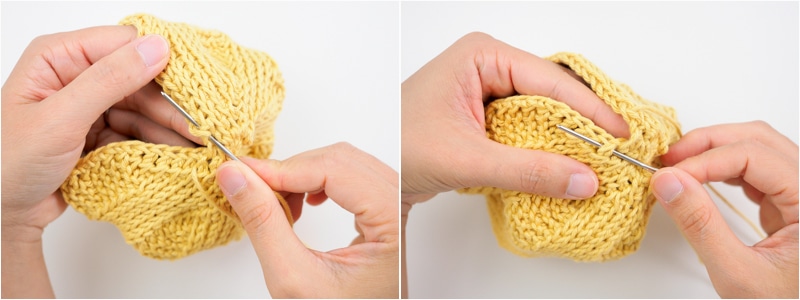
Add the stuffing, and complete the mattress stitch seam. Tie a knot to secure the seam.
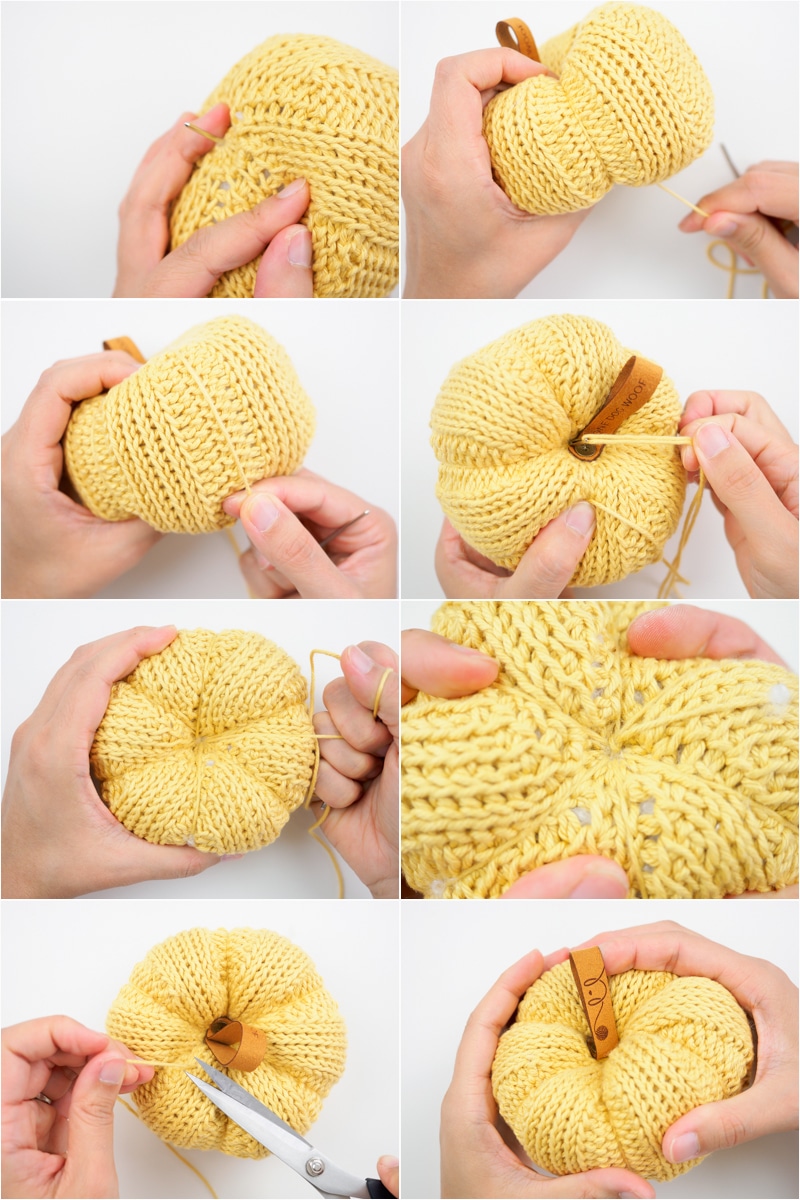
Use the rest of the tail to pull through the center of the pumpkin and wrap around the outside vertically to create 6 “cheeks”, pulling tightly to create each section. After creating 6 sections, secure the yarn with a knot. Weave in ends by sewing extra yarn through the pumpkin and cutting off the ends.
Happy Fall Y’all!


This so cute, as we are in pumpkin season this is honestly the cutes crochet pumpkins I’ve seen and the only pumpkin pattern that I’ve bookmarked. Really cute and a your pattern and pictures are really well written for a newbie like me. Thank you
Thank you for the pattern! It is really cute. The Tps stich you state insert hook from left to right, is this correct? I feel like these are leaving some rather large spaces.
I cannot make 20 stitches in the first row with 14 sts to begin with. Do you have 2 extra sts in the beginning chain to use as turning sts?
After you chain 14, you need to work a full foundation row forward and return pass. This should give you 14 vertical bars, then you work your increase on the next forward pass.
Ah, I’m so sorry for the typo! It’s right to left. I’m sure my husband will have something to say about me not getting my lefts and rights correct, lol.
Thank you so much!
Oh I love this idea! I want to make a huge pumpkin with this tutorial! Thank you for sharing!
I am so in love with your pumpkin!!! Thanks for sharing!
This is so beautiful. Do you have instructions on how to make a bigger one? I’m not sure how to do that…
I don’t have written instructions for a larger pumpkin, but you could use a bulkier yarn and go up a hook size!