
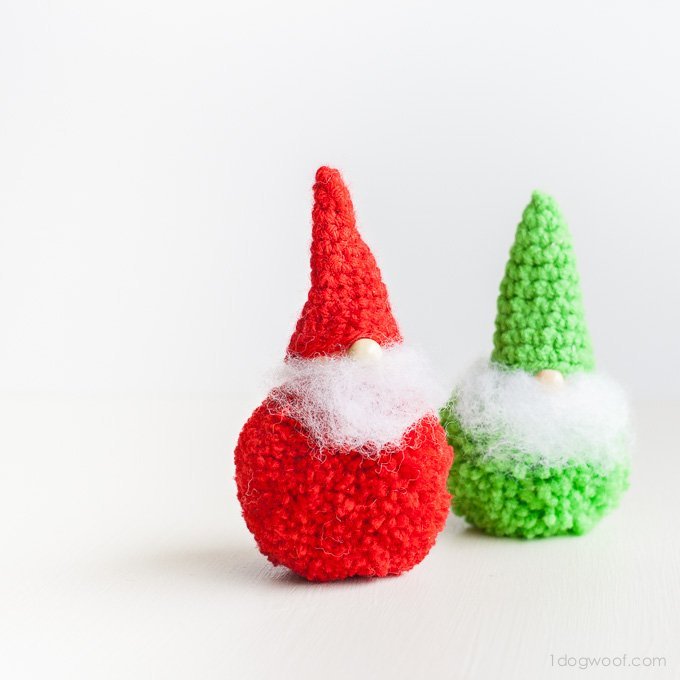
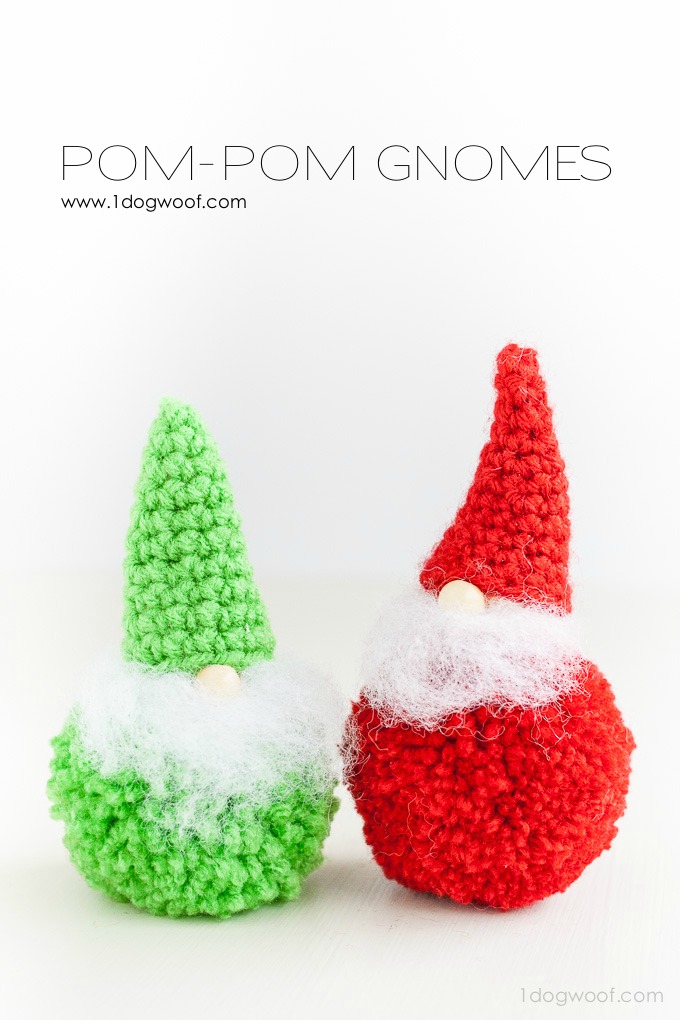
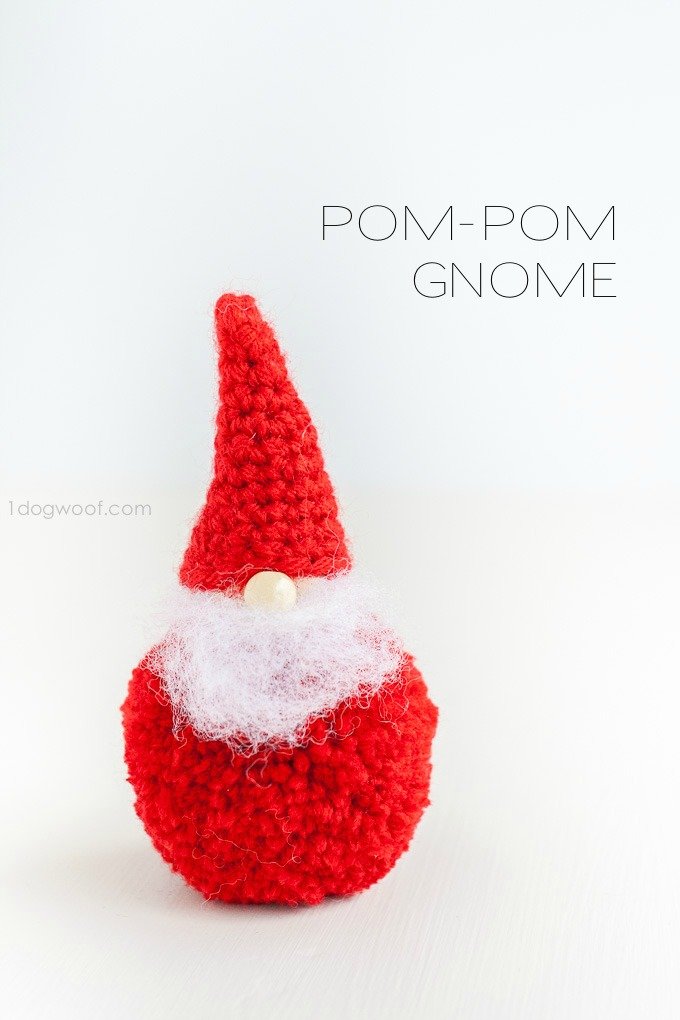
I’m sharing two last minute projects inspired by stuff I saw on the internet. First up are these pom-pom gnomes. I saw this pom-pom Santa knew I wanted to make my own. The instructions are pretty self-explanatory so I’m going to keep this simple.
Supplies
1 inch wood bead
10mm wood bead
hot glue
yarn
tiny bit of fiberfill stuffing
scissors
your choice of pom-pom maker
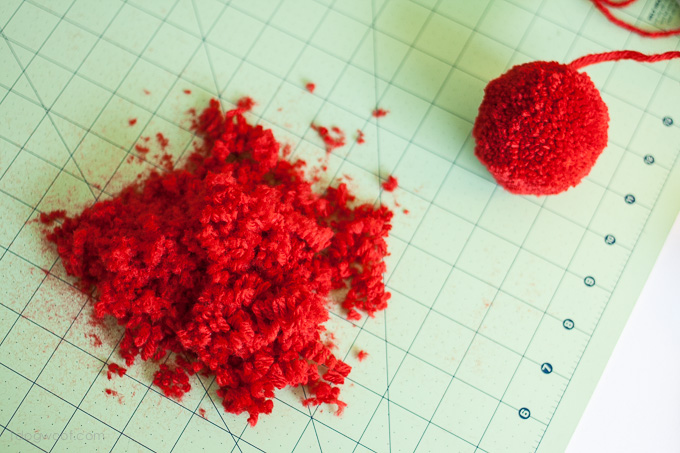
For the pom-pom, I used the Clover Large Pom Pom Maker![]() that I had bought on a whim a while back. It had been sitting around FOREVAH, so I finally busted it open and tried my hand at pom-poms. The first few were not pretty. I had to check out a video before I learned the secret tip to success. Wanna know what I know?
that I had bought on a whim a while back. It had been sitting around FOREVAH, so I finally busted it open and tried my hand at pom-poms. The first few were not pretty. I had to check out a video before I learned the secret tip to success. Wanna know what I know?
TIP: Wrap the yarn until the arm of the pom-pom maker is a half-moon shape, and don’t leave any space in the inner arch. In other words, over-wrap it. Then, when you tie the pom-pom, it’ll actually tighten instead of leaving a donut hole in your pom-pom.
You can see that the green one was a loosey-goosey pom-pom that I had to finagle to get right. Then I overstuffed the red one and it’s nice and dense.
Since I used the large version, the pom-poms I made were too big for the beads I had, so I did a lot of trimming. A LOT of trimming.
For the head/face, I crocheted the red hat using the pattern from my winter gnome. For the green hat, I used the following pattern.
Round 1. Sc 4 into magic circle.
Round 2. *Work 1 sc into next st, then 2 sc into next stitch* 2x. (6 st)
Round 3. Work 1 sc in each stitch around. (6 st)
Round 4. *Work 1 sc in each of next 2 st. Work 2 sc in next stitch* 2x. (8 st)
Round 5. Work 1 sc in each stitch around. (8 st)
Round 6. *Work 1 sc in each of next 3 st. Work 2 sc in next stitch* 2x. (10 st)
Round 7. Work 1 sc in each stitch around. (10 st)
Round 8. *Work 1 sc in each of next 4 st. Work 2 sc in next stitch* 2x. (12 st)
Round 9. Work 1 sc in each stitch around. (12 st)
Round 10. *Work 1 sc in each of next 7 st. Work 2 sc in next stitch* 2x. (14 st)
Round 11. Work 1 sc in each stitch around. (14 st)
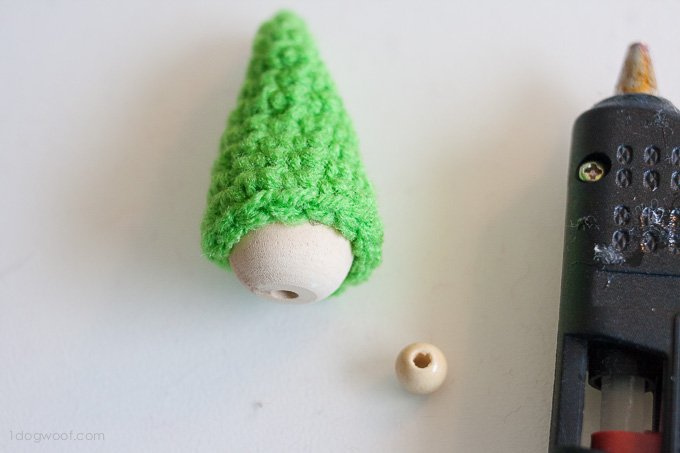
Assembly
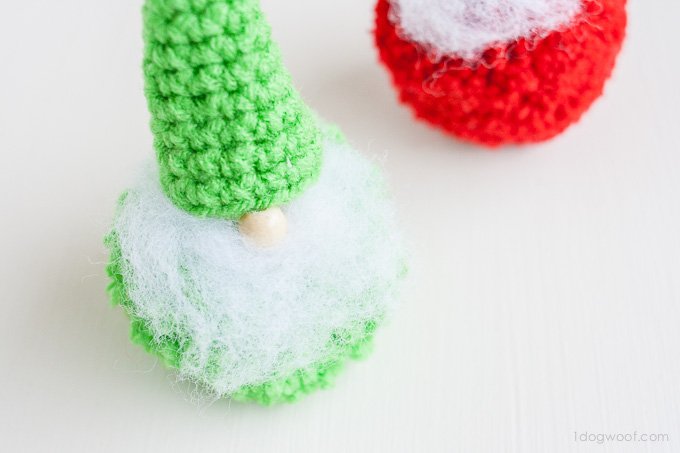
Hot glue the hat about halfway down on the 1 in wood bead.
Hot glue the 10mm wood bead on as the nose, nestled right under the rim of the hat.
Hot glue the hat/head/nose combo onto the pom-pom you created earlier. You might have to part the pom-pom a bit to find a good place to glue the head down.

As a finishing touch, pull a bit of loose fiberfill stuffing and glue to the head as a beard. I glued the beard on “behind the ears”, so to speak, so I could adjust the beard in the front to hang out right under the nose. And fluff it as necessary.
Sew a bit of string through the top of the hat and this doll turns into an ornament!


I just LOVE these little fellas!!! Pinned!
So adorable!
Thank you!
Thanks Bethany!
This is very interesting, You are an excessively skilled blogger.
I have joined your feed and look forward to looking
for more of your magnificent post. Additionally, I’ve shared your website in my social networks
Admiring the hard work you put into your blog and in depth information you provide.
It’s awesome to come across a blog every once in a while
that isn’t the same outdated rehashed information. Excellent read!
I’ve bookmarked your site and I’m including your RSS feeds to my Google account.
Loved your Santa gnomes . For sure will try them out thx
So cute. Will have to put a few of these on my to do list.