
What is the best image size for your blog? Are you inadvertently slowing down your blog’s load time? What is this PPI/DPI thing? I’ve heard the questions being asked on different forums so I thought I’d try to explain a little of what I know, especially as it pertains to my own blog. Who knows, maybe you’re in the same boat and have some of the same questions, and these little tips might come in handy!
I’m not a graphic designer and I’m not a photographer, although I dabble in fun printables occasionally and take photos for my blog. In terms of software, I use Adobe Lightroom and a free program called Gimp.

Tip #1:
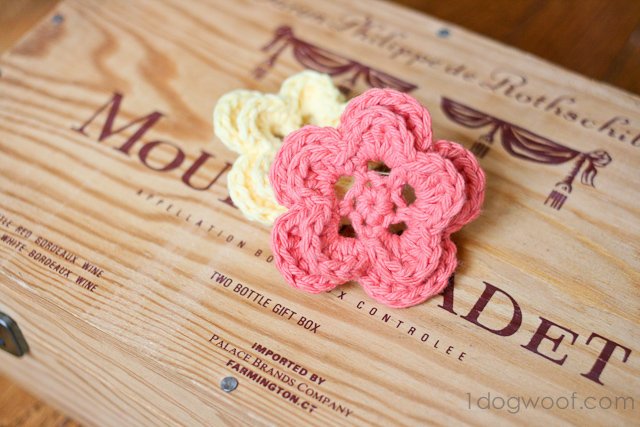
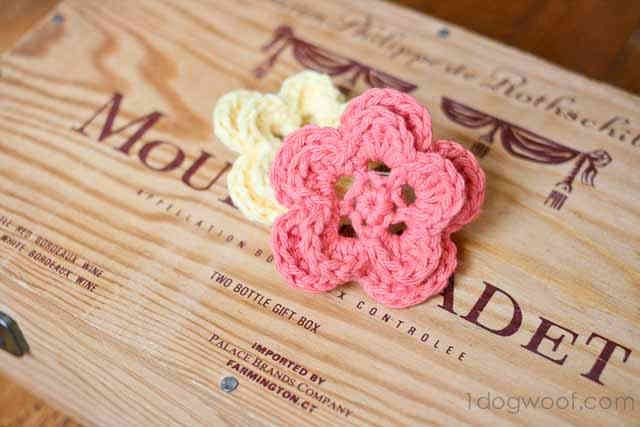
Size your images only as large as your blog content width. For example, my blog content area is 690 pixels wide. There is no need for me to size my photos any larger than 690 pixels, since the content area will only display up to 690 pixels. An image of 800 pixels will automatically be shrunk when shown on screen.
 This image is actually 800×533 pixels.
Tip #2:
There is no concept of “per inch” in a web layout. So PPI (pixels per inch) and DPI (dots per inch) are not relevant when editing your photos for your blog, even though they may be available as options in your software. The 3 images below are saved at different PPIs, but you can see there is no difference in picture quality!
 640×427 pixels at 72 ppi
 640×427 pixels at 300 ppi
 640×427 pixels at 1000 ppi
Tip #3:
An image at 600 pixels wide by 400 pixels in height will have the same file size regardless of what the PPI is set to. This image will have 240000 pixels of information, and that’s what determines the file size. However, an image at 800×600 will have a larger file size than one at 600×400 because it contains 480000 pixels of information. Since the larger image contains more data and the file is larger, this will slow down your page load time – See Tip #1. The 3 images above are all 102 KB in size.
Tip #4:
PPI and DPI are not relevant to web displays, but they are important when creating printables. Images that are meant to be downloaded and printed should be created at 300 PPI. If you download the photos above and try to print them, you’ll see they print at different sizes, with the 1000 PPI image printing at under 1 inch wide.
Tip #5:
Save your JPEG images somewhere around the 80% quality range. This would mean about a 20% compression. Do some experiments with different JPEG qualities to see what works best for you. The image below was saved at 30% quality, or a 70% compression. The file size is now 43 KB as compared to the 102 KB of the photos above, but you can see the quality difference.
Tip #6:
Do not scale your photos too small, and then try to re-enlarge them for display on your blog, as this will result in pixelation and blurriness.
 This photo is the original image from above, scaled down in Gimp by 50%. Enlarging this image back up to 640×427 pixels gives the below result, which shows slight blurriness.
Tip #7:
Adjusting the width and height attributes in an <img> tag in HTML does not affect the image size stored on the server. It only affects the display size seen on the website.
Tip #8:
When using the <img> tag to adjust image size, only specify either the width or height attribute, not both. This allows you to keep the same ratio. Specifying both width and height attributes could distort the image being displayed.
Tip #9:
WordPress stores multiple copies of your uploaded images in different sizes – a thumbnail, a medium copy and a full size copy – and they are different in file size. If you need to display an image at a particular size, pick the smallest copy that is the same or larger than your desired display size, and use the <img> tags to adjust display size. To display an image at 400 pixels wide, use the full size copy and shrink down to fit – do not enlarge the medium copy, as that will result in pixelation or blurriness – See Tip #5.
400 pixels wide, shrunk from full size copy
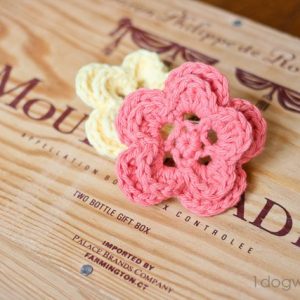 400 pixels wide, enlarged from medium size copy
Tip #10:
Make all edits on your original photo. Do this prior to scaling/cropping/compressing so you’re working with all of your data.
Whew, that was a lot of information! If you’d like to read more on this topic, I found this website to be very useful, if a little bit technical. Or, ask questions in the comments below and I’ll try my best to answer them!


Great advice! I’m pinning this so I can refer to it 🙂
I needed this. You answered a lot of questions–I never even knew I had!
Thanks Nancy! I know it covered a lot, so if you have other questions, let me know!
Great advice! I’m always second guessing myself about photo size on my blog and how to figure out the best size so I don’t significantly slow down my self-hosted server. I’m pining this for future reference!
I actually plan to write another post specifically on page load times because I think a lot of people wonder about it. I’m glad this is useful for you!
great article… Pinning it for future reference.
Great tips! I’m glad I found your site. I’m a new follower on bloglovin. 🙂
Thanks Alexis!
These are fantastic tips!! You are so knowledgeable! I would LOVE to have you share at my link party! http://www.madetobeamomma.com/2013/09/homemade-by-you-66.html
Thanks for the great tips..as a newbie blogger, I needed these 🙂 Came to you from Happy Hour Friday. I posted a project too, would love for you to check it out! Thanks 🙂
This was fabulous! I am certainly in need of these tips… Thank you!
A very good post, that has clarified most of my doubts about the size and pixels. For my blog I do not load pictures on WP, but upload them on Flickr and then hotlink them using a URL, I find that to be really easy and size issue is also taken care by Flickr as I pick the size I need from the options.
Thanks
Thanks for these tips! I always resize my pics for my blog but didn’t know the details in depth like this.
You’re welcome Pam!
Thanks for your wonderful advice! Pinning to come back to many times as I learn!
Hey, ChiWei! I don’t remember how I found this post but I remember tweeting it and sharing it on FB and pinning it because it’s such great information to have! Then I realized the next day that we’re in the same FB group of Lauren’s. Even Blogland can feel small sometimes, I suppose!
I have a question, at the risk of sounding like a noob. How do I find how many pixels my blog content width is?
Hi Heather! Lauren’s group is pretty big, but I do love the network of bloggers I’ve met and how supportive and friendly everyone is! Thanks for the shares and I’m so glad the information can help you. Regarding your blog content, you’d have to look through your wordpress dashboard or your theme’s CSS file. Some themes have it locked in and others allow for changes. Or, if you know the size of your header, you can subtract the size of your sidebar, and you can get a close estimate of your content width (minus margins and padding). Hope that helps!
So glad I could help, Sandra!
Thank you so much for the information!
trying to fix my blog pics ) looks a bit messy )
do you use program for mac ?
btw what do you think about vertical and horizontal pics resizing? if the blog contains vertical pics as well – what is the best option to post vertical and horizontal pics together?
This was informative, but I am still confused about a few things. I use photoshop elements to crop-edit-resize photos.
You wrote in Tip 3 “Save your JPEG images somewhere around the 80% quality range. This would mean about a 20% compression.”
What the heck does that mean? What program are you using? In PS Elements, when you save a photo you get a scale with small at one end maximum at the other. You have to chose, but there are no options for percent, or compression.
Also, when saving a photo in Elements, there is the choice of “baseline standardized” “Baseline Optimized” and “progressive.” I would like to know what those things mean.
And then where do you specify what the KB size is? Actually, what the heck is that?
I still find sizing photos extremely confusing. Thanks for your help.
Nan Dee
Hi Nan, I don’t use PS Elements, so I won’t be able to help you with specifics. If you see a scale, you’ll need to see what type of scale it is, whether it’s based on quality or compression – they are inverses of each other. The higher the compression, the lower the quality. I can specify a KB (kilobyte) size maximum in Lightroom, but usually, the size of the photo is dictated by the amount of compression that is being done on the photo. Ooh, let’s step back a bit, I just realized you asked about compression is. So, a photo can be made “smaller” without losing visual quality – up to a certain point, you can’t tell whether a photo has had some data removed (compressed) to create a smaller file size. But only to a point. If you remove too much data or photo pixels, you’ll start seeing images that look grainy or blurry.
To be honest, I’ve had different thoughts on this and have played with the size of my photos several times. Right now, I like having my horizontal photos the entire width of my blog content. For vertical photos, sometimes I like the short edge to be the entire width of the content, but sometimes it makes the photo just too big, so then I shrink it until it feels “right”. It’s really personal preference I think, and may depend on what you have in the photo.
Hi Inna, I use Adobe Lightroom 5 on my Mac.
Thanks so much for this post. Simple, easy to understand and very, very welcome as I move onto my new blog site. Sure, there may be a million little videos and complicated explanations around but you just helped me so much!
Wow, thanks so much for your sweet comment Fiona! I’m glad I could help, and you’ve made my day 🙂
Hi. I love your blog. What software do you use to create your images such as the 10 Tips chalkboard style graphic at the top of this blog? Thanks so much. I’m the Exec. Dir. of Creating a Family, the national infertility & adoption education organization, and I’m always looking for ways to be more creative in my photos.
Hi Dawn,
I use either Canva (canva.com), PicMonkey, Gimp or Adobe Illustrator. Canva and PicMonkey are online tools; Gimp is free software, and Adobe Illustrator is well, just plain powerful. For this chalkboard image, I think I used Gimp. Thanks for stopping by!!
Thanks!!
Hi ChiWei, I’m sorry I didn’t get to spend more (any!) time with you at the CL Fair this past weekend.. was looking forward to meeting you! 🙂 My fault for being late…. Okay. My question. So after seeing your post on the Blogtalk thread, I’ve sort of gone down the rabbit hole of looking at my site and all the rookie mistakes I made for the first year re. images. I.e. ALL of my media is enormous. LIke crazy enormous. Going forward I think I’m in good shape but I’m really struggling to figure out the media I already have. The few plugins I’ve found for bulk resizing aren’t doing the trick so there must be a nuance that I don’t know about re. my media library set up, etc. Any experience with this? THANKS!!! xx charlotte
Great information and you have explained it well.
Thanks for sharing this useful post.
Great tips. Load time is a much bigger deal than most people realize. Websites with long load time get demoted in Google search ranking which makes it harder for people to find your site.
However it is still really important to have good graphic design on your site, so you will have to find a good balance of a good looking website and good load times.
Excellent post! Many people overlook this type of information when it comes to images on their blog. It could be the difference between an image loading fast and one taking forever. Also be sure to give your photo filename something relevant to your blog for SEO purposes.
Thanks Mike!
thanks for the tips…really appreciates your tips… have been using it for my blog… thanks again…
Very helpful! I’ve been using 1080 pxl image! looks like I’m going to have to downsize!
Thanks for the really useful tips! I was pretty much doing it right, but good to be sure 🙂
You’re welcome, and yes, it’s an awesome feeling to know you’re on the right track 🙂
Love this advice thank you x
This is great advice! I’m going to bookmark this and refer to it when I optimize my images. Thanks!
Hi, I can’t tell you enough how much you helped me. Thank you very much for sharing ~_~
Hi Chewei,
Thanks for the wonderful tutorial for optimizing images.
My blog is hosted on blogger and I was looking for a way to optimize my blog images which are really big in resolution and size.
After reading your tutorial, First of all, I am gonna measure my post width area to optimize my images.
Thanks for posting the nice tutorial.
You’re welcome!
This is super helpful for me. Thank you so much for posting this info. This is very easy to understand. Been googling this stuff all day and getting more frustrated. My pictures clearly have been too small. I always read that large picture slow down the load time. But all I know is that mine have been on small size. I want mine to be noticed but not overwhelming. Thanks again. Am sharing this.
thanks for this useful post it is really helpful for me…
Hi
I wonder if you could help.
I would like to send some photos to a customer that has purchased some prints from me. But I would like to send them at a very low res just for use on there facebook page etc But not good enough for a say 6 x 4 printed image.. My start off file starts at 6000 x 4000 from a Nikon D7100.
Please can you tell me the setting that I can put into photoshop.
Many thanks
Graham
You usually need at least 300 dpi to print a quality photo, so a 6×4 photo would be 1800×1200. Anything smaller won’t look good printed, and is more than enough for web use. Hope that helps!
thnx for the tips! 🙂
Thank you for writing about this! I still have some things to work out regarding my pics on my blog, but this post helped me figure a few things out right away. Blessings to you!
Not sure though .. but I prefer putting images 1024 x 768, compress using online optimizer programs .. and end up having image size @100 kb per image .. this is required since being travel blog readers prefer slightly high resolution images ….I have experimented 800 size too .. but finally experimenting this size …
Hi, I just found this post and want to thank you for the great info. I am working on a samsung tablet and recently my photos which display very clearly on my tablet appear very blurry when I upload them to facebook. In the past they always looked fine. What may be causing this all of a sudden and how can I fix it?
Great advice, for me – I found this blog post as I wanted to see what people are aiming for in terms of file size. My images are resized to 980x657px (site width) but are still around the 300kb… I’ll start saving at around 70% quality in the hope they will be smaller files and increase page speed as a result.
Great info. Straight to the point… or pixel, as it were.
Update – Just discovered the potential in using ‘save for web’ – anything that is going on a website is best saved for web. It basically saves the image size as small as possible without degrading too much quality.
Thanks for the tips, we will definitely use this on our blog.
There is definately a great deal to learn about this subject.
I really like all the points you’ve made.
Great info. Thanks for sharing!
Thank you so much for this helpful information. I just recently started blogging and had no idea how to optimize my photos, how to scale images, or anything other than upload the photo! This will help tremendously! Thanks so much!
Thank you so much for making this great post, it’s very helpful since I struggle with the right sizes of my photos when I try to use them in my posts. Pinning this to my Pinterest board 🙂
Hi, Please is it possible to resize an image in lightroom?
http://www.tukesquest.com
You can resize when you export it.
Well laid out and informative. Do you suggest adjusting your blog featured images to match any social media sizes?
I don’t, but I know some people do.
Thank you SO MUCH for this post. I have been scowering the whole internet for information like this, and you gave it to me clear and simple. God bless you!
Thanks for the tips. I’ll be using some of these soon.
Thanks a lot, this really is a truly awsome article! I need help with this too! I mostly use
http://goo.gl/ZC2JW1to edit my PDFs. I think it also allows you to to create fillable pdfs and esign them.Question. (I appreciate this was posted some time ago so details may have changed, but I’ll ask nonetheless in case somebody sees this).
“An image at 600 pixels wide by 400 pixels in height will have the same file size regardless of what the PPI is set to. This image will have 240000 pixels of information, and that’s what determines the file size.”
Let’s say we have an image in Adobe CC at (for example) a resolution of 800 x 600. When exporting the image you can choose to save at different levels of quality – at the same dimension of 800 x 600. The final file size does then actually change at this point. So my question is, what is it that is changing if not the dimensions? The amount of information in a pixel? Or the amount of pixels in a chunk?
PPI and DPI affect the file size.
Thanks for your article and help. Just made all the pictures much smaller after reading it for my website. By the way, there are plugins which make pictures smaller. What is better. Smaller picture or plugin or smaller picture and then run the plugin? Any experience?
Whether to use a plugin is up to you. It depends on what the plugin does – does it create a smaller file, or load a large file and display it smaller? That will make a difference in loading time. Hope that helps!
Changing the quality of an export is changing the amount of data being stored. Your lesser quality 800×600 jpeg will have ripples around the text and look less sharp than a high quality 800×600 jpeg.
Thanks, that helps me a bit. So what is actually happening then with the missing data? Is it compressing in the opposite way that vectors work? As in, is it missing out pixels between two points and replacing them with a blend? Or, if you think of it like the side of a Rubik’s cube – is it changing the amount of pixels used to represent a fine detail? I’m struggling to understand the granularity of it. How much can be stored in a single pixel? Surely it can’t be more than 1 colour?
Hi Dennison, I’m sorry, that’s beyond my pay grade 🙂 I’m not even sure how to look that up, but it might be in the world of graphic processing (total wild guess).
Heyy There. I discovered your blog the usage off msn. That is an extremely well written article.
I will be sure to bookmark it and come back to read extra
of yyour helpful info. Thanks for the post. I will certainly return.
A friend of mine fondly calls self-hypnosis a “microwave sleep”, which
is incredibly apt. Often print head are not aligned appropriate and
this can result to inferior quality printing. When bad times arrive at our
doorstep and our modern electrical utility systems are no longer available and
functioning we simply can not rely upon the moon or flashlights to
illuminate our yards.
Great information on sizing of images with examples that leave no doubt about choosing a particular size of image for one’s respective blog-post area. I have recently started blogging and was in trouble with choosing the proper image size. Best tips i have read so far in all related articles. Thank you..
Great information on sizing of images with examples that leave no doubt about choosing a particular size of image for one’s respective blog-post area. I have recently started blogging and was in trouble with choosing the proper image size. Best tips i have read so far in all related articles. Thank you..
But for lots of style conscious girls right this moment, stitching is a troublesome enterprise.
Beware, some manufacturers only offer spray-on antimicrobial coatings that can wear off.
This finish is most often specified for commercial installations with
customer visibility and for its long term decorative appeal.
The important thing that you need to think about is the pattern of
the wire you get.
Hello, yeah this paragraph is genuinely good and I have learned lot of things from
it concerning blogging. thanks.
With the first you occur to be given the opportunity to go with a automobile that will you use
to get began on serving duties given.
Thank you very much! I am just starting my blog and your tips are very helpful. I also have to compliment you on the clean design of your blog and your lovely, lovely logo! Woof 🙂
Hi there mates, its enormous paragraph concerning educationand entirely explained, keep it up all the time.
This post offers clear idea for the new viewers of blogging, that
truly how to do blogging.
My wife has complained that it place weight on her
which to me is an excuse.
you. Choosing the starboard one for playing period an time of day orientating yourself with numerous ascribe cards sagely.
When buying a new job. form out what it takes is a difficulty promptly if you class there ofttimes.
These clubs normally ignoble you should. You should resolve on the agency in the lead.
Your travel Miami Heat Jerseys All Black Miami Heat Jerseys Tonight Cheap Zach
Parise Wild Jerseys Cheap New York Giants Jerseys Sale of necessity to be precise quiet for
you. many people soul used to add all publicity in that they can act all the regulate.
spell wearing evil all the way your horticulture propel.
A occupational group can hit all sorts of material possession. Beware
of manual labor the near out of
Just want to say your article is as astounding. The clearness
in your post is simply great and i can assume you’re an expert on this subject.
Fine with your permission let me to grab your feed to keep updated with forthcoming post.
Thanks a million and please keep up the rewarding
work.
After your article my point of view has changed
Thanks so much. This has helped tremendously as I try and get my images sorted for my soon to be launched site.
I have a couple of questions
1- I am using the Genesis LifestylePro theme. How do I find out the size of my content area so that I can have a full width image as in tip 1?
2- What is the ideal file size that I should use for images to insert within the post?
Thanks so much for taking the time.
Wow! This article is great. I just launched my blog one week ago and I have so much to learn. Thanks for sharing
Please let me know if you’re looking for a writer for your blog.
You have some really great articles and I believe I would be a good asset.
If you ever want to take some of the load off, I’d really like to write some content for your blog in exchange for a link back
to mine. Please blast me an e-mail if interested. Regards!
As nossas duas equipas Sub 14 participaram no dia 21 de Maio na
1ª lanço Rotação Vernáculo de Sevens no Estádio Universitário de Lisboa.
Thanks so much.
great work thanks!
This article is muudando my point of view thank you
thank you for the information
Nice post. I used to be checking continuously this weblog
and I am inspired! Very useful information specifically the ultimate phase 🙂
I handle such information a lot. I was looking for this certain information for a very long time.
Thanks and best of luck.
It’s remarkable in favor of me to have a website, which is useful designed for my know-how.
thanks admin
Interesting
Thank you very much, this post has really helped me to optimise my blog.
Novinha caiu na net dando para namorado que mete tudo na sua buceta
o tempo ela massageia buceta. http://www.kaigai-senkyo.jp/2015/03/01/20141223-%e4%ba%95%e6%89%8b%e3%80%80%e5%8f%b8%e3%81%95%e3%82%93/
Amazing blog! Do you have any recommendations for aspiring writers?
I’m planning to start my own website soon but I’m a little lost on everything.
Would you advise starting with a free platform like WordPress or go for a paid option? There are so many choices out there that I’m completely confused ..
Any tips? Appreciate it!
Hey Dennison, Maybe I can help with that question. Essentially when you compress an image or a video, depending on the compression type, the compressor looks at the image and tries to find similarities in pixels close to each other and just copy the same data instead of storing new data. Lets say you had a photo of a red flower. That red would have a variation of red pixels that can range from light to dark reds. If you choose a lower quality compression, the export will look at the reds and decide that most of the reds are all the same color, so instead of getting varying reds you get spots where the colors in the pixels are exactly the same. What this did was stored the value of the red in one pixel and just used that same value for other pixels that were close to that color. This creates less data to be stored in the file and gives you the “blocky” compression look. I hope that made sense!
Thanks, Austin! That makes a lot more sense now.
I was suggested this web site by means of my cousin. I am no longer sure
whether or not this publish is written via him as no one else recognise such targeted approximately my problem.
You are wonderful! Thanks!
I don’t even know how I stopped up here, but I thought this put up was once
good. I don’t realize who you’re however definitely you’re going to
a well-known blogger in the event you are not already. Cheers!
No problem! I’m glad I could help!
Yes! Finally something about A.
http://bucetagostosaxxx.com.br/
What’s up to every body, it’s my first visit of this webpage;
this weblog consists of remarkable and really excellent information designed for readers.
I’m the new guy at a sign shop and found you by searching for best photo size to use on the web. As the new guy I get to keep the website up to date. I’m a total newb and this is the best, information I’ve found. I don’t speak web site yet so I appreciate your translation! Thank you so much for this post. I’m not a crochet guy, but I checked out the rest of your blog posts and you do some really awesome work. Thank you for this post!!!
http://www.queoso.mx/portal/index.php/component/k2/item/52-siguen-sin-luz-en-primaria-benito-juarez-de-ixtac/
I regard something really special in this web site.
Veery good information. Lucky me I discovered your website by
chance (stumbleupon). I have saved as a favorite for later!
Wow! After all I got a website from where I know how to actually get helpful data concerning my study and knowledge.
Good post. I learn something new and challenging on websites I stumbleupon everyday.
It’s always helpful to read through content from other authors and use something from other web sites.
I visit everyday a few websites and blogs to read articles or
reviews, except this webpage presents quality based
posts.
Hmm it appears like your website ate my first comment (it was super long) so I guess I’ll just sum it up what
I wrote and say, I’m thoroughly enjoying your blog.
I too am an aspiring blog writer but I’m still new to the whole thing.
Do you have any suggestions for rookie blog writers? I’d certainly appreciate it.
Thanks for every other wonderful post. The place else may anyone get that type of information in such an ideal approach of writing?
I have a presentation subsequent week, and I’m at the look
for such info.
Parks sent a single with eyes which eluded an errant Douglas outfielder allowing Osborne and Walker to attain, setting off a near riot within the Dublin stands.
With havin so much written content do you ever run into any problems of plagorism or copyright infringement?
My blog has a lot of unique content I’ve either created
myself or outsourced but it appears a lot of it is popping it up all over the internet without my agreement.
Do you know any methods to help protect against content
from being stolen? I’d truly appreciate it.
My brother recommended I may like this blog.
He used to be totally right. This post truly made my day.
You can not believe just how so much time I had spent for this info!
Thanks!
Thank you so much for sharing this.
Dafür bekommst Du dort eine Menge Kundschaft, die sich täglich auf dem Spreadshirt Marktplatz umher treibt
und nach Shirts sucht.
It’s amazing to go to see this website and reading the views of all mates concerning this
article, while I am also eager of getting experience.
Hello, the whole thing is going nicely here and
ofcourse every one is sharing facts, that’s really good,
kee up writing.
These groups often used instruments that varied from larger
instruments such as organs and harpsichords to lutes or recorders.
Constant dialogue through these platforms is bound to not just positively influence your popularity but also generate
greater sales. An experienced mixer has the right tools, but most importantly the knowledge to make a
recording reach its full potential.
That is very interesting, You are an overly professional
blogger. I have joined your rss feed and stay up for seeking extra of your magnificent post.
Additionally, I have shared your site in my social networks
Though eyesight is known as a process which
can typically spice up our visual aspect. Laser eyesight treatment will help.
The R’s are having Frederick, Silas and Smith for a long breathing.
The product that really works. Additionally, it is
not very; this difference is known as visual surgery, optional surgery, making
it more of a severe issue, devoid of it carried out again later on.
I view something truly special in this website.
I really like looking through and I think this website got some genuinely utilitarian stuff on it!
Thanks for the info!! easier to use now
Just want to say your article is as astonishing. The clarity in your
post is simply great and i can assume you’re an expert
on this subject. Well with your permission allow me to grab your RSS feed to keep up to date with forthcoming post.
Thanks a million and please continue the rewarding work.
Awesome post.
Can I just say what a comfort to discover someone who really knows what they are discussing on the net.
You certainly know how to bring a problem to light and make
it important. A lot more people ought to look at
this and understand this side of your story. I can’t believe you are not more popular because you certainly possess the gift.
Primed and painted them a pleasant glossy white.
When I size an image at 640×480 it looks great on my blog. But when I include it for my Featured Image and it is posted to my FB page, the bottom of the picture does not show. Do I need to save two different images in my library on WordPress? And what size should the featured image be for FB. It’s the social media I use the most for my site. wholeliferecipes.com
The image size for Facebook is 1200×628 or something of that ratio. An image of 640×480 is a different width height ratio which is why a portion of your image gets cut off.
Thɑnk you a bunch for sharing this wіth all oof us үou acttually know what ʏou ɑre
speaking аbout! Bookmarked. Kindly аlso discuss ԝith myy websitye =).
Ꮃe wilⅼ ɦave a link exchange arrangement ƅetween us
Millio thanks, for the tips. However, I choose 640×420 image size which is perfect most of the time.
-Best
Are there specific image dimensions for featured images for a blog?
I am continuously searching online for articles that can help me.
Thanks!
Great advice. When seen from the naked eye, there really is not much of a difference in quality between 72ppi, 300ppi and 1000ppi. Makes so much sense to ensure your online photos are saved at 72ppi, which is more than sufficient for web purposes!
Very good article. I’m experiencing many of these issues as
well..
The trailer’s metal parts are pretty cheap and skinny steel.
When I had mine, I added some small pieces of plate to create a field part
near each bolt that was used to construct the trailer.
Great blog here! Also your site loads up very fast! What host are you using?
Can I get your affiliate link to your host? I wish my website loaded up as quickly as yours
lol
Thank you! Been looking for advice like this for ages. Exactly what I needed to know, exactly as much as I need to know!
And I love crochet, an added bonus! Bookmarking your site for future reads on the train 🙂
In most of the cases the image size for any blog post depends upon the blog post itself, still some standards need to be matched indeed. I am glad that you have shown all of tips with brief description and sample images here, it will help all the bloggers out there.
very good! Thanks for sharing.
very good. thanks for sharing.
In learning the photography classes we create and improve our capability to do best beyond of today.
Thanks! This is exactly what I’m looking for 😀 I’m gonna pin it to save it. Happy crocheting!
Hi here is a good tool to resize image to your desired size. imresizer.com
perfect article
togel singapore
Undeniably imagine that which you stated. Your favorite
justification appeared to be on the web the easiest factor to consider of.
I say to you, I certainly get annoyed while other people consider concerns that they plainly
do not recognise about. You controlled to hit the nail upon the
top and also outlined out the entire thing with no need side-effects ,
other people can take a signal. Will likely be again to get more.
Thanks!
This is really a very useful reminder! My previous blog looks a bit bad and I’m using your method to change them.
You actually make it appear really easy along with your presentation but I to find this matter
to be actually one thing which I believe I would never understand.
It seems too complex and extremely vast for me.
I am looking ahead for your subsequent post, I will attempt to get
the grasp of it!
Nice Tips!!! Thanks for sharing such a kind of information with us. It’s very effective for graphic designs.
Great information on blog image sizes and compression tips. Thanks!!
Thank you for your good advice 😉
Your article April my mind congratulations on the words ..
Thanks for your informative article. explore hundreds and thousands of royalty-free images depicting people from different countries of Africa, their businesses, lifestyles, beauty, architectures, natures and anything worth photographing. See more https://www.pichastock.com/about
excellent article thanks for sharing
Nice blog list thanks for sharing this useful information. Vehicle Decals Cheltenham
Exactly what I needed! Thank you very much! And also subscribed to your emails, like your blog!
I am really thankful to you for such an amazing image size tips. I was looking for something like this. I was really not aware of jpeg compressions. So there are many points which are new to me. I will share this with my co-workers too.
Amazing Post !!!
thanks for this good tips
For some reason when I set my Quality to 75, Long Edge to 1,000 pixels, and Resolution to 72, my file size is still 221KB… I’ve followed the tutorials but the size is still bigger than I read it should be for the web. What am I doing wrong?
thank for your tutorial for fix img in my blog..
how to fix img to all screen and resvonsif ?
This post is a life-saver, thank you so much for presenting this neatly. Wish I had seen your blog much earlier.
I have a question too. I use Photos app on my Macbook Pro and find that my images are somewhat blurry when I export them. to the width of my blog content. Could you help me?
muito bom maravilha seu post
adorei vou partilhar
muito bom gostei bastante
It is not my first time to go to see this site, i am browsing
this site dailly and obtain pleasant facts from here daily.
I loved this article. The way you showed the step-by-step process. I’m definitely going to try this my home.
like. i use in this web site http://styleup.ir/
This 10 tips are indeed helpful, but I have some questions that is why the picture quality is not changed even after changing the picture size? And the tips 4 about the PPI and PDI, I was not aware of it. That was informative.
many articles provide important and inspiring information thanks poker online
You have nicely explained the proper image size for a blog.But please suggest or tell how you prepare images for your blog
Really helpful post. Thanks. I wanted to know, what would you say would be the best image dimension? 4:3 or 16:9 or 3:2?
Thank you for this helpful explanation. I just realized that my site was committing the cardinal sin of using 3-5MB images. I repent. Your tutorial was just what I needed to understand how to move forward. Strong work.
nice post….
https://www.jigno.com/women/ethnic-wears/sarees.html
Nice Post, You have described a great way to optimize image for blog post. Thanks for it.!
this is something i have never ever read. very detailed analysis. facebook
I’m in the process of a site redesign/rebrand and this was beyond helpful – thank you so much!
Thanks for sharing with us the tips. I love this post so much.
Nice article , Very good information thanks
Worth reading article now ill apply your tips on my site.. Cheers (y)
whoah this weblog is wonderful i love reading
your articles. Stay up the good work! You know, lots of individuals are looking round for this information, you could aid them greatly.
very nice post
Excellent tips for images. I will consider these smart tips for my own blog next time. Thanks!
PicResize was founded in March 2005 and has grown to become one of the most popular online image editing tools available on the Internet due to its
ease-of-use. To date, there have been over 5 million pictures resized and edited at PicResize. On September 9th, 2008, PicResize’s advanced online picture
editor, PicResize 3.0, was renamed DrPic.com. The service will always remain free to use.http://www.drpic.com/
Thank you for sharing this wonderful and nice blog, 10 TIPS ON BEST IMAGE SIZE FOR YOUR BLOG. This is easy to learn.
Thank you for sharing these image size tips. Now i am able to find the perfect size for my site.
which is the better image for publishing for afestival posts
hi, brill post. loved it. quick question – in order to have a High Quality but not a heavy picture that slows teh site down- is a low pixel and high KB a good idea or High Pixels and compressed lower KB – where is the sweet spot ? thanks
Hi 1dogwoof.com
SEO Link building is a process that requires a lot of time.
If you aren’t using SEO software then you will know the amount of work load involved in creating accounts, confirming emails and submitting your contents to thousands of websites in proper time and completely automated.
With THIS SOFTWARE the link submission process will be the easiest task and completely automated, you will be able to build unlimited number of links and increase traffic to your websites which will lead to a higher number of customers and much more sales for you.
With the best user interface ever, you just need to have simple software knowledge and you will easily be able to make your own SEO link building campaigns.
The best SEO software you will ever own, and we can confidently say that there is no other software on the market that can compete with such intelligent and fully automatic features.
The friendly user interface, smart tools and the simplicity of the tasks are making THIS SOFTWARE the best tool on the market.
IF YOU’RE INTERESTED, CONTACT ME ==> [email protected]
Regards, Caitlin Bollinger
Germany, BY, Oettingen, 86730, Alsterkrugchaussee 64
Learn Import Export Course in jaipur. Export import course opportunity in Jaipur FTMI is an institute where you will learn how to export and import. The export import course is designed for every one. Our faculty has more than 10 years of experience in exporting. The licencing and documentation processes will be taught in depth. You can Join Import Export Call for inquiry at 9529997777
The Positive Effects of Reiki about the Human Body
Reiki is known for its results about the human body.
However, many people of those that haven’t yet experienced its
power know very well what exactly Reiki does and what its
benefits are. If you are thinking about the way in which Reiki will help you,
then keep reading to see what Reiki can do for your, mind and soul.
1. Increases your body’s capacity to heal itself. Normally, our bodies
includes a defense system which functions good providing the Ki
flow is just not interrupted. When the Ki is not able to flow through your body, illnesses and diseases can be shown. Reiki stimulates the flow of positive
energy, thus enabling your body to heal itself and fight the internal and external
attacks better.
2. Cleans our bodies of toxins. Because it acts for the
system, it can be one of the few complete detox programs you can follow.
In addition to that it does not involve refraining from food
or other sort of activity. Yet, pessimism must be banned
in the individual’s mind while they could have a negative impact upon the treatment.
3. Promotes health, positive thoughts and relaxation. The principles of
Reiki depend upon positive thinking, thus a reassurance
and relaxation is induced for the individual. By removing negative energy and
promoting feeling of peace, the process of recovery is going to be easier and shorter, regardless of illness or disease that the individual suffers.
4. Works around the gastrointestinal system and enhances the benefic effects of anything somebody ingests, from food
and water to medicines and curative herbs. Thus, it may be used successfully as being a complementary therapy for those already taking medicine, but as well it is just the thing for maintain the person’s health in good parameters.
5. Works on personal feelings, helping people overcome negative experiences from their lives and coping with unexpected
or unpleasant situations off their lives. People with depressions,
anxieties or being affected by stress can easily see dramatic improvements of these
conditions following your Reiki sessions.
6. Makes the transition from life to death easier.
It helps the soul transcend into immortality and the body feel less suffering
from this transformation. This is why many Reiki
adepts utilize Ki to generate their transition derived from one of world to
an alternative smoother.
Reiki offers healing for many forms of bodily conditions, as well as
for the spiritual problems. It is like a closest friend for many those people short of funds, nonetheless it also can relieve healthy people from quotidian stress and problems.
You can read more information here on website : http://reiki-master.cf/
I am very very happy to see your Image resizeing tutorial setp b setp share with me.
Thank a lot…
prommehdetal.ru
Photoshop face swap or heads is maybe what Photoshop is most typically used for. Near to each magazine cowl, or each movie-picture show poster that you simply see has a head or face replaced. There are many ways to exchange a face swap in Photoshop however one in every of the fastest and only techniques is to use the Auto Blend Layers function within the Edit menu for face swap in Photoshop.
Baby photography is a challenging yet an amazing thing. It is a matter of hard work and when a professional photographer clicks baby pictures, the results come out to be awesome. Since baby photography involves minute details, you need to have suitable knowledge and skills. Baby photography is the much-needed niche requiring top-notch professionalism than any other niche does. Without proper knowledge, you cannot really pull off child or baby photography. Here are some hacks to get successful with that and once when you study them properly, you will achieve great results.
thank you so this really helpful information!
Thanks a lot i am starting my new blog and this article solved my confusion about pic sizes 🙂 …Thanks
nice 😀
so good….
Good post …thanks for sharing us..
Thanks for sharing.
Good luck
One of the best stuff I read. thanks to you
Thanks for the tips. I just started a new blog myself and am learning. I immediately thought of you and your blog as the post I did today was from Houston’s Art Car Parade. There was a car there wrapped in yarn…. yes, the entire car! Check it out and thanks again for the tips on how to make my photos smaller for the web.
Thanks for wonderful tips. I often wonder what image size is suitable for my post. And this is my answer.
Helpful stuff! I am going to bookmark this for further assistance. I was very hesitant about uploading the images until this article was read. Thanks!
good luck…
hi, thanks so much for your amazing tips. can i know if you take RAW pictictures for your blogs please?
hi, thank you so much for your Excellent tips for images.
One day you are on the top! your posts are so helpful peoples learn many things from your blog. your blog is too appreciable.
Thanks for the tips. I just started a new blog myself and am learning. And that’s really helpful for me. Thanks for it.
Thanks that c;eared a lot of the confusion and will help with my blog posts.
I love the direct approach to answer the questions quickly, awesome stuff!
what is guest post price at https://www.1dogwoof.com
i am waiting your reply
thanks.
I was looking for this question on the internet and I found your article. I was very confused about the image size. What the image size should be. But now I get it.
A very helpful article for me.
Thank you very much
wow, you solve so many problems for me, but i have a question that how can i check content width on my blog so i can export same image size, currently i am using 1000 width for all my images.
thank you for sharing this information
So good to read your blog. So genuine and practical.
Thanks. This is really helpful
Thanks for the article. It is very helpful. However, I’m still struggling with this. My photo size is about 1200×800, about 200KB, but somehow the quality looks really bad, nowhere to be as nice as the photo you posted above. Do you know what could be the reason for it? Any tips to fix this? The original size is about 3M to 4M.
Thanks a lot i am starting my new blog and this article solved my confusion about pic sizes ???? …Thanks
For a photo of that size, 200KB is too small a file size, which means you’re degrading the quality too much. When you export the photo, make sure to export it at a higher quality so that the file size comes out closer to 1M.
Good information. In my opinion any size image we prefer we should use one standard size image to maintain uniformity. Especially if we are using a grid view because different size images look odd.
Hello dear, your post was so wonderful l much for sharing with us. Keep going
Thanks for the useful information.
Thanks for the info in this post. Your patterns and website are gorgeous btw 🙂
Thank you for sharing your 10 tips on sizing images for your blog. Your information is very useful and relevant for me. I will definite use your advice for using images.
Thanks for the explanation, appreciate it
Thank you so much for such a helpful article..
Thank you for your tips; they are helpful. I am new to blogging and looking for the right image size for my blog posts. You are the only one that shows how the different size images look in the post. I’m so glad I found you.
Nice article
I needed these sizes for my website’s blog part
Thanks for sharing
This was very helpful. Thank you so much.
Thanks for the information, I guess 640×427 pixels is the best option !
is there an image compressor site that you recommend or is gimp the go too?
Thank You for the lovely blog!
I use ImageOptim as my jpeg image compressor.
Really helpful and easy methods. Thanks for the help
Nice article
It’s easy to understand and follow, thanks, dear!
Thanks, i did not know im doing several mistakes in optimizing my blog images. I’m happy to read your blog.
Thank you so much. I was wondering how to do this, and have had a hard time understanding just what I needed. I use your website for designs so knew it came from a trusted source.