
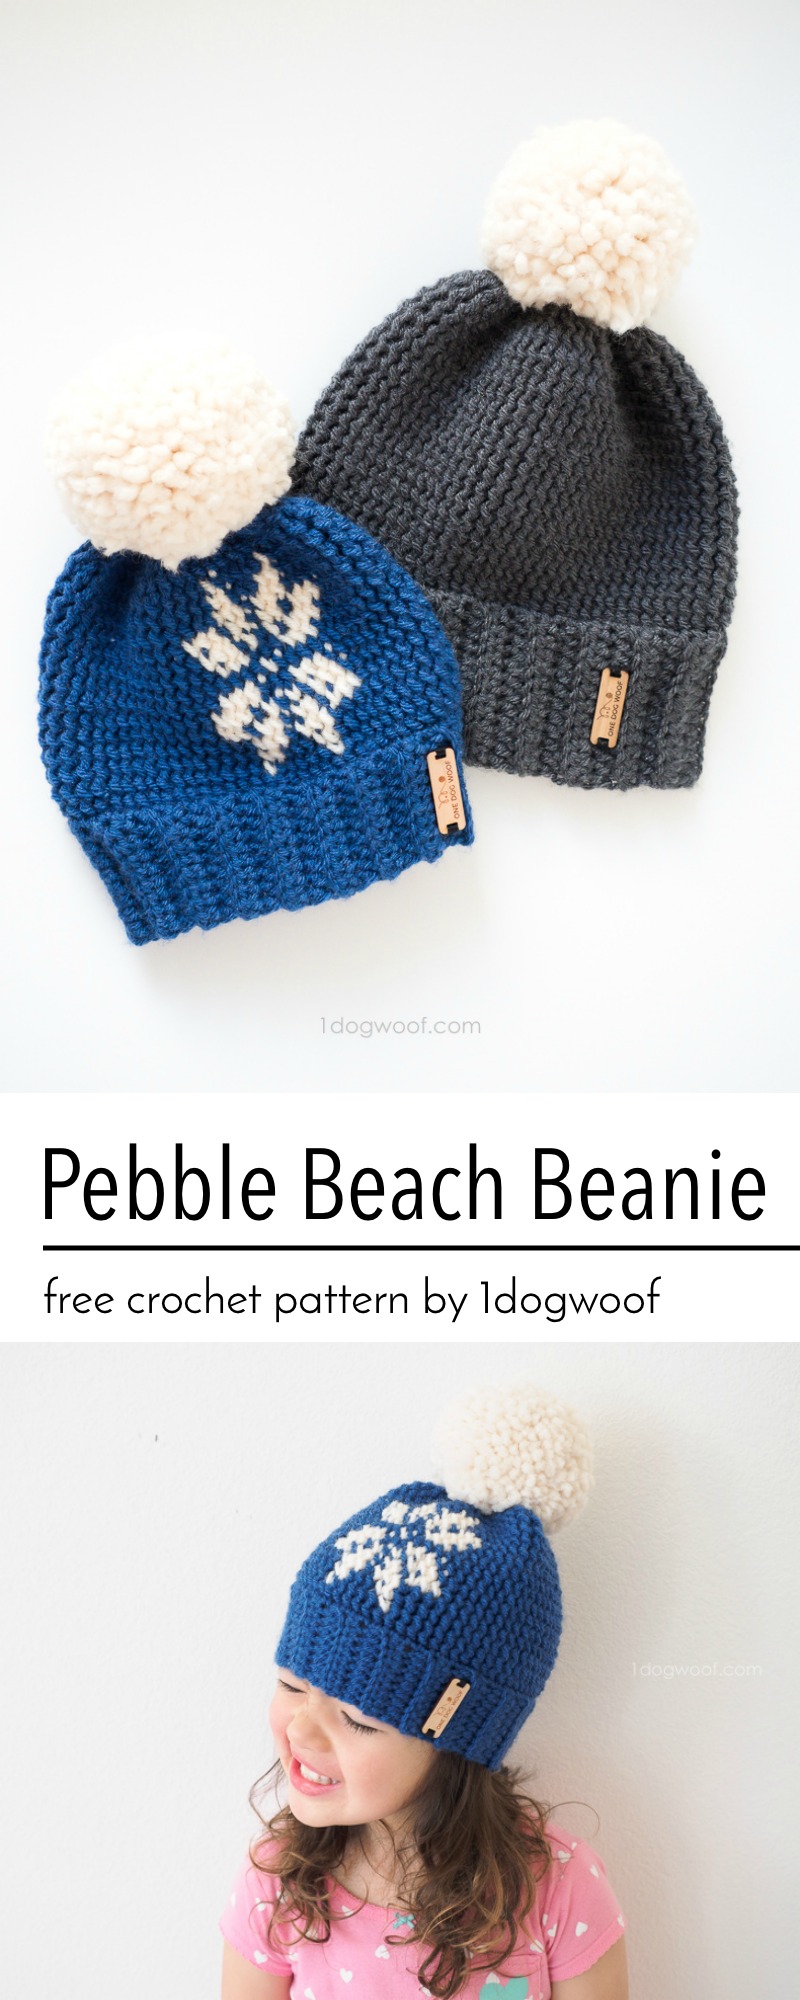
Happy New Year friends! I took quite the break last month just creating for fun, and it was such a treat to not worry about writing patterns. But the new year is upon us, and it’s time to get back this blogging thing. I’m excited to share the pattern for my Pebble Beach Beanie, and I even worked out 3 different sizes!

When do you get your best inspiration? I always get my best ideas in that moment just before I fall asleep. Unfortunately, that means my best ideas are probably lost in the ether because I don’t get a chance to write it down! I really started working on participating on Instagram in the last few months, and as I saw all these wonderful hats, I realized that they were being worked bottom-up instead of top-down. I know it sounds stupid, but that was a bit of an epiphany for me, especially because I always felt like designs on a hat worked top-down were upside down!
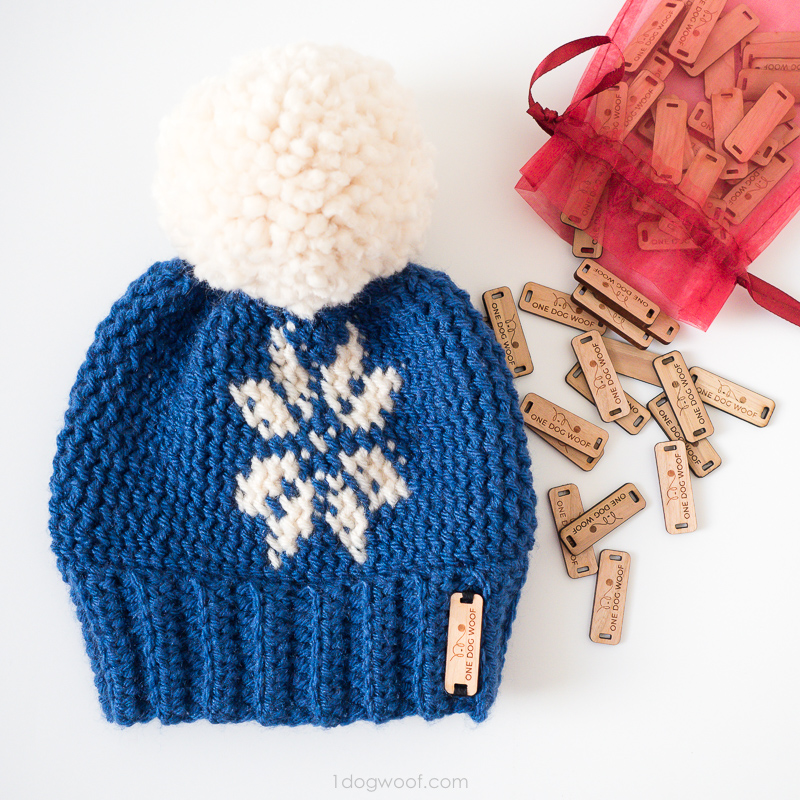
For these hats, I used Lion Brand Vanna’s Choice yarn, my favorite for a basic worsted weight yarn. It’s soft, warm, and comes in so many amazing colors – it works for so many projects – and there’s almost always a sale at Michaels! Then I used Lion Brand Wool Ease Thick and Quick for the pom pom just because I wanted something completely huge and fluffy. My husband commented that it looked too much like a cotton ball for his tastes, and he prefers the more sporty look of a pom pom made with thinner yarn. No matter what yarn I use, I always fall back to my Clover Pom Pom Makers*. I even got the extra large one* for Christmas!
I’ve gotten lots of questions about those adorable tags. You can get tags custom made at All This Wood on Etsy!
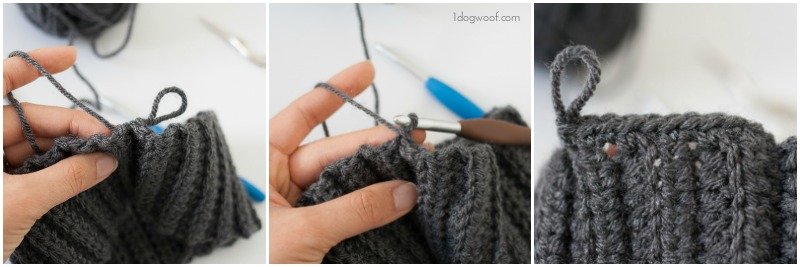
So this stitch. I’ve gotten comments about how it looks like knitting, but really, it’s just a single crochet! Can you believe it? It’s very similar to the stitch used in my heart mug cozy, inspired by @lakesideloops – the single crochet is worked around the post instead of through the front and back loops. Specifically:
- Insert your hook under both the front and back loops of the stitch.
- Without yarning over, insert your hook from back to front, under both the back and front loops, of the next stitch.
- Yarn over, pull up a loop, and complete your single crochet.
That’s it! The look of the finished product reminds me of a field of pebbles, hence the Pebble Stitch Beanie!
I noticed that when I work this stitch, it curls a bit, like the bottom of a knit piece, but it flattens out over time. Who knows, I may use that to my advantage in the future! And the back side of the stitch is interesting too – it looks even more like knitting. There’s so much potential to play around with different textures!
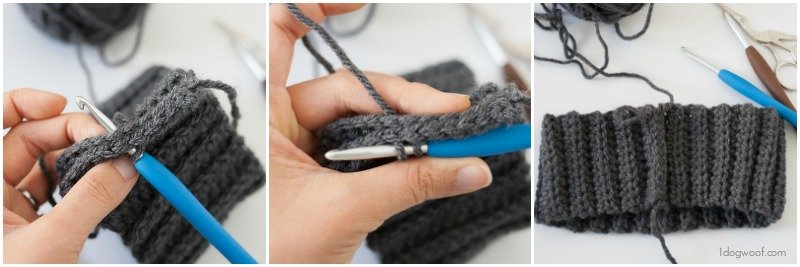
The bottom ribbing starts with a row of foundation half double crochet stitches (video below) and is made using half double crochet stitches worked into the back loop. I tried a few different methods, which I showed on Instagram, and decided this was my favorite crochet ribbing, as it gave texture and was able to stretch well. I think my *favorite* ribbing is still a classic knit ribbing. Another future idea – mix knitting and crochet, what do you think?
At the top, I reverted back to a normal single crochet stitch so I could decrease the rounds. I found that using this post single crochet, I couldn’t work either a decreasing or an increasing stitch. So the post single crochet is only worked when the hat is in a full cylinder mode. When I needed to decrease, I ended up just skipping a post single crochet stitch. One round of such decreasing seemed to blend in fine, but multiple rounds made it too noticeable, which is why I switched to normal single crochet for the other decreasing rounds. If you intend on putting a fluffy pom pom on top, this shouldn’t be a problem at all.
Below is the pattern for the adult beanie. The child and infant sizes are included in my printable PDF, which you can purchase through my Etsy shop. The PDF also includes the graph for the snowflake motif, shown below.
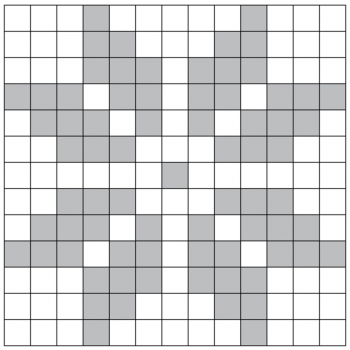
The motif can be worked anywhere on the hat, and the stitch counts are variable depending on the size you’re making, so the PDF only includes the graph and not written instructions for incorporating the snowflake.
Purchase the PDF for the Pebble Beach Beanie!
Supplies
- 1 skein of Lion Brand Vanna’s Choice
- 1 skein of Lion Brand Wool Ease Thick and Quick for pom pom (optional)
- Size H/5.0mm Clover Amour crochet hook*
- Size J/6.0mm Clover Amour crochet hook*
- stitch marker
- tapestry needle
- scissors
Abbreviations
- sl st – slip stitch
- ch – chain stitch
- sc – single crochet
- hdc – half double crochet
- fhdc – foundation half double crochet
- fpsc – front post single crochet: Insert your hook under both the front and back loops of the stitch. Without yarning over, insert your hook from back to front, under both the back and front loops, of the next stitch. Yarn over, pull up a loop, and complete your single crochet.
- sc2tog – decreasing single crochet
Pattern Notes
- Instructions are for Adult [Child, Infant] sizing.
- Ribbing is worked flat and seamed. 4 in = 9 rows.
- Rounds are worked seamlessly in a spiral.
- Body gauge: 4 in = 17 st, 15 rows.
- Circumference: ~22 [18, 15] inches.
- The fpsc tends to work tighter than a normal sc, so adjust hook size or tension as necessary.
- Body rounds can be added or removed for custom sizing.
Pebble Beach Beanie Instructions
Start with size H hook.
Row 1: Work 11 fhdc. Turn. (11)
Rows 2-40: Ch 2 (does not count as st). Hdc across the row in back loops only. Turn. (11)
Ch 1. Hold both ends of ribbing together. Work 11 sl st through all 4 loops. Do not cut yarn. (11)
Flip ribbing inside out. Ch 1.
Switch to size J hook or larger to achieve gauge.
Round 1: Work 80 sc evenly around edge of ribbing. (80)
Round 2-19: Work 1 fpsc in each stitch around. (80)
Round 20: Work 1 fpsc in next 2 st. Skip next st. Work [1 fpsc in next 3 st, skip next st] 19x. Work 1 fpsc. (60)
Round 21: Work [sc2tog] 30x.
Round 22: Work [sc2tog] 15x.
Cut yarn, leaving a 9 inch tail. Pull through last st. Weave tail through front loops around. Pull tight and secure. Weave in ends.
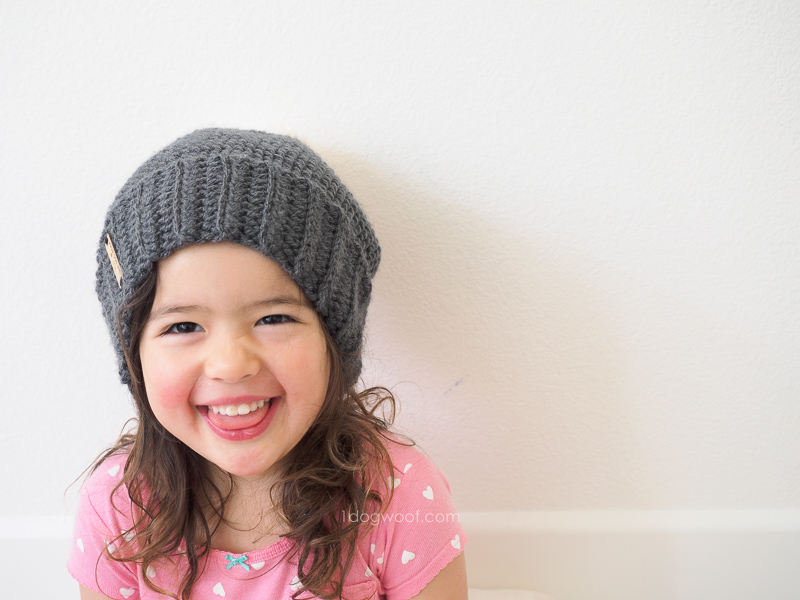
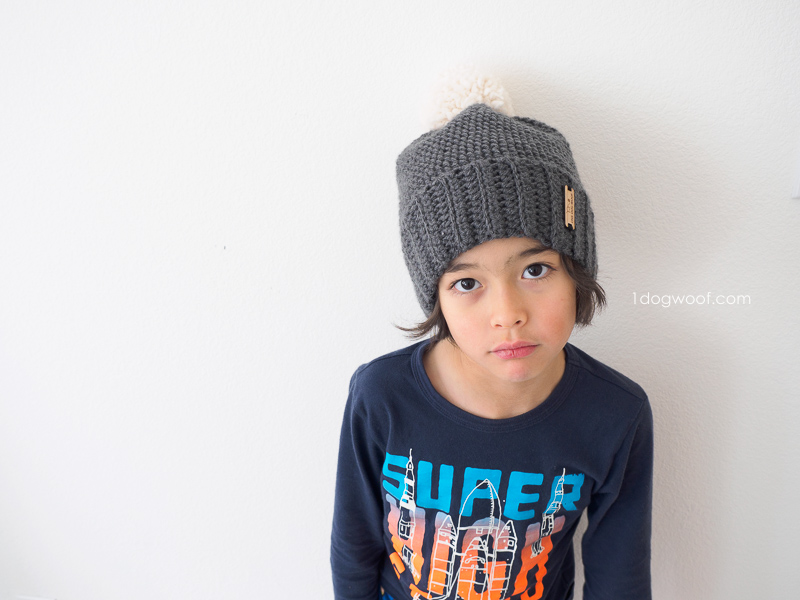
I recently purchased a new camera, an Olympus OMD EM5 Mark II, and have been playing with it on and off. I’m still getting used to the differences between this and my last camera, so my photos may look a bit funny until I get the hang of things. My kids were willing to pose but not quite patient enough to wait for me to figure out all the new dials.
I hope you enjoy making this Pebble Beach Beanie and customize it in your own way! Share your finished beanies with me on Facebook (One Dog Woof) or Instagram (@1dogwoof)! Remember to tag your post with #1dogwoof and #pebblebeachbeanie!
Check out my pattern shops on Etsy and Ravelry where you can purchase printable PDFs of my latest crochet patterns. These PDFs are formatted without comments or ads, and have instructional photos at the bottom for optional printing.
I sometimes include affiliate links in my supply lists. Purchasing from these merchants earns me a small commission with no extra cost to you, and goes towards supporting One Dog Woof.
Please be respectful and do not sell or distribute this pattern in any way, especially as your own. Instead, share the original blog post link! You can sell finished products made from this pattern by giving credit to One Dog Woof as the pattern designer and linking to the blog post. If you have any questions regarding distribution or translation of this pattern, please see my Terms of Use. Thank you for your consideration!


So cute and the name is perfect!
You are so talented! Thank you for sharing this adorable pattern!
How do you adjust size for a child?
I’m trying to make this but having issues with carrying/changing colors with post stitches. Could you maybe make a video for this ?????? Love your patterns! Thanks!!
There are so many adds on this page it keeps reloading due to errors. I’ve tried 4 times to play the video. It keeps reloading and starting over. I opened it in safari and put it in reading view, same problem. I’m moving on…
so you put your hook in one stitch then in the next before yarn over so when you do the next complete stitch do you start in the second stitch of the previous two you used? And doesn’t think using two stitches decrease the whole count by half… I know, I need to try it to find out and I’m sure I phrased the question in a confusing way but didn’t know how else to put it.
I love your patterns and don’t have any problem with your page as one of the posters said she did. Thank you for all your work
Really cute hats! I love the metal tags too. Where did you get the tags?
Love your tags too! Where did you find them?
Love the hat and the tags. Where can I get the tags?
Thanks
What a genius idea! My kids would go nuts for these.
Cute hat, but when I try doing as instructed my “Pebble ” stitch looks like a front post single crochet, not like yours. Would you please do a video?
Your hats are adorable and I too love your tags. Can you share where you got those?
I love this stitch, and the hats are adorable! Also, where did you get your cute little tags from?
Thanks!
Sorry, I see you already mentioned the tags in your post. Thanks!
Thank you for explaining fhdc so well as I have never caught on and I have tried many times. I’m having no trouble with page loading.