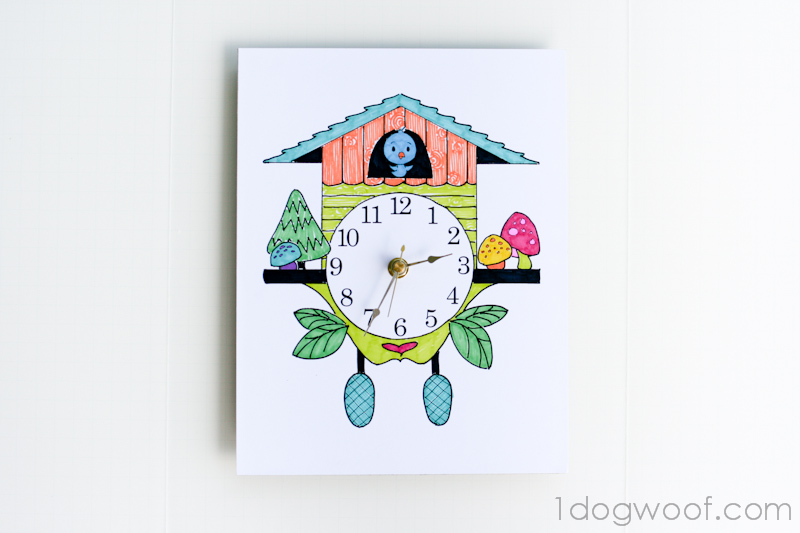
Our little toddler is almost not a toddler anymore, but we still get all the children’s catalogs and magazines delivered to our house, and we still like looking through them to see what fun stuff we can buy, or make! So, I got my inspiration for this DIY cuckoo clock from one such catalog, and thought it might be an easy project to pull off. Of course, that was also a couple of months ago, and I never got around to making it until I got this opportunity to try out The Write Dudes’ Infinity Permanent Markers. I say, Woohoo! Great timing! and Time to get my craft on!
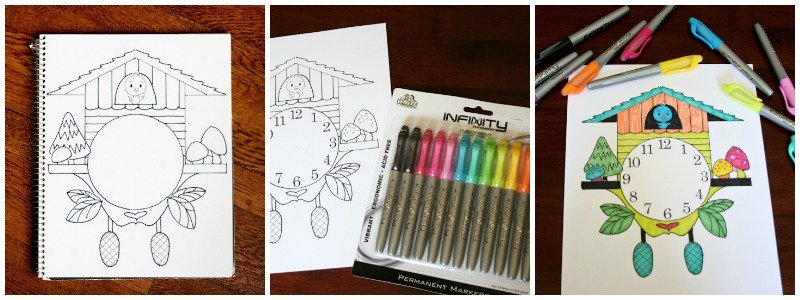
When inspiration first struck, I wasn’t sure how I wanted to produce the cuckoo clock itself, but now knowing I had to use an array of permanent markers, it forced me to draw out a clock outline which I could then color in. I made a sketch, outlined it in black, scanned it to a digital file, cleaned it up, and scaled down to fit on an 8.5×11 sheet of paper. Then came the fun part – coloring within the lines. If you look closely, you can see I wasn’t able to pull that off completely…ah well.

The Infinity Permanent Markers worked really well on the 120lb card stock I used. The colors were vibrant, the tips drew accurately, and the ink soaked into the paper just right. There was some minor bleeding on the back, but the color did not go all the way through the paper. I’m not sure if it would bleed completely through if I used thinner paper though. Oh, and there was even a slight cherry scent to the markers, instead of the usual gagging alcohol stink!
Once the drawing was colored, I used spray adhesive to adhere it to a piece of chipboard. I was actually going to try a piece of plywood, but got too lazy to saw it to the right size, especially after I found a perfect 8.5″x11″ piece of chipboard. Then, Drew got to drill through the cardstock/chipboard ensemble, and I installed a simple battery operated clock mechanism.

I don’t remember the last time I was able to complete a project during nap time with time to spare, but I did, which is when I made my cherry cobbler! Yay for productive afternoons! This cute little clock is going to hang in my not-quite-ready craft room, so I don’t lose track of time when I’m puttering around crafting.


ChiWei, this is such a fun project! Those markers look like they’re amazing..such vibrant colors! 😀
Wow! That’s awesome! Your sketch is fantastic, and I love how creative this project is! I love how you used markers to colour it in; love the effect!
Wow, the detailing on the wood is really stellar! Job well done! (And I’m so impressed by your productivity…I don’t even have a napping kid and I usually can’t knock out a craft AND a baked good in one day. You’re my hero.)
Warmly,
Lauren
The Thinking Closet
That is adorable, ChiWei!! I totally love it!
WOW! That is aDORable!! Love it…wish I could sketch like that!
Very cute! this is cheer up the room right away! you are so talented!
ChiWei, I LOVE this project even more every time I see it! So bright and cheery!
So cute ChiWei! You are so creative girl!
What a cute project!