
First off, I want to apologize for not being around lately. I’ve had some health issues, and it’s been exhausting. Then, after staring at a laptop all day at work, really, the last thing I want to do is stare at a laptop in the evenings to catch up on all my bloggy news. Pair that with a new and improved bedtime of 9pm, just after putting my toddler down, means there isn’t much of an evening to begin with! So, I apologize for being distant during what should be a fun and interactive Crochet Along. I do hope you’ve been working on the cowl, and checking out the tutorials and our awesome guest posts though – they’ve shared some great information! We’ve got one more guest post this week and then we’re getting ready to party!
So, today, let me try to catch up a bit and present a quick tutorial on increasing and decreasing stitches. You won’t need this for the cowl (although the V-stitch uses the concept of an increased stitch), but it comes in handy if you’re ever in the mood for some amigurumi or anything that requires more than a rectangular shape!
Increase
To increase means to increase the number of stitches in the row or round. So if you have 9 stitches in this row, if you increase one of the stitches, you’ll end up with 10 stitches total. Easy? Yes it is!
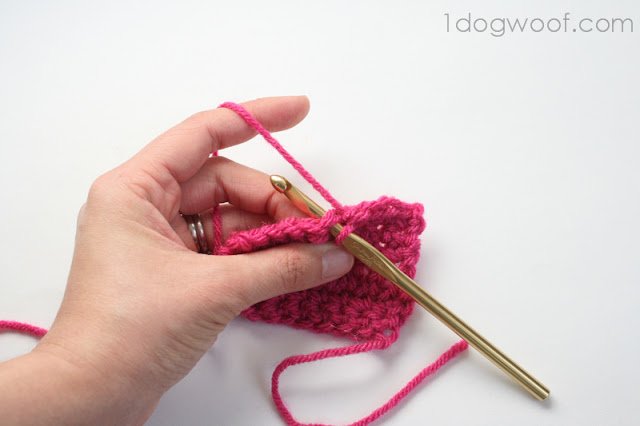
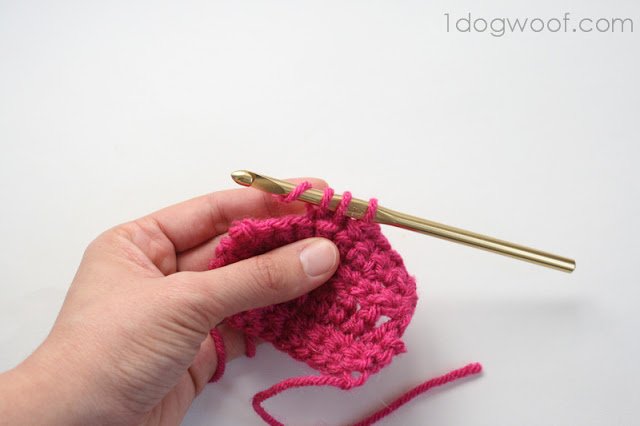
Start with a single crochet:
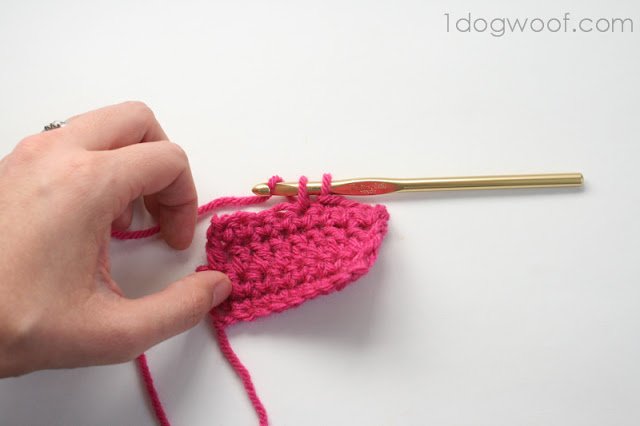
Single crochet complete.

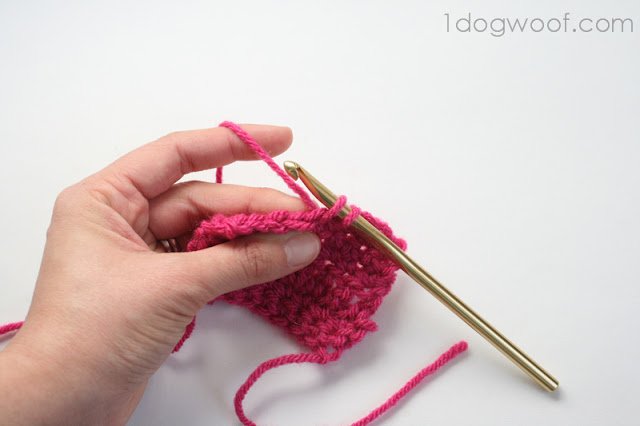
Here’s the increase. See that hole where you completed the single crochet. Insert your hook back into the same stitch for your next single crochet.
In other words, you’re making 2 single crochets in 1 stitch.

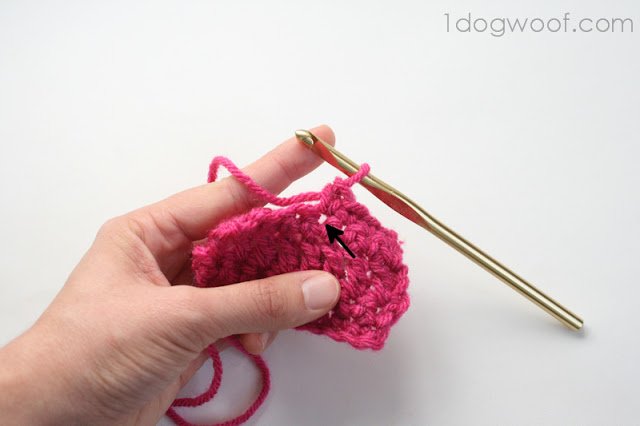
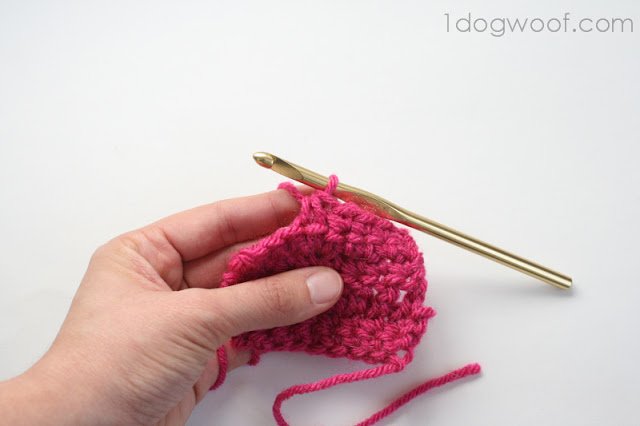
You can see the bump in the middle where there’s an extra stitch. Of course, you can increase in every stitch, or every other stitch, as indicated by the pattern. You see this most often when working in the round.
Decrease
To decrease means you’re taking that 10 stitches back down to 9. Sometimes in a pattern, you’ll see it written as sc2tog, which means single crochet 2 (stitches) together, which makes it really easy to understand.
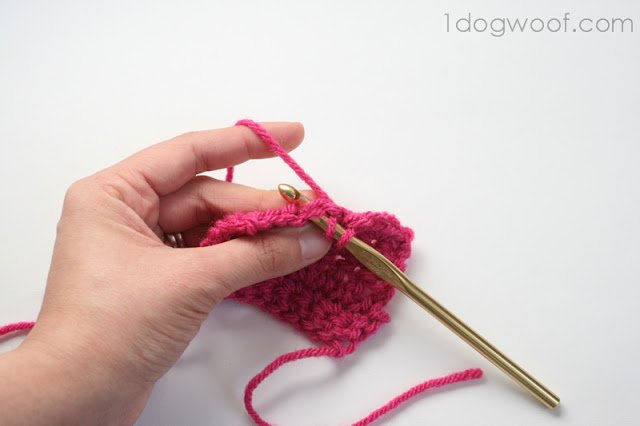
Insert your hook into the first stitch.
Bring yarn over the hook and pull through.
Now, insert your hook into the second stitch. You haven’t completed a single crochet yet.
Bring yarn over the hook and pull through. You should have 2 loops on the hook.
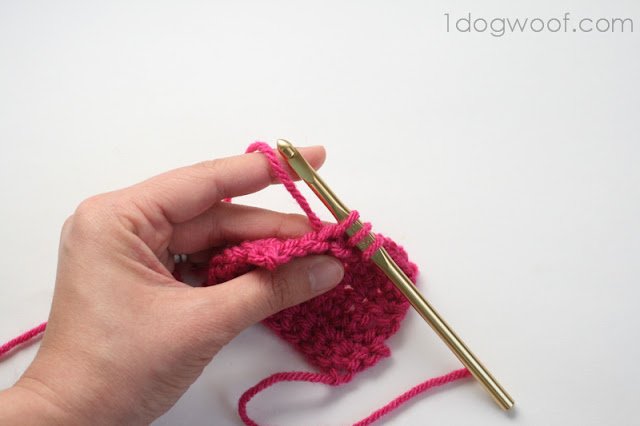
Bring yarn over the hook again, and pull through all 3 loops on the hook.
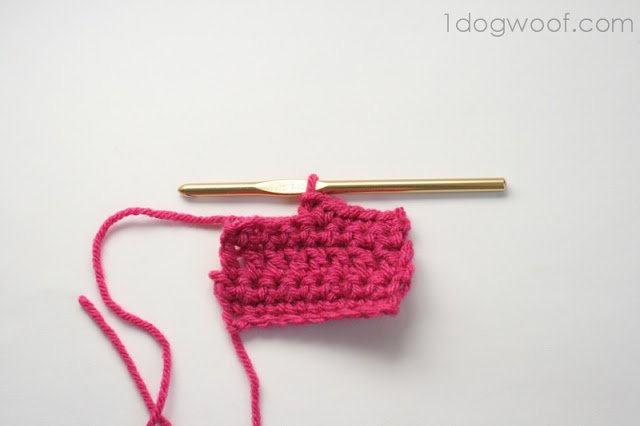
A sc2tog complete.
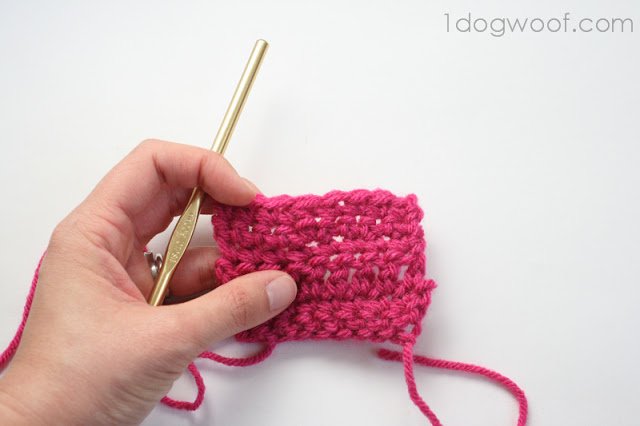
If you did the increase, and now the decrease as depicted, you should have the same number of stitches as you started with before the increase.
If you create amigurumi or anything in the round that requires a tighter decrease, you’ll definitely want to check out the “invisible decrease” by Planet June. Her version of a decrease doesn’t leave a hole in your work, and you can barely tell there was a decrease at all. Pretty amazing stuff!


thanks for your help and pattern I have finished mine and will get some photos and add it to my blog where do I link it to here please?
hugs Samantha x
Hello! Thanks for the CAL! I am finally crocheting! Just starting the cowl and want to e sure I do it correctly, for round 2 & 3 where it says Ch. 3 at beginning what does that mean? Does that mean on round 3 I am dc or dong the “v stitch” on ch 3 that I did in round 2 or what? Sorry I am totally new at crocheting and def. with patterns!
Finally finished mine! Woo hoo! First thing I’ve crocheted! Yay!
Thank you for sharing! Your pics are very clear & your instructions are clear! Thank you so much for sharing!
lovely patterns
you can find more patterns here https://crochetpatternsz.blogspot.com/