
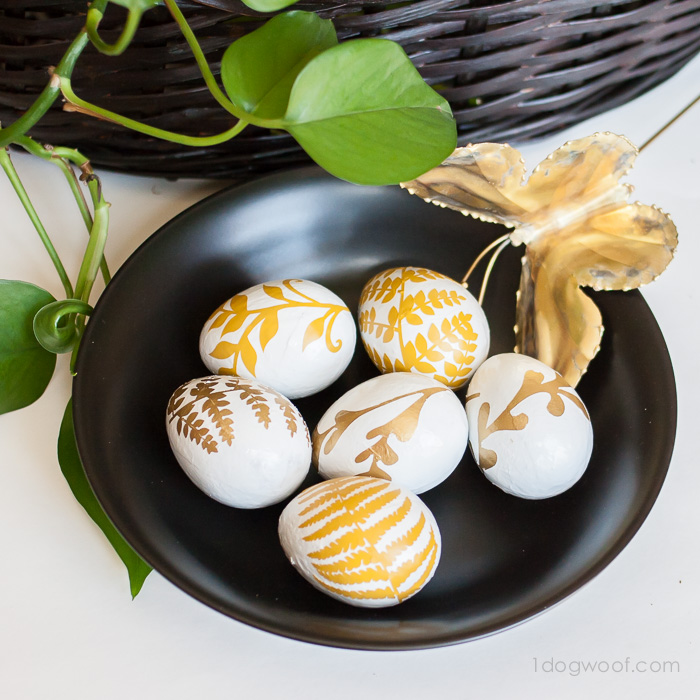
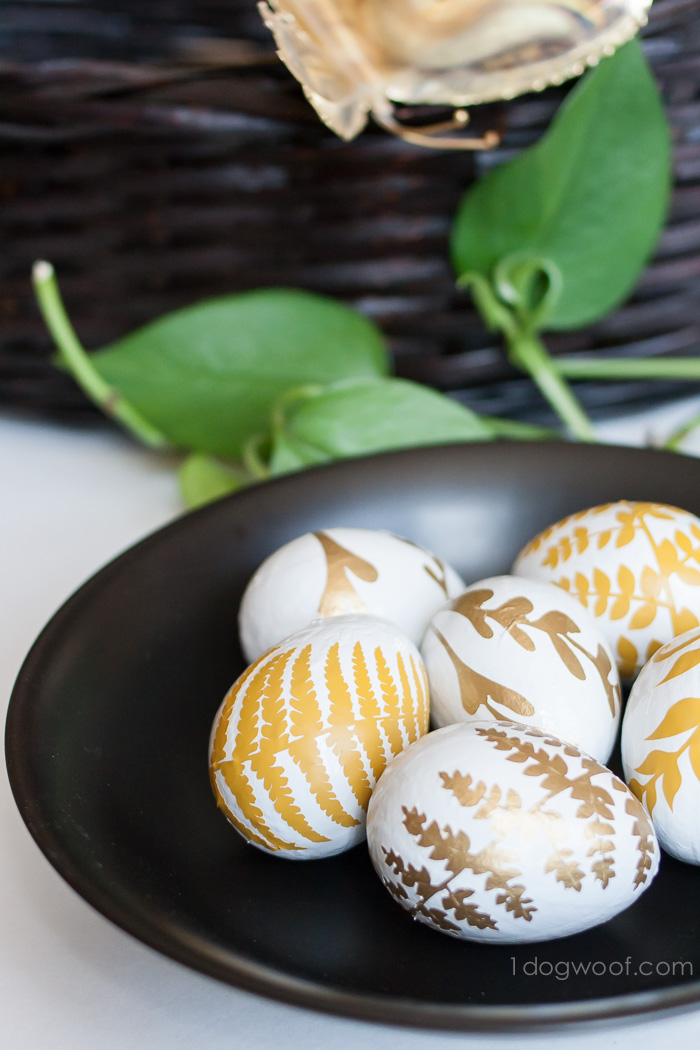
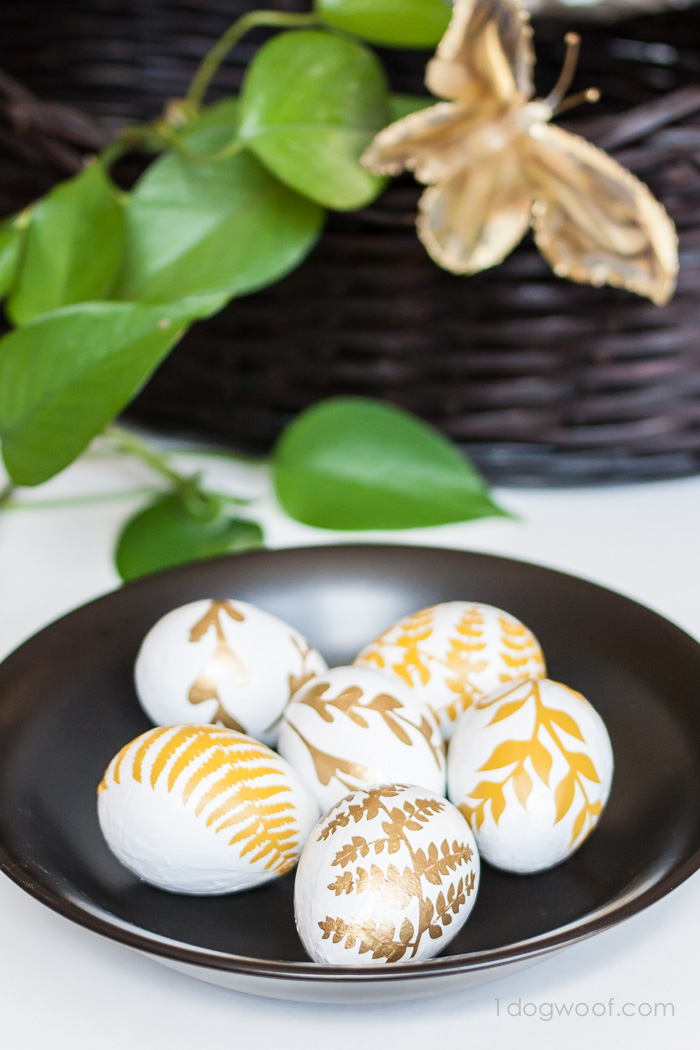
There’s one week before Easter, and J has been asking about Easter eggs. Particularly the ones with candy inside. So, he’s probably not interested in these gold fern easter eggs I made with my Silhouette, but I love them, especially sitting in my one and only black bowl. I suppose black and gold is an odd combination for my take on April’s Silhouette Challenge theme of SPRING, but when I think spring, I think about all the ferns that are slowly unfurling to embrace the sun’s warm light. And well, I’m on a gold kick and felt the need to gold-ify something, so there you go.
I had a vision for this project and I think I ended up making it a bit too difficult for myself. Apparently, I forgot my mantra of SIMPLIFY, and made a simple project more complicated.
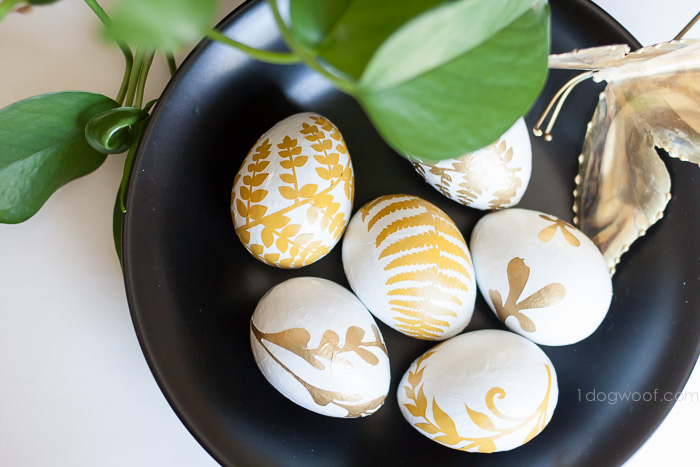
There’s two types of eggs here. One where I applied the vinyl silhouette then painted over it and then peeled off the vinyl, and the other is where I just applied a gold vinyl and nothing else. Guess which one was easier?
Supplies
paper mache eggs
gold and white craft paint
gold vinyl
Silhouette Cameo
Mod Podge
fern leaf silhouettes
Ok, a note on the fern leaves themselves. I’m all about finding a good image and tracing it myself in Silhouette Studio, but I couldn’t find a good image of a fern that traced well, so I ended up buying the cut files from the Silhouette store. That ensured a good amount of detail on the leaves without making it impossible to peel off.
Let’s start with the simple version
1. Paint your eggs. I chose to paint them white.
2. Load up your fern silhouettes in Silhouette Studio and size them to something less than 5.5 inches in height and less than 3 inches in width. You don’t need to keep the default width/height ratio, since leaves come in all sorts of shapes and sizes. I found the smaller images produced a classier egg – my favorites were sized at around 4.5 inches long and 2.5 inches wide.
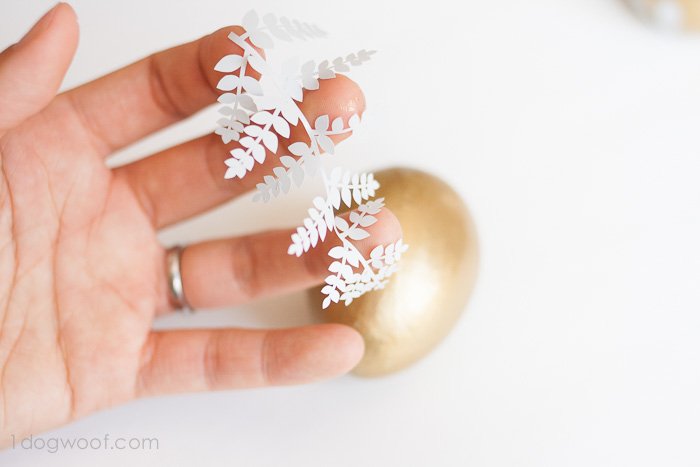
3. Cut the fern leaves out on gold vinyl.
4. Peel super carefully with the hook tool.
5. Apply to your eggs. This can get tricky. Stick the middle of the design onto the egg first and then apply the rest of the design pushing outwards. I also head the egg over my head so that the vinyl that wasn’t attached to the egg would dangle and not interfere with the part I was trying to stick (there was static cling?). Disclaimer – this is the first time I’ve played with vinyl, so of course I had to cut something this detailed, right?
That’s it for the simple eggs.
Now, let’s talk about how I completely complicated it up.
1. I painted my eggs gold. They were pretty. Golden goose pretty.
2. I followed the same instructions as above and cut out my fern silhouettes from vinyl, but I just used a plain old gray I had on hand.
3. Apply shape to the egg. Congratulate yourself thinking it’s looking pretty good, not knowing the hilarity that will ensue in the near future.
4. Brush on a thin coat of Mod Podge to seal down the edges. Let dry.
5. Paint the eggs white. Since there was gold paint on there already, it took a few coats of white paint to really cover up the gold. Let dry.
6. Peel the vinyl off to reveal the gold fern underneath.
And this is where the wheels came off the bus. Maybe it was the paint I used (white gloss latex); maybe I put on too many coats; maybe my design was too complicated. I had extreme difficulty in peeling the vinyl off. The vinyl ripped. The paint peeled off along with the vinyl. Did I mention the vinyl ripped? I used the hook and accidentally scraped the paint off down to the paper mache in certain areas. The vinyl ripped some more, and I couldn’t get the tiny fern details to come out.
Still, the gold was soooo pretty on the places that did turn out.
Comparison
As frustrated as I was with the reverse stenciling, I like the gold paint job way more than the gold vinyl. This particular vinyl just didn’t have that metallic glittery goodness to it, even though the edges are obviously sharper and cleaner.

So there you have it! My golden fern leaf eggs. Next time, I may just paint my eggs gold and have a bunch of gold eggs…
Want to Check Out More Silhouette Projects?
Since this is my Silhouette Challenge project, it means there’s a whole collection of Silhouette project inspiration for you to peruse. Enjoy!
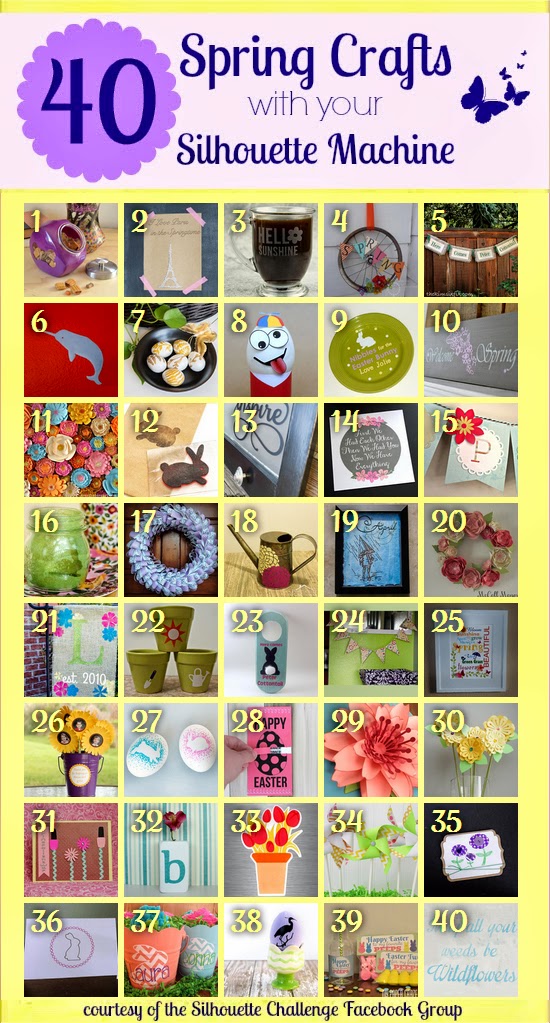
1. Dream a Little Bigger // 2. So Much Better With Age // 3. Adventures in All Things Food // 4. Creative Carnival // 5. The Kim Six Fix // 6. feto soap // 7. One Dog Woof // 8. The Experimental Home // 9. From Wine to Whine // 10. Architecture of a Mom // 11. Grey Luster Girl // 12. Minted Strawberry // 13. Designed Decor // 14. Tried & True // 15. Silhouette School // 16. Bringing Creativity 2 Life // 17. Weekend Craft // 18. Practically Functional // 19. Please Excuse My Craftermath… // 20. McCall Manor // 21. unOriginal Mom // 22. Creative Ramblings // 23. A Tossed Salad Life // 24. A Glimpse Into Barb’s Life // 25. Kate’s Paper Creations // 26. Simply Kelly Designs // 27. Cutesy Crafts // 28. Persia Lou // 29. Whats Next Ma // 30. Two Purple Couches // 31. The Frill of Life // 32. Nearly Handmade // 33. Get Silvered // 34. Ginger Snap Crafts // 35. Life After Laundry // 36. The Sensory Emporium // 37. Monograms & Cake // 38. The Thinking Closet // 39. My Paper Craze // 40. Chicken Scratch NY


Oh, I LOVE these, ChiWei!! I was thinking of gold-leafing some eggs for decoration, and then got overwhelmed by the intense gold-leafing instructions! Kinda forgot that I could’ve used my Silhouette! Ha! Pinning these for next year 😉
You did a great job, considering how difficult things got! I love love love both versions!
Love how simple and elegant these are!
These are gorgeous! Totally pinning. So fun being on the tour with you today!
Hugs,
Jamie
These are simply adorable! I’ve found when painting over vinyl that sometimes it’s better to remove the vinyl before the paint dries, otherwise it leaves a little lip that attached to the vinyl. It could also have been how intricate the vinyl was.
Either way, the final product is amazingly beautiful!
I also think plain gold eggs are gorgeous too!
These are beautiful! I love what you did with the eggs so much. I keep seeing all these awesome egg projects and I’m steering clear b/c I keep thinking “how long can hard boiled eggs last?” But you have just enlightened me…why did I not think of paper mache eggs?? I couldn’t even tell yours weren’t real until I looked really closely. Love love love! Pinning now!
These are so lovely!
Thanks Melanie!
Haha, yeah, I never use real eggs. I used plastic last year and this year I tried the paper mache. Thanks so much for coming by!
Yay, I’m not the only one! Maybe I’ll just do a bunch of golden eggs next year 🙂
Yes, I’ve heard that about using vinyl. The problem I had was that the first coat didn’t cover, so I needed more coats which meant I had to wait for the paint to dry. Maybe a better paint next time or a flat paint might help.
Thanks Jamie!
Thank you Vanessa!
Thanks Rachel! There was definitely frustration, but I’m glad it looks good in a bowl 🙂
Thank you Emily! I know gold-leaf is all the rage right now, but it sounds complicated. I should try it sometime though 🙂
What a smart idea using paper mache eggs! That seems way better than plastic! For the record, I think both versions of eggs turned out beautiful! I hope you get many “real life” compliments from guests this spring!
Wow you have really outdone yourself this time! These are absolutely breath taking!
Gorgeous, ChiWei! Despite the fact that they were more difficult, I agree with you – the painted eggs a bit nicer. I think it’s the tone of the gold – which is what you were saying, right?
Either or, I love them! Such a beautiful idea!
My jaw-dropped to see these, ChiWei. They are gorgeous! And well worth the extra effort. (Though I’m with ya: I always over-complicate things, it seems. It’s like I’m humanely incapable of doing a simple project. I think I only have one 10 minute craft on my blog. The rest are more like 10 hours. Lol. We need a support group!)
We do have a support group Lauren 🙂 It’s where we take the messiness after over-complicating things! I wish I had anywhere close to 10 hours to work on a project…those were the days…
Yup, exactly, but I imagine there are much better metallic gold vinyl out there somewhere. Mine was more of a mustard yellow, so I kinda have to pretend it was “gold” :-).
Thank you Michelle!
Thanks Janice! I think the paper mache absorbed the paint much better than plastic would. Now I just need to have people over so they can see my eggs 🙂
Based on your golden egg picture up there, I may just go paint some eggs gold myself. I’m on a gold kick here lately, too. My problem is that I can’t find anything that I want to give the Midas touch to.
So pretty!
Simple beauty! Great job!
I love these! Let me count the ways… 1. I love eggs. 2. I love leaf motifs 3. Black and Gold is one of my favorite combinations. 4. You combined them all! I’m finding that I over complicate my projects too… but I love how these turned out.
I like the combination of the gold paint and gold vinyl together! I can’t decide which one I like more :).
I like the two shades of gold displayed together and the results of both techniques look equally as good.
Thank you Pam!
Thanks Lisa!
Ha, thanks Lisa for a wonderful comment! You made my day 🙂
Thanks Sara!
Thanks Kara!
Oh, I want to Midas touch everything!
how do you do it? How is it that EVERYTHING you make is so beautiful!?!
Nancy, thank you so much! Hugs! You just don’t see the messes and the aggravation. Trust me, the learning process for this one wasn’t pretty.