
Today, let’s take a look at the pattern and see if we can make some sense out of it. If you’re unfamiliar with crochet, it must seem like a whole different language, especially if you try reading it out loud. My eyes often glaze over reading patterns, so it’s important to break it down line by line and try to picture the stitches in your head.
I’ve also gotten a few questions about the pattern, so I hope to answer them here as well.
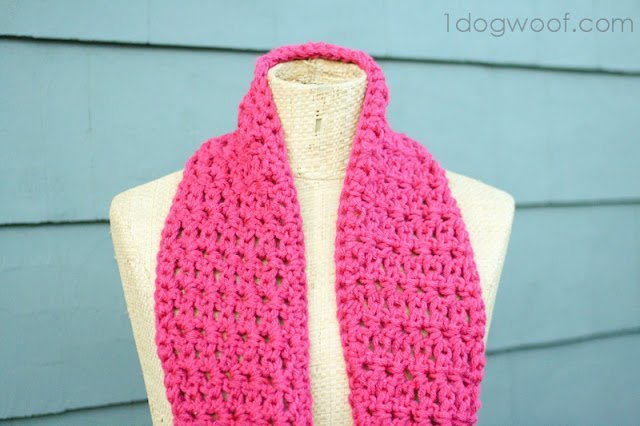
Here’s the original post with the pattern for the cowl. If you read it, you’ll notice I wrote that it looked like spring…I was dead wrong. It is FREEZING here, and I often wear this cowl all day, in the office, at home, in the car, making dinner, watching tv. Cold cold cold.
Anyways, let’s work through the pattern line by line. First, we’ll start with the abbreviations:
ch = chain
sl st = slip stitch
dc = double crochet
st(s) = stitch(es)
V-stitch = Work 1 dc, 1 ch, 1 dc into the same stitch.
This is your decoder. If you replace all the abbreviations in the pattern with the full names, everything starts to become clear!
Foundation: Ch 99 with 2 strands of yarn held together. Join with a sl st in the back ridge of first chain. This means you will twist the chain slightly in order to work into the back ridge or hump of the chain.
Start with loop on your hook, and make 99 chains. Keep the chains loose. It’s easy to make them nice and tight, but the rest of the scarf will be pretty loose and then you might end up with a crescent shape if one side of the scarf is worked too tightly. I found it’s better to keep your chain looser than you think you’ll want it. At 99 stitches, your chain link should be about 4 feet long. (The finished cowl hangs to the waist and is about 6 inches wide, with plenty of stretch)
Then you have two options. You can join with the beginning of your chains either in the back loop of the chain, or in the back ridge. When I first started learning, it was always easier to connect my chains using the back loop, as shown in the chain tutorial. If you’re up for something fancier, you can join the chains in the back hump of the chain. This is a bit more difficult, as it involves a bit of a twist, and you’ll need to remember to twist it back when you finish the next round.
** Regardless of how you work the slip stitch to connect the chain, stick with that method for all of Round 1. If you use the back hump, continue working single crochets into the back hump.
Round 1: Ch 1. Work 1 sc into each st around. Join to ch-1 with a sl st.
Now that you have your foundation chains linked together, you should have a big loosey goosey loop. Now, create 1 chain (gives height, and is actually the “last” stitch in the round). Then work one single crochet into every one of your chains, either in the back loop, or the back hump. When you get all the way around, you’ll need to join to that first chain that you made, with a slip stitch. If you count your stitches, you should still have 99 stitches all together. Correct me if I’m wrong, but that meant you made 98 single crochet stitches, and 1 stitch to join. If you have more or less stitches, you may need to pull out a stitch or add a stitch before joining.
If you single crocheted into the back hump of the chains, you’ll need to twist the work back before connecting the rounds. My advice is to play around, and it’s ok to fudge a little if necessary.
Round 2: Ch 3. Work 1 dc into same st as join. *Skip 2 st. Work (dc, ch 1, dc) in next st. This is one V-stitch made. Repeat from * around. Skip 2 st. Join with a sl st into 2nd chain of round. – 99 sts
At this point, count your stitches and make sure you still have the same number you started with.
For Round 2, it looks complicated, but remember to substitute the abbreviations in. First, you’ll make 3 chains, straight up. Then, work 1 double crochet into the same stitch that you’re sitting in. Then count two stitches over to find the next stitch you’ll work in. In that 3rd stitch, you’ll make 1 double crochet, then 1 chain, then 1 more double crochet into the same stitch. That means that for the 1 stitch that you worked into, you’ll have 3 stitches at the top – there’s the V-shape! Go back to the star (*) and repeat the instructions from the star over and over again until you reach the end of the round. Then you can move on to the last bit, where you skip 2 more stitches and then join. Again, it’s good to make sure you have the right number of stitches in your round.
Round 3: Ch 3. Work 1 dc into next ch-1 sp. *Skip 2 st. Work (dc, ch 1, dc) in next ch-1 sp. Repeat from * around. Skip 1 st, then join with a sl st into 2nd chain of round. – 99 sts
Round 4: Repeat Round 3.
Round 5: Repeat Round 3.
Round 6: Repeat Round 3.
Round 7: Repeat Round 3.
Round 8: Ch 1 (does not count as st). Work 1 sc into each st around. Join with a sl st.
Fasten off and weave in ends.
Hopefully, you can figure out the rest of the instructions. Read through slowly and break down each step. I’ll give a short tutorial on fastening off and weaving in ends a little bit later. Don’t be discouraged if you have to take it apart and redo pieces of the cowl. And don’t be afraid to change things up if you don’t like something either! This is a recipe only; feel free to make it your own and have fun!


First time crocheter here! I’m confused and hoping you can help clear something up for me – maybe with a picture? I don’t know what to do when the directions say to “work a stitch into the same stitch you’re sitting in” and how to double crochet, chain, then double crochet into the same stitch. What does that look like? Thanks for the tutorials! I’m very excited to be learning how to crochet!
Thank you, thank you for this. I’m fairly new to crochet and am trying to get it! This post has helped me tremendously and I’m well on my way with this project. I did decided to join in the back loop instead of the back ridge as it made it easier for me. I also use stitch markers. I cannot wait to see my project completed, I can barely put it down. 🙂